

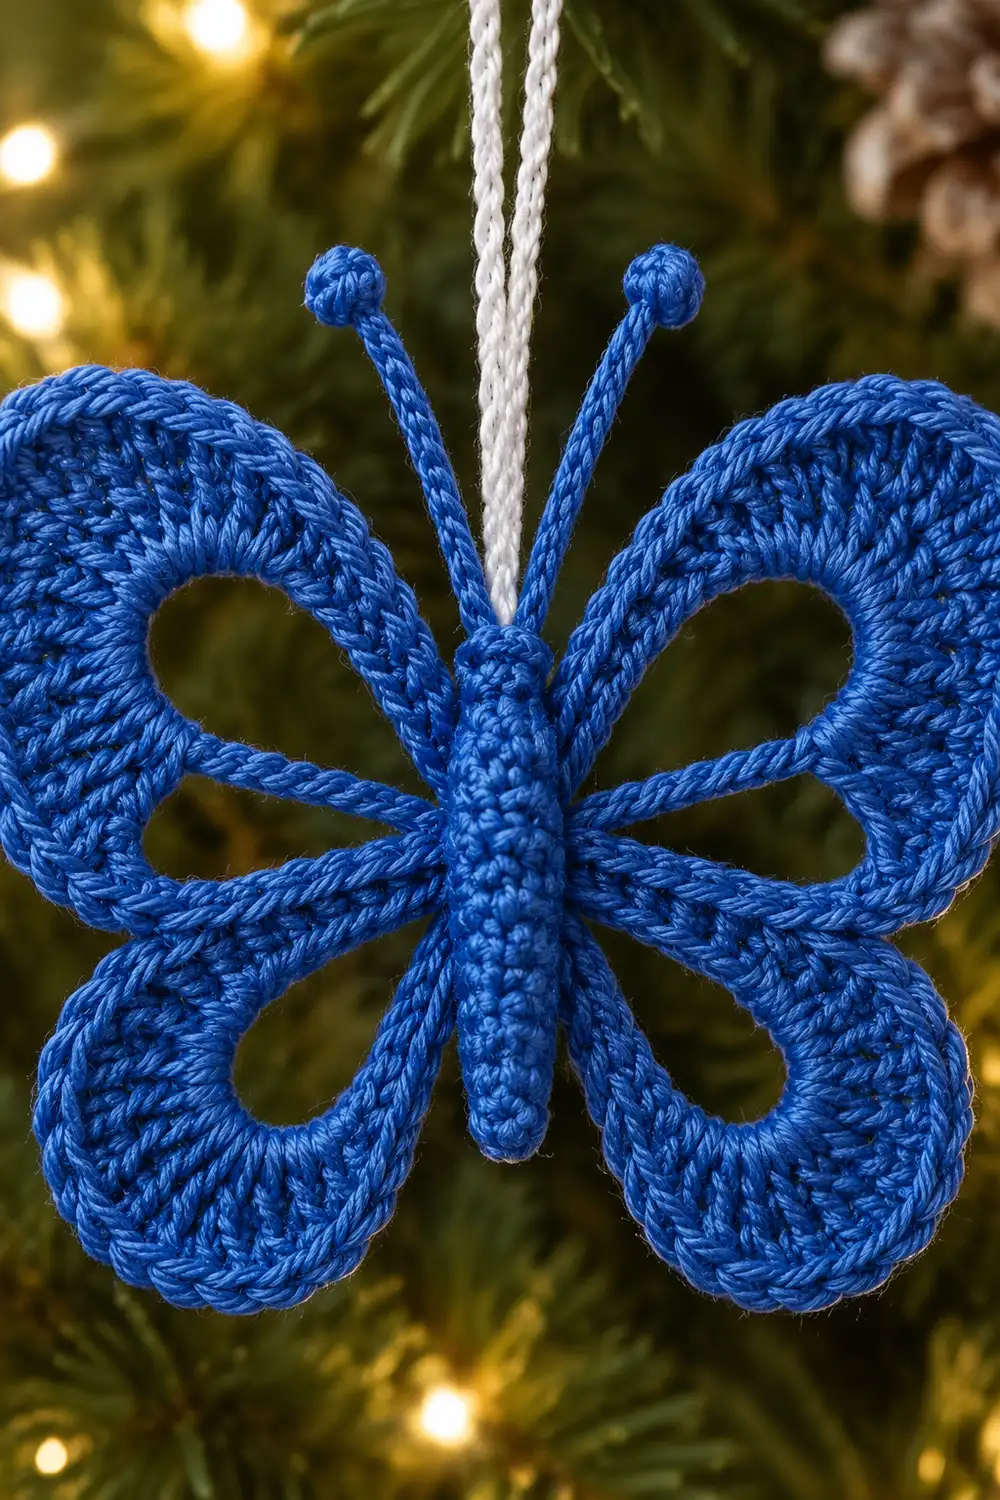
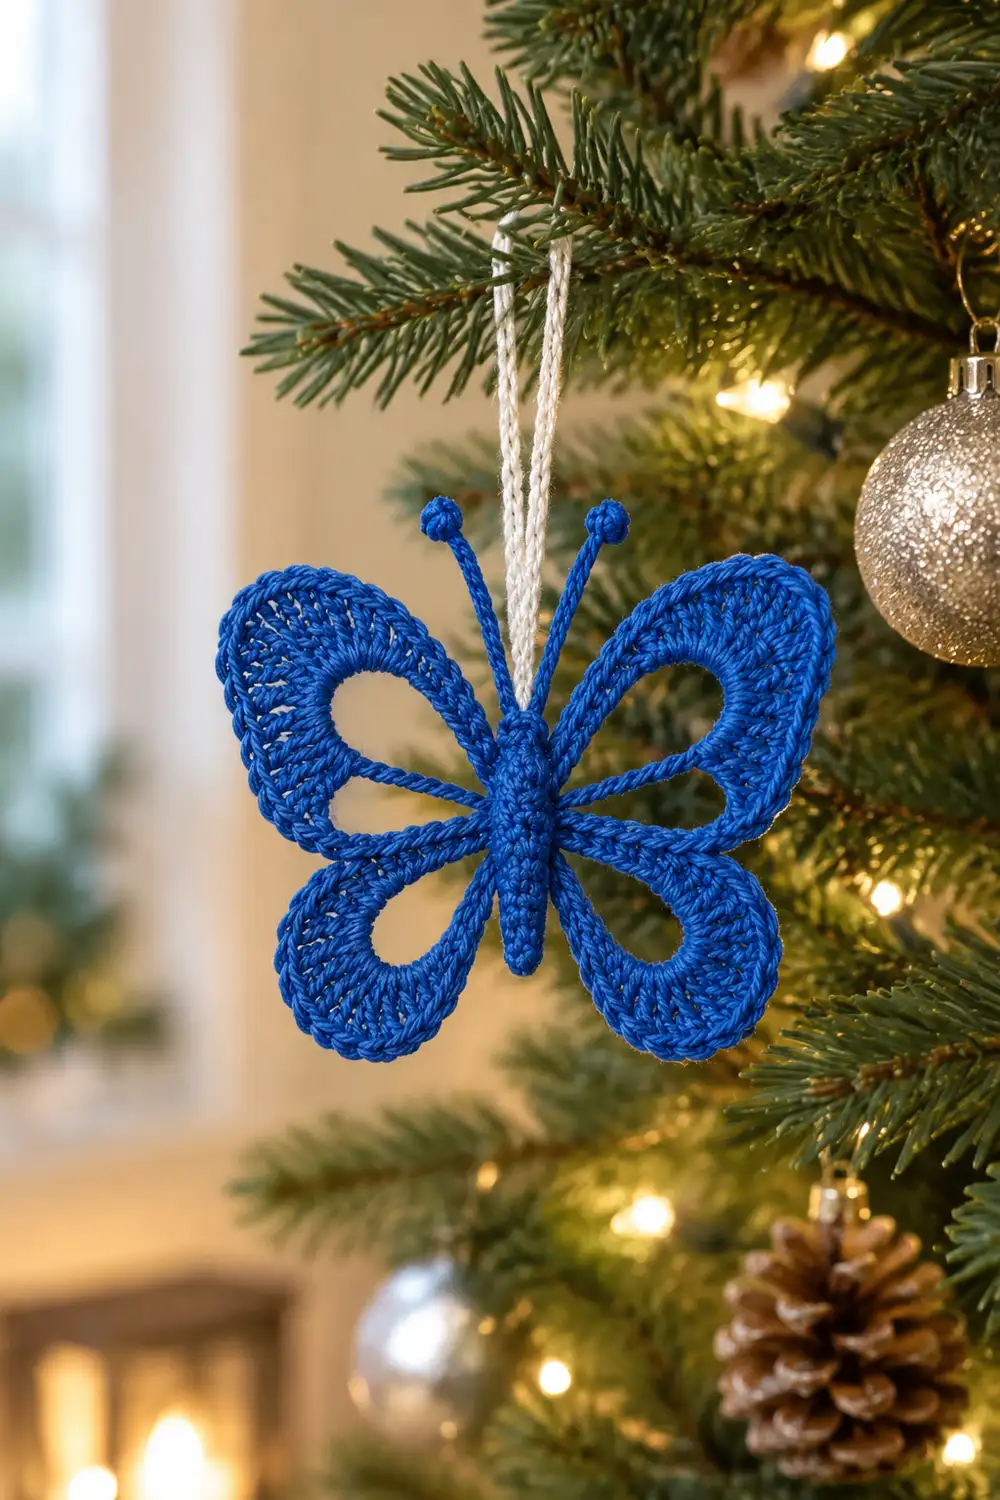
This butterfly is a small, flat motif with four rounded wings, a slim raised body, and two curled antennae. The wings are open frames: each has a window in the center and a ring of eyelets around it, so light and tree branches show through. It hangs from a white twisted cord, which makes it a good ornament for a Christmas tree, a window, or a gift tag.
The sample is worked in one solid royal blue. A crisp mercerized cotton keeps the eyelets open and the edges smooth. Any single color works, but a saturated shade stands out best against greenery and lights.
The pattern uses US crochet terms. The finished butterfly measures about 3.5 in (8.9 cm) across the wings and about 3 in (7.6 cm) tall at the wings. It is about 4 in (10.2 cm) tall including the antennae.
The butterfly is crocheted in one piece. You start with a small sc oval for the body. You then chain four loops off its sides, work an eyelet mesh around each loop, and add a smooth sc border. The antennae are chained from the head before you fasten off, so there is nothing to sew together.
Finished Size and Construction
- Finished size: 3.5 in (8.9 cm) wide x 3 in (7.6 cm) tall at the wings; 4 in (10.2 cm) tall with antennae
- Skill level: Easy / advanced beginner
- Terminology: US crochet terms
- Yarn weight: Sport (#2), mercerized cotton
- Hook: 2.75 mm (US C-2)
- Number of pieces: 1. The body, wings, and antennae are worked continuously.
- Layout: Classic butterfly silhouette, with 2 larger upper wings and 2 smaller lower wings, mirrored on either side of the body
- Piece size: Body 2 in (5.1 cm) long x 0.4 in (1.0 cm) wide; upper wing extends about 1.6 in (4.1 cm) from the body
- Size before border: About 3.1 in (7.9 cm) wide
- Border depth: 1 round of sc, about 0.2 in (0.5 cm)
Materials
Yarn: Use a sport-weight (#2) mercerized cotton. Cotton holds the open wing shape well and takes starch cleanly. Acrylic also works, but the eyelets look softer and the wings may curl more.
- Royal blue: 10 g, about 31 m (34 yd)
- White twisted cord or baker’s twine for the hanger: 10 in (25.4 cm)
The quantities include a margin of about 25%. One butterfly uses roughly 8 g.
Tools:
- 2.75 mm (US C-2) crochet hook
- Tapestry needle
- Scissors
- Stitch marker
- Blocking mat or foam board, plus rustproof pins
- Spray bottle with water
- Optional: fabric stiffener or spray starch
Abbreviations (US Terms)
- ch – chain
- sl st – slip stitch
- sc – single crochet
- dc – double crochet
- st(s) – stitch(es)
- sp(s) – space(s)
- Rnd(s) – round(s)
- RS – right side
Special stitch – Picot loop (antenna tip): Ch 3, then sl st into the next ch, which is the 4th ch from the hook. This closes a tiny ring at the tip of each antenna.
Gauge and Checkpoints
Gauge: 6 sc = 1 in (2.5 cm) with a 2.75 mm hook.
Gauge matters here because each wing’s border count is matched to the length of its mesh edge. Make one butterfly as your test piece and measure at every stage:
- After Rnd 1 (body): 2 in (5.1 cm) long and about 0.4 in (1.0 cm) wide.
- After Rnd 2 (wing loops): Lay each loop flat. Each ch-20 loop reaches about 1.5 in (3.8 cm) from the body. Each ch-16 loop reaches about 1.25 in (3.2 cm).
- After Rnd 3 (mesh): About 3.1 in (7.9 cm) wide across the upper wings.
- After Rnd 4 (border): About 3.5 in (8.9 cm) wide.
If your body is longer than 2 in (5.1 cm), go down to a 2.5 mm hook. If it is shorter, go up to a 3.0 mm hook. Change the hook, not the counts. The wing math depends on the counts staying the same.
Pattern
Rnd 1: Body (sc oval)
Ch 13.
Rnd 1 (RS): Sc in 2nd ch from hook, sc in next 10 ch, 3 sc in last ch. Rotate to work along the opposite side of the foundation chain. Sc in next 10 ch, 2 sc in the same ch as the first sc. Join with sl st to the first sc. (26 sc)
Place a marker in the first sc. Number the stitches from the marker:
- St 1 = first sc (head end)
- Sts 2–11 = Side A of the body (10 sts)
- Sts 12–14 = the 3 sc at the tail tip
- Sts 15–24 = Side B of the body (10 sts)
- Sts 25–26 = the 2 sc at the head end, which together with st 1 make the 3 head sts
Check: 1 + 10 + 3 + 10 + 2 = 26.
Rnd 2: Wing loops
Each wing starts as a chain loop anchored between two body sts. The loops are mirrored: Side A st n matches Side B st (26 − n).
Rnd 2:
- Sl st in st 2.
- Ch 20, sl st in st 5. (Upper wing A loop)
- Sl st in sts 6 and 7.
- Ch 16, sl st in st 10. (Lower wing A loop)
- Sl st in sts 11, 12, 13, 14, 15, and 16. This takes you around the tail.
- Ch 16, sl st in st 19. (Lower wing B loop)
- Sl st in sts 20 and 21.
- Ch 20, sl st in st 24. (Upper wing B loop)
- Sl st in sts 25 and 26, then join with sl st to st 1.
You now have 4 loops: 2 ch-20 loops and 2 ch-16 loops. Check that the Side A loops mirror the Side B loops (5↔21, 2↔24, 7↔19, 10↔16) before you continue.
Rnd 3: Eyelet mesh
All dc in this round are worked into the chain loop space, not into individual chains. Push the stitches along the loop so they spread evenly. The center of each loop stays open and becomes the wing window. The ch-1 spaces between the dc form the eyelet ring.
For the body sts in this round, sl st into the matching sl st from Rnd 2. If that is hard to find, work into the Rnd 1 sc beneath it.
Rnd 3:
- Sl st in st 2.
- Upper wing A: In ch-20 sp, work dc, (ch 1, dc) 14 times. Sl st in st 5. (15 dc, 14 ch-1 sps = 29 sts)
- Sl st in sts 6 and 7.
- Lower wing A: In ch-16 sp, work dc, (ch 1, dc) 10 times. Sl st in st 10. (11 dc, 10 ch-1 sps = 21 sts)
- Sl st in sts 11–16.
- Lower wing B: Work as Lower wing A. Sl st in st 19. (21 sts)
- Sl st in sts 20 and 21.
- Upper wing B: Work as Upper wing A. Sl st in st 24. (29 sts)
- Sl st in sts 25 and 26, then join to st 1.
Each wing count is that wing’s own complete count. Total around the four wings: 29 + 21 + 21 + 29 = 100 sts.
Each upper wing’s outer edge (29 st-widths) is much longer than its inner ch-20 loop. That difference is what makes the wing rounded instead of pointed.
Border
Border gauge: 6 sc = 1 in (2.5 cm). This is the same gauge as the body. The border is not worked tighter or looser.
The border is a conversion round. You work 1 sc into each existing stitch of the mesh and add no extra stitches. It follows the same path around the body as Rnds 2 and 3.
Rnd 4:
- Sl st in st 2.
- Upper wing A: Sc in each dc and each ch-1 sp across. Sl st in st 5. (15 sc in dc + 14 sc in ch-1 sps + 0 extra = 29 sc)
- Sl st in sts 6 and 7.
- Lower wing A: Sc in each dc and each ch-1 sp across. Sl st in st 10. (11 + 10 + 0 = 21 sc)
- Sl st in sts 11–16.
- Lower wing B: Work as Lower wing A. Sl st in st 19. (21 sc)
- Sl st in sts 20 and 21.
- Upper wing B: Work as Upper wing A. Sl st in st 24. (29 sc)
- Sl st in sts 25 and 26, then join to st 1. Do not fasten off.
Border totals:
- Each upper wing: 29 sc, about 4.8 in (12.2 cm) of outer edge
- Each lower wing: 21 sc, about 3.5 in (8.9 cm) of outer edge
- All four wings: 29 + 21 + 21 + 29 = 100 sc
Why the math works: Each dc and each ch-1 sp sits about one sc wide along the outer edge. So the outer edge of an upper wing is 29 units long, and 29 sc cover it exactly. Fewer sc would pull the edge in and cup the wing. More sc would make it ruffle. At 6 sc per inch, 29 sc gives 4.8 in (12.2 cm), which matches the arc of the mesh.
The three passes of sl sts along the body build a slightly raised, segmented ridge. That ridge gives the body its rounded look.
Antennae
You are at st 1 (head).
Antenna 1: Ch 12. Make a picot loop by sl st into the 4th ch from the hook. Sl st in each of the remaining 8 ch. Sl st in st 1.
Sl st in st 26.
Antenna 2: Ch 12. Make a picot loop by sl st into the 4th ch from the hook. Sl st in each of the remaining 8 ch. Sl st in st 26.
Each antenna is about 1.2 in (3.0 cm) long. Fasten off, leaving a 6 in (15.2 cm) tail. Weave in all ends along the body ridge, where they will be hidden.
If you prefer a solid tip, tie a tight overhand knot in place of the picot loop. Work the knot in the chain before making the sl sts back down.
Hanger
Fold the 10 in (25.4 cm) white cord in half. Thread both ends from front to back between the antennae, under the sts at the head. Tie the ends in a double knot to make a hanging loop about 4 in (10.2 cm) long. Trim the ends to 0.5 in (1.3 cm).
Final Blocking
- Spray the butterfly evenly until it is damp but not dripping.
- Lay it RS up on the blocking mat. Smooth the body into a straight line.
- Pin the body at the head and tail.
- Pin each upper wing at its outermost point, so the butterfly is 3.5 in (8.9 cm) across.
- Pin each lower wing so that it sits just below its upper wing. Leave a small gap of about 0.1 in (0.3 cm) between the upper and lower wings.
- Use a pin to open each wing window into a rounded oval. Check that the eyelets are evenly spaced.
- Pin the antennae into a V shape, with the picot loops slightly curled outward.
- Optional: For a stiff ornament, brush on fabric stiffener or spray with starch now.
- Let it dry completely, at least 6 hours, before unpinning.
Final Quality-Control Checklist
- The body is 2 in (5.1 cm) long and straight.
- The upper wing borders each have 29 sc.
- The lower wing borders each have 21 sc.
- The wing anchors mirror each other: sts 2–5 and 21–24 for the upper wings, sts 7–10 and 16–19 for the lower wings.
- All four wing windows are open and visible.
- The eyelet ring is even, with no doubled or skipped ch-1 sps.
- The width is about 3.5 in (8.9 cm) and the height with antennae is about 4 in (10.2 cm).
- Both antennae are the same length with matching tips.
- All ends are woven into the body.
- The hanger knot is secure and the butterfly hangs level.
Troubleshooting
Wing cups or curls inward: The border is too tight, or a sc was skipped. Recount the sc to 29 or 21. If the count is right, work the border with a hook one size larger.
Wing ruffles: You have extra sc, usually 2 sc in one ch-1 sp. Recount and redo that wing.
Wing window closed up: The dc are bunched together on the loop. Spread them evenly along the chain loop before you work the border, and open the window with a pin when blocking.
Wings are uneven: An anchor sl st landed in the wrong body st. Check the stitch numbers against Rnd 2.
Butterfly is too big or too small: Your gauge is off. Change the hook size and keep all counts the same.
Antennae are floppy: Starch them, or work the sl sts back down more tightly.
Butterfly hangs crooked: Retie the cord so it sits centered between the antennae.
Care
Hand wash in cool water, press out the water in a towel, and reblock flat. Store the ornament flat so the wings and antennae keep their shape.
Final Notes
Everything in this butterfly follows one measurement chain. The 26-sc body sets the 2 in (5.1 cm) length. The mirrored chain loops set the wing positions. Each mesh round produces an outer edge of 29 or 21 stitches, and the border matches it 1 sc per stitch. With a gauge of 6 sc = 1 in (2.5 cm), that gives a finished butterfly 3.5 in (8.9 cm) wide and 4 in (10.2 cm) tall with antennae.
If you check your gauge on the body first, the rest of the measurements will follow.
Optional: Several butterflies in different colors make a nice set of ornaments, but each one is still made exactly as written above.
Happy crocheting!