

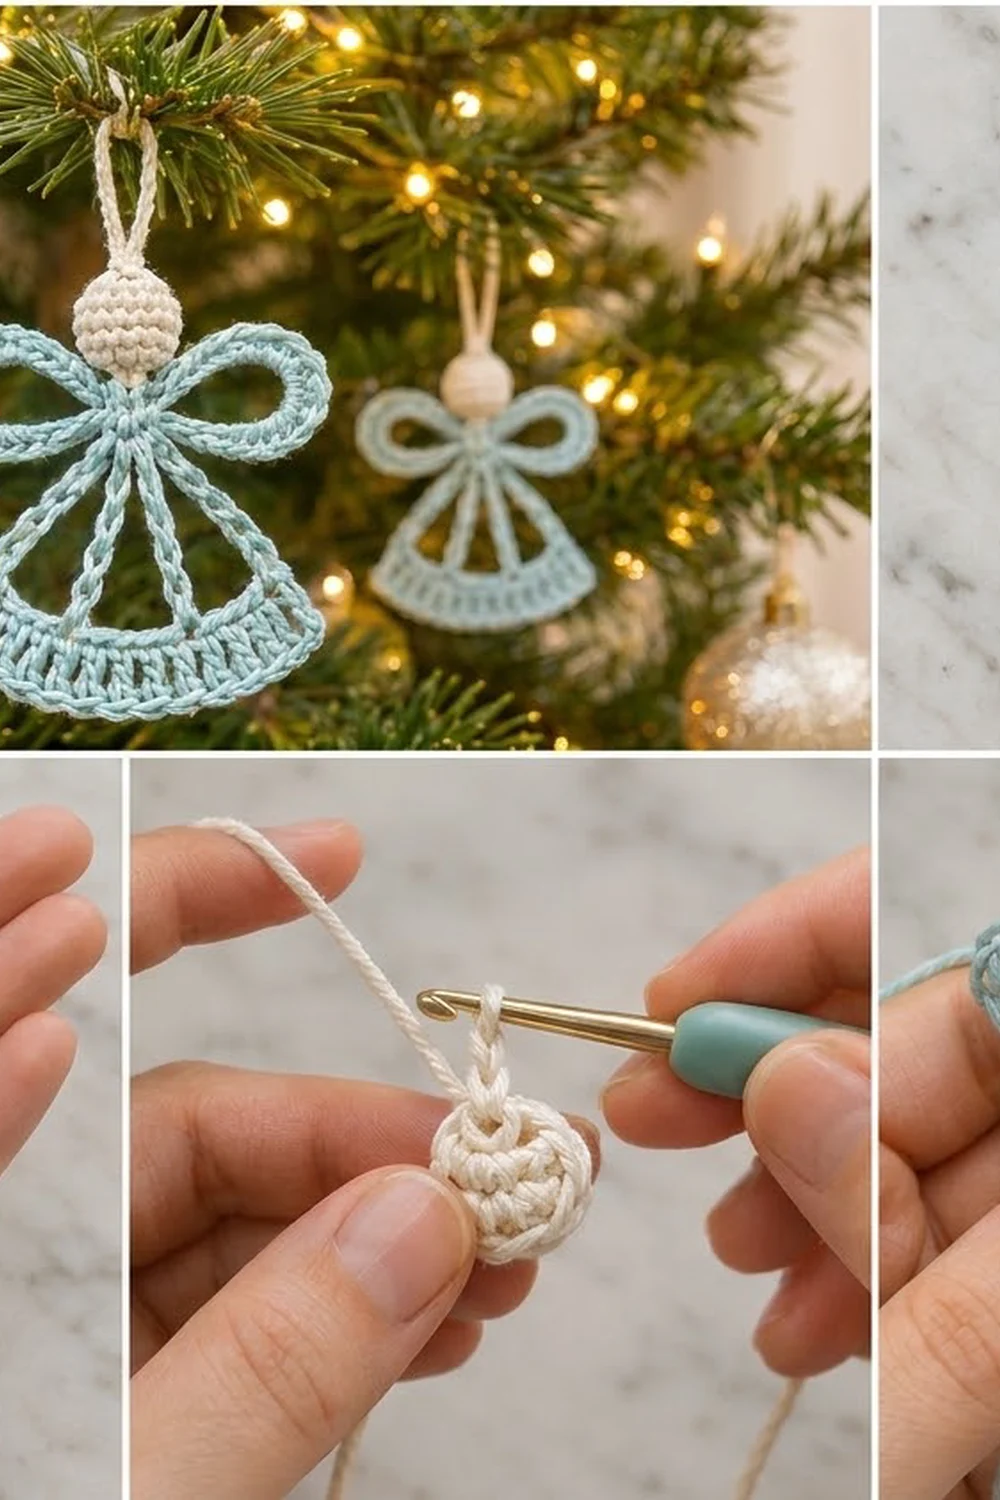
The Seafoam Halo Angel is a small, airy tree ornament that uses very little yarn. Her body is an open frame of thick cords: two round wing loops, four spokes that fan down like the folds of a gown, and a curved skirt band of tall stitches at the hem. A firm, stuffed cream head and a cream hanging loop finish her off.
The colors are calm and wintry: soft aqua or seafoam for the body and cream for the head and loop. Worked in fingering-weight mercerized cotton, the stitches look crisp and the cords hold their shape well. The finished angel is about 3.3 in (8.4 cm) wide and 3.4 in (8.6 cm) tall from head to hem, or about 4.5 in (11.4 cm) with the hanging loop.
This pattern uses US crochet terms throughout.
You make her in three stages. First you work the skirt band flat in two rows of double crochet, shaping it into a fan, and edge it with one round of single crochet. Next you make a small neck ring and work the wings and spokes out of it, anchoring each spoke into the top of the band. Last, you make the stuffed head with its hanging loop and sew it on above the neck.
Finished Size and Construction
- Finished size: 3.3 in (8.4 cm) wide x 3.4 in (8.6 cm) tall; 4.5 in (11.4 cm) tall with loop
- Skill level: Easy-intermediate
- Terminology: US crochet terms
- Yarn weight: Fingering / #1 super fine, mercerized cotton
- Hook: 2.5 mm
- Number of pieces: 1 ornament (skirt band and frame worked in aqua, plus 1 cream head)
- Layout: Single item; no motifs to arrange
- Piece size: Skirt band 3.3 in (8.4 cm) wide at the hem, 2.6 in (6.6 cm) wide at the top, 0.8 in (2.0 cm) deep
- Size before border: Band 3.1 in (7.9 cm) at the hem, 2.4 in (6.1 cm) at the top, 0.6 in (1.5 cm) deep
- Border depth: About 0.1 in (0.3 cm) on each edge
Materials
Choose a smooth, mercerized cotton in fingering weight (about 170 m per 50 g). Cotton gives the cords a firm, clear shape and blocks well. Acrylic works too, but the wings will be softer and may need light starching.
- Color A, Aqua/Seafoam: 5 g, about 17 m (body, wings, spokes, skirt band)
- Color B, Cream: 3 g, about 10 m (head and hanging loop)
Tools:
- 2.5 mm crochet hook
- Tapestry needle
- Scissors
- Small pinch of fiberfill
- Stitch marker
- Blocking pins and a foam mat
- Optional: spray starch
The yarn amounts include about 30% extra for swatching and tails.
Abbreviations (US Terms)
- ch – chain
- sl st – slip stitch
- sc – single crochet
- dc – double crochet
- dc2tog – double crochet 2 together
- sc2tog – single crochet 2 together
- st(s) – stitch(es)
- RS – right side
- MR – magic ring
Special stitch – dc2tog: Yarn over, insert hook in next st, yarn over and pull up a loop, yarn over and pull through 2 loops (2 loops on hook). Yarn over, insert hook in next st, yarn over and pull up a loop, yarn over and pull through 2 loops (3 loops on hook). Yarn over and pull through all 3 loops. One stitch decreased.
Gauge and Checkpoints
Gauge: 7 sc and 8 sc rows = 1 in (2.5 cm) with a 2.5 mm hook. Work firmly so the cords can stand up on their own.
Because the angel is small, the skirt band itself is your test piece. Make it first and check it before starting the frame.
Checkpoints:
- After band Row 1: 22 dc measure about 3.1 in (7.9 cm) across.
- After band Row 2: the top edge (17 dc) measures about 2.4 in (6.1 cm), and the band is about 0.6 in (1.5 cm) deep.
- After band border: hem 3.3 in (8.4 cm), top 2.6 in (6.6 cm), depth 0.8 in (2.0 cm).
- After the frame: each wing loop is about 1.5 in (3.8 cm) long, and the neck sits about 1.6 in (4.1 cm) above the band.
- Head: about 0.8 in (2.0 cm) across.
If your band is too big, go down to a 2.25 mm hook or crochet more tightly. If it is too small, go up to a 2.75 mm hook. A difference of 0.2 in (0.5 cm) across the hem is fine for an ornament, but bigger differences will change how the spokes sit.
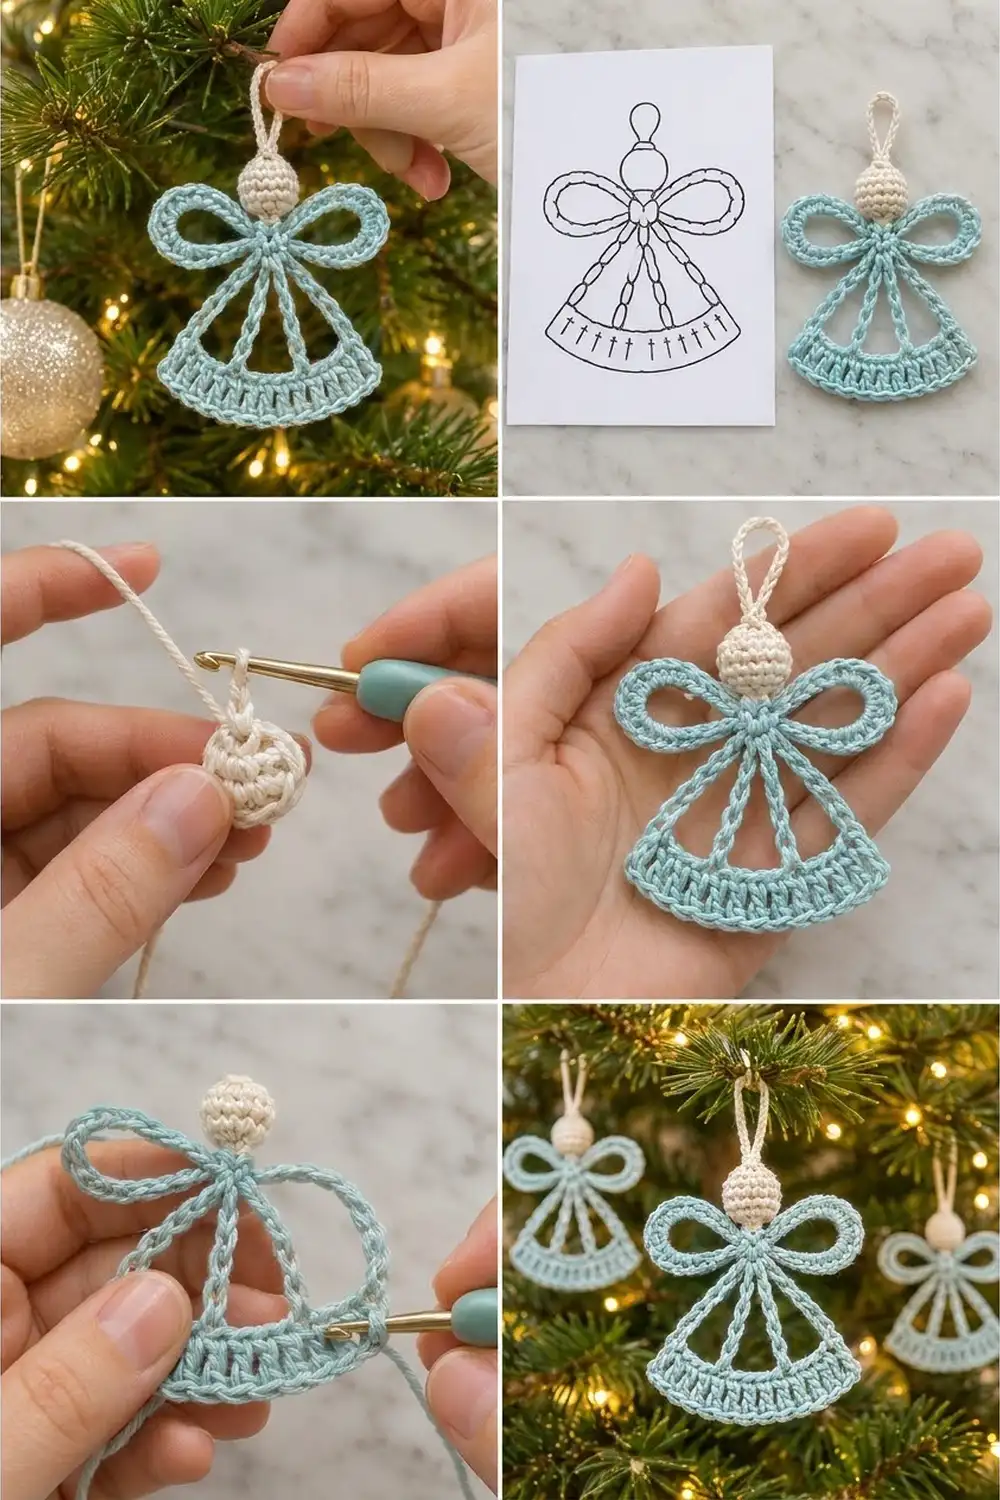
Part 1: Skirt Band (Color A)
You work the band from the bottom up, so it narrows toward the top and forms the fan shape.
Row 1: Ch 24. Dc in 4th ch from hook and in each ch across. The skipped 3 ch count as the first dc. Turn. (22 dc)
Row 2 (decrease row): Ch 3 (counts as first dc), dc in next st, dc2tog over next 2 sts, dc in next 2 sts; repeat from * 4 more times. Turn. (17 dc)*
Check: Row 2 uses 2 + (5 x 4) = 22 sts and makes 2 + (5 x 3) = 17 sts. The last “dc in next 2 sts” ends in the top of the turning ch.
Do not fasten off.
Part 2: Band Border (Color A)
Work the single border round now, right after Row 2, using the same strand. The full instructions are in the Border section below. When the border is done, come back for Part 3.
Part 3: Neck, Wings and Spokes (Color A)
Lay the bordered band RS up with the top edge (17 sc) facing away from you. Place a marker in the right-hand top sc and number the top-edge sts 1 to 17 from right to left. The spokes anchor in sts 1, 6, 12 and 17. That leaves 5 sts between the outer and inner spokes on each side and 6 sts in the center.
Neck ring: With a new strand of Color A, ch 6, sl st in first ch to form a ring.
Work everything below into the ring, in this order:
- Neck top: Ch 1, 2 sc in ring.
- Right wing: Ch 24, sc in ring (wing loop made). Working into the ch-24 loop (not into the chains), work 32 sc around the loop back to the ring. Sl st in ring. The sc pack tightly around the chain to form the thick, rounded wing cord.
- Outer right spoke: Ch 14. With the band RS up below the ring, sl st in band st 1. Sc in each of the 14 ch back toward the neck (14 sc), sc in ring.
- Inner right spoke: Ch 12, sl st in band st 6, sc in each of the 12 ch back toward the neck (12 sc), sc in ring.
- Inner left spoke: Ch 12, sl st in band st 12, sc in each of the 12 ch back (12 sc), sc in ring.
- Outer left spoke: Ch 14, sl st in band st 17, sc in each of the 14 ch back (14 sc), sc in ring.
- Left wing: Ch 24, sc in ring. Work 32 sc into the ch-24 loop back to the ring. Sl st in ring.
- Neck top: 2 sc in ring, sl st in first sc to close.
Ring total: 10 sc (2 + 1 + 4 + 1 + 2). The sl sts are not counted. Fasten off and weave in ends.
Why the spoke lengths differ: The neck sits 1.6 in (4.1 cm) above the center of the band. The outer spokes also travel 8 sts (about 1.1 in / 2.8 cm) sideways, so they need 14 ch, about 2.0 in (5.1 cm). The inner spokes travel only 3 sts sideways, so 12 ch, about 1.7 in (4.3 cm), is enough. All four spokes reach the same neck height.
Part 4: Head (Color B)
Work in continuous spiral rounds and mark the first st of each round.
Rnd 1: 6 sc in MR. (6 sc)
Rnd 2: 2 sc in each st around. (12 sc)
Rnd 3: Sc in next st, 2 sc in next st; repeat from * around. (18 sc)
Rnds 4–5: Sc in each st around. (18 sc)
Rnd 6: Sc in next st, sc2tog; repeat from * around. (12 sc)
Stuff firmly with a small pinch of fiberfill.
Rnd 7: Sc2tog 6 times. (6 sc)
Fasten off, leaving a 10 in (25.4 cm) tail. Thread it through the front loops of the last 6 sts and pull closed. Keep the tail for sewing.
Hanging loop: Join Color B in a st of Rnd 1 at the top center of the head. Ch 16, sl st in the same st. Sl st in each of the 16 ch around the loop to firm it into a cord. Fasten off and weave in. The folded loop measures about 1.1 in (2.8 cm).
Attach the head: Center the closed bottom of the head over the 4 neck-top sc of the ring. Sew through the ring sts and the base of the head 3 times around, then weave the tail up into the head and trim.
Border
The border is one round of sc around the skirt band. You work it directly after band Row 2 with the same strand. It gives the hem and top edge their outlined look and creates the 17 top sts that the spokes anchor into.
Border gauge: Same as the main gauge, 7 sc = 1 in (2.5 cm). Work one sc per st on the long edges and 2 sc per dc row-end on the short sides.
Border Rnd 1: Ch 1. Working across the top of Row 2:
- Top edge: Sc in each st across. (17 sc)
- Corner: Ch 1.
- Side 1: Work 2 sc around the post at the end of each dc row (2 rows). (4 sc)
- Corner: Ch 1.
- Hem edge: Working in the base of each Row 1 st along the foundation chain, sc in each. (22 sc)
- Corner: Ch 1.
- Side 2: 2 sc around each dc row-end. (4 sc)
- Corner: Ch 1. Sl st in first sc to join.
Round total: 47 sc (17 + 4 + 22 + 4) plus 4 corner ch-1 sps. The corner ch-1 sps are not counted in the side totals, so no corner is counted twice.
Fasten off and weave in ends.
Why the math works: The top and hem edges take exactly one sc per existing stitch (17 and 22), so they don’t ruffle or pull in. A dc row-end is about as tall as 2 sc are wide, so 2 sc per row-end keeps the short sides flat. The ch-1 at each corner gives the turn a little room without adding bulk. At 7 sc per inch, the 22-st hem is about 3.1 in (7.9 cm). The side sc add about 0.1 in (0.3 cm) at each end, which gives the 3.3 in (8.4 cm) finished hem.
Final Blocking
- Soak the angel in cool water or mist it well. Press out extra water in a towel; don’t wring it.
- Pin the hem flat to the mat, 3.3 in (8.4 cm) wide, easing it into a gentle downward curve.
- Pin the neck centered 2.4 in (6.1 cm) above the hem edge. That is 1.6 in (4.1 cm) of spoke height plus the 0.8 in (2.0 cm) band.
- Straighten each spoke into a clean line from the neck to its anchor st.
- Shape each wing into a rounded teardrop about 1.5 in (3.8 cm) long, tilted slightly upward. Pin the outer tip of each wing so the full span is 3.3 in (8.4 cm).
- Optional: mist with spray starch for a crisper ornament.
- Let it dry completely, at least 6 hours, before unpinning. Don’t pin the head; just roll it round between your fingers.
Final Quality-Control Checklist
- Band Row 1 has 22 dc and Row 2 has 17 dc.
- Border has 17 / 4 / 22 / 4 sc and 4 corner ch-1 sps.
- Spokes are anchored in band sts 1, 6, 12 and 17, evenly spaced on both sides of the center.
- Outer spokes have 14 sc each; inner spokes have 12 sc each.
- Each wing has 32 sc around a ch-24 loop.
- The neck ring holds 10 sc and sits centered above the band.
- The head is firm and round, about 0.8 in (2.0 cm) across, with no stuffing showing.
- The hanging loop is centered on top of the head and measures about 1.1 in (2.8 cm).
- The finished angel is 3.3 in (8.4 cm) wide and 3.4 in (8.6 cm) tall.
- All ends are woven in and trimmed.
Troubleshooting
The band curls up at the top edge: Row 2 was worked too tightly. Block it firmly, or redo Row 2 a little more loosely.
The hem ruffles: Check that you made exactly 22 sc across the hem. Extra sts here make the edge flare.
The spokes look slack or bowed: Your chains are looser than your sc. Redo the spoke with 1 fewer ch and 1 fewer sc.
The wings are floppy: Pack the 32 sc tightly around the loop and starch the finished piece. If 32 sc won’t fit, you can work 30 instead, as long as both wings match.
The neck ring is too crowded: Use a ch-7 ring instead of ch 6. The stitch counts stay the same.
The head looks lumpy: Stuff it in small pieces and roll the head between your palms before closing Rnd 7.
The angel hangs crooked: The loop is off-center. Remove it and rejoin at the exact center of Rnd 1.
Care
Hand wash in cool water with mild soap, press dry in a towel, and lay flat to dry, reshaping as needed. Store flat or hanging so the wings keep their shape.
Final Notes
Every measurement follows from your gauge. At 7 sc = 1 in (2.5 cm), the 22-st hem is 3.1 in (7.9 cm) and the 17-st top is 2.4 in (6.1 cm). The border brings these to 3.3 in (8.4 cm) and 2.6 in (6.6 cm), with a band depth of 0.8 in (2.0 cm). Spokes of 14 and 12 ch lift the neck 1.6 in (4.1 cm). The 0.8 in (2.0 cm) head takes the angel to 3.4 in (8.6 cm), and the 1.1 in (2.8 cm) loop brings her to 4.5 in (11.4 cm). Once your band matches its checkpoints, the rest of the angel will follow. Make one in seafoam, then try ivory, blush or pale gold to fill the tree.
Happy crocheting!