
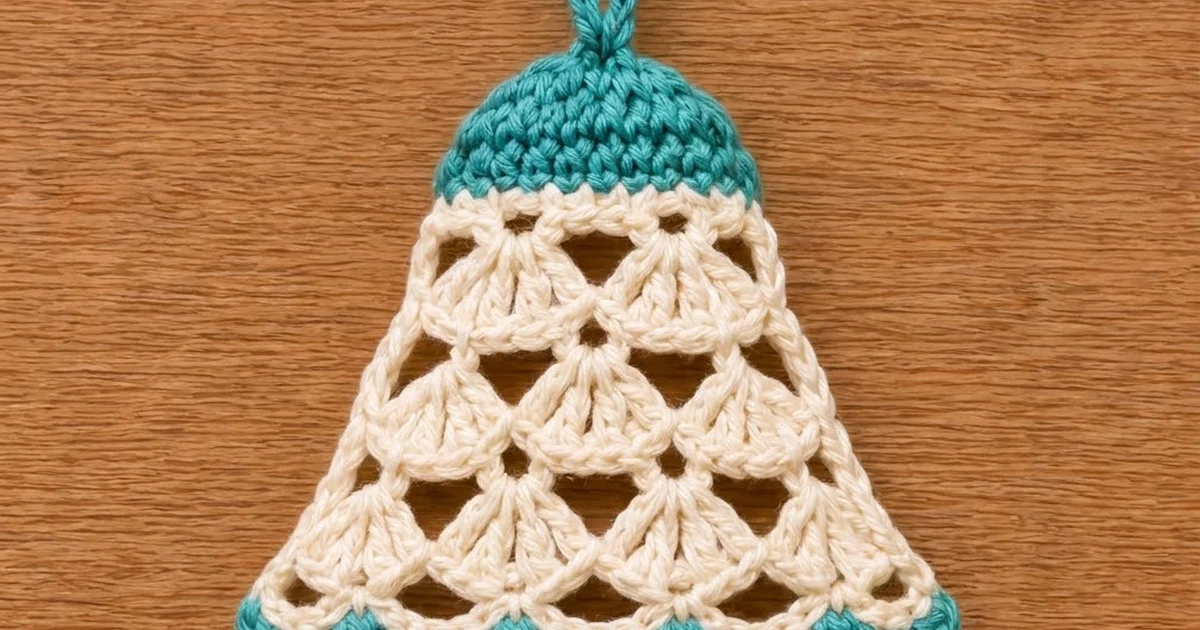
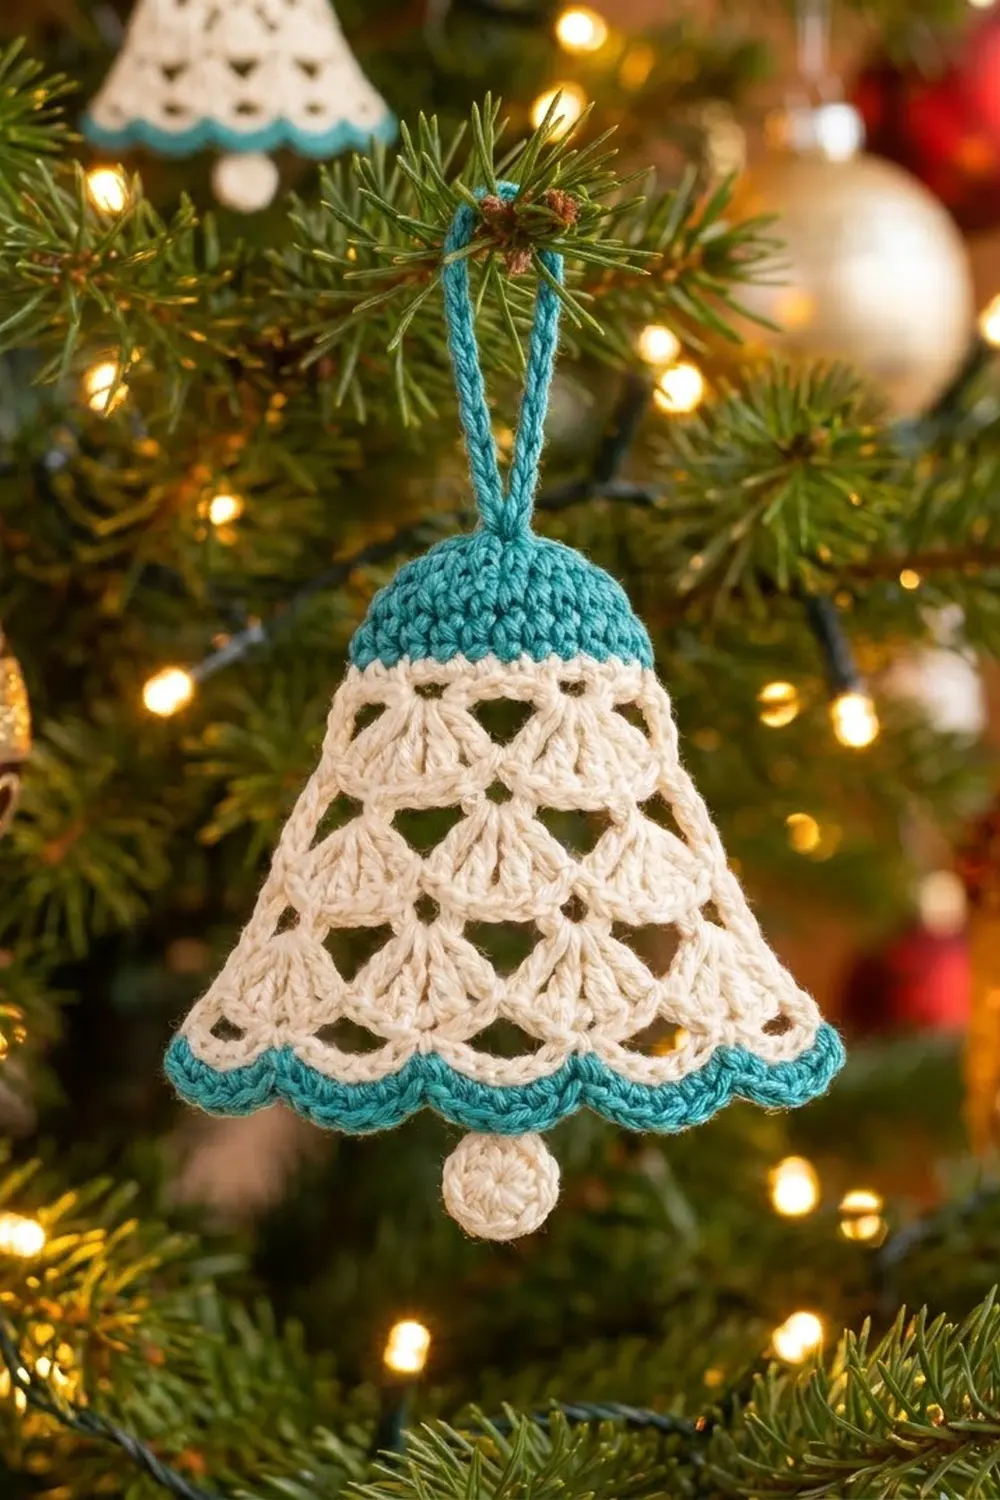
The Seaglass Chime Bell is a flat, lacy Christmas ornament with a soft coastal palette. A solid teal dome sits on top, cream fan stitches open into a flared bell shape, and a teal scalloped hem finishes the bottom edge. A small cream clapper disc hangs at the center of the hem, and a firm teal loop at the top lets it hang straight on a tree branch.
The design is a cottagecore take on a classic bell. The open triangles between the fans let the tree lights show through, and the solid teal at the top and bottom gives the lace a clean frame. It works as a tree ornament, a gift tag or a package topper.
This pattern uses US crochet terms. The finished bell measures about 4.2 in (10.7 cm) wide at the hem and 4 in (10.2 cm) tall. With the loop and clapper, the full length is about 6.5 in (16.5 cm).
The bell is worked flat in turned rows from the top down. You start with the teal dome, switch to cream for three fan tiers joined by chain-arch rows, then finish with two teal hem rows. The loop is worked from the top of the dome, and the clapper is a tiny circle sewn to the middle scallop.
Finished Size and Construction
- Finished size: 4.2 in (10.7 cm) wide × 4 in (10.2 cm) tall (bell body only)
- Overall length: about 6.5 in (16.5 cm) including the loop and clapper
- Skill level: Easy-intermediate
- Terminology: US terms
- Yarn weight: DK / light (#3) cotton or cotton blend
- Hook: 3.5 mm (E-4)
- Number of pieces: 1 bell body worked in one piece, plus 1 small clapper disc sewn on
- Layout: Single ornament, not joined to other pieces
- Dome size: 2.6 in (6.6 cm) wide × 1 in (2.5 cm) tall
- Size before hem border: about 4.5 in (11.4 cm) across the bottom fan tips × 3.4 in (8.6 cm) tall
- Hem border depth: about 0.6 in (1.5 cm), 2 rows
Materials
Use a smooth, mercerized or combed cotton in DK weight. Cotton gives crisp fans and holds its shape after blocking. Avoid fuzzy or very stretchy yarns, because they blur the open triangles.
The amounts below assume a yarn with about 125 m per 50 g.
- Teal: 5 g (13 m) for the dome, hem border and loop
- Cream: 7 g (18 m) for the lace body and clapper
Both amounts include a margin of about 20% for swatching, tails and color changes.
Tools:
– 3.5 mm (E-4) crochet hook
– Tapestry needle
– Scissors
– Stitch marker
– Blocking mat and rust-proof pins
– Spray bottle with water
– Optional: liquid fabric stiffener
Abbreviations (US Terms)
- ch – chain
- sl st – slip stitch
- sc – single crochet
- hdc – half double crochet
- dc – double crochet
- sk – skip
- sp – space
- st(s) – stitch(es)
- RS / WS – right side / wrong side
Special stitches:
– Small fan: 5 dc worked into the same stitch.
– Large fan: 7 dc worked into the same ch-4 space.
– Scallop: 5 hdc worked into the same stitch.
Gauge and Checkpoints
Gauge: 20 sc and 20 rows = 4 in (10.2 cm) in sc worked flat. This gives 5 sc and 5 rows per 1 in (2.5 cm).
Make one complete bell before you make a set, and check it at each checkpoint below.
- After dome Row 1: 7 sc, about 1.4 in (3.6 cm) wide.
- After dome Row 5: 13 sc, about 2.6 in (6.6 cm) wide and 1 in (2.5 cm) tall.
- After Lace Row 1: 3 small fans, about 2.8 in (7.1 cm) across the fan tips.
- After Lace Row 3: 4 large fans, about 3.5 in (8.9 cm) across. Total height is about 2.5 in (6.4 cm).
- After Lace Row 5: 5 large fans, about 4.5 in (11.4 cm) across the fan tips. Total height is about 3.4 in (8.6 cm).
- After Hem Row 7: 4.2 in (10.7 cm) wide and 4 in (10.2 cm) tall.
If your dome is too big (more than 2.8 in / 7.1 cm wide at Row 5), go down to a 3.25 mm hook. If it is too small (less than 2.4 in / 6.1 cm), go up to a 3.75 mm hook. Small differences are fine for an ornament, but the dome width controls how the fans sit, so get it close.
Pattern
Part 1: Teal Dome
Work the dome flat, turning at the end of each row. The ch 1 at the start of a row does not count as a stitch.
Row 1 (RS): With teal, ch 8. Sc in 2nd ch from hook and in each ch across. Turn. (7 sc)
Row 2: Ch 1, 2 sc in first st, sc in next 5 sts, 2 sc in last st. Turn. (9 sc)
Row 3: Ch 1, 2 sc in first st, sc in next 7 sts, 2 sc in last st. Turn. (11 sc)
Row 4: Ch 1, 2 sc in first st, sc in next 9 sts, 2 sc in last st. Turn. (13 sc)
Row 5: Ch 1, sc in each st across. (13 sc) Change to cream on the last yarn over of the final sc. Turn and cut teal, leaving a 4 in (10.2 cm) tail.
The increases at both ends of Rows 2–4 round off the shoulders of the dome. Row 5 keeps the bottom edge straight so the first fan row has a level base.
Part 2: Cream Lace Body
The body has three fan tiers with chain-arch rows between them. Each arch row anchors a sc in the center of every fan below, plus one sc at each edge. The next fans are worked into those arches, so each new tier sits between the fans above it and gains one fan.
Lace Row 1 (small fans): Ch 1, sc in first st, sk 1 st, small fan in next st, sk 1 st, sc in next st; repeat from * 2 more times. Turn.
Check: 1 + (3 × 4) = 13 sts used.
(3 small fans: 15 dc + 4 sc = 19 sts)*
Lace Row 2 (arches): Ch 1, sc in first sc, ch 4, sc in 3rd (center) dc of next fan, ch 4, sc in center dc of next fan; repeat from * once more, ch 4, sc in last sc. Turn.
The sc stitches between the fans are skipped. The empty space under each ch-4 makes the triangle openings.
(4 ch-4 arches + 5 sc)*
Lace Row 3 (large fans): Ch 1, sc in first sc, large fan in next ch-4 sp, sc in next sc; repeat from * 3 more times. Turn.
(4 large fans: 28 dc + 5 sc = 33 sts)*
Lace Row 4 (arches): Ch 1, sc in first sc, ch 4, sc in 4th (center) dc of next fan, ch 4, sc in center dc of next fan; repeat from * 2 more times, ch 4, sc in last sc. Turn.
(5 ch-4 arches + 6 sc)*
Lace Row 5 (large fans): Ch 1, sc in first sc, large fan in next ch-4 sp, sc in next sc; repeat from * 4 more times.
(5 large fans: 35 dc + 6 sc = 41 sts)*
Change to teal on the last yarn over of the final sc. Turn and cut cream, leaving a 4 in (10.2 cm) tail.
The fan count goes up by one each tier (3, 4, 5) because every arch row has one more arch than the fans below it. That steady increase gives the straight, flaring sides of the bell.
Border
The border is a two-row teal hem along the bottom edge only. The side edges stay cream, as in the finished piece.
Border gauge: 5 sc per 1 in (2.5 cm), the same as the dome. The hem is meant to gather the 4.5 in (11.4 cm) fan edge slightly to 4.2 in (10.7 cm) so the bottom of the bell looks crisp.
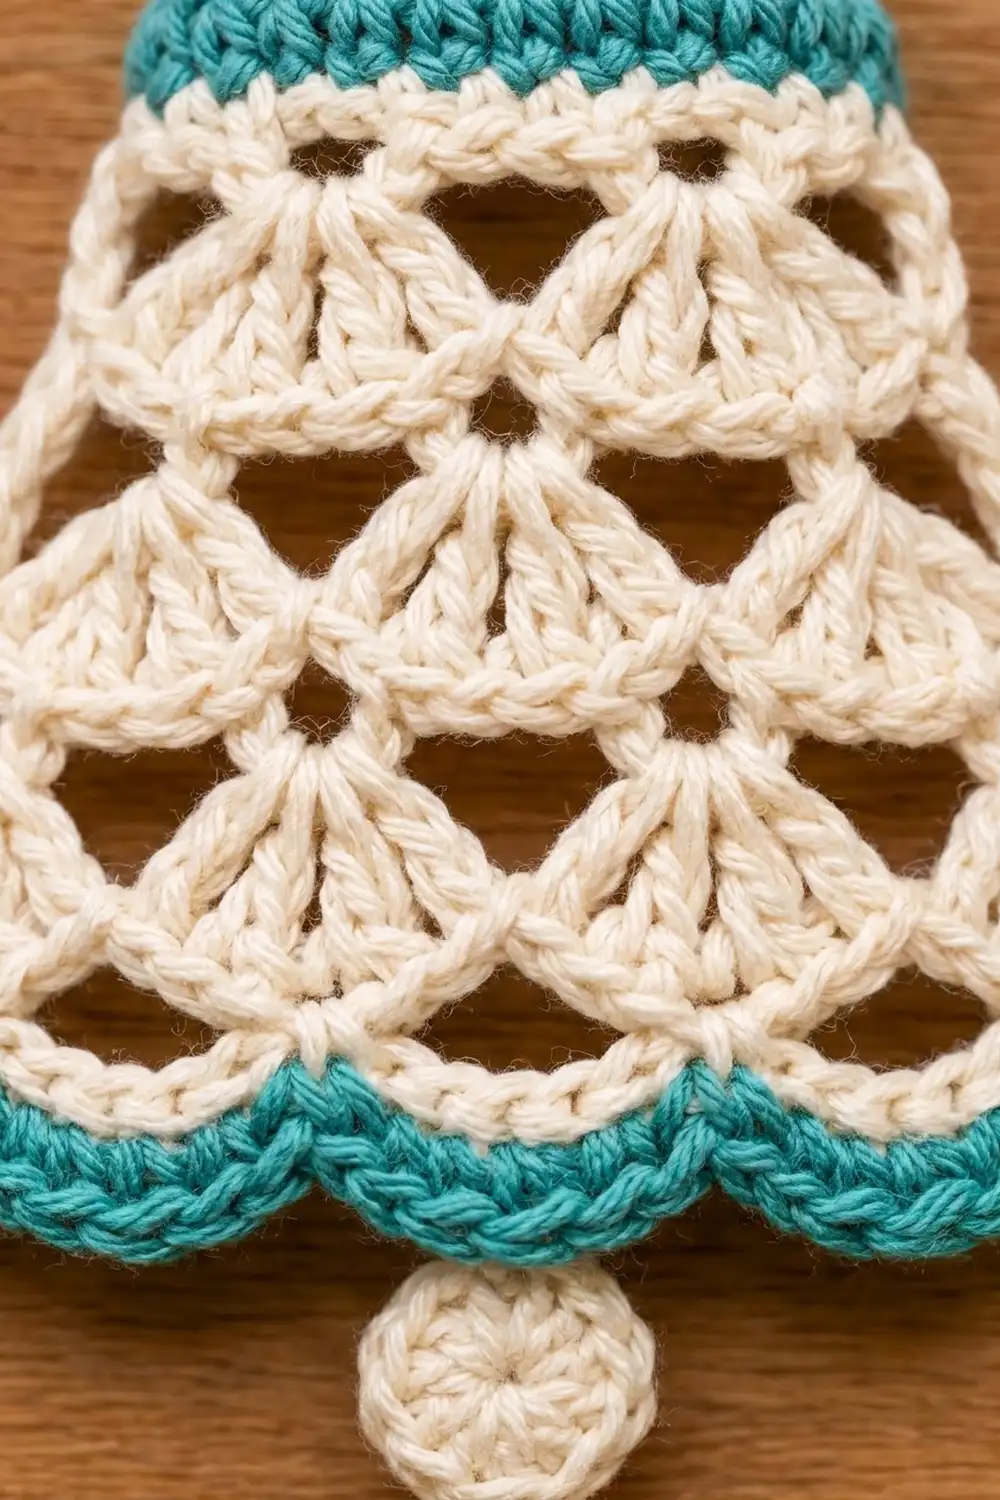
Hem Row 6 (teal sc band): Ch 1, sc in first sc, sc in 2nd dc, 4th dc and 6th dc of next fan, sc in next sc; repeat from * 4 more times. Turn.
Each fan section has 8 sts (7 dc + 1 sc), and you work 4 sc into it.
(1 + 5 × 4 = 21 sc)*
Hem Row 7 (scallops): Ch 1, sc in first st, sk 1 st, scallop in next st, sk 1 st, sc in next st; repeat from * 4 more times.
(5 scallops: 25 hdc + 6 sc = 31 sts)*
Fasten off, leaving a 4 in (10.2 cm) tail.
Why the math works: Lace Row 5 has 5 fan sections of 8 sts plus 1 starting sc, for 41 sts. Row 6 turns each section into 4 sc, so 1 + (5 × 4) = 21 sc. That is 4.2 in (10.7 cm) at 5 sc per inch. Row 7 uses 4 sc per scallop repeat plus the starting sc, so 1 + (5 × 4) = 21. Every stitch is used exactly once, and each scallop sits under one large fan.
Hanging Loop
With the RS facing, join teal with a sl st in the 4th (center) st of the dome foundation (the bottom of the Row 1 chain). Ch 18, then sl st in the same st. Sl st back along each of the 18 ch to make a firm cord. Sl st into the starting st and fasten off.
The loop stands about 1.5 in (3.8 cm) above the dome.
Clapper
Round 1: With cream, make a magic ring and work 6 sc into it. Join with a sl st to the first sc. (6 sc)
Round 2: Ch 1, 2 sc in each st around. Join with a sl st to the first sc. (12 sc)
Fasten off, leaving an 8 in (20.3 cm) tail. The disc should be about 0.75 in (1.9 cm) across.
Attach: Use the tail to ch 2, then sew the end of the chain to the 3rd (center) hdc of the middle scallop. This leaves a short cord about 0.25 in (0.6 cm) long, so the clapper hangs centered just below the hem.
Final Blocking
- Weave in all tails along matching colors: teal into the dome or hem, cream into the fan stitches.
- Mist the bell evenly with water until it is damp but not dripping.
- Lay it RS up on the blocking mat.
- Pin the dome flat at 2.6 in (6.6 cm) wide, keeping the shoulders rounded.
- Pin the hem straight at 4.2 in (10.7 cm) wide, with one pin at the tip of each scallop.
- Pin the outer edge of each side fan so the bell sides are straight lines from dome to hem.
- Push a pin into each triangle opening to open it up.
- Check that the total height is 4 in (10.2 cm), then let it dry completely.
- Optional: brush on a light coat of fabric stiffener before drying for a crisper ornament.
Final Quality-Control Checklist
- The dome has 13 sc in Row 5 and a smooth, rounded top.
- The fan tiers go 3, 4, 5 with no missing arches.
- Every arch row has one more arch than the fans below it.
- The triangle openings are even and clearly open.
- Hem Row 6 has 21 sc and Row 7 has 5 scallops.
- The bell is 4.2 in (10.7 cm) wide × 4 in (10.2 cm) tall.
- The loop is centered and firm, and the bell hangs straight.
- The clapper is centered under the middle scallop.
- All tails are woven in and none show on the RS.
Troubleshooting
The bell leans to one side when hanging: The loop is off-center. Re-attach it to the 4th foundation st of the dome.
The fans cup or ruffle: Your dc may be loose. Go down 0.25 mm, or work the ch-4 arches more tightly.
The triangle openings are closed up: The arch chains are too tight. Chain loosely, or block with a pin in each opening.
The hem flares instead of gathering: Check that you worked only 3 sc into each fan in Row 6, for 21 sc total.
The scallops don’t line up under the fans: Count Row 6 again. You need 21 sc so that each scallop sits under one fan.
The clapper twists around: Shorten the cord to 1 ch, or add a small stitch through the back of the hem.
Care
Hand wash in cool water with mild soap, press out the water in a towel, and re-block flat to dry. If you used stiffener, re-apply it after washing.
Final Notes
Everything in this ornament follows from one measurement. The 13-sc dome at 2.6 in (6.6 cm) sets the base for 3 small fans. The arch rows then add one fan per tier, growing the bell to 5 fans and 4.5 in (11.4 cm) across. The 21-sc teal hem gathers this to 4.2 in (10.7 cm), and 5 scallops finish the edge at 4 in (10.2 cm) tall. If your dome checkpoint is right, the rest of the bell falls into place.
Happy crocheting!