
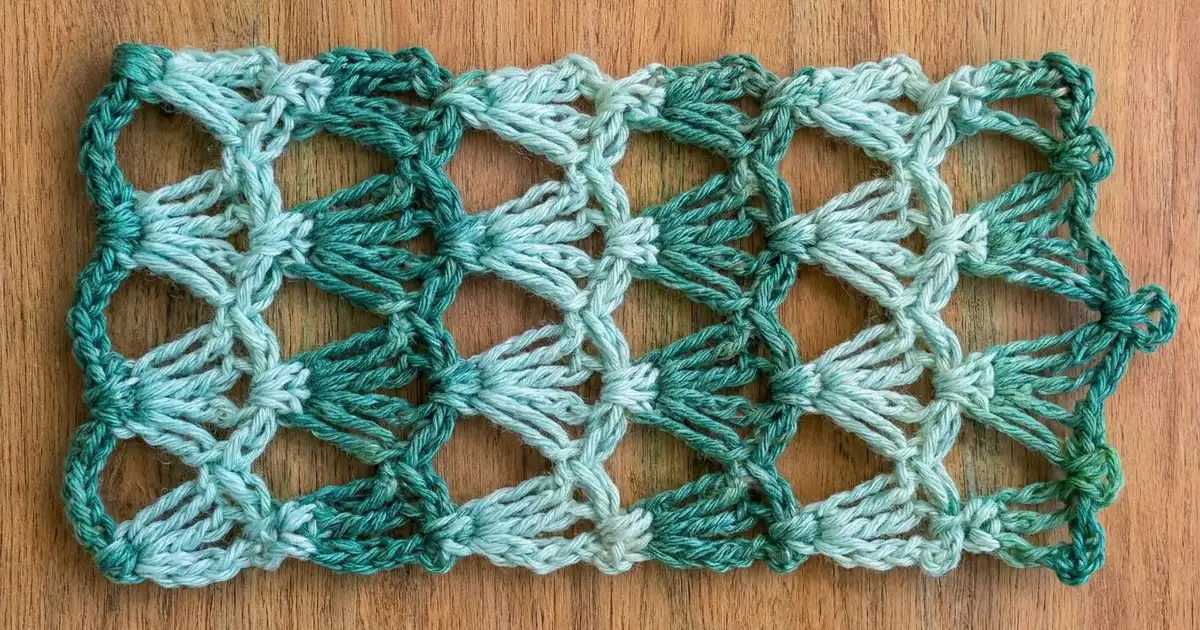
The Seaglass Fans Lace Panel is a single rectangle of open, airy lace. Tall fans of treble crochet open upward from a gathered base, and long chain arches pinch the top of each fan to a point. Stacked row after row, they form a column of hourglass shapes with big eyelet holes between them.
The panel uses two calm, watery shades: a deep jade-teal and a pale aqua-mint. They alternate in stripes two rows deep, so each color band holds one full row of fans. A teal picot edging frames the panel and makes it look finished.
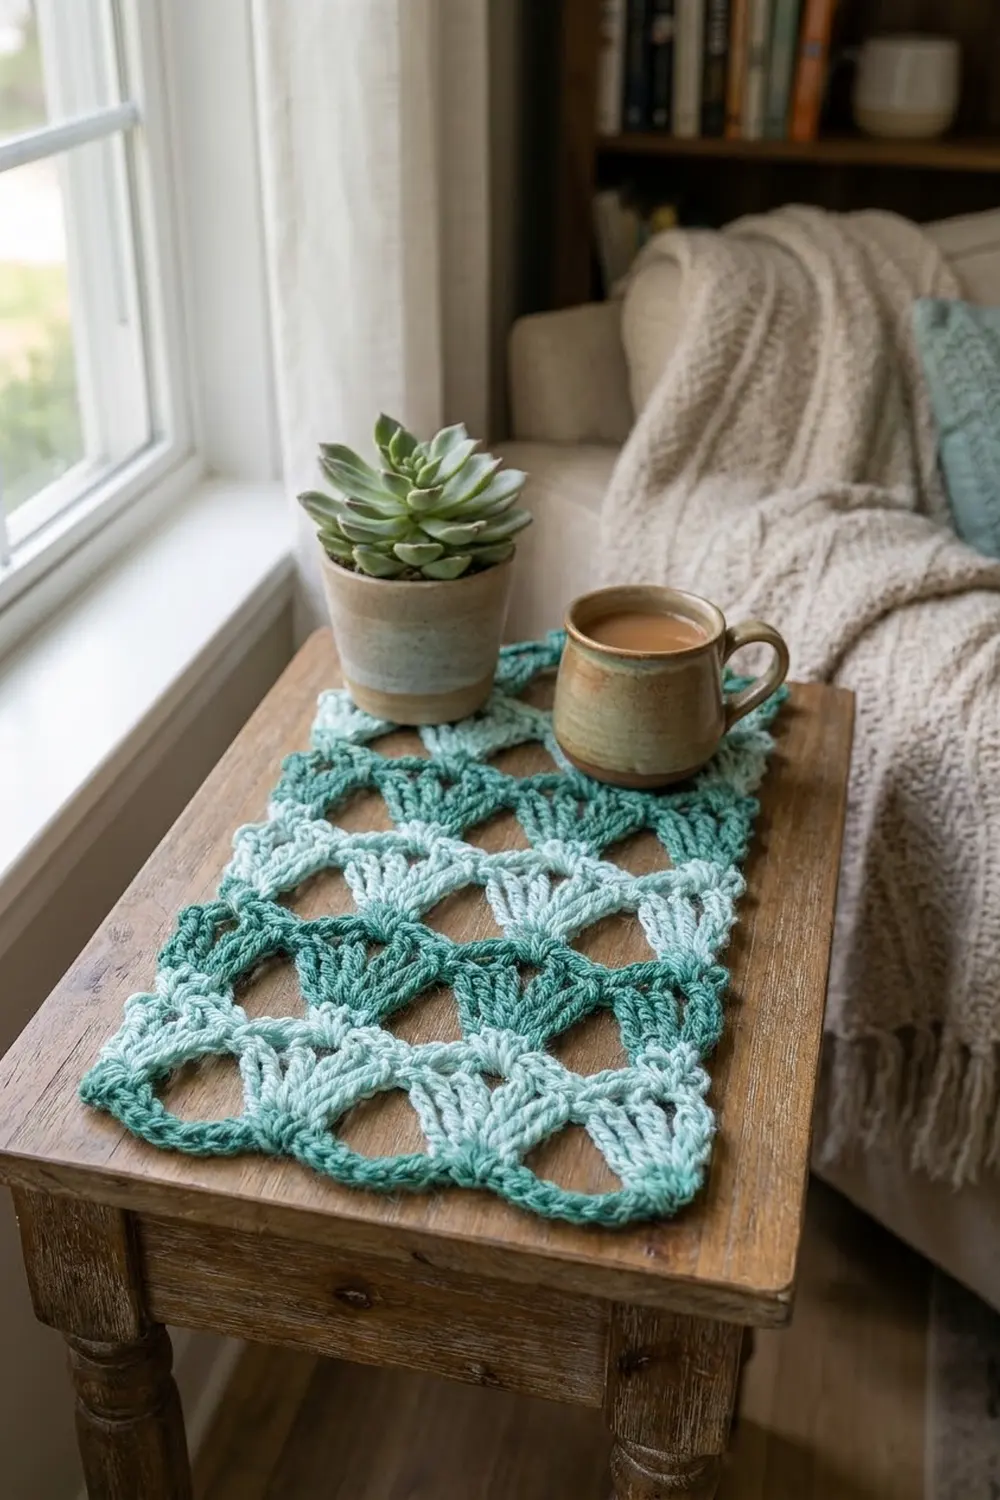
This pattern uses US crochet terms. The finished panel measures 7.25 in x 13.5 in (18.4 cm x 34.3 cm) after blocking. Use it as a small table mat, a dresser runner, a wall hanging, or a stitch sampler.
You work the panel flat in rows from the bottom up. You start with a foundation row of single crochet, then repeat a 2-row pattern (fan row, arch row) eight times, changing color every 2 rows. A closing row of single crochet and a 2-round border finish the piece.
Finished Size and Construction
- Finished size: 7.25 in x 13.5 in (18.4 cm x 34.3 cm)
- Skill level: Easy-intermediate
- Terminology: US crochet terms
- Yarn weight: Worsted (#4)
- Hook: 5.0 mm (H-8)
- Number of pieces: 1
- Layout: Single panel, upright rectangle, 3 fans across x 8 fan bands tall
- Piece size before border: 6.25 in x 12.5 in (15.9 cm x 31.8 cm)
- Border depth: 0.5 in (1.3 cm) per side, 2 rounds
- Size after border: 7.25 in x 13.5 in (18.4 cm x 34.3 cm)
Materials
Yarn: Use a smooth worsted-weight cotton or cotton blend, about 170 m per 100 g. Cotton keeps the fans crisp and the eyelets open. A soft acrylic also works, but the lace may relax more after blocking.
- Color A, deep jade-teal: 40 g (about 68 m)
- Color B, pale aqua-mint: 25 g (about 43 m)
Both amounts include a margin of roughly 20% for your gauge swatch and weaving in ends.
Tools:
- 5.0 mm (H-8) crochet hook
- Tapestry needle
- Scissors
- 2 stitch markers
- Rust-proof pins and a blocking mat or folded towel
- Spray bottle with clean water
- Measuring tape or ruler
Abbreviations (US Terms)
- ch – chain
- sc – single crochet
- tr – treble crochet (yo twice, insert hook, yo and pull up a loop, [yo, pull through 2 loops] 3 times)
- sk – skip
- sp – space
- st(s) – stitch(es)
- yo – yarn over
- sl st – slip stitch
- RS – right side
Special stitches:
- Fan: 7 tr worked into the same stitch.
- Picot: ch 3, sl st into the front loop and side bar of the sc just made.
Gauge and Checkpoints
Gauge: 4 sc = 1 in (2.5 cm) in the foundation row. Each tr row is 0.75 in (1.9 cm) tall, so one fan band (fan row plus arch row) is 1.5 in (3.8 cm) tall.
Test first. Chain 26, then work Rows 1–3 of the pattern. Lay the swatch flat without stretching it.
- After Row 1: 25 sc should measure 6.25 in (15.9 cm) wide.
- After Row 3: the swatch should be 1.75 in (4.4 cm) tall.
If your swatch is too big, try a 4.5 mm hook. If it’s too small, try a 5.5 mm hook. If only the height is off, check how tall your tr stitches are. Pull each first loop up to full height, and don’t pinch the loops down as you work.
Keep checking as you go:
- After Row 9: about 6.25 in (15.9 cm) tall, width still 6.25 in (15.9 cm).
- After Row 17: about 12.25 in (31.1 cm) tall.
- After Row 18: 6.25 in x 12.5 in (15.9 cm x 31.8 cm).
A difference of 0.25 in (0.6 cm) is fine. Blocking will even it out.

Panel Pattern
Color plan: Rows 1–3 in A. After that, change color at the start of every fan row: Rows 4–5 B, Rows 6–7 A, Rows 8–9 B, Rows 10–11 A, Rows 12–13 B, Rows 14–15 A, Rows 16–17 B, and Row 18 in A.
Color change: Work the last st of the old row until 2 loops (sc) or the final 2 loops (tr) are left on the hook. Drop the old color, yo with the new color, and pull through. Don’t cut the yarn. Carry the unused color loosely up the side edge. The border will cover it.
Turning chains: The ch 4 at the start of a fan row counts as 1 tr. The ch 7 at the start of an arch row counts as 1 tr plus ch 3.
Foundation
With A, ch 26.
Row 1 (RS): Sc in 2nd ch from hook and in each ch across. Turn. (25 sc)
Check: 6.25 in (15.9 cm) wide.
Band 1
Row 2 (fan row, A): Ch 4 (counts as tr), sk next 3 sc, fan in next sc, sk next 3 sc, sc in next sc, sk next 3 sc, fan in next sc, sk next 3 sc, sc in next sc, sk next 3 sc, fan in next sc, sk next 3 sc, tr in last sc. Turn. (3 fans, 2 sc, 2 tr = 25 sts)
The fans sit on sc number 5, 13, and 21 of Row 1, which centers them 2 in (5.1 cm) apart.
Row 3 (arch row, A): Ch 7 (counts as tr + ch 3), sc in 4th (center) tr of first fan, ch 7, sc in center tr of next fan, ch 7, sc in center tr of last fan, ch 3, tr in top of turning ch-4. Change to B in the last tr. Turn. (2 tr, 3 sc, 2 ch-3 sps, 2 ch-7 sps)
The sc pulls each fan’s top together into a point, and the ch-7 arches stretch over the gaps between fans to open the eyelets.
Band 2 and Repeats
Row 4 (fan row, B): Ch 4 (counts as tr), sk ch-3 sp, fan in next sc, sc in next ch-7 sp, fan in next sc, sc in next ch-7 sp, fan in next sc, sk ch-3 sp, tr in 4th ch of turning ch-7. Turn. (3 fans, 2 sc, 2 tr = 25 sts)
Each new fan starts from the sc that gathered the fan below it. The fans stack straight up the panel, and each gathered point looks like a small bow.
Row 5 (arch row, B): Work as Row 3, but change to A in the last tr. (2 tr, 3 sc, 2 ch-3 sps, 2 ch-7 sps)
Rows 6–17: Repeat Rows 4–5 six more times, following the color plan. You’ll end with Row 17 (arch row, B). Change to A in the last tr of Row 17. Turn.
That makes 8 fan bands total. Check: about 12.25 in (31.1 cm) tall.
Closing Row
Row 18 (A): Ch 1, sc in first tr, 3 sc in ch-3 sp, sc in next sc, 7 sc in ch-7 sp, sc in next sc, 7 sc in ch-7 sp, sc in next sc, 3 sc in ch-3 sp, sc in 4th ch of turning ch-7. (25 sc)
Stitch math: 1 + 3 + 1 + 7 + 1 + 7 + 1 + 3 + 1 = 25. This matches Row 1, so the top and bottom edges are the same width.
Cut B, leaving a 6 in (15.2 cm) tail. Don’t cut A. Go straight on to the border.
Border
Border gauge: 4 sc = 1 in (2.5 cm), the same as the panel.
Side-edge rule: Rows 2–17 are each 0.75 in (1.9 cm) tall, and each ends in a tr or a tr-height turning chain. Work 3 sc into each of those row ends. That puts 4 sc in every 1 in (2.5 cm), which matches the horizontal gauge. Rows 1 and 18 are where the corners go, so they don’t get any extra side sts.
Corners: Each corner is a 3-sc group. The middle sc of the group is the corner st. Per-side counts below include both corner sts.
Round 1 (A)
Don’t turn. Ch 1, 3 sc in the last sc of Row 18 (corner). Work down the side: 3 sc in the end of each of Rows 17–2 (48 sc). 3 sc in the first ch of the foundation (the base of the first sc of Row 1) for a corner. Sc in the remaining loop of the next 23 ch. 3 sc in the last foundation ch (corner). Work up the second side: 3 sc in the end of each of Rows 2–17 (48 sc). 3 sc in the first sc of Row 18 (corner). Sc in the next 23 sc across the top. Join with sl st to the first sc. (154 sc)
Per side, including both corner sts:
- Top and bottom: 1 + 1 + 23 + 1 + 1 = 27 sts
- Each long side: 1 + 1 + 48 + 1 + 1 = 52 sts
Check: 27 + 27 + 52 + 52 − 4 shared corners = 154. Place a marker in the top-right and bottom-left corner sts if that helps.
Round 2 (A, picot edge)
Ch 1, (sc, ch 3, sc) in the corner st. Then work each side as follows:
- Top and bottom (25 sts between corner sts): Sc in next st, sc in next 2 sts, picot 12 times. (sc, ch 3, sc) in the next corner st.
- Long sides (50 sts between corner sts): Sc in next 2 sts, picot 25 times. (sc, ch 3, sc) in the next corner st.
Leave out the last corner group (you already worked it at the start) and join with sl st to the first sc. Fasten off. (158 sc, 74 picots, 4 corner ch-3 loops)
Why the math works: Round 1 makes 25 sts between corner sts on the short sides and 50 on the long sides. The picot repeat uses 2 sts. On the short sides, 25 = 1 + (2 x 12), so you work 1 lead-in sc and then 12 repeats. On the long sides, 50 = 2 x 25 exactly. Because there are no leftover sts, the corners stay square and the picots are evenly spaced. Each round adds 0.25 in (0.6 cm), giving a 0.5 in (1.3 cm) border on each side. Width: 6.25 + 0.5 + 0.5 = 7.25 in (18.4 cm). Height: 12.5 + 0.5 + 0.5 = 13.5 in (34.3 cm).
Final Blocking
- Weave in all ends along the side edges, inside the border stitches, before blocking.
- Spray the panel with clean water until it’s damp all the way through but not dripping.
- Lay it flat on the blocking mat with the RS facing up.
- Pin the 4 corners first to 7.25 in x 13.5 in (18.4 cm x 34.3 cm). Check that both diagonals measure the same.
- Pin along each edge every 1 in (2.5 cm), and put a pin through each corner ch-3 loop.
- Gently open each eyelet with your fingertips so the fans spread evenly and the gathered points line up in 3 straight vertical columns.
- Leave it to dry completely, at least 12 hours, before taking out the pins.
Final Quality-Control Checklist
- Rows 1 and 18 each have 25 sc.
- Every fan has exactly 7 tr, with 3 fans per fan row and 24 fans in total.
- The gathered points line up in 3 straight vertical columns.
- The stripes alternate A and B every 2 rows, with A at both the top and the bottom.
- The carried yarn on the edges is fully hidden by the border.
- Border Round 1 has 154 sc, and Round 2 has 74 picots plus 4 corner loops.
- The blocked size is 7.25 in x 13.5 in (18.4 cm x 34.3 cm), give or take 0.25 in (0.6 cm).
- The corners are square and the edges are straight, not wavy.
Troubleshooting
The fans curl or ruffle. Your tr stitches are probably too loose for the arches. Go down half a hook size, or make sure each ch-7 sits flat and isn’t stretched.
The panel pulls in at the waist. The ch-7 arches are too tight. Go up a hook size just for the chain sections, or loosen up your chaining.
The fans lean to one side. Make sure each arch-row sc goes into the 4th (center) tr of the fan, not the 3rd or 5th.
The side edges are wavy after the border. Count your row-end sts. You need exactly 3 per row on Rows 2–17. If you have more, the edge will flute. If you have fewer, it will pucker.
The carried yarn shows. Carry it more loosely, and work the Round 1 sc over the strand so they hide it.
You run short on picots. Recount Round 1. The 25-st and 50-st sections must be exact, or the 2-st repeat won’t come out even.
Care
Hand wash in cool water with mild soap, squeeze gently in a towel, and dry flat. Re-pin it to size if the eyelets need opening up again.
Final Notes
The whole panel follows one measurement chain. Gauge is 4 sc = 1 in (2.5 cm), so the 25-st foundation is 6.25 in (15.9 cm) wide. Eight fan bands of 1.5 in (3.8 cm) plus the 2 sc rows make the panel 12.5 in (31.8 cm) tall. The 2-round border adds 0.5 in (1.3 cm) on every side, for a finished size of 7.25 in x 13.5 in (18.4 cm x 34.3 cm). Check your gauge in the first 3 rows, and the rest of the numbers will follow.
Happy crocheting!