
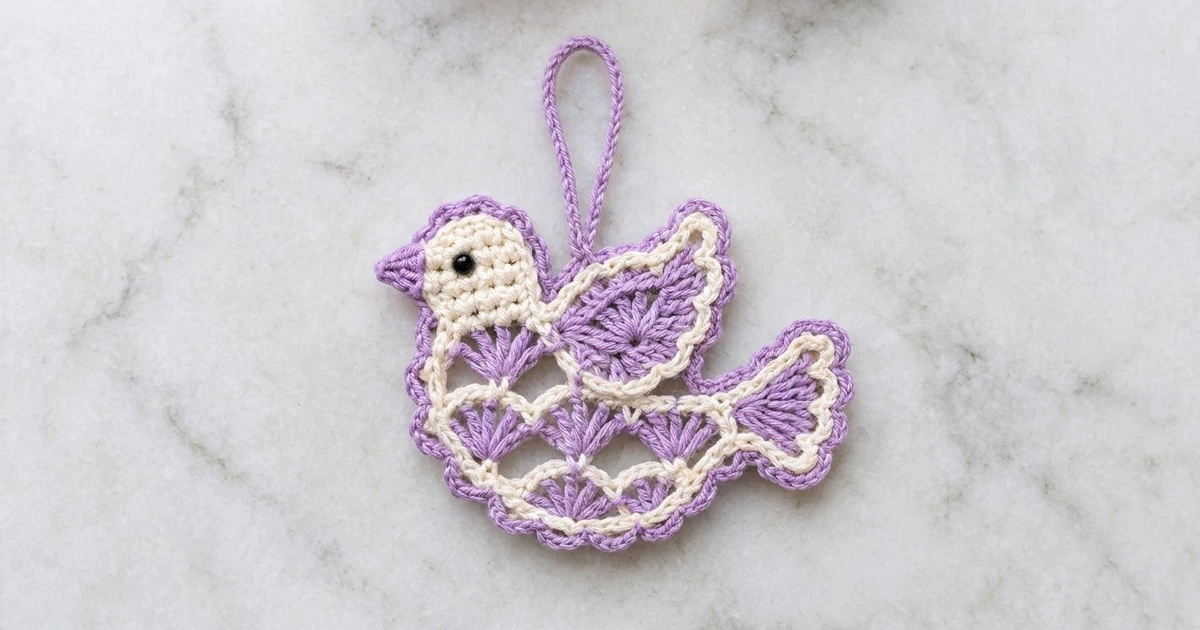
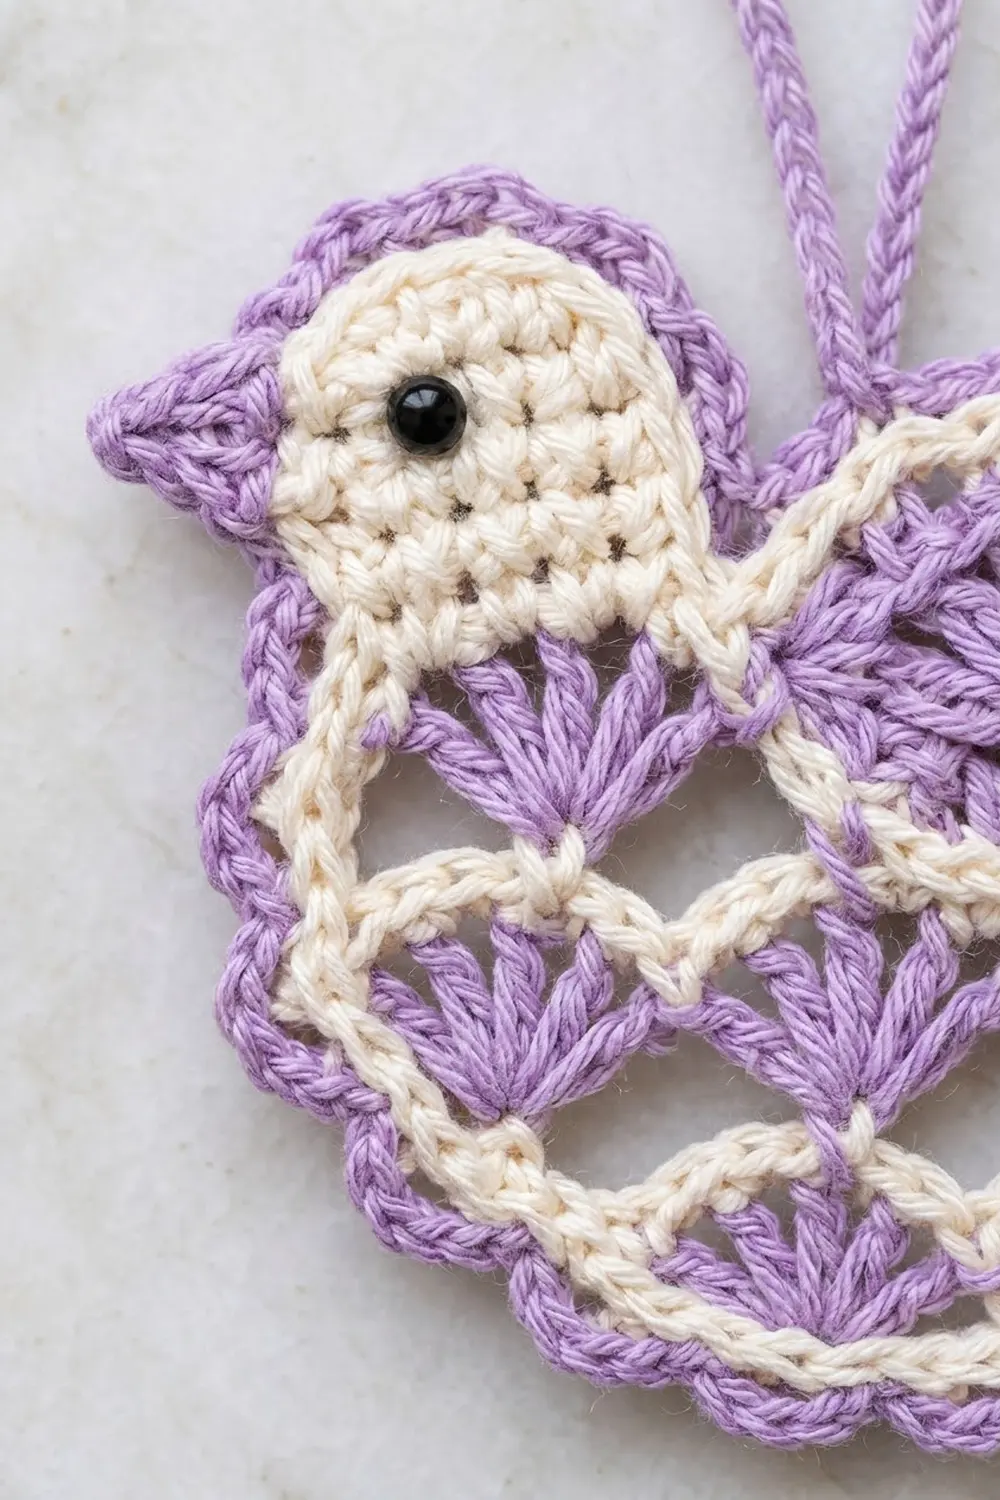
This little songbird is a flat, lacy ornament in soft lilac and cream. It has a solid cream head, a tiny lilac beak and a black bead eye. The body is made of fan shells framed by cream outlines, with a leaf-shaped wing on the back and a flared fan tail.
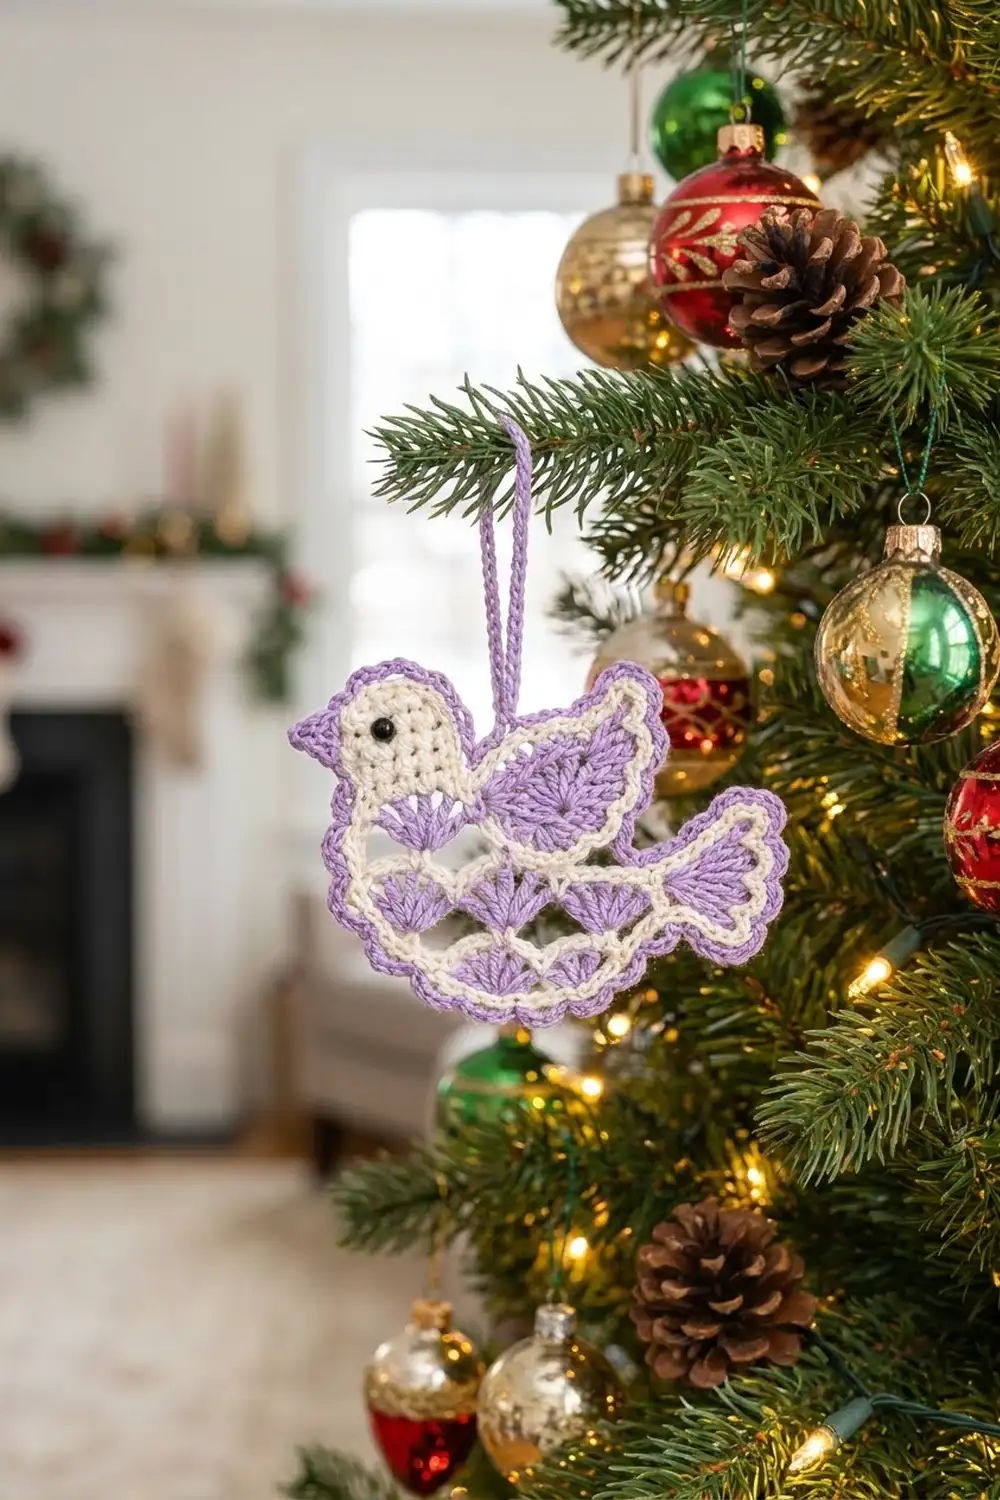
The style is light and a little vintage, like a paper-cut bird turned into lace. A small lilac scalloped border goes around the whole bird and gives it a neat finish. It looks lovely on a tree, a gift or in a window.
The pattern uses US crochet terms. The finished ornament measures about 5 in (12.7 cm) wide and 4 in (10.2 cm) tall. The hanging loop adds about 2 in (5.1 cm) on top of that.
You start with one cream foundation row, which forms the bird’s back line. You work the head and wing up from the free loops of that chain, and the fan tiers down from the tops of the stitches. Then you add the tail, work a cream outline round all the way around, add a lilac scalloped border and finish with the loop.
Finished Size and Construction
- Finished size: 5 in x 4 in (12.7 cm x 10.2 cm), plus a 2 in (5.1 cm) loop
- Skill level: Intermediate (simple stitches, frequent color changes)
- Terminology: US crochet terms
- Yarn weight: DK / light (#3) cotton
- Hook: 3.5 mm (E-4)
- Number of pieces: 1, worked as one continuous piece
- Layout: single motif, bird facing left
- Size before border: about 4.5 in x 3.5 in (11.4 cm x 8.9 cm)
- Border depth: about 0.25 in (0.6 cm) on every edge
Materials
Use a smooth mercerized or combed cotton in DK weight. Cotton shows the fan shells clearly and blocks flat. Avoid fuzzy yarns, because they blur the cream outlines.
- Lilac: about 10 g / 25 m (27 yd), for the beak, fans, wing, tail, border and loop
- Cream: about 8 g / 20 m (22 yd), for the head, foundation and outlines
These quantities include a margin for weaving in ends and checking your gauge.
Tools:
– 3.5 mm (E-4) crochet hook
– Tapestry needle
– One 6 mm black bead, black sewing thread and a sharp needle
– Scissors
– Rustproof pins and a blocking mat or folded towel
– Spray bottle with water
Abbreviations (US Terms)
- ch: chain
- sl st: slip stitch
- sc: single crochet
- hdc: half double crochet
- dc: double crochet
- tr: treble crochet
- sc2tog: single crochet 2 together
- sk: skip
- sp: space
- st(s): stitch(es)
- RS: right side
Special stitches:
– Fan: 5 dc in the same stitch.
– Picot: ch 3, sl st in the 3rd ch from hook.
Gauge and Checkpoints
Gauge: 20 sc and 22 rows = 4 in (10.2 cm) in cream.
This is a one-piece project, so the bird itself is your test piece. Work the foundation row and the head first, then measure before you go on.
Checkpoints:
– Foundation Row 1 (17 sc): 3.4 in (8.6 cm) long.
– Head Row 4 (9 sc): 1.8 in (4.6 cm) wide.
– Finished head: about 1.5 in (3.8 cm) tall.
– Finished wing: about 1.6 in (4.1 cm) from base to tip.
– Body after Row 7: about 2 in (5.1 cm) deep below the foundation row.
– Finished tail: about 0.75 in (1.9 cm) from the body to its edge.
– After the outline round: about 4.5 in x 3.5 in (11.4 cm x 8.9 cm).
If your piece is too big, switch to a 3.25 mm (D-3) hook. If it is too small, switch to a 3.75 mm (F-5) hook. The head must lie flat. If it cups, your stitches are too tight. If it ruffles, they are too loose.
The Pattern
Turn at the end of each row unless the pattern says otherwise. The colors change almost every row, so fasten off at the end of each color section. Leave 4 in (10.2 cm) tails and weave them in as you go.
Part 1: Foundation (Back Line)
With cream:
Row 1 (RS): Ch 18, sc in 2nd ch from hook and in each ch across. (17 sc)
Fasten off. With RS facing, number the stitches 1 to 17 from the left. The free loops of the starting chain point up toward the bird’s back. The tops of the sc point down toward the belly.
Part 2: Head
Hold the piece with RS facing and the free loops on top. Join cream in the free loop under st 1.
Row 1: Ch 1, sc in the free loops under sts 1–9. (9 sc)
Rows 2–4: Ch 1, turn, sc in each st across. (9 sc)
Row 5: Ch 1, turn, sc2tog, sc in next 5 sts, sc2tog. (7 sc)
Row 6: Ch 1, turn, sc in each st across. (7 sc)
Row 7: Ch 1, turn, sc2tog, sc in next 3 sts, sc2tog. (5 sc)
Row 8: Ch 1, turn, sc2tog, sc in next st, sc2tog. (3 sc)
Fasten off. You now have a rounded dome with a flat base.
Part 3: Beak
Work into the row ends on the left (front) edge of the head.
Row 1: Join lilac in the row end of head Row 3. Ch 1, sc in the row ends of Rows 3, 4 and 5. (3 sc)
Row 2: Ch 1, turn, sc2tog, sc in last st. (2 sc)
Row 3: Ch 1, turn, sc2tog. (1 sc)
Fasten off. You now have a small triangle pointing left.
Part 4: Wing
Hold the piece with RS facing and the free loops on top. Join lilac in the free loop under st 10.
Row 1: Ch 1, sc in same loop, sk 2 loops, 9 dc in the loop under st 13, sk 2 loops, sc in the loop under st 16. (9 dc + 2 sc = 11 sts)
The loop under st 17 stays free for now.
Row 2: Ch 1, turn, sl st in first sc. Work (tr, picot, tr) in the first dc for the wing tip. Then work 2 tr in the next dc, 2 dc in each of the next 2 dc, hdc in each of the next 2 dc, sc in each of the next 3 dc, and sl st in the last sc. (4 tr, 4 dc, 2 hdc, 3 sc = 13 sts, plus the picot and 2 sl sts)
Fasten off. The tallest stitches sit at the back of the wing, so it rises to a leaf point at the upper right.
Part 5: Body Fan Tiers
Turn the piece so the sc tops of Row 1 are on top. Each tier is a lilac fan row followed by a cream outline row.
Row 2 (lilac, Tier 1): Join lilac in st 17. Ch 1, sc in same st, sk 1, fan in next st, sk 1, sc in next st; repeat from * 3 more times. (4 fans + 5 sc = 25 sts)
Row 3 (cream outline): Join cream in the first sc. Ch 1, sc in same st, ch 2, sc in 3rd dc of next fan, ch 2, sc in next sc; repeat from * 3 more times. (9 sc, 8 ch-2 sps)
In the next rows, a “center sc” is a sc sitting on top of a fan, and a “between sc” is a sc sitting between two fans.
Row 4 (lilac, Tier 2): Sk the first sc and ch-2 sp. Join lilac in the first center sc. Ch 1, sc in same st, fan in next between sc, sc in next center sc; repeat from * 2 more times. Skip the ch-2 sps as you go. Leave the last ch-2 sp and the last sc unworked. (3 fans + 4 sc = 19 sts)
Row 5 (cream outline): Join cream in the first sc. Ch 1, sc in same st, ch 2, sc in 3rd dc of next fan, ch 2, sc in next sc; repeat from * 2 more times. (7 sc, 6 ch-2 sps)
Row 6 (lilac, Tier 3): Sk the first sc and ch-2 sp. Join lilac in the next sc. Ch 1, sc in same st, fan in next sc, sc in next sc; repeat from * once more. Leave the last ch-2 sp and the last sc unworked. (2 fans + 3 sc = 13 sts)
Row 7 (cream outline): Join cream in the first sc. Ch 1, sc in same st, ch 2, sc in 3rd dc of next fan, ch 2, sc in next sc; repeat from * once more. (5 sc, 4 ch-2 sps)
Fasten off after each row. Each tier has one fewer fan than the one above, so the belly narrows in steps. The outline round smooths these steps into a curve. Checkpoint: about 2 in (5.1 cm) deep.
Part 6: Tail
Hold the piece with RS facing and the bird facing left.
Row 1: Join lilac in st 17 of foundation Row 1. Ch 4, then work 8 dc in the 4th ch from hook. Sl st in the last sc of Row 3 to anchor. (9 dc, counting the ch-3 as a dc)
Row 2: Ch 3 (counts as dc), turn, dc in same st, 2 dc in each of next 8 sts. Sl st in the side of foundation st 17. (18 dc)
Fasten off. The tail is a half-circle fan flaring out to the right.
Part 7: Eye
Sew the 6 mm bead to head Row 6, in the 3rd stitch from the front edge. Knot the thread firmly on the back.
Border
Border gauge: the outline round follows the main gauge of 20 sc = 4 in (10.2 cm). Each scallop uses 2 outline stitches and is about 0.4 in (1 cm) wide.
Round A (cream outline)
Work clockwise with RS facing. Join cream in the row end of head Row 1 on the front edge, ch 1, and work these segments in order:
- Head (24 sc): 2 sc in the row ends of head Rows 1–2. Around the beak, work 2 sc up its lower edge, 3 sc in the tip and 2 sc down its upper edge. Work 3 sc in the row ends of head Rows 6–8. Across the head top, sc in the first st, 2 sc in the center st and sc in the last st. Finish with 8 sc down the back of the head.
- Wing (18 sc): 1 sc at the wing base, sc in each of the 12 sts before the picot, 3 sc in the picot, sc in the last tr, then 1 sc at the wing base.
- Back (2 sc): sc in the free loop under st 17, then sc in the tail’s joining sl st.
- Tail (28 sc): 2 sc in the top row ends. Around the outer edge, sc in next 2 dc, 2 sc in next dc 6 times (24 sc). Then 2 sc in the bottom row ends.
- Right side (10 sc): 2 sc in the last ch-2 sp of Row 3, 2 sc in the end of Row 4, 1 sc in the end of Row 5, 2 sc in the last ch-2 sp of Row 5, 2 sc in the end of Row 6, then 1 sc in the last sc of Row 7.
- Bottom (12 sc): 2 sc in each of the next 2 ch-2 sps, sc in next sc, 2 sc in the center sc, sc in next sc, then 2 sc in each of the next 2 ch-2 sps (2+2+1+2+1+2+2 = 12).
- Left side (14 sc): 1 sc in the first sc of Row 7, 2 sc in the end of Row 6, 2 sc in the first ch-2 sp of Row 5, 1 sc in the end of Row 5, 2 sc in the end of Row 4, 2 sc in the first ch-2 sp of Row 3, 1 sc in the end of Row 3, 2 sc in the end of Row 2, then 1 sc in the end of Row 1.
Sl st in the first sc to join. Total: 24 + 18 + 2 + 28 + 10 + 12 + 14 = 108 sc. Checkpoint: 4.5 in x 3.5 in (11.4 cm x 8.9 cm).
Round B (lilac scallops)
Join lilac in the first sc of any segment.
Round B: Sl st in next st, 3 hdc in next st; repeat from * around. Sl st in the first sl st to join. (54 scallops = 54 sl sts + 162 hdc = 216 sts)
Scallops per segment: head 12, wing 9, back 1, tail 14, right side 5, bottom 6, left side 7. Total: 54.
Why the math works: each scallop uses exactly 2 outline stitches, so every segment needs an even count. All seven segments are even (24, 18, 2, 28, 10, 12 and 14), so no scallop crosses a segment boundary, and 108 ÷ 2 = 54. The extra stitches at the beak tip, head top, picot, tail and belly center let the border lie flat around the curves.
Hanging Loop
Join lilac in the border at the top of the back, where the head meets the wing. Ch 26, then sl st in the same stitch. Fasten off. The loop stands about 2 in (5.1 cm) tall.
Final Blocking
- Weave in all remaining ends through stitches of the same color.
- Lay the bird RS up on a mat or folded towel.
- Spray it until it is damp all the way through.
- Pin the outline round to 4.5 in x 3.5 in (11.4 cm x 8.9 cm).
- Pin each fan open and shape the cream ch-2 outlines into smooth arches.
- Pin the wing tip and the center of each scallop.
- Let it dry completely. It should measure 5 in x 4 in (12.7 cm x 10.2 cm).
Final Quality-Control Checklist
- Foundation row: 17 sc.
- Head Rows 1–8: 9, 9, 9, 9, 7, 7, 5 and 3 sts.
- Fan tiers: 4, 3 and 2 fans.
- Wing: 9 dc in Row 1 and a clear picot tip.
- Tail: 18 dc in Row 2.
- Outline round: 108 sc.
- Border: 54 scallops.
- The bead is secure and the loop is centered.
- The piece lies flat, with no cupping or ruffling.
Troubleshooting
Head cups: your stitches are too tight. Go up a hook size.
Fans bunch up: check that you skipped exactly 1 stitch on each side of every fan.
Outlines pull the fans tight: loosen your ch-2s.
Border ruffles: recount Round A. It must have exactly 108 sc.
Border pulls in: check that you worked all the 2-sc and 3-sc increases on the curves.
Wing tip is soft: pin the picot firmly while it dries.
Care
Hand wash in cool water with mild soap, roll it in a towel to remove water, and dry flat. Store it flat between seasons.
Final Notes
Here’s the measurement chain:
- Foundation row: 17 sc, 3.4 in (8.6 cm) long.
- Head: 1.8 in (4.6 cm) wide and 1.5 in (3.8 cm) tall.
- Body: three tiers of 4, 3 and 2 fans, about 2 in (5.1 cm) deep.
- Outline round: 108 sc, measuring 4.5 in x 3.5 in (11.4 cm x 8.9 cm).
- Border: 54 scallops, for a finished size of 5 in x 4 in (12.7 cm x 10.2 cm).
- Loop: 2 in (5.1 cm) tall.
If each checkpoint matches, your songbird will come out flat and balanced, ready to hang.
Happy crocheting!