

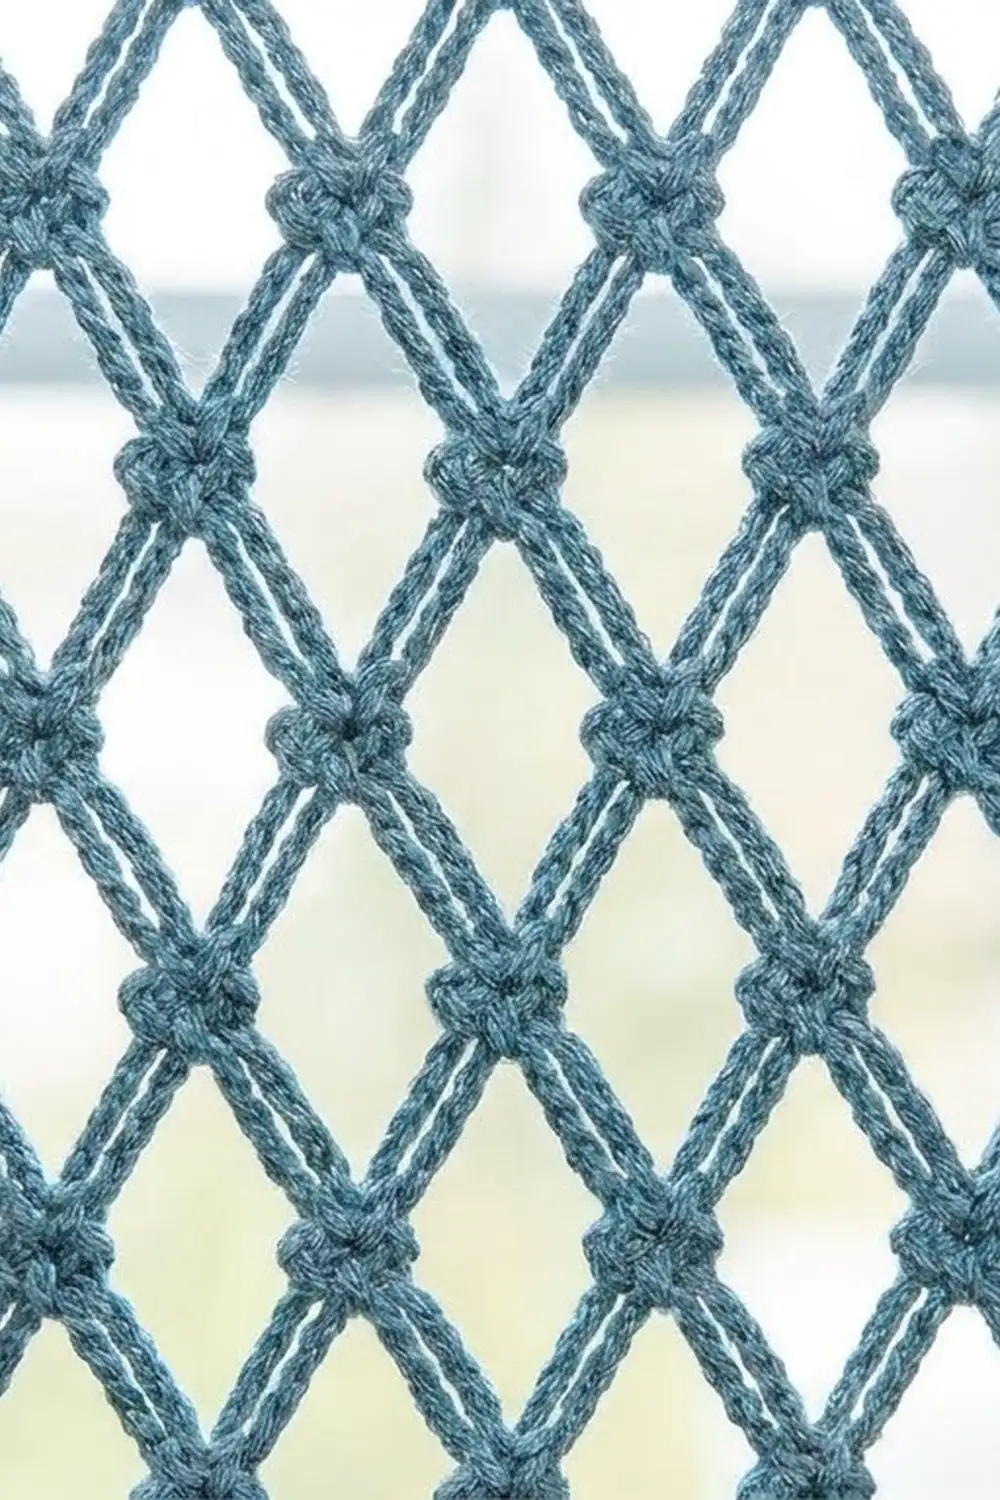
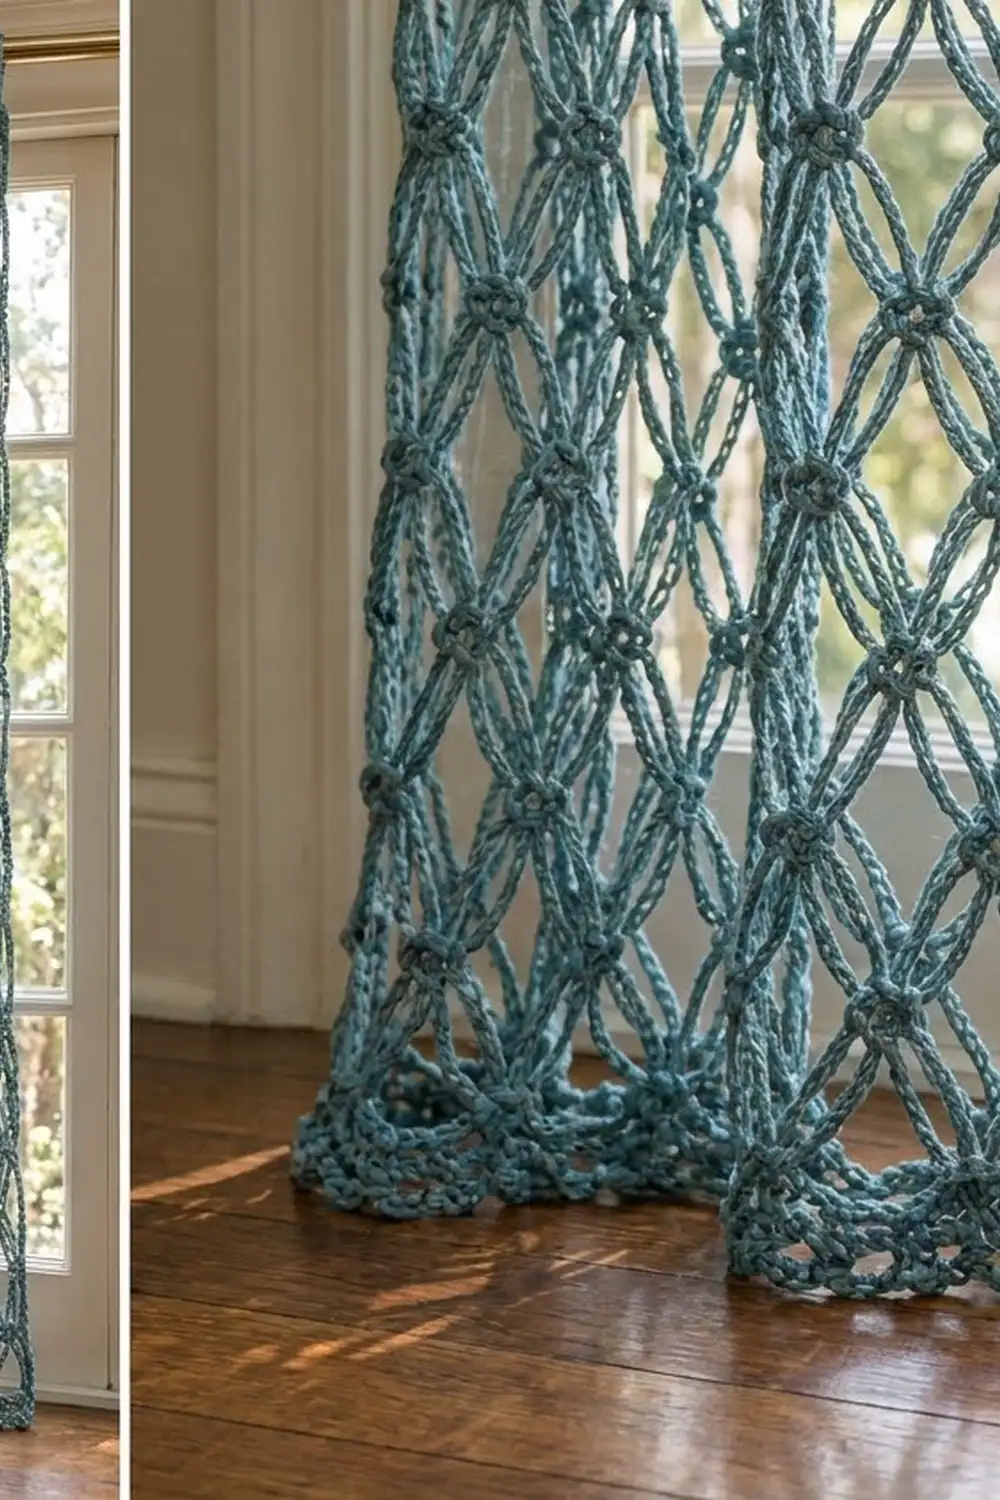
The Seaglass Lattice Curtain Panel is an open, airy window panel made from long chain arches. Small flower knots hold the arches together where they cross. When the panel hangs, its weight stretches each cell into a tall, narrow lens, so light comes through in a soft diamond pattern.
The panel is worked in one color, a heathered dusty teal-blue. The style sits between vintage filet lace and modern macramé. It suits Art Deco rooms, coastal bedrooms and plain neutral spaces equally well. All instructions use US crochet terms.
The finished panel measures 40 1/4 in (102.2 cm) wide and 82 in (208.3 cm) long, measured from the top of the band to the bottom of the border. The tab loops add about 3 in (7.6 cm) above the band.
You make the panel in one piece, from the top down. First you crochet a solid half double crochet band. Seven tabs are then worked from the band’s foundation edge. Next, 39 rows of lattice are worked down from the band, and a 3-row knotted border finishes the bottom edge. Nothing is sewn together except the tab ends. To dress a whole window, make a second identical panel.
Finished Size and Construction
- Finished size: 40 1/4 in (102.2 cm) wide × 82 in (208.3 cm) long, plus 3 in (7.6 cm) tab loops
- Skill level: Intermediate
- Terminology: US crochet terms
- Yarn weight: Worsted (#4)
- Hook: 6 mm (J-10)
- Number of pieces: 1 panel, worked in one piece
- Layout: Top band, then lattice body, then bottom border
- Band size: 40 1/4 in × 2 in (102.2 cm × 5.1 cm)
- Size before border: 40 1/4 in × 80 in (102.2 cm × 203.2 cm)
- Border depth: 2 in (5.1 cm)
Materials
Yarn: Use a worsted weight cotton or cotton blend with a firm twist. Cotton hangs straight, keeps its shape and does not fuzz across the open cells. Avoid very slippery yarns like bamboo or rayon: the lattice will keep growing longer as it hangs.
- Dusty teal (heathered): about 350 g / 600 yd (549 m). That is about four 100 g / 190 yd (174 m) skeins.
The quantity includes a margin of about 20% for your swatch, tension differences and weaving in ends.
Tools:
– 6 mm (J-10) crochet hook
– Tapestry needle
– Stitch markers (at least 8)
– Measuring tape
– Rust-proof blocking pins
– Spray bottle
– A large flat surface for blocking (a floor covered with towels or foam mats works)
Abbreviations (US Terms)
- ch – chain
- sl st – slip stitch
- sc – single crochet
- hdc – half double crochet
- dtr – double treble crochet
- sp – space
- st(s) – stitch(es)
- RS / WS – right side / wrong side
Special stitches
- Picot: Ch 3, sl st in 3rd ch from hook.
- Flower Knot (FK): Work (sc, picot, picot, sc) all in the same stitch or chain. The two picots, plus the arches coming in from each side, make the small four-point flower you see at each lattice crossing.
Gauge and Checkpoints
Band gauge: 16 hdc = 5 in (12.7 cm); 5 rows of hdc = 2 in (5.1 cm).
Lattice gauge (blocked and hanging): One arch repeat, from knot to knot, = 2.5 in (6.4 cm) wide. Two lattice rows = 4 in (10.2 cm) tall.
Test one piece first. Make a mini panel before you start the full one:
- Ch 27, then work hdc rows over 25 sts (see Top Band) for 5 rows.
- Work 6 lattice rows over 3 arch repeats.
- Wet-block the swatch and let it dry hanging, with a clip at the bottom.
Check these measurements:
- Band: 25 hdc should measure about 7 3/4 in (19.7 cm) wide and 2 in (5.1 cm) tall.
- Lattice: 6 rows should hang to about 12 in (30.5 cm).
If your swatch is too big, go down to a 5.5 mm (I-9) hook. If it is too small, go up to a 6.5 mm (K-10.5) hook. If only the lattice length is off, add or remove 1 chain from each half of every arch. Keep the arch count odd (13 becomes 15 or 11) so the center chain still exists.
Checkpoints on the full panel:
| Stage | Measurement |
|---|---|
| After Top Band | 40 1/4 in × 2 in (102.2 cm × 5.1 cm) |
| After lattice Row 10 | 22 in (55.9 cm) total length, hanging |
| After lattice Row 20 | 42 in (106.7 cm) total length |
| After lattice Row 39 | 80 in (203.2 cm) total length |
| After border | 82 in (208.3 cm) total length |
Measure lattice length with the panel hanging, not lying flat. Lying flat, the cells close up and can look up to 25% shorter.
Top Band
Foundation: Ch 131.
Row 1 (RS): Hdc in 3rd ch from hook and in each ch across, turn. (129 hdc)
Rows 2–5: Ch 2 (does not count as a st), hdc in each st across, turn. (129 hdc)
Do not fasten off. The band should measure 40 1/4 in (102.2 cm) wide and 2 in (5.1 cm) tall.
Why 129? The lattice repeat uses 8 band sts per arch. Sixteen arches need 16 × 8 = 128 sts, plus 1 st for the final knot: 128 + 1 = 129.
Lattice Body
Each lattice row hangs to 2 in (5.1 cm) once blocked.
Row 1: Ch 1, FK in first hdc. Ch 13, skip 7 hdc, FK in next hdc. Repeat from * to * 15 more times, turn. (17 FK, 16 ch-13 arches)
The last FK lands in the 129th hdc: 1 + 16 × 8 = 129.
Row 2 (offset row): Ch 7 (counts as a half arch), FK in 7th (center) ch of first ch-13 arch. Ch 13, FK in 7th ch of next ch-13 arch. Repeat from * to * 14 more times. Ch 6, dtr in last sc of final FK of the row below, turn. (16 FK, 15 ch-13 arches, 2 half arches)
Row 3 (full row): Ch 1, FK in top of dtr. Ch 13, FK in 7th ch of next ch-13 arch. Repeat from * to * 14 more times. Ch 13, FK in 4th ch of turning ch-7, turn. (17 FK, 16 ch-13 arches)
The center of each arch from the row above becomes the new knot. This offsets each row by half a cell and builds the diamond lattice. When the panel hangs, the two arch halves between knots stretch downward into the long lens shapes.
Rows 4–39: Repeat Rows 2–3 eighteen more times. You will finish on Row 39, a full row with 17 FK and 16 arches. Do not fasten off.
Checkpoint: Hang the panel from its band. It should measure 80 in (203.2 cm) from the top of the band to the bottom knots: 2 in (5.1 cm) of band plus 78 in (198.1 cm) of lattice. Keep a stitch marker in every tenth row so counting stays easy.
Tabs
Tabs are worked into the free loops of the foundation chain, along the top edge of the band.
Placement: With the RS facing, number the foundation loops 1 to 129. Tabs sit over loops 1–9, 21–29, 41–49, 61–69, 81–89, 101–109 and 121–129. Place markers before you start.
- 7 tabs × 9 sts = 63 sts
- 6 gaps × 11 sts = 66 sts
- 63 + 66 = 129, so both outer tabs sit flush with the panel edges.
Each tab:
Row 1: Join yarn in the first loop of the tab. Ch 2 (does not count as a st), hdc in same loop and in next 8 loops, turn. (9 hdc)
Rows 2–15: Ch 2, hdc in each st across, turn. (9 hdc)
Fasten off, leaving a 12 in (30.5 cm) tail. Each tab measures about 2 3/4 in (7.0 cm) wide and 6 in (15.2 cm) long. The gaps between tabs measure about 3 1/2 in (8.9 cm).
Finishing the tabs: Fold each tab to the WS of the band. Whipstitch its last row along band Row 3, keeping it straight in line with its own base. This makes a loop that stands about 3 in (7.6 cm) tall above the band.
Bottom Border
The border is 2 in (5.1 cm) deep. Continue with the working yarn from Row 39.
Border gauge: The 129 sc in Row 1 should measure the same as the band, 40 1/4 in (102.2 cm). If Row 1 flares, use a hook one size smaller for the border only. If it pulls in, use a hook one size larger.
Row 1: Ch 1, sc in first sc of first FK. 7 sc in next ch-13 arch, sc in center of next FK (between the two picots). Repeat from * to * 15 more times, turn. (129 sc)
Why the math works: Each arch repeat gives 7 + 1 = 8 sc. Sixteen repeats give 128 sc, plus the first sc: 1 + 16 × 8 = 129. That matches the band exactly, so the lower edge hangs the same width as the top. The 7 sc in each arch fill its 2.5 in (6.4 cm) span at band gauge without ruffling.
Row 2: Ch 1, sc in first sc. Ch 5, skip 3 sc, sc in next sc. Repeat from * to * 31 more times, turn. (33 sc, 32 ch-5 loops)
Check: 1 + 32 × 4 = 129, so every stitch of Row 1 is used.
Row 3: Ch 1, sc in first sc. Ch 3, FK in 3rd ch of next ch-5 loop, ch 3, sc in next sc. Repeat from * to * 31 more times. (32 FK, 33 sc, 64 ch-3 sps)
This last row gives the knotted, scalloped lower edge, with the same flower knots used in the lattice. Fasten off.
Depth check: Row 1 is about 3/8 in (1.0 cm), Row 2 about 3/4 in (1.9 cm) and Row 3 about 7/8 in (2.2 cm). Together that is 2 in (5.1 cm), for a total length of 82 in (208.3 cm).
Final Blocking
- Weave in all ends. Run them along the chain arches, never across an open cell, and split the plies as you go so the ends stay hidden.
- Soak the panel in lukewarm water with a little wool or cotton wash for 15 minutes.
- Press out the water gently; do not wring. Roll the panel in towels to remove more moisture.
- Lay it flat on mats. Pin the band to 40 1/4 in (102.2 cm) wide and 2 in (5.1 cm) tall.
- Pin the bottom border to the same 40 1/4 in (102.2 cm) width.
- Pull down along the center of the lattice until the panel measures 82 in (208.3 cm) long. Pin each edge knot along both sides in a straight line.
- Open each picot with a fingertip so the flower knots lie flat.
- Spray lightly and let the panel dry completely.
- Hang it on the rod for 24 hours before the final measurement. The lattice settles a little under its own weight.
Final Quality-Control Checklist
- Band and border both have exactly 129 sts.
- Every full lattice row has 17 FK and 16 arches.
- Every offset row has 16 FK, 15 arches and 2 half arches.
- There are 39 lattice rows, ending on a full row.
- All 7 tabs are evenly spaced, with the outer tabs flush with the panel edges.
- Tab loops stand the same height, about 3 in (7.6 cm).
- The side edges hang straight, without bowing in or flaring out.
- Every FK has two picots that are open and visible.
- Hanging length is 82 in (208.3 cm), and width is 40 1/4 in (102.2 cm) at top and bottom.
- No ends show inside the cells.
Troubleshooting
The lattice leans to one side. You probably placed a knot in the 6th or 8th ch instead of the 7th (center) ch. Mark the center ch of each arch while you work, until it becomes automatic.
One side edge sags. Your half arches don’t match the length of your full arches. Change the end of the offset row: use ch 7 instead of ch 6 if that edge is tight, or a tr instead of a dtr if it droops.
The border flares. Work 6 sc per arch instead of 7 in Border Row 1, and adjust the counts to match. Or use a smaller hook for the border only.
The panel stretches too long over time. The yarn is too slippery or too soft. Shorten every arch to ch 11 and reblock.
The knots look like lumps, not flowers. Your picots are too tight. Make the ch 3 slightly looser and pinch each picot open before blocking.
Tabs twist. Sew each tab end directly in line with its base, not at an angle.
Care
Hand wash cool or machine wash on a gentle cycle in a mesh laundry bag. Then reshape and dry flat or hanging. Do not tumble dry: the heat and tumbling will stretch the lattice and felt the knots.
Final Notes
The measurement chain is simple:
- Band: 129 hdc = 40 1/4 in (102.2 cm) wide and 2 in (5.1 cm) tall.
- Lattice: 16 arch repeats across, 39 rows at 2 in (5.1 cm) each, for 78 in (198.1 cm) of lattice.
- Border: back to 129 sts, adding 2 in (5.1 cm), for a finished length of 82 in (208.3 cm).
- Tabs: 7 tabs of 9 sts with 11-st gaps, adding 3 in (7.6 cm) loops on top.
Check your swatch, count your knots at each checkpoint, and block the panel hanging. Your Seaglass panel will hang straight and fill the window with diamond-shaped light.
Happy crocheting!