
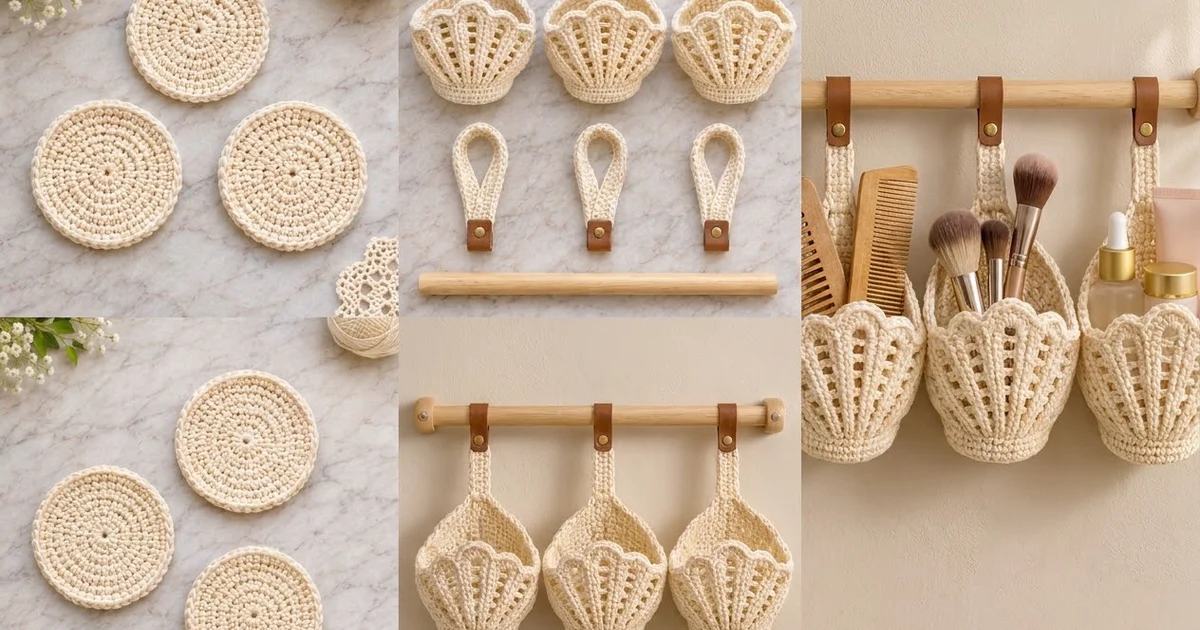
This hanging basket set looks like a row of seashells. Each small cream basket has a fan of raised ribs across the front, open “ladder” gaps between the ribs, and a scalloped top edge. The plain back wall rises higher than the front, so the basket stays open and easy to reach into. All three hang from crocheted straps with leather tabs on a simple wooden dowel.
The set uses one color: a soft cream cotton. The texture comes from front post double crochet ribs and chain-space ladders, not from color changes. The calm, natural look suits a bathroom, vanity, nursery or entryway. The pattern uses US crochet terms throughout.
Each finished basket is about 6 in (15.2 cm) wide measured flat. The front is 3.7 in (9.4 cm) tall at the scallop peaks, and the back is 4.8 in (12.2 cm) tall. The base is 3.5 in (8.9 cm) across. Each strap is a strip 8 in (20.3 cm) long, folded to 4 in (10.2 cm).
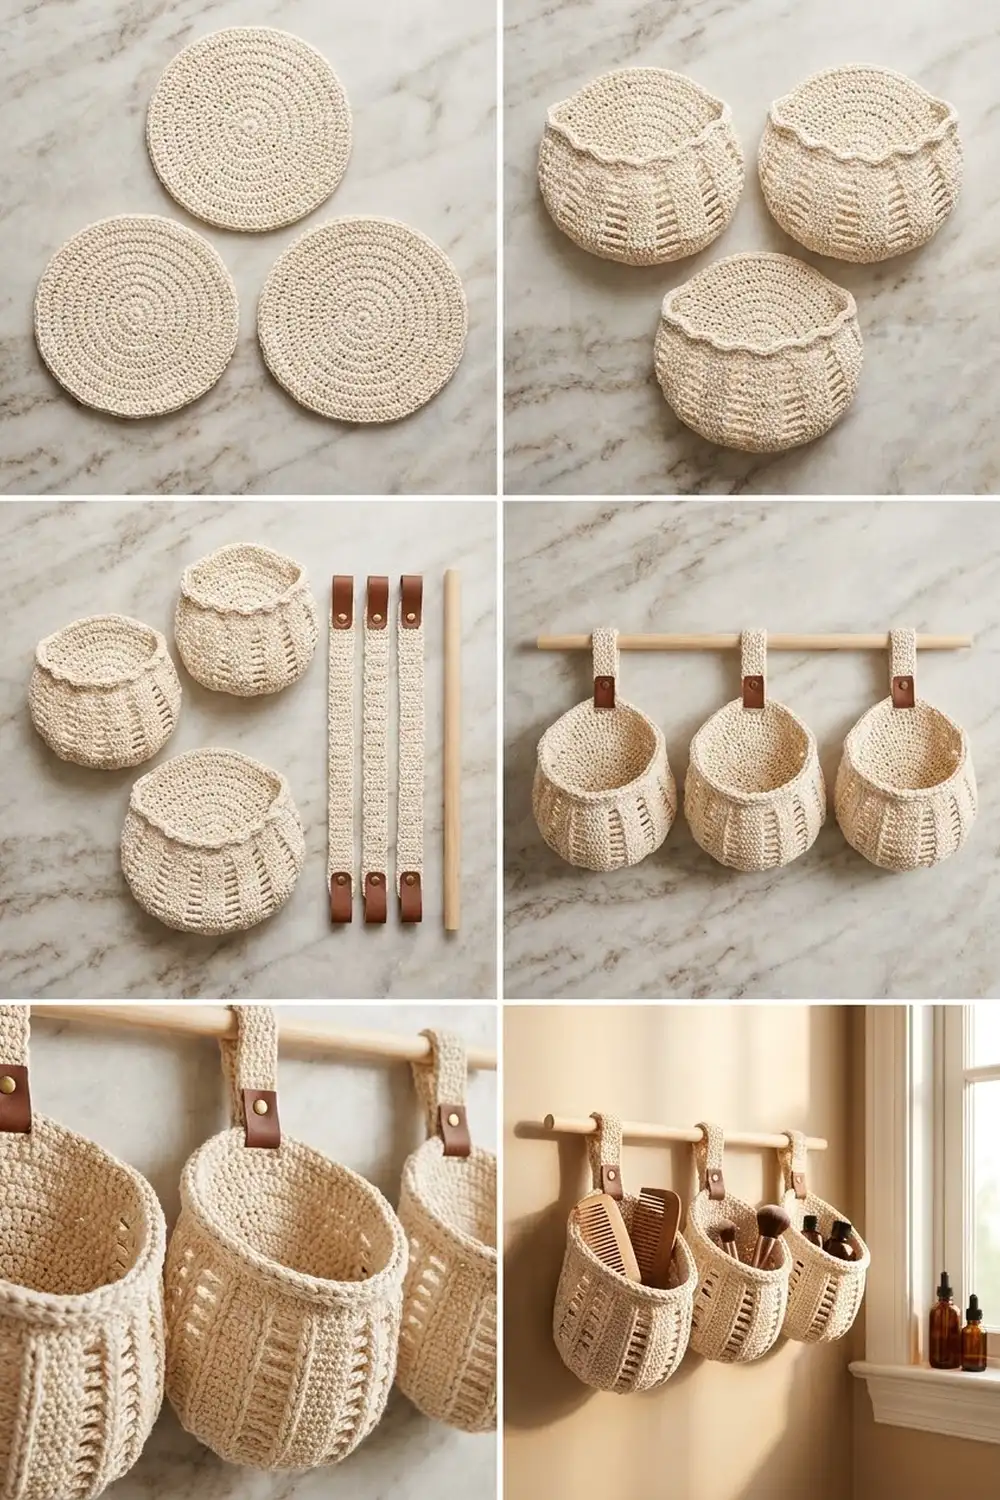
Construction is simple and seamless for the basket body. You work a flat circle base in rounds, then turn the wall upward with a back-loop round. Next you work the ribbed shell front and solid back together in joined rounds, and finish the front with scallops. Finally you work short rows across the back to raise it and add a two-round rim. The straps are worked separately in rows, then sewn on.
Finished Size and Construction
- Finished basket size: 6 in (15.2 cm) wide flat; front 3.7 in (9.4 cm) tall; back 4.8 in (12.2 cm) tall
- Base diameter: 3.5 in (8.9 cm)
- Skill level: Intermediate (post stitches, reverse single crochet)
- Terminology: US crochet terms
- Yarn weight: Worsted (#4) cotton
- Hook: 4.0 mm (G-6)
- Number of pieces: 6 crocheted pieces (3 baskets and 3 straps), plus 3 leather tabs and 1 dowel
- Layout: 3 baskets in a single horizontal row on one dowel
- Basket size before border: front 3.3 in (8.4 cm), back 4.4 in (11.2 cm)
- Border depth: 0.4 in (1.0 cm), 2 rounds
- Strap size: 1.3 in (3.3 cm) wide x 8 in (20.3 cm) long before folding
Materials
Yarn: Use a firm, smooth worsted-weight cotton or cotton blend. Cotton holds its shape, shows off the post-stitch ribs, and handles bathroom humidity well. Avoid fuzzy or very stretchy yarns, because the baskets will sag when filled.
- Cream / ivory: 170 g, about 325 m (355 yd)
This covers all three baskets (about 43 g each, including the strap) and includes a safety margin of roughly 25 percent.
Tools and notions:
– 4.0 mm (G-6) crochet hook
– Stitch markers (at least 3)
– Tapestry needle
– Scissors
– 3 genuine or faux leather strips, each 5 in x 0.75 in (12.7 cm x 1.9 cm), in brown
– 3 brass double-cap rivets and a rivet setter (or sew-on snaps)
– 1 wooden dowel, 20 in (50.8 cm) long and 0.75 in (1.9 cm) in diameter
– 2 dowel wall brackets or end hooks
– Rust-proof pins and a blocking surface
Abbreviations (US Terms)
- ch – chain
- sl st – slip stitch
- sc – single crochet
- dc – double crochet
- BLO – back loop only
- sk – skip
- sp – space
- st(s) – stitch(es)
- MR – magic ring
- rev sc – reverse single crochet (crab stitch)
- FPdc – front post double crochet
Special stitches:
FPdc: Yarn over, insert the hook from front to back to front around the post of the stitch below, yarn over and pull up a loop, then (yarn over, pull through 2 loops) twice.
Rev sc: Work single crochet from left to right (right-handers). Insert the hook into the next stitch to the right, pull up a loop, yarn over and pull through both loops.
Gauge and Checkpoints
Gauge: 18 sc and 20 rounds = 4 in (10.2 cm). 8 rounds of dc = 4 in (10.2 cm), so each dc round is about 0.5 in (1.3 cm) tall.
Make one complete basket before starting the others. Then compare it with these checkpoints:
- After Rnd 4 (24 sts): base is 1.7 in (4.3 cm) across.
- After Rnd 8 (48 sts): base is 3.5 in (8.9 cm) across and lies flat.
- After Rnd 12: the solid band stands 0.8 in (2.0 cm) tall.
- After Rnd 16: the wall is 2.8 in (7.1 cm) tall from the base fold.
- After Rnd 17: the front is 3.3 in (8.4 cm) tall at the scallop peaks.
- After Row 24: the back is 4.4 in (11.2 cm) tall.
If your piece is too big: go down to a 3.75 mm hook. Loose bases also tend to ruffle.
If it is too small: go up to a 4.5 mm hook. A tight base will cup before Rnd 9.
A firm fabric matters more than an exact match, so lean toward the tighter fabric.

Basket Base
Work in continuous joined rounds. Do not turn.
Rnd 1: Make a MR, ch 1, work 6 sc in the ring, then sl st to the first sc to join. (6 sts)
Rnd 2: Ch 1, work 2 sc in each st around, join. (12 sts)
Rnd 3: Ch 1, (sc in next st, 2 sc in next st) around, join. (18 sts)
Rnd 4: Ch 1, (sc in next 2 sts, 2 sc in next st) around, join. (24 sts)
Rnd 5: Ch 1, (sc in next 3 sts, 2 sc in next st) around, join. (30 sts)
Rnd 6: Ch 1, (sc in next 4 sts, 2 sc in next st) around, join. (36 sts)
Rnd 7: Ch 1, (sc in next 5 sts, 2 sc in next st) around, join. (42 sts)
Rnd 8: Ch 1, (sc in next 6 sts, 2 sc in next st) around, join. (48 sts)
Checkpoint: the base is 3.5 in (8.9 cm) across.
Wall Band
Rnd 9 (turning round): Ch 1, sc in BLO of each st around, join. (48 sts) The unused front loops leave a crisp ridge where the base turns upward.
Rnds 10–12: Ch 1, sc in each st around, join. (48 sts)
Mark the sections now. Counting from the first st of the round, sts 1–26 are the back and sts 27–48 are the front. Place a marker in st 1 and another in st 27.
Shell Front and Back Wall
Each of these rounds is worked in two sections. The back is plain dc. The front has 8 FPdc ribs with 7 chain spaces between them.
Rnd 13: Ch 3 (counts as the first dc), then work a dc in each of the next 25 sts, for 26 dc across the back. On the front, FPdc around st 27. Then repeat (ch 2, sk 2 sts, FPdc around next st) 7 times. Join to the top of the beginning ch-3.
Count: 26 dc + 8 FPdc + 7 ch-2 sps (14 ch) = 48 sts.
The ribs sit on sts 27, 30, 33, 36, 39, 42, 45 and 48, which spaces them evenly across the front.
Rnd 14: Ch 3, dc in next 25 dc. FPdc around the next FPdc, then repeat (ch 2, sk ch-2 sp, FPdc around next FPdc) 7 times. Join.
(48 sts) Each chain spans the gap left by the previous round’s chain, which forms the first ladder rung.
Rnd 15 (flare round): Ch 3, dc in next 25 dc. FPdc around the next FPdc, then repeat (ch 3, sk ch-2 sp, FPdc around next FPdc) 7 times. Join.
Count: 26 dc + 8 FPdc + 7 ch-3 sps (21 ch) = 55 sts. The longer chains let the ribs fan apart like a shell.
Rnd 16: Ch 3, dc in next 25 dc. FPdc around the next FPdc, then repeat (ch 3, sk ch-3 sp, FPdc around next FPdc) 7 times. Join.
(55 sts)
Checkpoint: the wall is 2.8 in (7.1 cm) tall from the base fold.
Scallop Round
Rnd 17: Ch 1, sc in each of the 26 back dc. On the front, sc in the top of the first FPdc, then repeat (6 dc in next ch-3 sp, sc in top of next FPdc) 7 times. Join to the first sc.
Count: 26 back sc + 8 front sc + 42 dc (7 scallops x 6) = 76 sts.
Each scallop is centered over a ladder gap, and the sc on top of each rib becomes the dip between scallops. Checkpoint: the front is 3.3 in (8.4 cm) tall at the peaks.
Raised Back Panel
You now work in turning rows over the 26 back sc only.
Row 18: Ch 1, turn your work if needed so the right side of the back sc faces you. Sc in the same st as the join and in the next 25 sts. (26 sts)
Rows 19–24: Ch 1, turn, sc in each st across. (26 sts)
These 7 rows add 1.4 in (3.6 cm). Checkpoint: the back is 4.4 in (11.2 cm) tall. Do not fasten off.
Border
Border gauge: Work 1 sc in each stitch and 1 sc in each sc row-end. Because the sc gauge is 4.5 sts and 5 rows per inch (2.5 cm), working one sc per row-end keeps the edge flat. It will not flare or pull in.
The top edge is one continuous loop with four segments:
– the left side of the back panel (7 row-ends, Rows 18–24)
– the front scallops (8 sc + 42 dc = 50 sts)
– the right side of the back panel (7 row-ends)
– the top of Row 24 (26 sts)
The 26 back sc of Rnd 17 are hidden under the back panel, so they are not part of the edge.
Border Rnd 1: Ch 1. Do not turn. Work 7 sc evenly down the side of the back panel, 1 sc in each row-end. Sc in each of the 50 front sts. Work 7 sc up the other side, 1 in each row-end. Sc in each of the 26 sts across the top. Join.
Count: 7 + 50 + 7 + 26 = 90 sts.
Do not add corner increases at the top of the back panel. The rounded corners are intended, and they let the back wall curve gently, as in the shell shape.
Border Rnd 2: Ch 1, rev sc in each st around, then join. (90 sts) Fasten off and weave in the ends.
Why the math works: Each round keeps the same count as the one before, so the rim lies at exactly the length of the edge underneath it. Rnd 2 is a 1:1 crab-stitch finish that stands up as a corded rim. The border adds 0.4 in (1.0 cm), which brings the front to 3.7 in (9.4 cm) and the back to 4.8 in (12.2 cm).
Strap
Row 1: Ch 7, sc in the 2nd ch from the hook and in each ch across. (6 sts)
Rows 2–40: Ch 1, turn, sc in each st across. (6 sts)
Fasten off, leaving a 16 in (40.6 cm) tail. The strip measures 1.3 in (3.3 cm) x 8 in (20.3 cm).
Shape the loop: Fold the strip in half so the short ends meet. The folded strap is 4 in (10.2 cm) long. Whipstitch the two long edges together for 1.5 in (3.8 cm) from the short ends to make a solid tail. The rest forms the teardrop loop.
Leather tab: Fold a leather strip in half around the tail end. Leave a leather loop at the top big enough for the dowel. Punch through all layers about 0.5 in (1.3 cm) above the tail end and set one brass rivet.
Make All Pieces
All pieces are cream.
- Baskets: 3 (Rnds 1–17, Rows 18–24, Border Rnds 1–2)
- Straps: 3 (Rows 1–40, folded and riveted)
Layout, viewed from the front on the dowel:
[ dowel =========================================== ]
    |  strap 1  |      |  strap 2  |      |  strap 3  |
  [ Basket 1 ]       [ Basket 2 ]       [ Basket 3 ]
That is 1 row x 3 baskets, with the strap centers 6.5 in (16.5 cm) apart.
Joining
The baskets are not joined to each other. Each strap is sewn to its own basket, and the leather tabs carry them on the dowel.
Method: Turn the strap so the leather tab points up and the loop points down. Flatten the bottom of the loop and set it against the inside of the back panel. Center it over sts 11–16 of Row 24, which are the middle 6 of the 26 sts and match the strap’s 6-st width. The rounded fold should sit 1 in (2.5 cm) below the rim.
Stitch-to-stitch: Use the long tail to whipstitch each long edge of the strap’s lower loop to the back panel. Work 1 stitch per sc row along Rows 20–24 on each side, then across the fold to Row 20. The loop opens over the back wall in a teardrop shape. Weave the needle through the back loops only so the stitching stays hidden on the outside.
Tension: Pull each stitch snug but not tight. If you over-tighten, the back panel puckers and the rim tilts forward.
Size checkpoint: Hold the basket up by its leather tab. The top of the rim should sit about 3 in (7.6 cm) below the dowel, and the basket should hang straight without leaning forward.
Final Blocking
- Mist each basket lightly with water, or dampen it and roll it in a towel.
- Stuff the basket firmly with a rolled towel or a plastic bag of fiber fill so the walls stand straight.
- Shape the front ribs into an even fan, and press each scallop into a smooth arch with your fingers.
- Pin the rim of the back panel into a gentle curve.
- Lay each strap flat and pin it to 1.3 in (3.3 cm) wide.
- Let everything dry completely, for at least 12 hours.
- Remove the stuffing and check the measurements: 6 in (15.2 cm) wide flat, front 3.7 in (9.4 cm), back 4.8 in (12.2 cm).
Final Quality-Control Checklist
- Base lies flat at 3.5 in (8.9 cm) with no ruffles.
- The BLO ridge is clean all around.
- There are 8 ribs and 7 ladder gaps on each basket, with even spacing.
- Each basket has 7 even scallops.
- Border counts are 90 sts on both rounds.
- All three baskets match in height and width to within 0.2 in (0.5 cm).
- Straps are centered and the stitching is hidden.
- Rivets are tight and the leather loops slide freely on the dowel.
- All ends are woven in securely.
Troubleshooting
Base cups or ruffles: Cupping means the base is too tight, so go up a hook size. Ruffling means it is too loose, so go down a size. Recheck Rnd 8 at 48 sts.
Ribs lean sideways: Make sure each FPdc goes around the FPdc directly below it. Count to 26 back dc before each front section.
Front gaps look uneven: Keep the chain tension consistent, and work Rnds 15–16 as ch 3, not ch 2.
Scallops look flat: Check that you are working 6 dc per ch-3 space, and block over stuffing.
Back panel curls: Work Rows 18–24 a little looser, or block with pins.
Rim ripples: You have added extra sts. Rework the border to exactly 90.
Basket tilts forward: Lower the strap attachment by one row, or sew farther down the back wall.
Care
Hand wash in cool water with a mild soap, press out the water with a towel, and dry flat over a stuffed form. Wipe the leather tabs with a damp cloth only, and keep them out of the water.
Final Notes
Here is the full measurement chain:
– Gauge: 18 sc and 20 rounds = 4 in (10.2 cm)
– Base: 48 sts, 3.5 in (8.9 cm) across
– Solid band: 0.8 in (2.0 cm)
– Ribbed shell rounds: 48 sts, then 55 sts, bringing the wall to 2.8 in (7.1 cm)
– Scallop round: 76 sts; front reaches 3.3 in (8.4 cm)
– Back panel: 26 sts, reaching 4.4 in (11.2 cm)
– Border: 90 sts, adding 0.4 in (1.0 cm)
– Finished: front 3.7 in (9.4 cm), back 4.8 in (12.2 cm)
If you check each stage as you go, all three seashell baskets will match and hang neatly together.
Happy crocheting!