

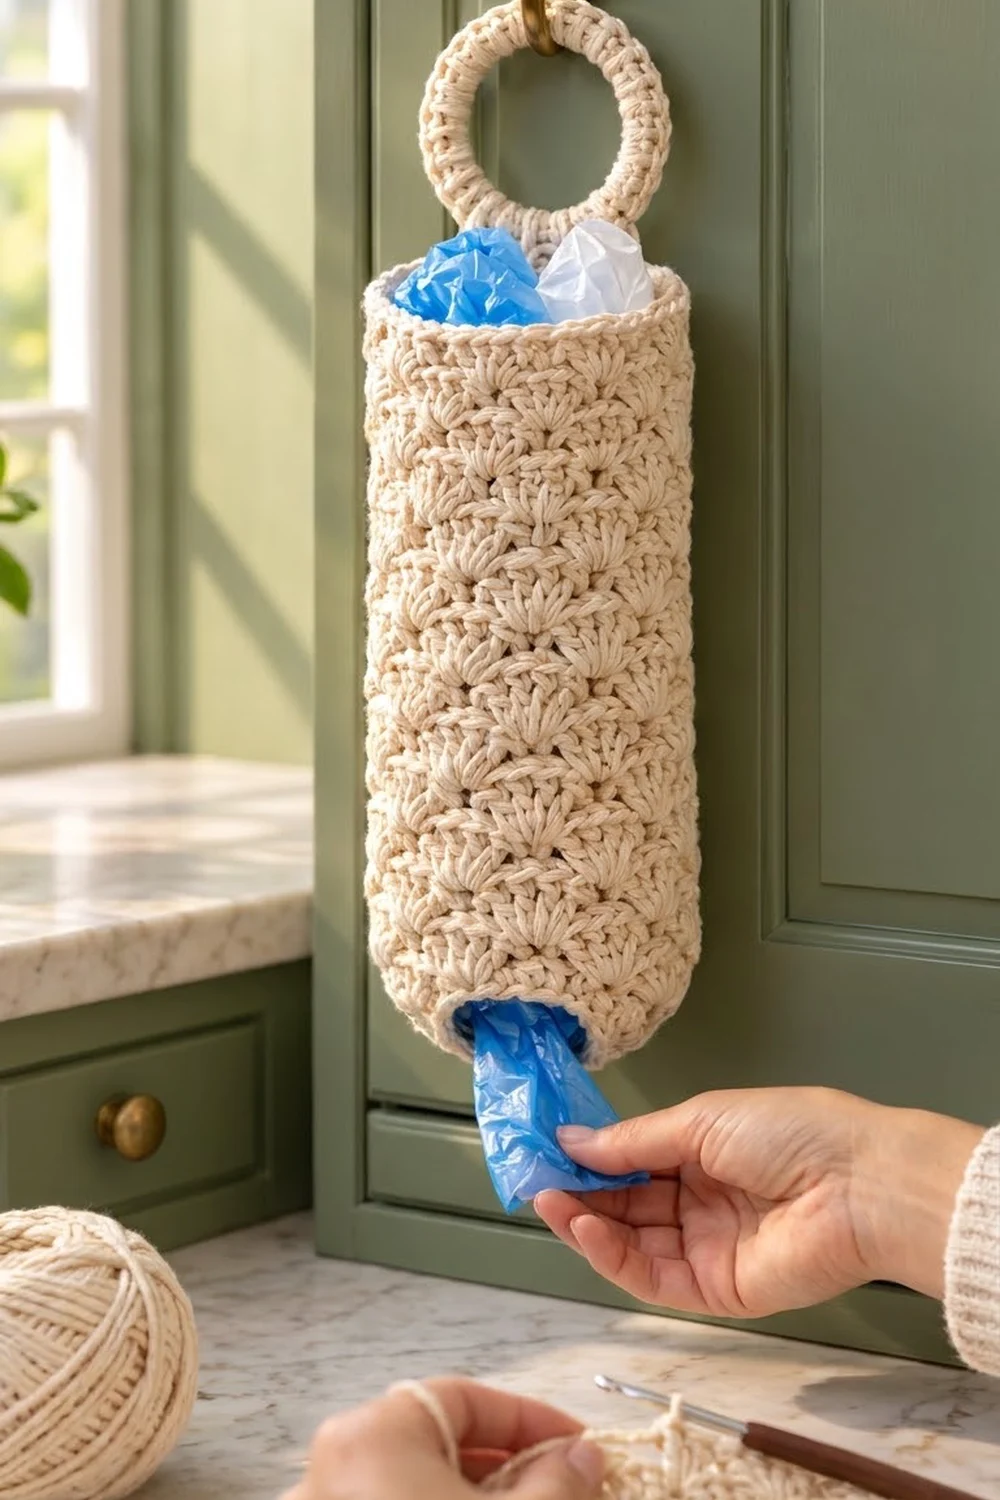
The Seashell Pantry Plastic Bag Holder is a tall, textured tube that keeps loose grocery bags tidy behind a cabinet door or on a hook. You push bags in at the wide top and pull them out one at a time through the small opening at the bottom.
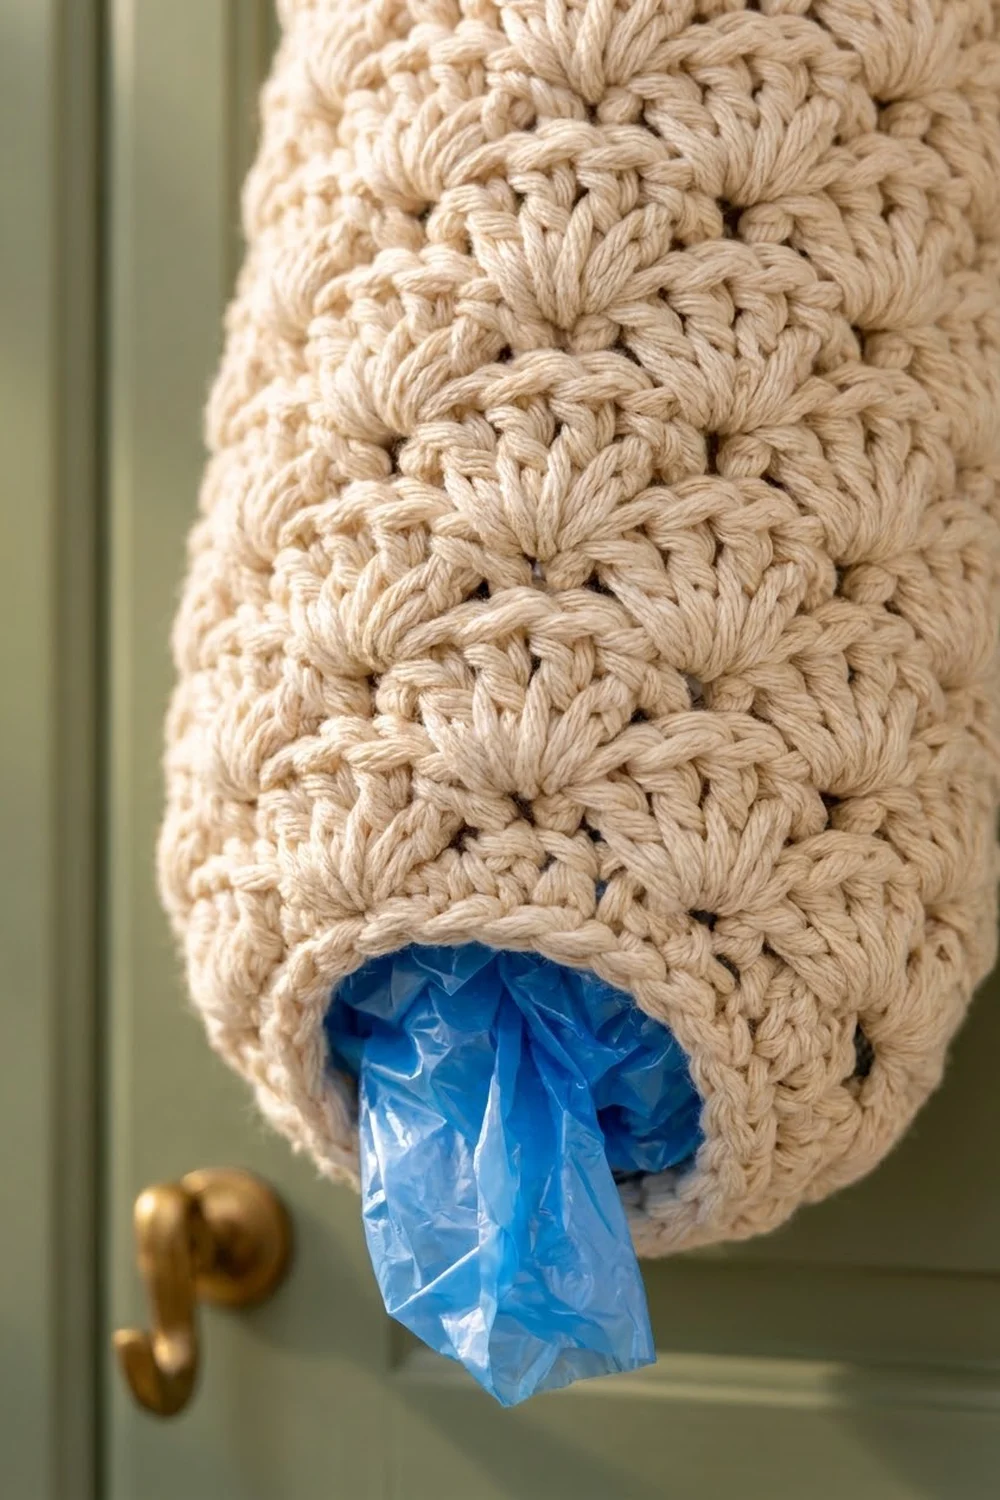
The whole body is covered in staggered fan shells, so it reads like rows of tiny scallops climbing up the tube. A single cream cotton shows off the texture best and suits a calm, farmhouse-style kitchen. Plain single-crochet bands at the top and bottom keep the edges firm, and a chunky covered ring gives it a sturdy hanger.
This pattern uses US crochet terms. The finished holder measures 12 in (30.5 cm) around, 6 in (15.2 cm) wide when flat, and 18 in (45.7 cm) long, not counting the ring. The ring adds about 3 in (7.6 cm) above the rim.
Construction is simple. You chain a ring and work 20 rounds of shells in the round without turning. Then you work a tapered single-crochet band at the bottom and add a top rim into the free loops of the starting chain. Last, you cover a ring with single crochet and sew it to the inside back of the rim.
Finished Size and Construction
- Finished size: 12 in (30.5 cm) circumference; 6 in (15.2 cm) flat width; 18 in (45.7 cm) length
- Skill level: Easy / Advanced Beginner
- Terminology: US crochet terms
- Yarn weight: Worsted (#4) cotton or cotton blend
- Hook: 5.0 mm (US H-8)
- Number of pieces: 1 tube body + 1 hanging ring, sewn together into one holder
- Layout: Vertical tube, worked in joined rounds
- Body circumference: 48 stitches (8 shell repeats)
- Size before border: 12 in (30.5 cm) around × 15 in (38.1 cm) tall (shell section only)
- Border depth: Top rim 1 in (2.5 cm); bottom band 2 in (5.1 cm)
Materials
Yarn advice: Pick a smooth worsted-weight cotton or cotton-acrylic blend. Cotton holds the shell texture crisply and won’t stretch out of shape under a full load of bags. Avoid fuzzy or very loosely plied yarns, because they blur the fans.
- Cream / Ecru: 220 g, about 375 m (410 yd)
This quantity includes a margin of about 15% for your gauge swatch, the ring, and any differences in tension.
Tools:
- 5.0 mm (US H-8) crochet hook
- 3 in (7.6 cm) plastic or wooden ring for the hanger
- 2 stitch markers
- Tapestry needle
- Scissors
- Measuring tape
- Rolled towel or a 4 in (10.2 cm) wide tube, such as a large rolled magazine, for blocking
Abbreviations (US Terms)
- ch – chain
- sl st – slip stitch
- sc – single crochet
- dc – double crochet
- sc2tog – single crochet 2 together (insert hook in next st, pull up a loop, insert in following st, pull up a loop, yarn over, draw through all 3 loops)
- sk – skip
- st(s) – stitch(es)
- rnd(s) – round(s)
- BLO – back loop only
Special stitches:
- Shell: 5 dc in the same stitch.
- Half shell: 3 stitches in the same stitch, made of the beginning ch 3 plus 2 dc at the start of a round, or 2 dc at the end of a round. The starting and ending half shells sit on the same stitch, so together they make one full 5-stitch shell.
Gauge and Checkpoints
Single crochet gauge: 16 sc and 16 rnds = 4 in (10.2 cm).
Shell gauge: 2 shell repeats (12 sts) = 3 in (7.6 cm) wide; 4 shell rnds = 3 in (7.6 cm) tall.
Test the piece first. Since this is a tube, the most accurate swatch is the start of the holder itself. Work the foundation and Rnds 1–4, then lay the tube flat without stretching it and measure.
Checkpoints:
- After Rnd 4: The flat width is 6 in (15.2 cm) and the height is 3 in (7.6 cm).
- After Rnd 12: The height is 9 in (22.9 cm).
- After Rnd 20: The height is 15 in (38.1 cm) and the width is still 6 in (15.2 cm).
- After the bottom band: The bottom opening measures 6 in (15.2 cm) around, about 1.9 in (4.8 cm) across.
- After the top rim: The total length is 18 in (45.7 cm).
If your tube is too big: Pull back and change to a 4.5 mm (US 7) hook. Shells spread easily, so a loose gauge makes a floppy holder.
If your tube is too small: Change to a 5.5 mm (US I-9) hook. A tight tube is hard to fill and makes the bottom opening stiff.
Fix the width before you go past Rnd 4. Height is easy to adjust later by adding or removing pairs of rounds.
Body Pattern
Work in joined rounds with the right side always facing you. Do not turn. Place a marker in the first stitch of each round.
Foundation: Ch 48 and join with a sl st to the first ch to form a ring. Check that the chain is not twisted. (48 ch)
Rnd 1 (Round A): Ch 1, sc in the same ch as the join, sk 2 ch, shell in the next ch, sk 2 ch, sc in the next ch. Repeat from * 6 more times. Then sk 2 ch, shell in the next ch, sk 2 ch, and join with a sl st to the first sc. (8 shells + 8 sc = 48 sts)
Rnd 2 (Round B): Ch 3 (counts as dc), 2 dc in the same st as the join (half shell). Sk 2 dc, sc in the center (3rd) dc of the next shell, sk 2 dc, shell in the next sc. Repeat from * 6 more times. Then sk 2 dc, sc in the center dc of the last shell, sk 2 dc, 2 dc in the first sc (the same st as the beginning ch 3), and join with a sl st to the top of the beginning ch 3. (7 full shells + 2 half shells forming 1 shell + 8 sc = 48 sts)
Stitch check for Rnd 2: half shell (3) + 7 × (sc + 5 dc) (42) + sc (1) + 2 dc (2) = 48.
Rnd 3 (Round A): Ch 1, sc in the top of the ch 3 from the previous round (the center of the split shell). Sk 2 dc, shell in the next sc, sk 2 dc, sc in the center dc of the next shell. Repeat from * 6 more times. Then sk 2 dc, shell in the next sc, sk 2 dc, and join with a sl st to the first sc. (48 sts)
Each new shell sits on the sc between two shells of the round below, and each sc sits in the center of a shell. That offset creates the staggered fan texture.
Rnds 4–20: Repeat Rnd 2 on even rounds and Rnd 3 on odd rounds. You finish with Rnd 20, which is a Round B. (48 sts in every round)
At this point the shell section measures 15 in (38.1 cm) tall and 6 in (15.2 cm) wide when flat. Do not fasten off.
Border
The border has two parts: the tapered bottom band and the firm top rim.
Border gauge: 16 sc = 4 in (10.2 cm) and 4 rnds = 1 in (2.5 cm). This matches the shell section, because 48 sts at 4 sts per inch equals the same 12 in (30.5 cm) circumference.
When the tube is flat, each side is half the round: 24 sts. There are no corner stitches on a tube, so nothing is counted twice.
Bottom Band (continue from Rnd 20)
Rnd 21 (conversion round): Ch 1, sc in the top of the beginning ch 3 and in each dc and sc around. Join with a sl st. (48 sts worked 1 per existing stitch + 0 added = 48 sc; 24 per flat side)
Rnd 22: Ch 1, sc in the next 4 sts, sc2tog. Repeat from * around and join. (40 sc; 20 per side)
Rnd 23: Ch 1, sc in the next 3 sts, sc2tog. Repeat from * around and join. (32 sc; 16 per side)
Rnd 24: Ch 1, sc in the next 2 sts, sc2tog. Repeat from * around and join. (24 sc; 12 per side)
Rnds 25–28: Ch 1, sc in each st around and join. (24 sc; 12 per side)
Fasten off and weave in the tail.
Why the math works: Each decrease round removes exactly 8 stitches, one in each of the 8 repeats, so the taper is even all the way around and doesn’t twist. The sequence 48 → 40 → 32 → 24 halves the circumference to 6 in (15.2 cm). That opening is small enough to hold the bags in but wide enough to pull one out easily. The 8 rounds of the band measure 2 in (5.1 cm).
Top Rim
Turn the tube so the foundation chain is at the top. The shells of Rnd 1 were worked into one side of the chain. You will now work into the free loops on the other side.
Rnd T1: Join the yarn with a sl st in the free loop at the base of any sc from Rnd 1. Ch 1 and sc in each of the 48 free loops around. Join. (48 loops worked 1 per stitch + 0 added = 48 sc; 24 per side)
Rnds T2–T4: Ch 1, sc in each st around and join. (48 sc; 24 per side)
Fasten off and weave in the tail.
Why the math works: The foundation chain had 48 chains, so it has exactly 48 free loops. One sc in each keeps the rim at 12 in (30.5 cm), which matches the body, so the top neither flares nor puckers. The 4 rim rounds measure 1 in (2.5 cm), which brings the total to 1 + 15 + 2 = 18 in (45.7 cm).
Hanging Ring
Rnd 1: Make a slip knot on your hook. Hold the 3 in (7.6 cm) ring in front of the working yarn and work 60 sc around the ring, packing them tightly so no plastic shows. Join with a sl st to the first sc. (60 sc)
Rnd 2: Working in the BLO, sl st loosely in each sc around. (60 sl sts)
The BLO slip stitches roll the outer edge into a smooth, rope-like cord. Fasten off and leave a 16 in (40.6 cm) tail for sewing.
The covered ring measures about 3.75 in (9.5 cm) across the outside, with an opening of about 2.25 in (5.7 cm).
Attaching the Ring
- Flatten the tube and choose the back. Mark the center 8 sts of the back at the top rim; this is 2 in (5.1 cm) wide.
- Place the ring so its lower edge overlaps the inside of the rim by about 0.75 in (1.9 cm), covering Rnds T2–T4.
- Using the tail and a tapestry needle, whipstitch the ring to the inside of the rim across all 8 marked sts. Go through each sc twice.
- Make a second pass along the top edge of Rnd T4 so the ring stays upright and doesn’t flop backward.
- Weave the tail into the rim and trim it.
This leaves about 3 in (7.6 cm) of ring above the rim, so the holder hangs as shown in the photo.
Final Blocking
- Lightly mist the holder with water, or soak it for 10 minutes and gently squeeze it out in a towel. Do not wring it.
- Slide a rolled towel or a 4 in (10.2 cm) wide tube inside the body.
- Pat the shells into even fans and line up the shell columns vertically.
- Measure the length: 18 in (45.7 cm) from the bottom edge to the top of the rim.
- Check the width: 6 in (15.2 cm) when flat. Ease the fabric along the form if one area pulls in.
- Shape the bottom opening into a neat circle about 1.9 in (4.8 cm) across.
- Let it dry completely, standing upright, before removing the form.
Final Quality-Control Checklist
- Every shell round counts 48 sts, with 8 shells.
- The shells stagger evenly, with no doubled or missing fans.
- The joins line up in one neat column at the back.
- The bottom band steps evenly: 48, 40, 32, 24.
- The bottom opening measures 6 in (15.2 cm) around.
- The top rim is 48 sc and lies flat, with no flare.
- The total length is 18 in (45.7 cm); the flat width is 6 in (15.2 cm).
- The ring is fully covered, with no gaps showing the core.
- The ring is sewn securely across 8 sts, with two passes.
- All tails are woven in and trimmed.
Troubleshooting
The tube twists in a spiral. The seam column is drifting. Always join into the correct first stitch and start the next round in that same stitch.
My count is 47 or 49. Usually a half shell was missed or doubled. In Round B, the final 2 dc must go into the same sc as the beginning ch 3.
The shells look flat or crowded. Your gauge is too tight. Go up a hook size, or loosen the dc by pulling the first loop up a little taller.
The bottom opening is too tight. Skip Rnd 24 and work Rnds 25–28 on 32 sts. The opening will be 8 in (20.3 cm) around.
The top rim ruffles. You may have worked 2 sc into some free loops. Pull back and work exactly 48.
The ring tilts forward. Add a few more whipstitches along the top edge of Rnd T4.
There’s a gap at the join seam. Tighten the sl st join and use the tail to close any hole when weaving in.
Care
Hand wash or machine wash on gentle in cool water, then reshape and lay flat or stand upright to dry. Do not tumble dry, because cotton can shrink and distort the shells.
Final Notes
The measurement chain starts with gauge. 16 sc to 4 in (10.2 cm) gives a 48-stitch round, and that round measures 12 in (30.5 cm) around and 6 in (15.2 cm) flat. Twenty shell rounds at 4 rounds per 3 in (7.6 cm) make a 15 in (38.1 cm) body. The bottom band decreases 8 stitches per round down to 24 stitches, adding 2 in (5.1 cm). The top rim adds 1 in (2.5 cm), for a total of 18 in (45.7 cm). The 3.75 in (9.5 cm) ring finishes it. Check each stage against these numbers and the holder will hang straight and hold plenty of bags.
Happy crocheting!