
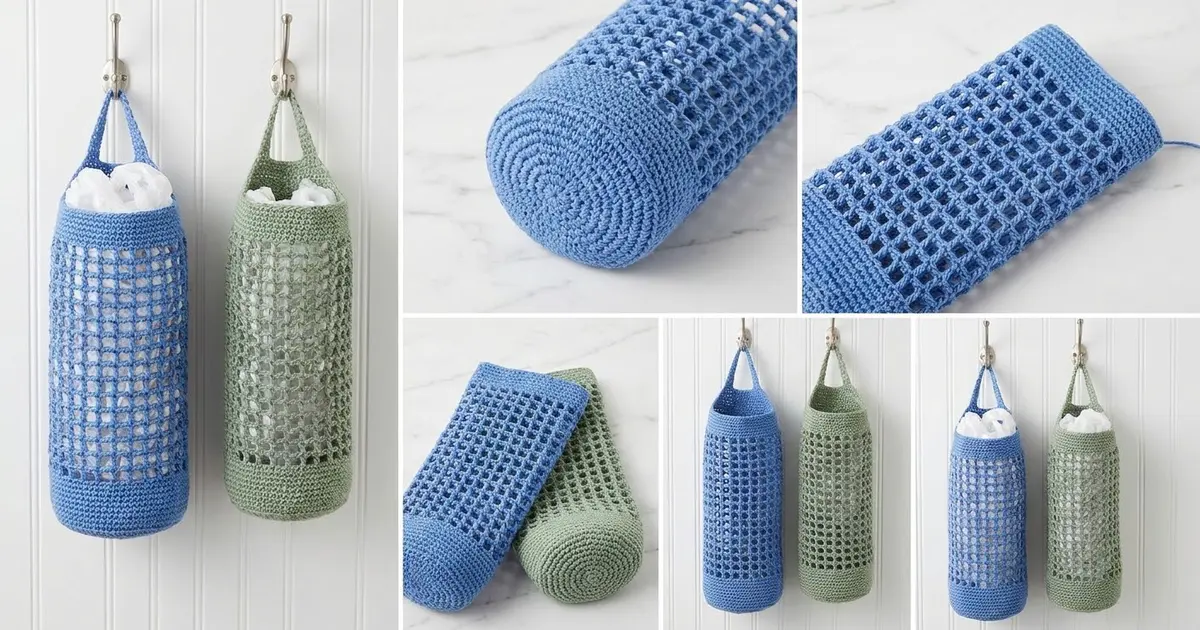
This bag holder is a tall, airy tube that keeps loose grocery bags tidy and easy to grab. The open grid shows what is inside and the solid bands give it structure. A cord tied at the bottom lets you pull out one bag at a time.
The sample is worked in cornflower blue. A second holder in sage green shows how well the design suits a soft, coastal palette. Both use the same pattern; only the color changes. The look is clean and modern with a little farmhouse feel, and it is very practical.
The pattern uses US crochet terms. The finished holder measures about 8 in (20.3 cm) wide when laid flat and 16.5 in (41.9 cm) tall, not counting the hanging loop.
The construction is simple. You chain a ring and work a solid bottom band that includes an eyelet round for the drawstring. Then you build the grid with alternating treble and single crochet rounds and finish with a solid top band. A strap loop and a slip-stitch cord complete the holder. The tube is one seamless piece.
Finished Size and Construction
- Finished size: 8 in (20.3 cm) wide flat x 16.5 in (41.9 cm) tall
- Circumference: 16 in (40.6 cm)
- Skill level: Easy
- Terminology: US crochet terms
- Yarn weight: Worsted (#4), cotton or cotton blend
- Hook: 5.0 mm (US H-8)
- Number of pieces: 1 seamless tube, plus a separate drawstring cord
- Layout: Bottom band, 12-window grid section, top band, hanging loop
- Piece size before top band: 8 in (20.3 cm) flat x 15 in (38.1 cm) tall
- Top band (border) depth: 1.5 in (3.8 cm)
Materials
Choose a smooth worsted cotton or cotton blend. Cotton holds the grid shape crisply and does not stretch under the weight of the bags. Avoid fuzzy or very splitty yarns, which blur the windows.
- Main color (cornflower blue): 100 g, about 180 m
- Optional second holder (sage green): 100 g, about 180 m
Each holder uses roughly 70 to 80 g. The quantities above include a comfortable margin for your gauge swatch and the drawstring.
About the second color: The green holder is not a separate piece of this project. It is simply a second copy of the same holder. If you want a matching pair, make one holder, check it against every measurement, and then repeat the whole pattern in the second color. Use the same hook and the same yarn brand for both so they hang at exactly the same height.
Tools:
- 5.0 mm (US H-8) crochet hook
- Tapestry needle
- Stitch marker
- Scissors
- Measuring tape
- Spray bottle and blocking pins
- A rolled towel or tall jar, about 5 in (12.7 cm) across, for blocking
Abbreviations (US Terms)
- ch – chain
- sl st – slip stitch
- sc – single crochet
- dc – double crochet
- tr – treble crochet
- sk – skip
- sp – space
- st(s) – stitch(es)
- rnd(s) – round(s)
- beg – beginning
Special stitch – treble crochet (tr): Yarn over twice, insert the hook in the stitch, yarn over and pull up a loop (4 loops on hook). [Yarn over and pull through 2 loops] 3 times.
Counting note: In this pattern every chain counts as one stitch. A ch-3 space counts as 3 stitches and a ch-1 space counts as 1 stitch, so every round totals 60.
Gauge and Checkpoints
Gauge: 15 sc and 16 sc rnds = 4 in (10.2 cm). One tr rnd plus one sc rnd = 1 in (2.5 cm).
Make a flat swatch of 20 sc by 20 rows and measure the center 4 in (10.2 cm). Then add two rows of the grid pattern (ch 4, then a repeat of tr 2, ch 3, sk 3; then sc back across) and check that the pair measures 1 in (2.5 cm) tall.
Width gauge sets the circumference. Height gauge, especially in the tr rounds, sets the length. Check both.
Treat the first few rounds of the holder as your real test. Checkpoints:
- After Rnd 2: circumference 16 in (40.6 cm), or 8 in (20.3 cm) flat
- After Rnd 11: bottom band is 3 in (7.6 cm) tall
- After Rnd 23: total height 9 in (22.9 cm)
- After Rnd 35: total height 15 in (38.1 cm)
- After Rnd 41: total height 16.5 in (41.9 cm)
Too big? Go down half a hook size to 4.5 mm and restart. Too small? Go up to 5.5 mm. Do not change the stitch count, because the 60-stitch round keeps the grid columns aligned. If only the tr rounds are the wrong height, change how far you pull up the first loop of each tr instead of changing the hook.
Bottom Band
Work in joined rounds with the right side facing, and do not turn. The joins form a faint seam line that will sit at the back.
Foundation: Ch 60. Without twisting the chain, sl st in the first ch to form a ring.
Rnd 1: Ch 1, sc in each ch around, sl st in first sc to join. (60 sc)
Rnd 2: Ch 1, sc in each st around, join. (60 sc)
Lay the ring flat. It should measure 8 in (20.3 cm) across.
Rnd 3 (eyelet round): Ch 4 (counts as dc and ch 1), sk next st, *dc in next st, ch 1, sk next st; repeat from * 28 more times, sl st in 3rd ch of beg ch-4. (30 dc + 30 ch-1 sps = 60 sts)
Rnd 4: Ch 1, sc in each dc and in each ch-1 sp around, join. (30 sc + 30 sc = 60 sc)
Rnds 5–11: Ch 1, sc in each st around, join. (60 sc)
The bottom band now has two solid rounds below the eyelets and eight solid rounds above them. It measures 3 in (7.6 cm) tall.
Grid Section
The grid repeats every 2 rounds. The tr round makes the vertical posts and the windows, and the sc round makes the solid horizontal bar. Each post is 2 tr wide and each window is 3 stitches wide, so one repeat covers 5 stitches. 60 stitches give exactly 12 windows around.
Rnd 12 (window round): Ch 4 (counts as first tr), tr in next st, *ch 3, sk next 3 sts, tr in each of next 2 sts; repeat from * 10 more times, ch 3, sk last 3 sts, sl st in top of beg ch-4. (24 tr + 12 ch-3 sps = 60 sts)
Rnd 13 (bar round): Ch 1, sc in each of first 2 tr, *3 sc in next ch-3 sp, sc in each of next 2 tr; repeat from * 10 more times, 3 sc in last ch-3 sp, join. (24 sc + 36 sc = 60 sc)
Rnd 14: Ch 4 (counts as first tr), tr in next sc, *ch 3, sk next 3 sc, tr in each of next 2 sc; repeat from * 10 more times, ch 3, sk last 3 sc, sl st in top of beg ch-4. (24 tr + 12 ch-3 sps = 60 sts)
Each pair of tr lands on the 2 sc directly above the previous pair of tr, which keeps the posts in straight vertical columns.
Tip: Place a stitch marker in the first sc of every bar round. Once you know where that sc is, you can find the first tr of the next round easily. Count the 3 skipped stitches out loud for the first few repeats until the rhythm feels natural.
Rnd 15: Repeat Rnd 13. (60 sc)
Rnds 16–35: Repeat Rnds 14–15 ten more times. Even rounds are window rounds (60 sts) and odd rounds are bar rounds (60 sc).
You now have 12 window rounds and 12 bar rounds, and the grid section measures 12 in (30.5 cm) tall. The posts should run straight up the tube in 12 clean columns. If they spiral, you are placing the first tr of a round one stitch off. Count from the join each time.
Checkpoint at Rnd 23 (6 windows): total height 9 in (22.9 cm). Checkpoint at Rnd 35: total height 15 in (38.1 cm), still 8 in (20.3 cm) flat.
Top Band (Border)
The top band is the border of this piece. It is solid single crochet with the same stitch count as the body, so the tube stays straight and does not flare.
Border gauge: 15 sc and 16 rnds = 4 in (10.2 cm), so 6 rounds give 1.5 in (3.8 cm).
Rnds 36–41: Ch 1, sc in each st around, join. (60 sc each round)
Count each round. Rnd 35 is a full 60-sc bar round, so each top-band stitch sits on one sc below. That makes 60 stitches worked 1-per-stitch, with no stitches added. When the tube is flat, those 60 stitches split into 30 on the front and 30 on the back. At 15 sc per 4 in (10.2 cm), 30 stitches measure 8 in (20.3 cm) across. That is why the band matches the grid width.
Do not fasten off.
Hanging loop: Ch 30, sk next 2 sts of Rnd 41, sl st in next st (the 3rd st from the join). Turn. Sc in each of the 30 ch, then sl st in the join st of Rnd 41. (30 sc) Fasten off and weave in the end.
The strap is 30 sc long, about 8 in (20.3 cm), and folds into a loop about 3.5 in (8.9 cm) tall. It sits over the join seam, so the seam hangs at the back.
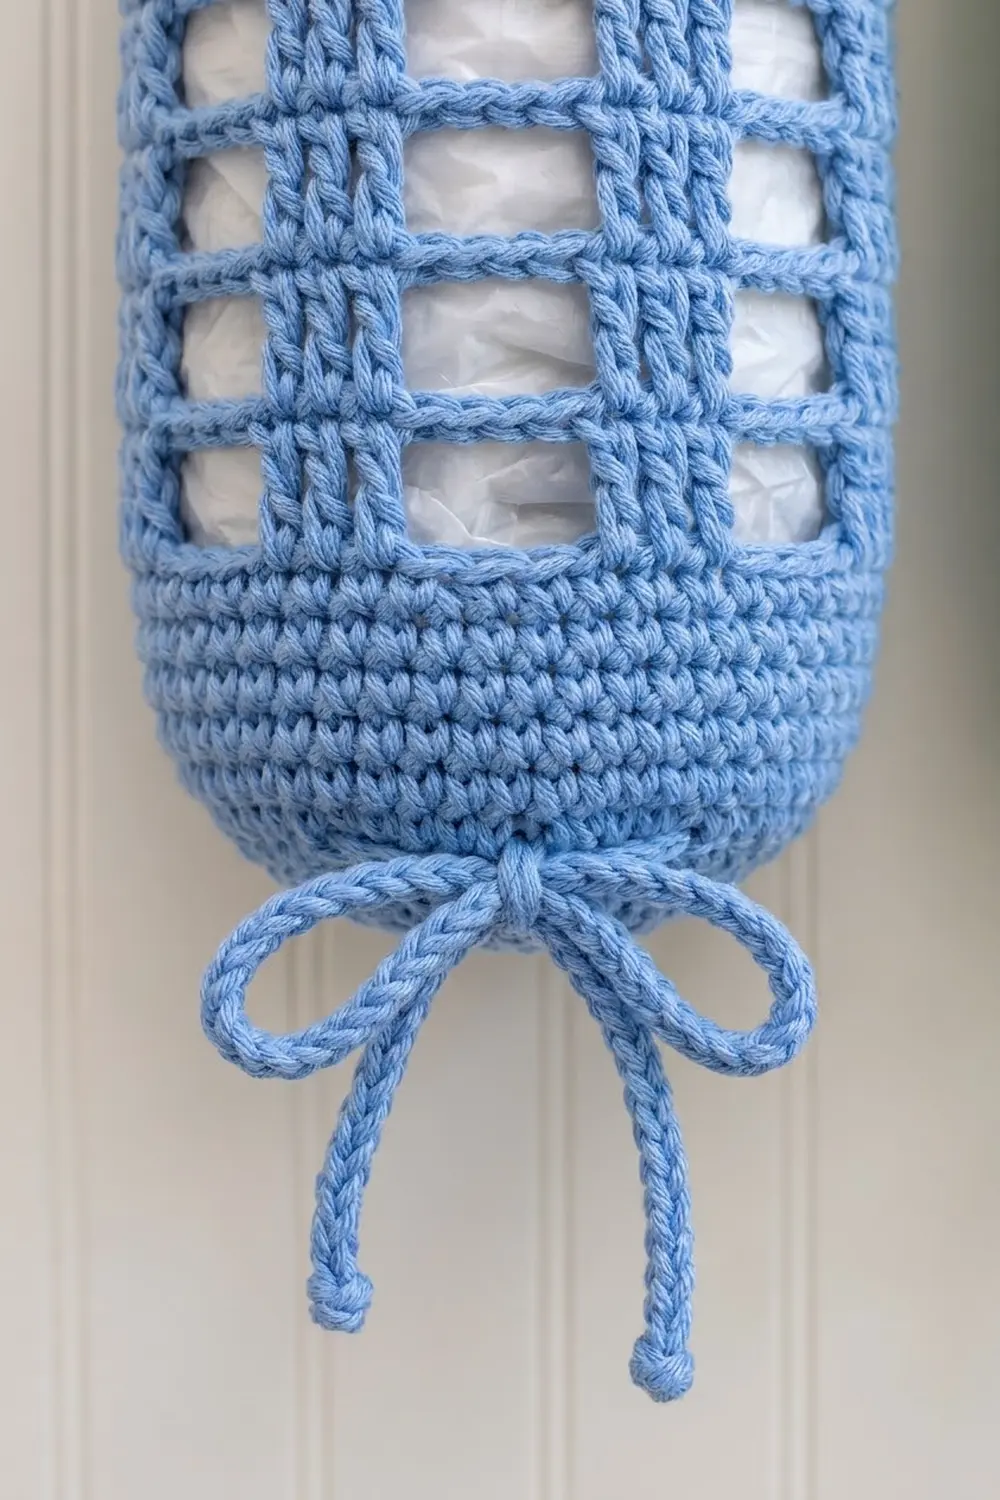
Drawstring cord: Ch 110. Sl st in the back bump of the 2nd ch from the hook and in each ch across. (109 sl sts) Fasten off, leaving short tails. The cord measures about 26 in (66.0 cm).
Threading: Turn the holder so the seam is at the back. Start at the center front ch-1 sp of Rnd 3 and weave the cord in and out of every ch-1 sp all the way around. There are 30 spaces, an even number, so both ends come out side by side at the front. Knot each cord end and trim the tails.
Cinching: Pull both cord ends evenly until the bottom opening is about 1.5 in (3.8 cm) across. The two solid rounds below the eyelets gather into a small ruffled lip, which grips the bag as you pull it out. Tie the ends in a bow. To refill the holder, push bags in through the top opening, not the bottom.
Final Blocking
- Weave in all ends before blocking, running them along the solid sc bands instead of across the windows.
- Mist the holder with water until it is damp but not dripping.
- Slide it over a rolled towel or tall jar about 5 in (12.7 cm) across.
- Straighten each post column with your fingers so the windows are even rectangles.
- Smooth the top and bottom bands so the edges are level.
- Check the size: 8 in (20.3 cm) flat and 16.5 in (41.9 cm) tall.
- Let it dry completely before removing it.
- Lay the hanging loop flat on a towel and pin it while it dries so it keeps its shape.
Final Quality-Control Checklist
- Every round has 60 stitches.
- There are 12 windows around and 12 windows high.
- Post columns run straight, not spiraling.
- The bottom band is 3 in (7.6 cm) and the top band is 1.5 in (3.8 cm).
- Total height is 16.5 in (41.9 cm) and flat width is 8 in (20.3 cm).
- The hanging loop is centered over the seam and attached securely.
- The drawstring passes through all 30 eyelets and both ends exit at the front.
- When cinched, the bottom opening is about 1.5 in (3.8 cm) across.
- All ends are woven in and invisible.
Troubleshooting
The posts lean or spiral. Mark the first tr of each window round. The beg ch-4 must sit directly above the previous beg ch-4.
The windows look squashed. Your tr is too tight. Pull up the first loop a little taller before finishing the stitch.
The top band flares or pulls in. Recount it. It must be exactly 60 sc. Extra stitches make it flare and missing stitches make it pull in.
The bottom band ripples. The foundation chain was too tight. Restart and use a hook one size larger for the chain only.
A visible gap at the join. Pull the beg chain snug, and work the joining sl st through both loops of the top of the beg ch.
Bags slide out too easily. Pull the drawstring tighter and tie a double bow.
The loop stretches. Use cotton instead of acrylic, and work the sc along the strap firmly.
Care
Hand wash in cool water with mild soap and lay flat to dry, reshaping the grid while it is damp. Cotton can also go in the washing machine on a gentle cycle inside a mesh bag.

Final Notes
The measurements build in a simple chain. The 60-stitch ring sets the flat width of 8 in (20.3 cm). The bottom band adds 3 in (7.6 cm). Twelve grid repeats at 1 in (2.5 cm) each add 12 in (30.5 cm), bringing the height to 15 in (38.1 cm). The 6-round top band adds 1.5 in (3.8 cm), for a finished height of 16.5 in (41.9 cm). If each checkpoint matches, the finished holder will too.
Make one in your favorite color, then a second in a coordinating shade to hang beside it.
Happy crocheting!