
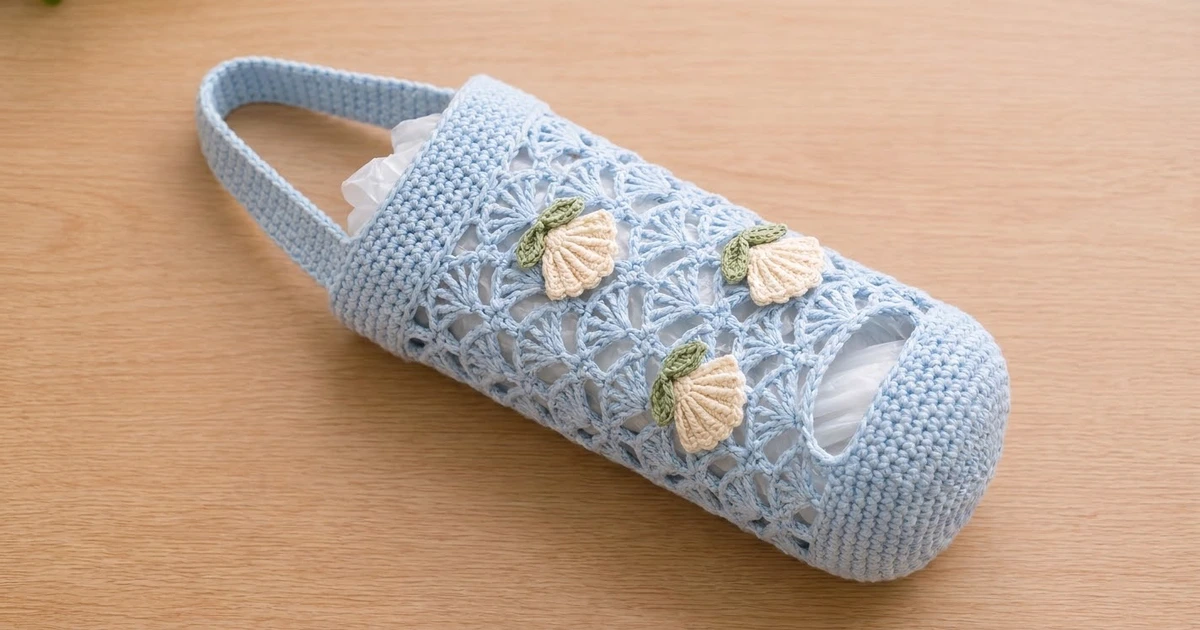
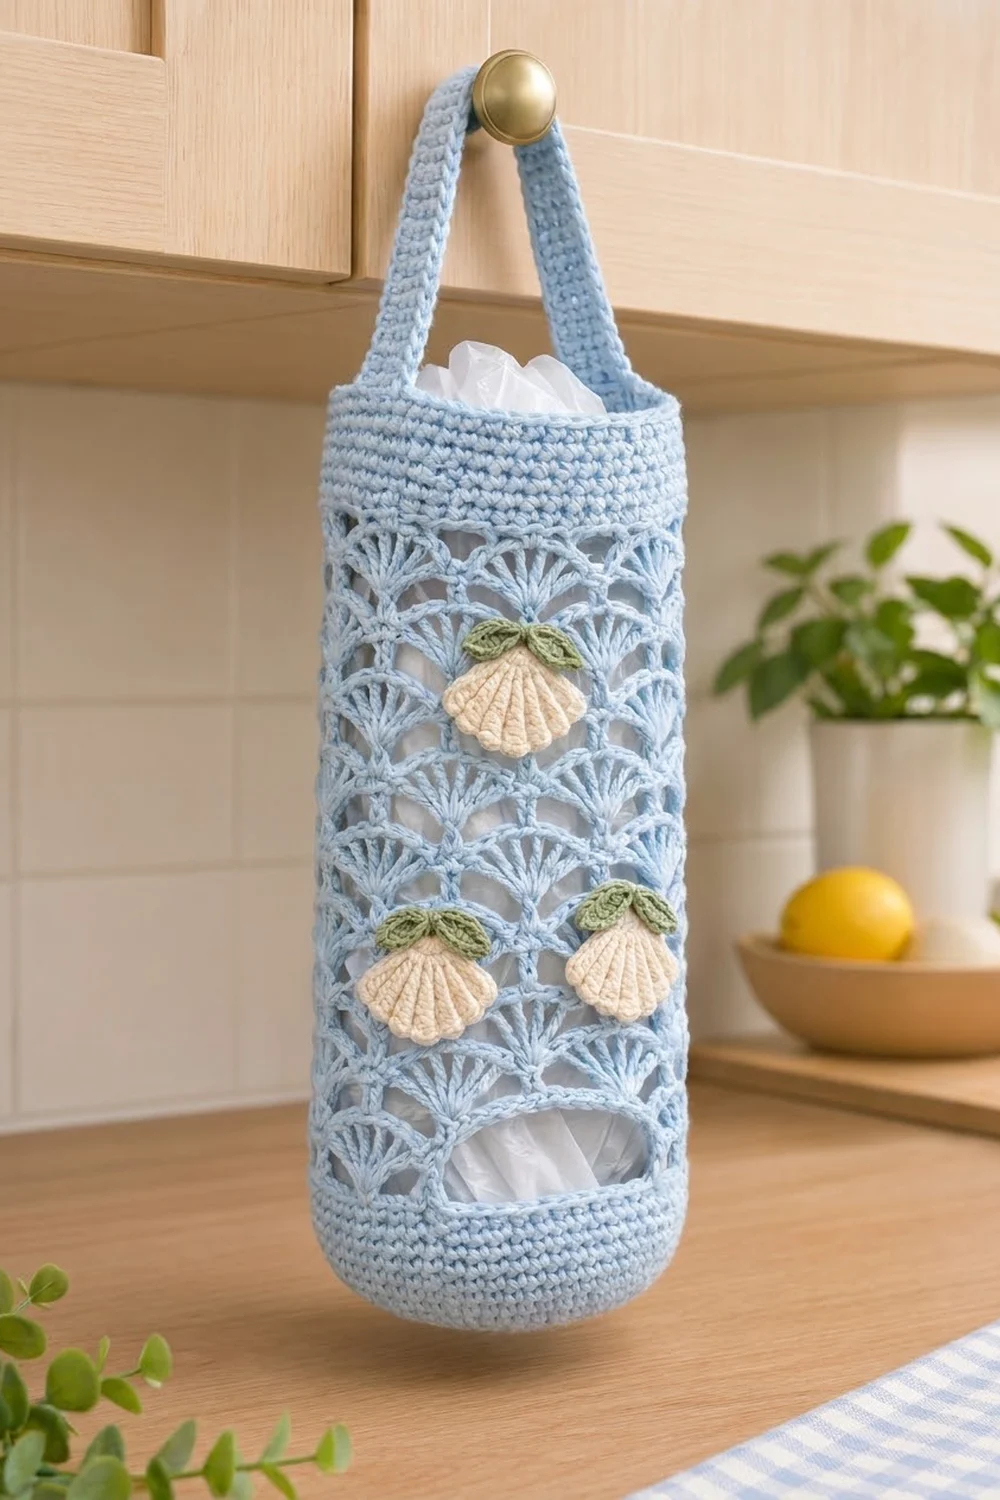
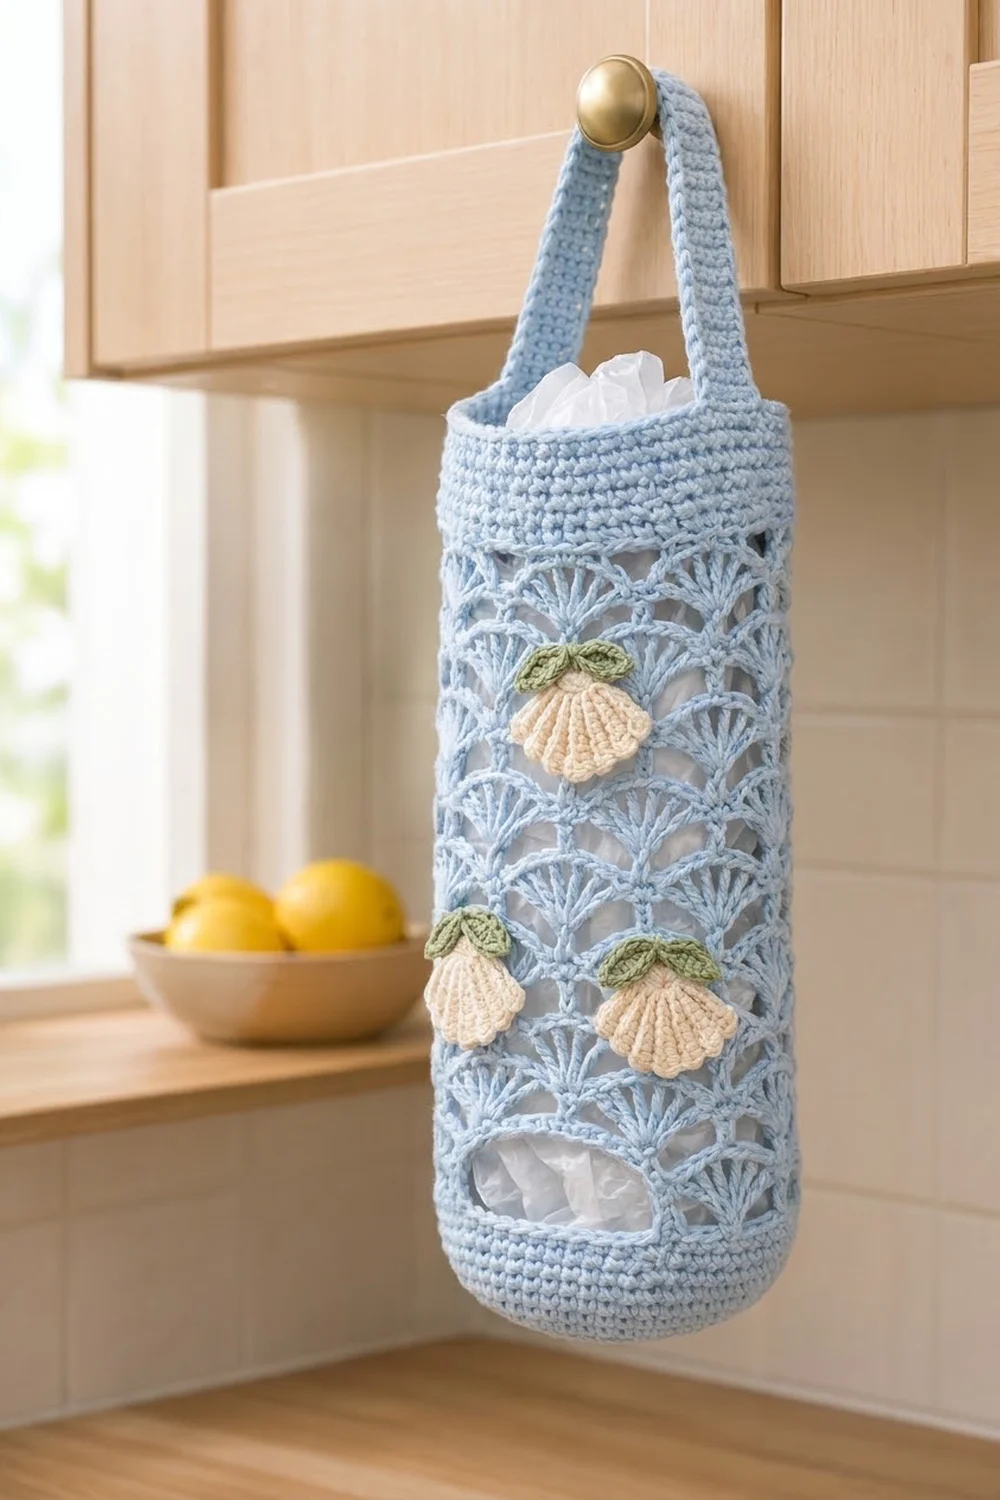
This plastic bag holder is soft, practical and pretty enough to leave out on a cabinet knob. The body is a light blue tube of airy fan lace, finished with solid single-crochet bands at the top and bottom. Bags go in through the top and pull out through an oval opening near the base.
Three cream scallop shells, each topped with a pair of sage green leaves, are sewn to the front. They add a coastal, cottage-kitchen feel without taking away from the lace.
The pattern uses US crochet terms. The finished holder measures about 5.3 in (13.5 cm) wide when flat and 12.6 in (32.0 cm) tall, not counting the strap. With the strap loop, it hangs about 18.6 in (47.2 cm) long.
You work it from the bottom up in one piece: a flat round base, a single-crochet band with the dispensing opening built in, 14 rounds of fan lace, then a leveling round and the top band. The strap, shells and leaves are made separately and sewn on.
Finished Size and Construction
- Finished size: 5.3 in (13.5 cm) wide flat x 12.6 in (32.0 cm) tall; circumference 10.7 in (27.2 cm)
- Skill level: Intermediate
- Terminology: US crochet terms
- Yarn weight: Worsted (#4) cotton or cotton blend
- Hook: 4.0 mm (US G-6)
- Number of pieces: 1 body, 1 strap, 3 shells, 3 leaf pairs (one finished holder)
- Layout: Single seamless tube; strap ends sewn at the side folds; appliqués on the front
- Base diameter: 3.4 in (8.6 cm)
- Size before border: 10.8 in (27.4 cm) tall after the last fan round
- Border depth: 1.8 in (4.6 cm) for the leveling round and top band
Materials
Choose a smooth, firm cotton. It holds the fan shape, carries the weight of the bags without stretching much, and washes well. Avoid fuzzy or very drapey yarns, which blur the lace.
- Light blue (body and strap): 140 g, about 240 m
- Cream (shells): 15 g, about 25 m
- Sage green (leaves): 8 g, about 14 m
All quantities include a margin of about 15 percent for a gauge swatch and tails.
Tools:
- 4.0 mm (US G-6) crochet hook
- Tapestry needle
- Stitch markers (at least 4)
- Scissors
- Measuring tape
- Pins and a blocking surface
- Spray bottle
Abbreviations (US Terms)
- ch – chain
- sl st – slip stitch
- sc – single crochet
- hdc – half double crochet
- dc – double crochet
- tr – treble crochet
- BLO – back loop only
- sk – skip
- st(s) – stitch(es)
- sp – space
- rnd – round
Special stitch – Fan: (dc, ch 1) 4 times, dc, all in the same st. One Fan has 5 dc and 4 ch-1 sps. The 3rd dc is the center dc.
Gauge and Checkpoints
Sc gauge: 18 sts and 20 rnds = 4 in (10.2 cm). One sc rnd is about 0.2 in (0.5 cm) tall.
Fan gauge: 1 Fan repeat (6 base sts) = 1.3 in (3.3 cm) wide; 5 fan rnds = 3 in (7.6 cm), so each fan rnd adds about 0.6 in (1.5 cm).
Make the base first as your test piece. It is small and quick, and it sets the circumference for the whole tube.
Checkpoints:
- After Rnd 8: base diameter 3.4 in (8.6 cm)
- After Rnd 20: wall height 2.4 in (6.1 cm) above the base edge
- After Rnd 34: wall height 10.8 in (27.4 cm)
- After Rnd 43: total height 12.6 in (32.0 cm)
If your base is too big, go down a hook size (3.75 mm). If it is too small, go up (4.5 mm). If only the fan rounds run long, keep the same hook but work the dc a little more snugly, or work 13 fan rounds instead of 14.
Pattern
Base
Work in joined rounds. Join each rnd with a sl st to the first sc and ch 1 to start the next (the ch 1 does not count).
Rnd 1: In a magic ring, 6 sc. Join. (6 sts)
Rnd 2: 2 sc in each st. (12 sts)
Rnd 3: Sc in next st, 2 sc in next st 6 times. (18 sts)
Rnd 4: Sc in next 2 sts, 2 sc in next st 6 times. (24 sts)
Rnd 5: Sc in next 3 sts, 2 sc in next st 6 times. (30 sts)
Rnd 6: Sc in next 4 sts, 2 sc in next st 6 times. (36 sts)
Rnd 7: Sc in next 5 sts, 2 sc in next st 6 times. (42 sts)
Rnd 8: Sc in next 6 sts, 2 sc in next st 6 times. (48 sts)
Checkpoint: the base lies flat and measures 3.4 in (8.6 cm) across.
Lower Band
Rnd 9: Sc in BLO of each st. (48 sts) This makes the crisp bottom fold.
Rnds 10–14: Sc in each st. (48 sts)
Dispensing Opening
To form the opening, you work back and forth over part of the tube, then chain across the gap.
Row 15 (RS): Ch 1, sc in first 34 sts, turn. Leave the last 14 sts unworked. (34 sts)
Rows 16–19: Ch 1, sc in each of 34 sts, turn. Do not turn after Row 19. (34 sts)
Bridge: At the end of Row 19, ch 14, then sl st to the first sc of Row 19 to close the tube.
Rnd 20: Ch 1, sc in same st as join and in next 33 sc, sc in each of 14 ch. Join. (34 + 14 = 48 sts)
The opening is 14 sts wide and 5 rows tall, about 3.1 in (7.9 cm) by 1 in (2.5 cm). It softens into an oval once edged. Checkpoint: wall height 2.4 in (6.1 cm).
Fan Lace
Rnd 21: Ch 1, sc in first st, sk 2 sts, Fan in next st, sk 2 sts, sc in next st 7 times, sk 2 sts, Fan in next st, sk 2 sts. Join to first sc. (8 Fans and 8 sc; each repeat uses 6 sts, 8 x 6 = 48)
Rnds 22–34: Sl st in next dc, ch-1 sp, dc, ch-1 sp and dc (5 sl sts; you are now in the center dc of the first Fan). Ch 1, sc in same dc, Fan in next sc, sc in center dc of next Fan 7 times, Fan in next sc (the joining sc of the previous rnd). Join to first sc. (8 Fans and 8 sc)
Each rnd shifts the Fans by half a repeat, so they sit offset like overlapping shells. Checkpoint after Rnd 34: wall height 10.8 in (27.4 cm). Do not fasten off; go straight on to the border below.
Strap
With light blue, ch 6.
Row 1: Sc in 2nd ch from hook and in each ch across, turn. (5 sts)
Rows 2–80: Ch 1, sc in each st, turn. (5 sts)
Fasten off, leaving a 12 in (30.5 cm) tail. The strap measures 1.1 in (2.8 cm) wide and 16 in (40.6 cm) long.
Shell Appliqué (make 3)
With cream.
Row 1: In a magic ring, ch 3 (counts as dc), 6 dc. Pull ring closed to a half circle, turn. (7 dc)
Row 2: Ch 3 (counts as dc), dc in first st, 2 dc in each of next 6 sts, turn. (14 dc)
The small gaps between dc pairs become the shell’s ribs.
Row 3 (scallop row): Ch 1, sc in next st, (hdc, dc, hdc) in next st 7 times. Sl st down the side of Row 1 to the ring. (7 sc and 7 scallops)
Fasten off, leaving an 8 in (20.3 cm) tail. Each shell measures about 1.8 in (4.6 cm) wide and 1.5 in (3.8 cm) tall. The ring is the top point and the scallops form the lower edge.
Leaf Pair (make 3)
With sage green, ch 6.
First leaf: Sc in 2nd ch from hook, hdc in next ch, dc in next ch, hdc in next ch, sc in last ch. Working along the other side of the chain: sc, hdc, dc, hdc, sc. Sl st to the first sc.
Second leaf: Ch 6 and repeat the first leaf. Sl st to the base of the first leaf.
Fasten off, leaving an 8 in (20.3 cm) tail. Each leaf is about 1 in (2.5 cm) long.
Border (Top Band and Opening Edge)
Border gauge: the top band uses the sc gauge, 18 sts = 4 in (10.2 cm). 48 sts give 10.7 in (27.2 cm), the same as the base, so the top neither flares nor pulls in. Flattened, that is 24 sts on the front and 24 on the back.
Rnd 35 (leveling): You are at the joining sc between Fans. Ch 4 (counts as tr), [hdc in 1st ch-1 sp, sc in 2nd ch-1 sp, sc in center dc, sc in 3rd ch-1 sp, hdc in 4th ch-1 sp] over the next Fan, tr in next sc, [hdc, sc, sc, sc, hdc over next Fan as before] 7 times. Join to top of ch-4. (8 tr worked 1 per valley sc + 8 sc worked 1 per center dc + 32 sts worked into ch-1 sps = 48 sts; 24 per flat side)
The tall tr fills each valley and the short sts sit on the Fan tops, giving a straight edge. This rnd adds about 0.4 in (1.0 cm).
Rnds 36–42: Ch 1, sc in each st. Join. (48 sts; 24 per flat side)
These 7 rnds add 1.4 in (3.6 cm).
Rnd 43: Sl st loosely in each st. (48 sl sts) Fasten off.
Why the math works: the body is 48 sts at every stage. The base ends at 48, each Fan repeat uses 6 sts (8 x 6 = 48), and the leveling round turns each repeat back into 6 sts. Height: 10.8 in + 0.4 in + 1.4 in = 12.6 in (27.4 cm + 1.0 cm + 3.6 cm = 32.0 cm).
Opening edge: Join light blue at the lower right corner of the opening. Sc in each of the 14 unworked sts of Rnd 14, 5 sc along the row ends, sc in each of the 14 ch loops on the underside of Rnd 20, then 5 sc along the other row ends. Join. (14 + 5 + 14 + 5 = 38 sc) A sc row end is almost as tall as one sc is wide, so one sc per row lies flat. Do not add corner increases. Easing the stitches around the corners is what rounds the opening into an oval.
Attaching the Strap and Appliqués
- Flatten the holder with the opening centered on the front. Mark the two side folds.
- Lay each strap end 1.25 in (3.2 cm) inside the top band at one fold, without twisting. Whipstitch all four edges of each overlap through the band.
- Pin one shell centered on the front, with its top point about 3 rnds below the leveling round.
- Pin the other two shells side by side about 4 fan rnds lower, centered 1.4 in (3.6 cm) left and right of the center line.
- Sew each shell around its edge through the sc and dc of the lace, keeping your stitches on the back of the fabric.
- Sew one leaf pair at the top point of each shell, with the leaves angled out left and right. Weave in all ends.
Final Blocking
- Lightly mist the holder until it is damp but not dripping.
- Fill the tube with a rolled towel, or with a 3 in (7.6 cm) jar wrapped in a towel.
- Ease the Fans open so each one is evenly spread and the rnds are level.
- Shape the opening into a smooth oval with your fingers.
- Flatten the strap and pin the shells flat with their scallops spread.
- Let it dry completely. Check the size: 5.3 in (13.5 cm) flat width and 12.6 in (32.0 cm) height.
Final Quality-Control Checklist
- Base lies flat with a crisp fold at Rnd 9
- Rnd 20 has 48 sts and every fan rnd has 8 Fans
- Fans alternate cleanly, with no doubled or missing Fan
- Top edge is level after Rnd 35
- Top band measures 10.7 in (27.2 cm) around
- Opening edge has 38 sc and lies flat
- Strap is untwisted and both ends are securely sewn
- Shells and leaves are firmly attached, with no stitches showing on the front
- All ends are woven in
Troubleshooting
Base cups or ruffles: Cupping means your gauge is tight, so go up a hook size. Ruffling means it is loose, so go down a size.
Fan count is off: Count the sc between Fans; there must be 8. Usually the last Fan was skipped or doubled at the join.
Top edge is wavy: Check that every valley has a tr in Rnd 35.
Opening gapes: Work the opening edge with a smaller hook.
Holder stretches with use: Use a firmer cotton, or add a second sl st rnd at the top.
Strap stretches: Work it with a hook 0.5 mm smaller.
Care
Hand wash, or machine wash cold on a gentle cycle in a mesh bag. Reshape while damp and lay flat to dry.
Final Notes
The measurements build in a simple chain. A 48-st base at 3.4 in (8.6 cm) sets a 10.7 in (27.2 cm) circumference. The lower band and opening reach 2.4 in (6.1 cm). Fourteen fan rounds bring the wall to 10.8 in (27.4 cm). The 1.8 in (4.6 cm) border finishes the holder at 12.6 in (32.0 cm). If each checkpoint matches, the finished holder will too.
Happy crocheting!