

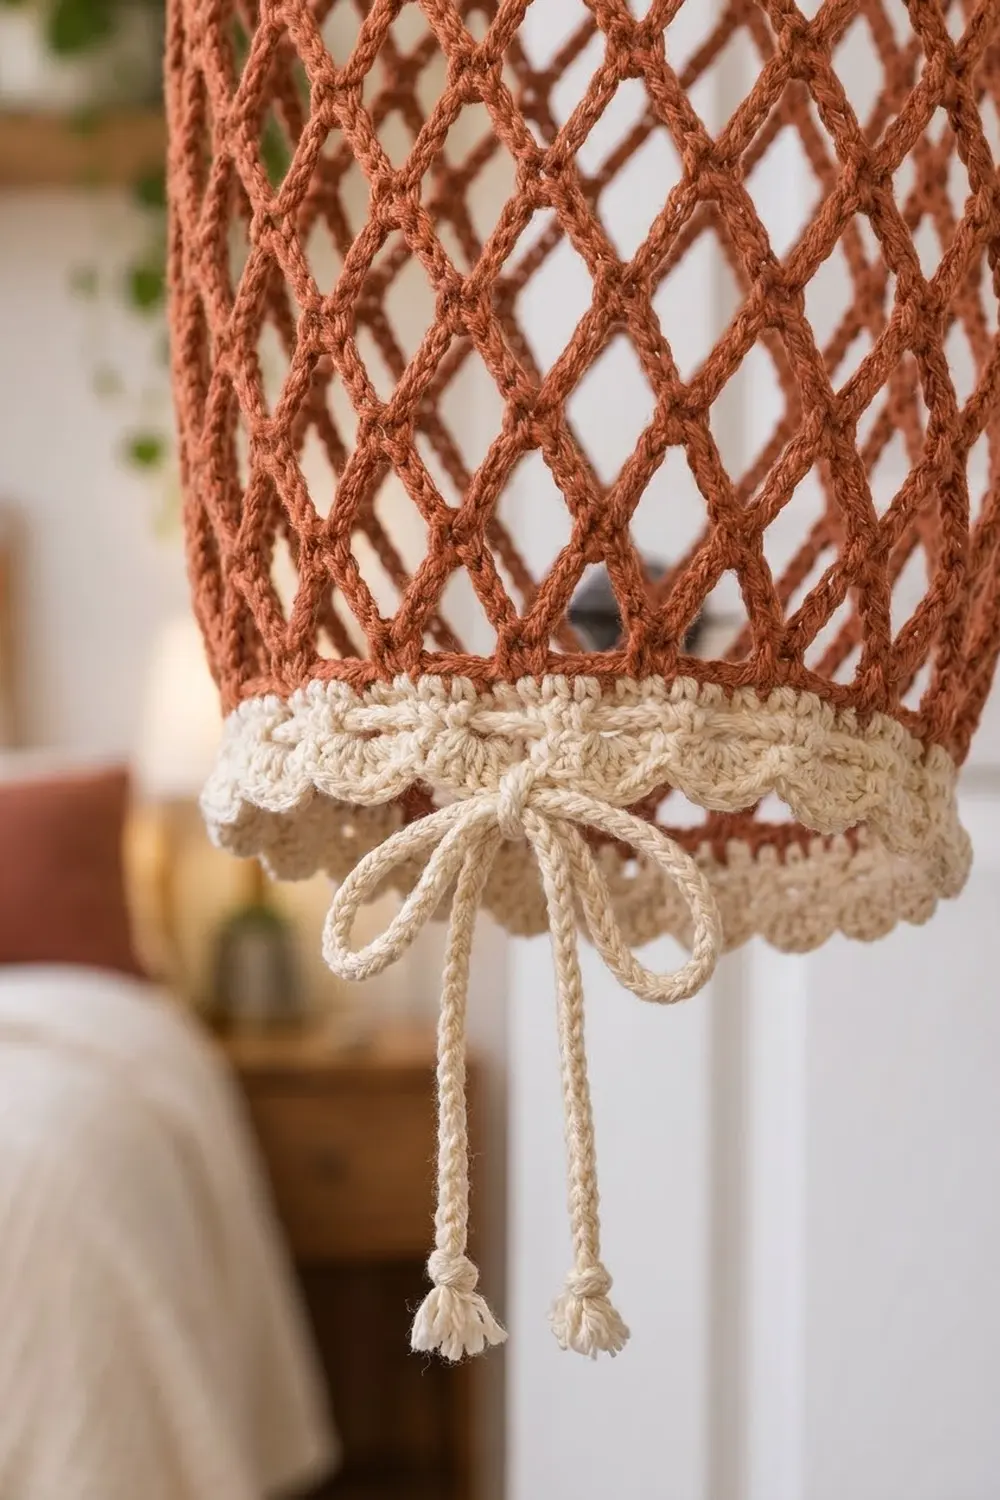
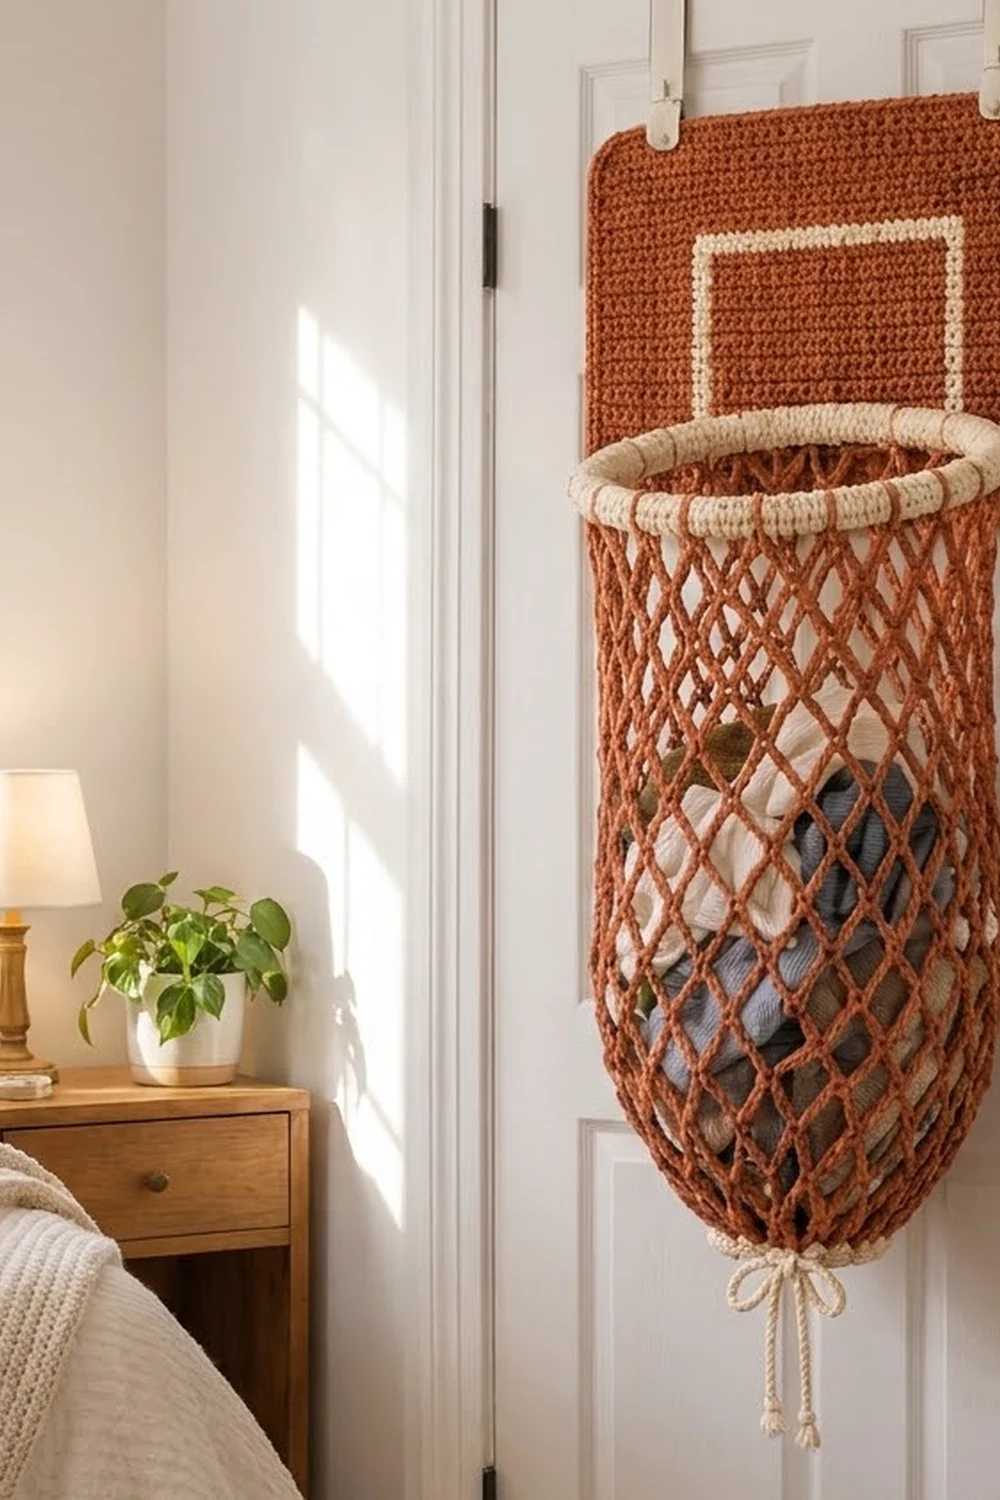
This over-the-door laundry hamper looks like a basketball hoop. A rust backboard hangs from two cream straps, and a padded cream rim sits at the bottom of a cream target square. A deep rust diamond-mesh net hangs from the rim, and a cream scalloped drawstring band cinches the bottom closed. To empty the hamper, untie the bow.
The warm rust and soft cream suit a bedroom, dorm, or kids’ room. The backboard is dense single crochet. The net is open chain mesh, so air can get through.
This pattern uses US crochet terms. The finished hamper is about 34 in (86.4 cm) tall from the top of the backboard to the bottom of the band. The backboard is 18 x 13 in (45.7 x 33.0 cm), and the rim is 14 in (35.6 cm) across.
Here’s the construction order:
1. Crochet a flat backboard, add a 2-round border, and surface-crochet the square.
2. Cover a metal ring with a cream strip.
3. Work the net top-down in a spiral, straight off the rim.
4. Finish with the drawstring band, the cord, and the straps.
Finished Size and Construction
- Finished size: about 34 in (86.4 cm) tall; backboard 18 x 13 in (45.7 x 33.0 cm); rim 14 in (35.6 cm) across
- Skill level: Intermediate
- Terminology: US
- Yarn weight: Worsted (#4) cotton or cotton blend
- Hook: 5.0 mm (H-8)
- Number of pieces: one hamper made from 5 parts: backboard, rim cover, net with band, drawstring, and 2 straps
- Layout: backboard on top, rim at the bottom line of the square, net hanging below
- Backboard size before border: 17 x 12 in (43.2 x 30.5 cm)
- Border depth: 0.5 in (1.3 cm) per side
- Net: 24 in (61.0 cm) of mesh, plus a 1.5 in (3.8 cm) band
Materials
Choose a smooth, firm worsted cotton or cotton blend. It holds the diamond shape and handles frequent washing. Stretchy acrylic tends to sag in the net once it’s full of laundry.
- Rust (MC): 350 g (about 665 m)
- Cream (CC): 100 g (about 190 m)
Both amounts include about a 15% margin for swatching and seaming.
Tools and supplies:
- 5.0 mm (H-8) hook
- 14 in (35.6 cm) metal macramé ring
- About 3 m of soft cotton cord or fleece strip, for padding the ring
- Optional: 17 x 12 in (43.2 x 30.5 cm) sheet of plastic canvas
- 2 slim over-the-door hooks
- Tapestry needle, stitch markers, pins, measuring tape, scissors
Abbreviations (US Terms)
- ch: chain
- sl st: slip stitch
- sc: single crochet
- dc: double crochet
- sk: skip
- sp(s): space(s)
- st(s): stitch(es)
- MC / CC: rust / cream
Mesh decrease (mesh-dec): Insert hook in next ch-5 sp, yarn over, pull up a loop. Insert hook in following ch-5 sp, yarn over, pull up a loop. Yarn over and pull through all 3 loops on hook. This joins 2 loops into one anchor point.
Surface slip stitch: Hold the yarn behind the work. Insert the hook from front to back between stitches, pull up a loop, and draw it through the loop on your hook.
Gauge and Checkpoints
Gauge: 16 sc and 18 rows = 4 in (10.2 cm).
Mesh gauge: 1 round of ch-5 mesh is about 0.75 in (1.9 cm) tall when hanging.
Make a 4 in (10.2 cm) swatch before you start. If you have too many stitches, go up a hook size. If you have too few, go down a size.
Checkpoints:
- Backboard after Row 54: 17 x 12 in (43.2 x 30.5 cm)
- Backboard after border: 18 x 13 in (45.7 x 33.0 cm)
- Rim strip: 44 in (111.8 cm) long, which matches the ring’s circumference
- Net after Rnd 20: about 15 in (38.1 cm) below the rim
- Net after Rnd 32: about 24 in (61.0 cm) below the rim
- Band after Rnd 35: 15 in (38.1 cm) around, about 4.8 in (12.2 cm) across
If a section comes out too big, rip back to the last checkpoint and go down a hook size. If it’s too small, go up a size. The rim strip is the exception: it has to fit the ring, so add or remove foundation chains instead of changing hooks.
Part 1: Backboard (MC)
Ch 69.
Row 1: Sc in 2nd ch from hook and in each ch across, turn. (68 sc)
Rows 2–54: Ch 1, sc in each st across, turn. (68 sc)
Don’t fasten off.
Checkpoint: 68 sc ÷ 4 sts per in = 17 in (43.2 cm). 54 rows ÷ 4.5 rows per in = 12 in (30.5 cm).
Part 2: Backboard Border (MC)
Border gauge: same as the body, 4 sc per in. Each side count below is the sc between the corner ch-2 spaces. The corner chains are not included in it.
Rnd 1: Ch 1 and turn to work along the top edge.
– Top: sc in each of the 68 sts, ch 2.
– Side: work 48 sc across the 54 row ends (8 sc, sk 1 row end 6 times), ch 2.
– Bottom: sc in each of the 68 foundation chs, ch 2.
– Other side: work 48 sc across the row ends the same way, ch 2.
– Sl st to first sc.
(232 sc: 68 / 48 / 68 / 48, plus 4 corner sps)
Rnd 2: Ch 1. Sc in each sc, and work (sc, ch 2, sc) in each corner sp. Sl st to first sc. (240 sc: 70 per top and bottom, 50 per side, plus 4 corner sps)
Fasten off.
Why the math works: Rows are shorter than stitches are wide (4.5 rows per in vs. 4 sts per in). That’s why the 12 in (30.5 cm) sides get 48 sc, not 54. After Rnd 2:
– Top and bottom: 70 sc ÷ 4 = 17.5 in (44.5 cm). The corner chains bring it to 18 in (45.7 cm).
– Sides: 50 sc ÷ 4 = 12.5 in (31.8 cm). The corners bring it to 13 in (33.0 cm).
Part 3: Target Square (CC)
The square is 8 x 6 in (20.3 x 15.2 cm). It’s made from two side-by-side lines of surface slip stitch, which form a thick cream band.
- Mark body sts 19 and 50. That’s 32 sts, or 8 in (20.3 cm), with 18 sts left on each side.
- Mark Row 19 for the bottom line and Row 45 for the top line. That’s 27 rows, or 6 in (15.2 cm).
- Surface sl st around the rectangle. Work 1 sl st per st along the top and bottom lines and 1 per row up the sides. Join and fasten off.
- Work a second line just inside the first, so the band is 2 sts wide.
Keep the slip stitches loose so the backboard doesn’t pucker.
Part 4: Rim Cover (CC)
Wrap the ring with the padding until the padded ring measures about 1.3 in (3.3 cm) around its thickness. Stitch the padding ends in place.
Ch 177.
Row 1: Sc in 2nd ch from hook and across, turn. (176 sc)
Rows 2–6: Ch 1, sc across, turn. (176 sc)
Checkpoint: 44 in (111.8 cm) by about 1.3 in (3.3 cm).
- Wrap the strip around the padded ring.
- Sl st the foundation chain and Row 6 together through both layers so the ring is enclosed.
- Sew the short ends together.
- Turn the seam so it faces down.
- Place 44 markers along the seam, one every 4 sts (176 ÷ 4 = 44).
Part 5: Net (MC)
Work in a continuous spiral. Don’t join rounds, and move a marker up to the start of each round.
Rnd 1: Join MC with sc around the whole covered rim at the first marker, then ch 5. Sc around the rim at the next marker, ch 5. Repeat from * 42 more times. (44 sc, 44 ch-5 loops)
Rnds 2–20: Sc in next ch-5 sp, ch 5. Repeat from * around. (44 loops)
Checkpoint: about 15 in (38.1 cm).
Rnd 21: [Sc in next sp, ch 5] 9 times, mesh-dec over next 2 sps, ch 5. Repeat from * 3 more times. (40 loops)
Rnd 22: Work even. (40 loops)
Rnd 23: [Sc in next sp, ch 5] 8 times, mesh-dec, ch 5. Repeat from * 3 more times. (36 loops)
Rnd 24: Work even. (36 loops)
Rnd 25: [Sc in next sp, ch 5] 7 times, mesh-dec, ch 5. Repeat from * 3 more times. (32 loops)
Rnd 26: Work even. (32 loops)
Rnd 27: [Sc in next sp, ch 5] 6 times, mesh-dec, ch 5. Repeat from * 3 more times. (28 loops)
Rnd 28: Work even. (28 loops)
Rnd 29: [Sc in next sp, ch 5] 5 times, mesh-dec, ch 5. Repeat from * 3 more times. (24 loops)
Rnd 30: Work even. (24 loops)
Rnd 31: [Sc in next sp, ch 5] 4 times, mesh-dec, ch 5. Repeat from * 3 more times. (20 loops)
Rnd 32: Work even. (20 loops)
In each decrease round, every repeat uses one more space than it makes. For example, each Rnd 21 repeat uses 11 spaces and makes 10 loops, so 4 repeats take the count from 44 to 40. Sl st into the next sp and fasten off.
Checkpoint: about 24 in (61.0 cm) below the rim.
Part 6: Drawstring Band (CC)
Rnd 33 (conversion): Join CC in any ch-5 sp. Work 3 sc in each sp around and sl st to first sc. (20 base sc + 40 extra sc = 60 sc)
Rnd 34 (eyelets): Ch 4 (counts as dc + ch 1), sk next sc. Dc in next sc, ch 1, sk next sc. Repeat around. Sl st to 3rd ch of beginning ch-4. (30 dc, 30 ch-1 sps)
Rnd 35: Ch 1. Sc in each dc and in each ch-1 sp around. Sl st to first sc. (30 + 30 = 60 sc)
Checkpoint: 15 in (38.1 cm) around.
Rnd 36 (scallops): Sk 1 sc, 5 dc in next sc, sk 1 sc, sl st in next sc. Repeat around. (15 scallops) Fasten off.
Drawstring:
1. With CC, ch 130. Sl st in the back bump of each ch across. The cord is about 32 in (81.3 cm) long.
2. Starting at center front, weave the cord through the Rnd 34 eyelets so both ends come out side by side.
3. Knot each end 1 in (2.5 cm) from the tip and trim the tails into small tufts.
Part 7: Straps (CC, make 2)
Ch 7.
Row 1: Sc in 2nd ch from hook and across, turn. (6 sc)
Rows 2–40: Ch 1, sc across, turn. (6 sc)
Each strap measures 1.5 x 8.9 in (3.8 x 22.6 cm).
Assembly
- Stiffener (optional): Whipstitch the plastic canvas to the back of the backboard body, inside the border.
- Straps: Sew the bottom 2 in (5.1 cm) of each strap to the back of the backboard, 3 in (7.6 cm) in from each side edge. Fold the top 2 in (5.1 cm) of each strap into a loop and sew it down.
- Rim: Center the back of the rim along the square’s bottom line, 4.5 in (11.4 cm) up from the bottom edge of the backboard. Tack it with CC across a 6 in (15.2 cm) span, stitching every 0.5 in (1.3 cm).
- Level rim (optional): To keep the rim level, run two thin CC chain cords from the front sides of the rim up to the top corners of the square.
Keep the tacking snug but not tight. Checkpoint: 8.5 in (21.6 cm) from the top of the backboard to the rim.
Final Blocking
- Mist the backboard until damp.
- Pin it to 18 x 13 in (45.7 x 33.0 cm), keeping the corners square.
- Straighten the square’s lines and let it dry completely.
- Hang the hamper and mist the net.
- Pull each diamond gently lengthwise until the net measures 24 in (61.0 cm).
- Fan out the scallops and let everything dry while hanging.
Final Quality-Control Checklist
- Backboard is 18 x 13 in (45.7 x 33.0 cm) and flat
- Square is 8 x 6 in (20.3 x 15.2 cm) and centered
- Rim seam is hidden and the ring doesn’t show through
- Net has 44 loops at the top and 20 at the bottom
- Band has 30 eyelets and 15 scallops
- Drawstring knots are secure and the bow closes the band
- Tails are woven in at least 2 in (5.1 cm)
Troubleshooting
- Net is too long: Tighten your chains, or leave out 2 of Rnds 2–20.
- Diamonds slant: This is normal for spiral mesh. Block the net while it hangs.
- Rim strip is short: Add 4 chs for every 1 in (2.5 cm) missing.
- Border ruffles: Recount your row-end sc to 48 per side.
- Band won’t close: Pull the cord snug before tying the bow.
Care
Remove the plastic canvas if you used it. Machine wash cold on a gentle cycle in a laundry bag, then reshape and hang to dry.
Final Notes
Each measurement sets up the next one:
– Gauge gives the 17 x 12 in (43.2 x 30.5 cm) backboard body, and the border brings it to 18 x 13 in (45.7 x 33.0 cm).
– The 176-stitch strip fits the 14 in (35.6 cm) ring, and its 44 markers set the 44 mesh loops.
– Six decrease rounds take the net from 44 loops to 20.
– Those 20 loops become the 60-stitch, 15 in (38.1 cm) drawstring band.
Check each stage against its checkpoint and the hamper will hang straight.
Happy crocheting!