

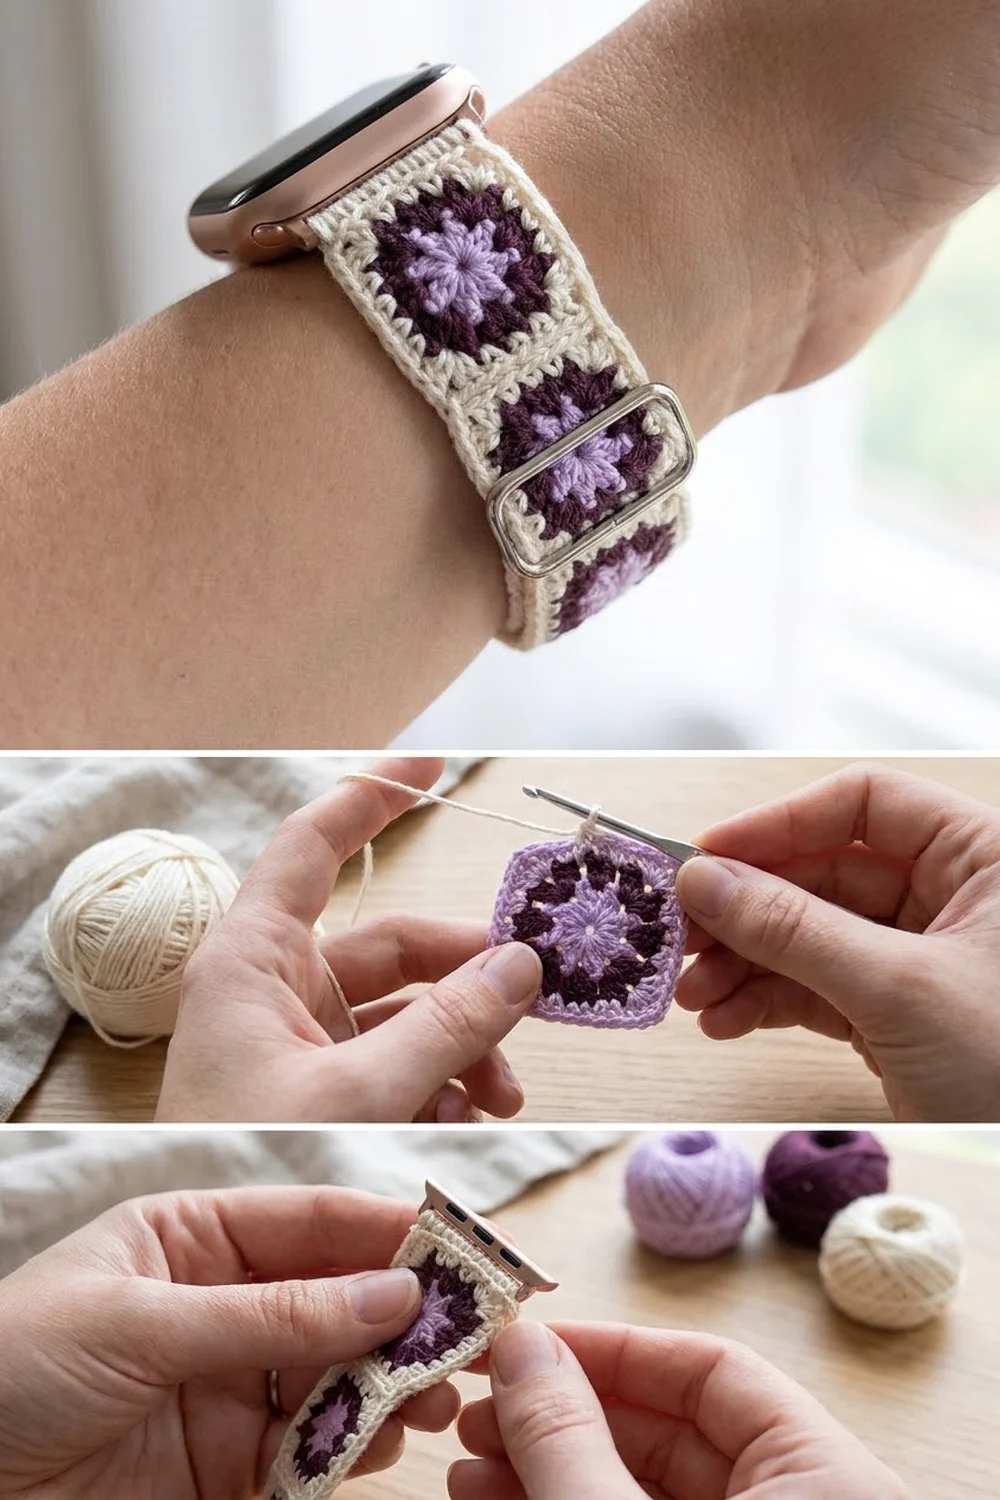
This watch band is made from tiny three-round granny squares. Each square has a lilac center, a dark plum ring and a cream frame. The squares are joined in a single column, and a slim cream border finishes the edge. The result is a soft, vintage-style strap that fits most smartwatches with standard fabric-strap adapters.
The palette is gentle and easy to wear: lilac, deep plum and warm cream. Fine mercerized cotton thread gives clear stitch definition, so even a 0.75 in (1.9 cm) square shows its starburst center.
This pattern uses US crochet terms. The finished band is 0.91 in (2.3 cm) wide. Strap A is 2.41 in (6.1 cm) long and Strap B is 3.91 in (9.9 cm) long before folding. With the watch case, the band fits wrists of about 6–7 in (15.2–17.8 cm).
Construction is simple:
1. Crochet eight identical squares.
2. Join them into a 3-square strap and a 5-square strap.
3. Work one border round around each strap.
4. Block both straps.
5. Fold and sew the ends around the adapter bars and the slide buckle.
Finished Size and Construction
- Finished band width: 0.91 in (2.3 cm)
- Strap A (buckle strap): 0.91 x 2.41 in (2.3 x 6.1 cm)
- Strap B (tail strap): 0.91 x 3.91 in (2.3 x 9.9 cm)
- Skill level: Intermediate (fine thread, small pieces)
- Terminology: US
- Yarn weight: Size 3 mercerized cotton crochet thread (CYC 1, super fine)
- Hook: 1.75 mm steel hook
- Number of pieces: 8 squares (3 for Strap A, 5 for Strap B)
- Layout: Strap A is 1 x 3 squares; Strap B is 1 x 5 squares
- Square size: 0.75 in (1.9 cm)
- Size before border: Strap A 0.75 x 2.25 in (1.9 x 5.7 cm); Strap B 0.75 x 3.75 in (1.9 x 9.5 cm)
- Border depth: 0.08 in (0.2 cm), one round of sc
Materials
Use a smooth, tightly plied mercerized cotton. It resists stretching against the skin, holds its shape around the hardware and keeps its sheen after washing. Avoid fuzzy or acrylic-blend threads, because they blur the tiny stitches.
- Color A, lilac: 5 g (about 15 m)
- Color B, dark plum: 5 g (about 15 m)
- Color C, cream: 10 g (about 30 m)
These quantities include a generous margin for gauge swatching, joining tails and weaving in ends.
Tools:
– 1.75 mm steel crochet hook
– Fine tapestry needle with a sharp or semi-blunt tip
– One pair of watch-band adapters for your watch model, with a fabric bar that fits a strap 0.9–1 in (2.3–2.5 cm) wide
– One rectangular slide buckle with a center bar and a 1 in (2.5 cm) inner opening
– Small scissors
– Rustproof pins and a foam blocking board
– Spray bottle with water
– Ruler marked in inches and cm
Abbreviations (US Terms)
- ch: chain
- sl st: slip stitch
- sc: single crochet
- dc: double crochet
- st(s): stitch(es)
- sp: space
- rep: repeat
- RS / WS: right side / wrong side
Special stitch: standing sc. With a slipknot on the hook, insert the hook into the indicated stitch or space, yarn over and pull up a loop, then yarn over and pull through both loops. Use it to join a new color without a slip-stitch-and-chain start.
Magic ring. Wrap the thread around two fingers to form an adjustable loop. Work the first round into this loop, then pull the tail to close the center completely.
Gauge and Checkpoints
Gauge: 12 sc = 1 in (2.5 cm) in Color C.
Make one full square before anything else and measure it flat, without stretching.
- After Round 1: the circle should be about 0.4 in (1.0 cm) across.
- After Round 2: the square should be about 0.6 in (1.5 cm) across.
- After Round 3: the square should be 0.75 in (1.9 cm) per side.
If the square is too big (0.8 in / 2.0 cm or more), go down to a 1.5 mm hook. Also tighten your magic ring, and pull each dc’s first yarn-over snug.
If the square is too small (0.7 in / 1.8 cm or less), go up to a 2.0 mm hook.
Width matters more than length on this project, because the strap must pass through the adapter bar and the buckle. Hold your test square against the adapter bar before you make the rest. The square plus about 0.16 in (0.4 cm) of border should fit through without bunching.
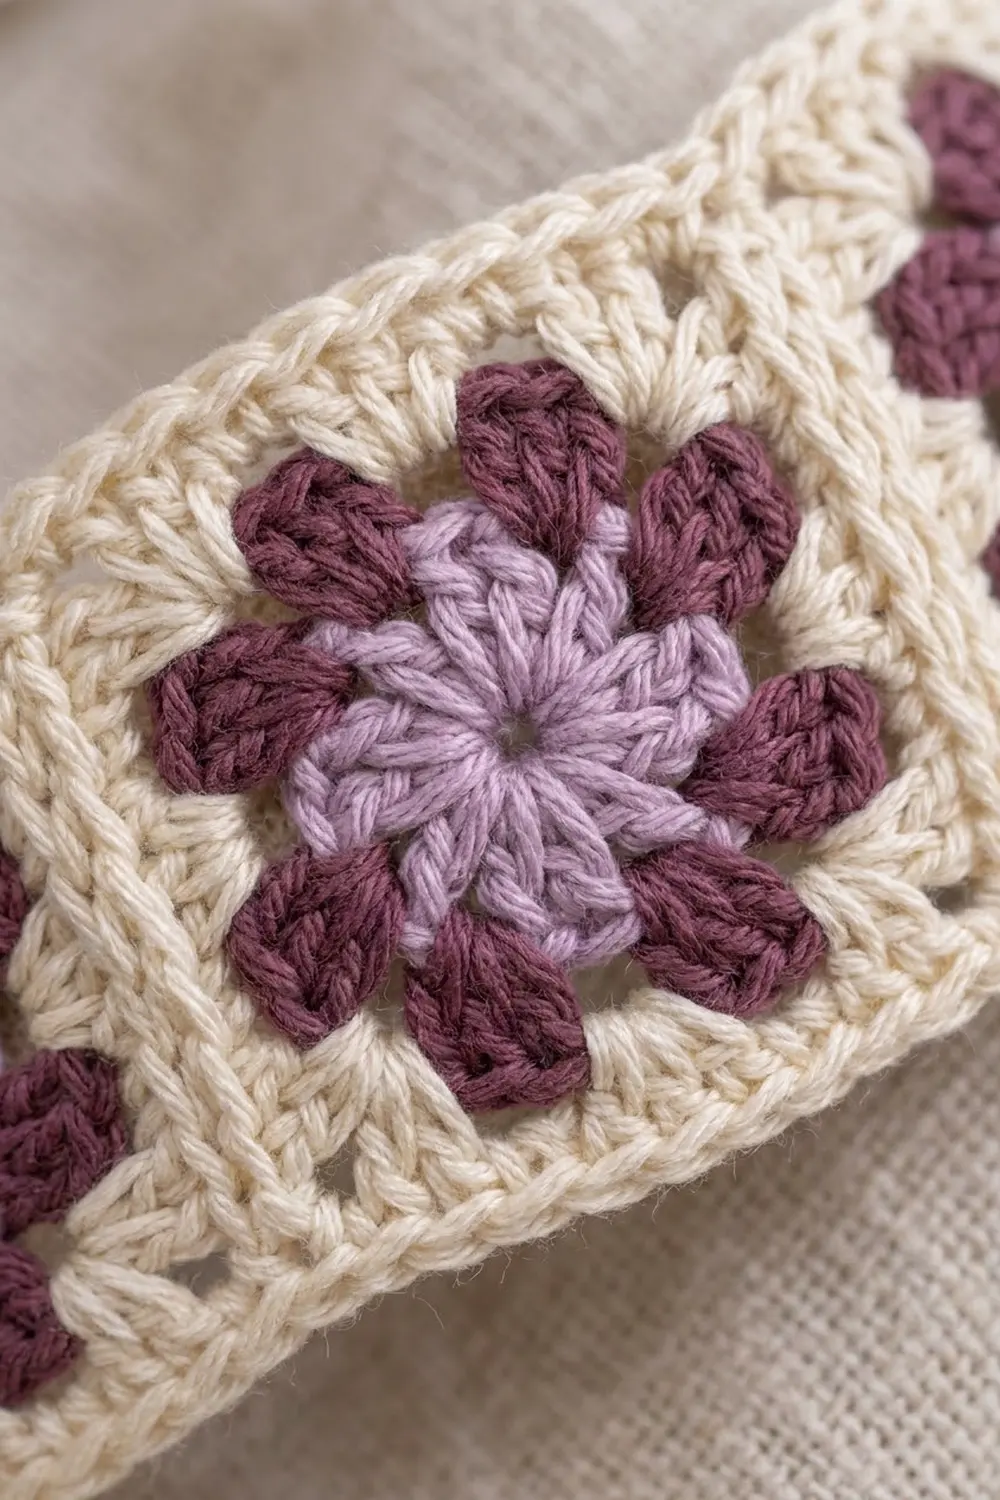
The Square (Make 8)
Round 1 (Color A, lilac)
Make a magic ring.
Ch 3 (counts as dc), then work 15 dc into the ring. Pull the tail firmly to close the center. Sl st to the top of the beginning ch-3.
Stitch count: 16 dc.
Fasten off and weave the tail through the back of the ring once more to lock the center tight.
Round 2 (Color B, dark plum)
This round turns the circle into a square: four corner groups, each with three plain dc between them.
- Join B with a sl st in any dc.
- Ch 3 (counts as dc). Work (dc, ch 2, 2 dc) in the same st. This is the first corner.
- Dc in each of the next 3 sts.
- (2 dc, ch 2, 2 dc) in the next st, then dc in each of the next 3 sts. Rep from * 2 more times.
- Sl st to the top of the beginning ch-3.
Stitch count: 28 dc and 4 ch-2 corner spaces. Each side has 7 dc: 2 from one corner, 3 plain, and 2 from the next corner.
Check: the 16 stitches of Round 1 divide into 4 repeats of (1 corner st + 3 plain sts). That gives 4 x 4 = 16 corner dc plus 4 x 3 = 12 plain dc, for 28 dc in total.
Fasten off.
Round 3 (Color C, cream)
This is a trim round that builds the frame.
- Make a standing sc in any ch-2 corner sp. Ch 1, then sc in the same sp.
- Sc in each of the next 7 dc.
- (Sc, ch 1, sc) in the next ch-2 sp, then sc in each of the next 7 dc. Rep from * 2 more times.
- Sl st to the first sc.
Stitch count: 28 sc worked one per existing dc, plus 8 sc added at the corners (2 per corner), for 36 sc and 4 ch-1 corner spaces.
Per side: 9 sc. That is 1 corner sc, 7 sc over the dc, and 1 corner sc. The 9 already includes both corner sc for that side. The ch-1 spaces sit outside the count.
Fasten off, leaving a 4 in (10.2 cm) tail. Weave in all ends on the WS, going in at least two directions, because cotton thread can work loose.
Checkpoint: 0.75 in (1.9 cm) per side.
Make All Pieces
Make 8 squares in total, all using the same color sequence.
| Color | Per square | Total for 8 squares |
|---|---|---|
| A, lilac | Round 1 | 8 rounds |
| B, dark plum | Round 2 | 8 rounds |
| C, cream | Round 3 | 8 rounds, plus joining and border |
Text layout grid ([S] = one square):
Strap A (buckle strap)     Strap B (tail strap)
[S]  <- adapter end        [S]  <- adapter end
[S]                        [S]
[S]  <- buckle end         [S]
                           [S]
                           [S]  <- free tip
Strap A is 1 square wide and 3 squares long. Strap B is 1 square wide and 5 squares long.
Joining
Method: slip-stitch seam in Color C, worked with the RS together, so the ridge sits on the WS and the RS shows a flat cream line.
Stitch-to-stitch logic: each square has 9 sc per side, so two facing sides match exactly, one stitch to one stitch.
- Hold two squares with the RS together and the edges aligned.
- Join C with a sl st through both corner ch-1 spaces at the right end.
- Sl st through both loops of both layers in each of the next 9 sc pairs.
- Sl st through both corner ch-1 spaces at the left end.
Each seam uses 11 sl sts: 9 matched stitches plus 2 corner spaces. The corner spaces are fully used by the seam, and the border will not work into them.
Join Strap A as a column of 3 squares (2 seams). Join Strap B as a column of 5 squares (4 seams). Keep every square in the same orientation so the plum corners line up.
Tension advice: keep each sl st as loose as one sc is tall. Tight seams make the strap curl lengthwise and shorten it.
Size checkpoint: Strap A should measure 0.75 x 2.25 in (1.9 x 5.7 cm). Strap B should measure 0.75 x 3.75 in (1.9 x 9.5 cm).
Border
Border gauge: 12 sc = 1 in (2.5 cm), the same as the squares.
Work one round of sc around each strap with the RS facing.
Strap A border
- Make a standing sc in the outer corner ch-1 sp at the top right. Ch 1, then sc in the same sp. This is the corner.
- Short end: sc in each of the 9 sts.
- Work (sc, ch 1, sc) in the next outer corner sp.
- Long side: sc in each st along the side, 3 squares x 9 sts = 27 sc. Skip the seam points; they have no free corner space.
- Work (sc, ch 1, sc) in the next corner sp.
- Sc in each of the 9 sts along the second short end.
- Work (sc, ch 1, sc) in the last corner sp.
- Sc in each of the 27 sts along the second long side.
- Sl st to the first sc.
Count: 9 + 27 + 9 + 27 = 72 sc worked one per existing stitch, plus 8 corner sc, for 80 sc and 4 ch-1 corner spaces.
Strap B border
Work exactly as for Strap A. Each long side is 5 x 9 = 45 sc and each short end is 9 sc.
Count: 9 + 45 + 9 + 45 = 108 sc worked one per existing stitch, plus 8 corner sc, for 116 sc and 4 ch-1 corner spaces.
Why the math works
Every border sc sits on one existing sc, and both are at 12 sc per 1 in (2.5 cm).
- A long side of 27 sc measures 2.25 in (5.7 cm), exactly the length of 3 squares.
- A long side of 45 sc measures 3.75 in (9.5 cm), exactly the length of 5 squares.
- A short end of 9 sc measures 0.75 in (1.9 cm).
No stitches are added at the seams, so the edges stay straight without flaring. The corner groups only turn the corner. The single round adds 0.08 in (0.2 cm) on every edge:
- Width: 0.75 + 0.16 = 0.91 in (2.3 cm)
- Strap A: 2.25 + 0.16 = 2.41 in (6.1 cm)
- Strap B: 3.75 + 0.16 = 3.91 in (9.9 cm)
Fasten off and weave in the ends.
Final Blocking
- Lay both straps RS up on the foam board.
- Mist them evenly with water until they are damp, not soaked.
- Pin Strap A to 0.91 x 2.41 in (2.3 x 6.1 cm), putting pins only at the corners and the seams.
- Pin Strap B to 0.91 x 3.91 in (2.3 x 9.9 cm).
- With your fingertip, nudge each seam line straight and each lilac center round.
- Let them dry completely, usually 2–4 hours.
- Unpin the straps and attach the hardware:
- Strap A: fold one short end 0.25 in (0.6 cm) around the bar of the first adapter and whipstitch the fold to the WS with C. Fold the other end 0.25 in (0.6 cm) around the center bar of the slide buckle and sew it the same way.
- Strap B: fold one short end 0.25 in (0.6 cm) around the second adapter bar and sew it. Leave the other end free.
- To wear the band, thread Strap B’s tip up through one slot of the buckle, over the center bar, and down through the other slot. Adjust for fit; friction holds it in place.
Final Quality-Control Checklist
- Each square measures 0.75 in (1.9 cm) per side.
- Each square has 16 dc in Round 1, 28 dc in Round 2 and 36 sc in Round 3.
- Every seam has 11 sl sts and lies flat on the RS.
- Strap A’s border has 80 sc; Strap B’s border has 116 sc.
- Both straps are 0.91 in (2.3 cm) wide.
- The folds are sewn securely, with no thread showing on the RS.
- All ends are woven in at least two directions.
- Strap B slides through the buckle smoothly but holds firm.
Troubleshooting
The center has a hole. Pull the magic-ring tail harder before joining, and run the tail through the ring a second time.
The squares are cupping. Your Round 2 dc are too tight. Loosen the first yarn-over, or check that you have exactly 3 plain dc between corners.
The squares are rippling. Recount Round 3. More than 7 sc per side between corner spaces adds ruffle.
The strap curls lengthwise. The seams are too tight. Undo them and rejoin more loosely, or block again with more pins.
The strap won’t fit through the adapter. Rework the squares with a smaller hook, or replace the border sc with sl sts on the long sides only.
The buckle slips. Fold the tip back 0.25 in (0.6 cm) and sew it down to make a stopper, or choose a buckle with a narrower center-bar gap.
Care
Hand wash in cool water with mild soap, pressing gently rather than wringing. Remove the watch first, lay the band flat to dry, and reshape it while damp.
Final Notes
The measurement chain is short and reliable: 12 sc = 1 in (2.5 cm), so a 9-stitch side gives a 0.75 in (1.9 cm) square. Three squares make 2.25 in (5.7 cm) and five make 3.75 in (9.5 cm). The one-round border adds 0.08 in (0.2 cm) on every edge, giving a 0.91 in (2.3 cm) wide band that fits neatly through standard hardware. Check your first square, keep your seams relaxed, and the rest falls into place.
Happy crocheting!