

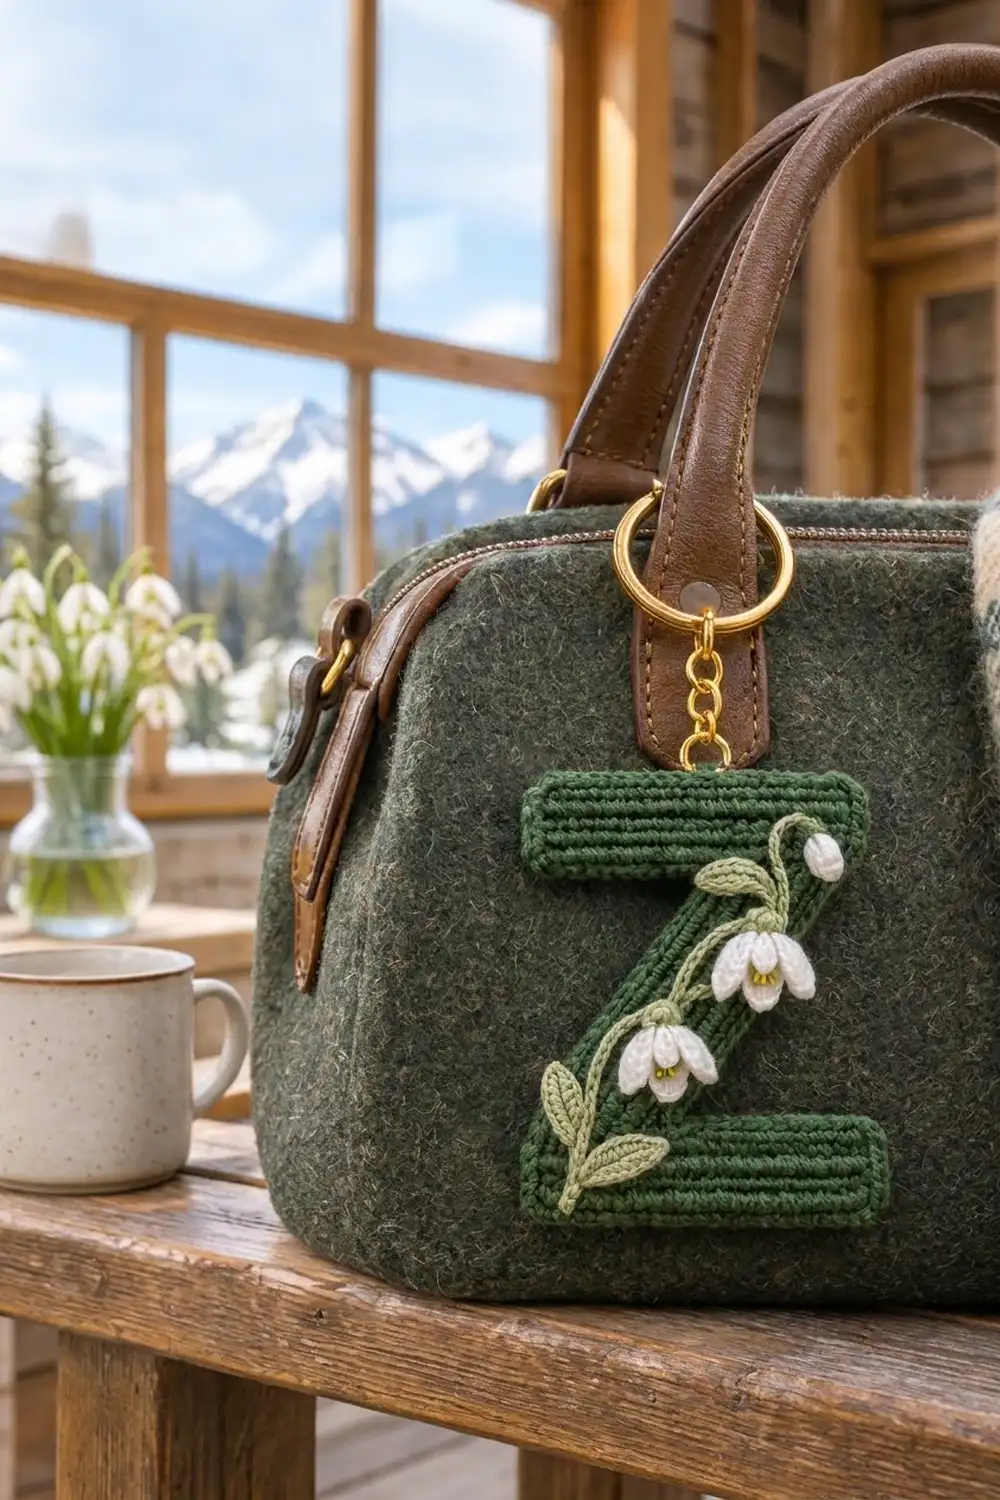
This little letter Z keychain pairs a crisp, ribbed initial in deep forest green with a delicate snowdrop sprig in sage green and white. It is a quick, satisfying project that makes a personal gift and looks lovely clipped to a bag handle.
The letter is worked flat in rows of half double crochet. Stacked hdc posts create the fine vertical ribbing on the bars, and one round of single crochet gives the outline a neat, raised finish with rounded corners. The flowers, bud, leaves, and stem are made separately in finer yarn and sewn on.
This pattern uses US crochet terms. The finished keychain measures 3.83 in (9.7 cm) wide and 4.5 in (11.4 cm) tall, not counting the hardware.
The construction is easy to follow. Work the bottom bar first, build the diagonal with short shifting rows, and add the top bar with a chain extension. A single border round then joins the whole outline. Add the appliqués and the key ring last.
Finished Size and Construction
- Finished size: 3.83 in (9.7 cm) wide x 4.5 in (11.4 cm) tall
- Skill level: Intermediate (shaping with chain and foundation extensions)
- Terminology: US crochet terms
- Yarn weight: DK (3) for the letter; fingering (1) for the appliqués
- Hook: 3.5 mm for the letter; 2.0 mm for the appliqués
- Number of pieces: 1 letter, worked in one continuous piece, plus 9 small appliqué parts
- Layout: single letter Z
- Size before border: 3.33 in (8.5 cm) wide x 4.0 in (10.2 cm) tall
- Border depth: 0.25 in (0.6 cm) on every edge
- Bar height: 0.67 in (1.7 cm) before border, 1.17 in (3.0 cm) after border
Materials
Choose a smooth, mercerized cotton or cotton blend. It shows the ribbing clearly, holds its shape, and stands up to the wear a keychain gets.
- Color A, forest green (DK): 15 g, about 32 m
- Color B, sage green (fingering): 5 g, about 17 m
- Color C, white (fingering): 5 g, about 17 m
- Color D, yellow-green embroidery floss: under 1 g, about 1 m
All quantities include a generous margin for gauge swatches and sewing tails.
Tools:
- 3.5 mm and 2.0 mm crochet hooks
- Gold split key ring, 1 in (2.5 cm), with a short chain and jump ring
- Tapestry needle and a fine sharp embroidery needle
- Stitch markers
- Blocking mat, rust-proof pins, and a spray bottle
- Scissors and a ruler
Abbreviations (US Terms)
- ch – chain
- sl st – slip stitch
- sc – single crochet
- hdc – half double crochet
- dc – double crochet
- dc3tog – double crochet 3 together
- MR – magic ring
- st(s) – stitch(es)
- RS / WS – right side / wrong side
Special stitch – fhdc extension: At the end of a row, yarn over and insert the hook into the bottom “chain” of the last hdc made. Yarn over and pull up a loop, then yarn over and pull through 1 loop (this forms the new chain). Yarn over and pull through all 3 loops. Work the next fhdc into the chain of the fhdc you just made. Each fhdc counts as 1 hdc.
Gauge and Checkpoints
Gauge: 12 hdc and 6 rows = 2 in (5.1 cm) square with Color A and the 3.5 mm hook. That is 6 sts and 3 rows per inch. Each hdc is about 1/6 in (0.4 cm) wide and each row is 0.33 in (0.8 cm) tall.
Work a small swatch first: ch 14, then work 6 rows of 12 hdc. Measure the middle of the swatch, not the edges.
Checkpoints:
- After Row 2: 3.33 in (8.5 cm) wide x 0.67 in (1.7 cm) tall
- After Row 10: 3.33 in (8.5 cm) tall at the right end
- After Row 12: 3.33 in (8.5 cm) wide x 4.0 in (10.2 cm) tall
- After the border: 3.83 in (9.7 cm) wide x 4.5 in (11.4 cm) tall
If your swatch is too big, go down 0.25 mm. If it is too small, go up 0.25 mm. Row height matters as much as width here, because the diagonal moves exactly 2 sts per row to keep its 45-degree angle.
The Letter
Positions are numbered 1 to 20 from left to right as seen from the RS. Turning ch-2 never counts as a stitch. Row 2 and all other even rows are RS rows. Place a marker on the RS after Row 2.
Bottom Bar
Row 1 (WS): With Color A and the 3.5 mm hook, ch 22. Hdc in 3rd ch from hook and in each ch across. (20 hdc)
Row 2 (RS): Ch 2, turn, hdc in each st across. (20 hdc) Row 2 ends at position 1, the left end as seen from the RS.
Diagonal
The diagonal is 6 sts wide. Each row gains 2 sts on its right side and loses 2 on its left, so the bar steps up and to the right.
Row 3 (WS): Ch 2, turn, hdc in the first 6 sts, leave the remaining 14 sts unworked. (6 hdc, positions 1–6)
Row 4 (RS): Ch 4, turn, hdc in 3rd ch from hook and in next ch (2 hdc, positions 8 and 7), hdc in next 4 sts, leave the last 2 sts unworked. (6 hdc, positions 3–8)
Row 5 (WS): Turn, sl st in first 2 sts, ch 2, hdc in next 4 sts, work 2 fhdc extensions. (6 hdc, positions 5–10)
Row 6: Repeat Row 4. (6 hdc, positions 7–12)
Row 7: Repeat Row 5. (6 hdc, positions 9–14)
Row 8: Repeat Row 4. (6 hdc, positions 11–16)
Row 9: Repeat Row 5. (6 hdc, positions 13–18)
Row 10: Repeat Row 4. (6 hdc, positions 15–20)
Row 10 lines up exactly with the right end of the bottom bar. Check: the right end now stands 3.33 in (8.5 cm) tall.
Top Bar
Row 11 (WS): Ch 16, turn, hdc in 3rd ch from hook and in next 13 ch (14 hdc, positions 1–14), hdc in each of the 6 sts of Row 10 (positions 15–20). (20 hdc)
Row 12 (RS): Ch 2, turn, hdc in each st across. (20 hdc)
Do not fasten off. The letter now measures 3.33 in (8.5 cm) x 4.0 in (10.2 cm).
Border
Border gauge: Work sc along the edges at 6 sts per inch, matching the hdc. Work 1 sc in each stitch top or underside. Work 2 sc in each hdc row end, since each row is 0.33 in (0.8 cm) tall.
Corner group: (sc, hdc, sc) in the same stitch. This rounds off each of the 8 outer bar corners. Concave inner corners take no extra stitches; the sc pulls neatly into the angle.
Round 1 (RS): Ch 1, turn so the RS faces you. Work counterclockwise:
- Top edge of top bar: corner group in position 20, sc in positions 19–2, corner group in position 1. (24 sts = 20 worked 1-per-stitch + 4 extra at corners)
- Left end of top bar: 2 sc in each row end of Rows 12 and 11. (4 sts)
- Underside of top bar: working into the chain underside of Row 11, corner group in position 1, sc in positions 2–14. (16 sts = 14 + 2 extra)
- Upper-left edge of diagonal: 2 sc in the row end of Row 10. For Rows 9 down to 4, sc in the 2 exposed tops (or sl sts) and 2 sc in the row end. Finish with sc in position 2 of Row 3 and a corner group in position 1. (30 sts = 14 row-end sts + 14 top sts + 2 extra)
- Left end of bottom bar: 2 sc in each row end of Rows 3, 2, and 1. (6 sts)
- Bottom edge: working into the foundation chain, corner group in position 1, sc in positions 2–19, corner group in position 20. (24 sts = 20 + 4 extra)
- Right end of bottom bar: 2 sc in each row end of Rows 1 and 2. (4 sts)
- Top of bottom bar: corner group in position 20 of Row 2, sc in positions 19–7. (16 sts = 14 + 2 extra)
- Lower-right edge of diagonal: 2 sc in the row end of Row 3. For Rows 4 up to 9, sc in the 2 exposed undersides and 2 sc in the row end. Finish with sc in position 19 of Row 10’s underside and a corner group in position 20. (30 sts = 14 + 14 + 2 extra)
- Right end of top bar: 2 sc in each row end of Rows 10, 11, and 12. (6 sts)
Sl st to the first sc. Fasten off. (160 sts total)
Why the math works: Every stitch and row end on the outline is covered once, at the same 6-per-inch rate as the fabric, so the edge lies flat. The total breaks down like this:
- 40 sts on the four horizontal bar edges
- 20 row-end sts on the bar ends
- 84 sts on the two diagonal edges (28 row-end sts + 56 top or underside sts)
- 16 extra corner sts (2 at each of the 8 corners)
One sc round adds 0.25 in (0.6 cm) per side. The width grows from 3.33 in (8.5 cm) to 3.83 in (9.7 cm), and the height grows from 4.0 in (10.2 cm) to 4.5 in (11.4 cm).
Snowdrop Appliqués
Use the 2.0 mm hook. Leave 6 in (15.2 cm) tails for sewing.
Stem (make 1)
With Color B, ch 30, sl st in 2nd ch from hook and in each ch across. (29 sl sts, about 3.0 in / 7.6 cm)
Leaves (make 4)
With Color B, ch 8. Working in 2nd ch from hook: sl st, sc, hdc, dc, dc, hdc in next 6 ch; (sc, ch 2, sc) in last ch for the tip. Working along the other side of the chain: hdc, dc, dc, hdc, sc, sl st. Sl st to the first sl st. Each leaf is about 0.7 in (1.8 cm) long and pointed at both ends.
Flowers (make 3)
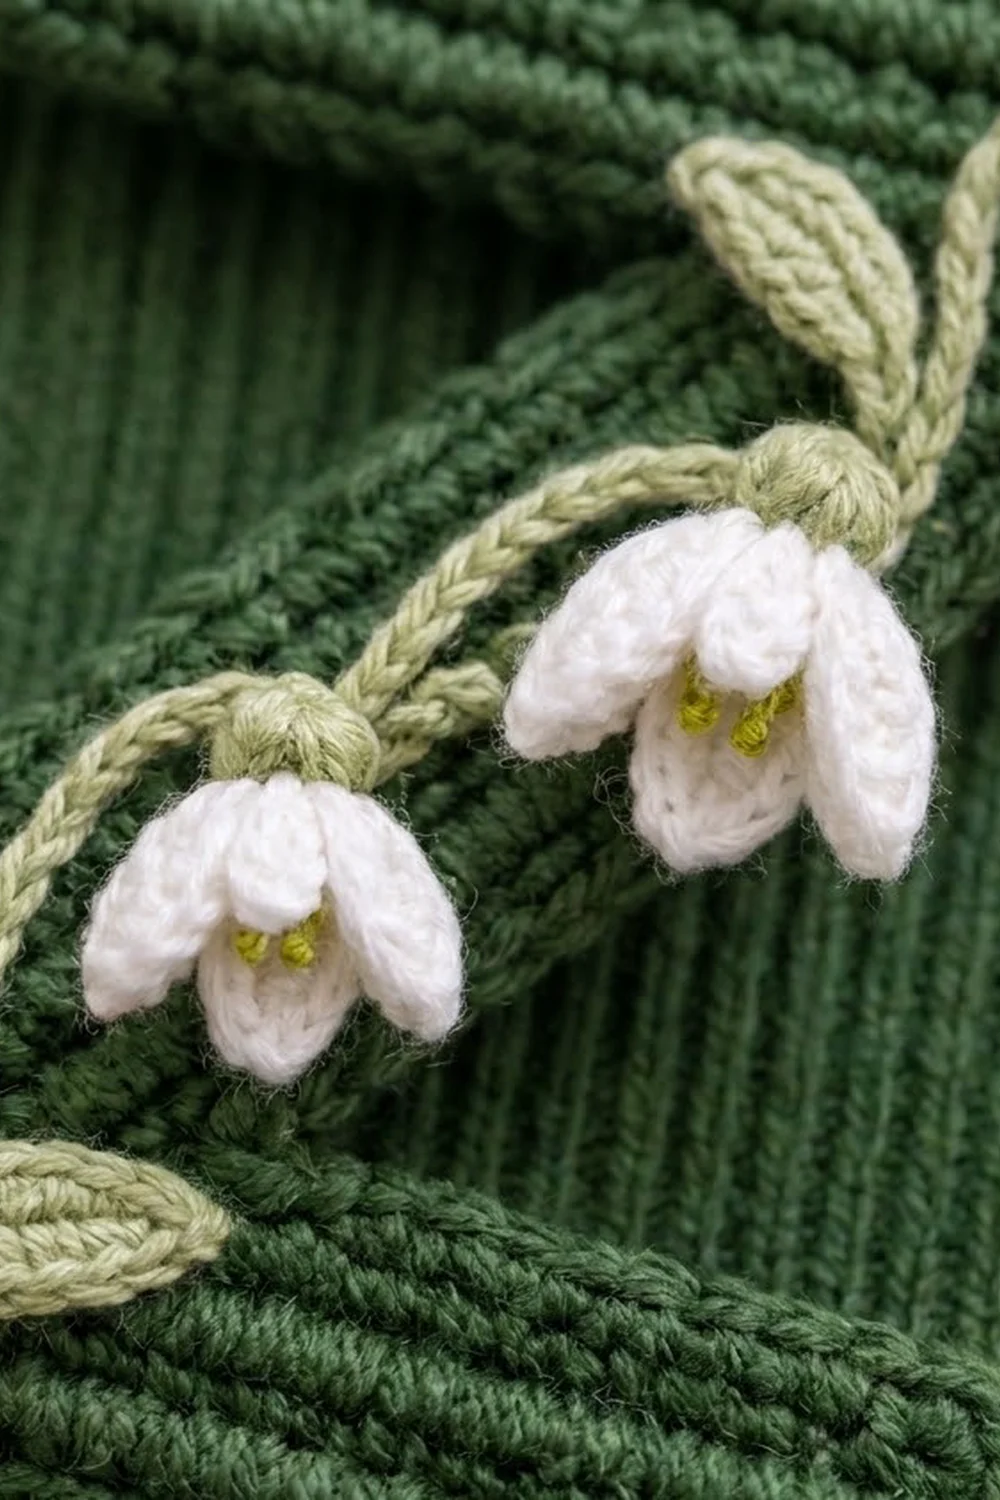
With Color C, MR. Ch 5, sl st in 2nd ch from hook, sc in next ch, hdc in next ch, dc in last ch, sl st in ring. Repeat from * to * 2 more times. (3 petals) Pull the ring closed and cup the petals downward into a bell about 0.5 in (1.3 cm) long.
Cap: With Color B, join with a sl st at the closed center, ch 6 for the flower stalk. Fasten off.
Accent: With Color D, make 2 tiny straight stitches at the tip of the center petal so the yellow-green shows at the opening.
Bud (make 1)
With Color C, ch 3, dc3tog in 3rd ch from hook, ch 1 to close. Fasten off. With Color B, sl st into the top, ch 5. Fasten off. The bud is about 0.4 in (1.0 cm) long.
Placement
Lay the letter RS up. Start the stem on the bottom bar, about 0.6 in (1.5 cm) in from the left end. Curve it up along the right half of the diagonal so it ends on the top bar, a little right of center. Couch it down with Color B every 0.25 in (0.6 cm).
Sew two leaves at the base, one leaf halfway up on the left of the stem, and one near the top. Sew the three flower stalks to the right side of the stem so the bells hang down over the diagonal. Sew the bud stalk at the very top so the bud tips over the top bar.
Final Blocking
- Weave in all Color A tails along the border, on the WS.
- Pin the letter RS up on the mat to 3.83 in (9.7 cm) x 4.5 in (11.4 cm), pinning each of the 8 corners.
- Check that the diagonal edges are straight and the bars are parallel.
- Mist lightly and let dry completely, about 4 hours.
- Remove the pins, then add the appliqués if you blocked before sewing.
- Open the jump ring and pass it through the border at the center of the top edge, between positions 10 and 11. Close it with the chain and split ring attached.
Final Quality-Control Checklist
- Rows 1, 2, 11, and 12 each have 20 hdc; Rows 3–10 each have 6 hdc.
- The border round has 160 sts with 8 rounded corner groups.
- Size is 3.83 in (9.7 cm) x 4.5 in (11.4 cm).
- The diagonal runs from bottom-left to top-right, reading as a Z from the RS.
- All appliqués are secure and no tails show on the front.
- The jump ring is fully closed.
Troubleshooting
The letter reads as a backwards Z. You are looking at the WS. Turn it over; the RS is the side facing you while you work Row 2.
The diagonal is too steep or too shallow. Row height is off. Change hook size to match 3 rows per inch.
The border ruffles. Go down a hook size for the border only.
The border cups. Go up a hook size for the border only.
The diagonal edges look jagged. Make sure every row end gets 2 sc; skipped ends create notches.
Flowers flop open. Pull the magic ring tighter and add one small stitch where the petals meet.
Care
Hand wash in cool water, press out the moisture in a towel, and dry flat. Remove the metal hardware before washing if possible.
Final Notes
The measurement chain is short and reliable. A gauge of 6 hdc and 3 rows per inch gives a 3.33 in (8.5 cm) x 4.0 in (10.2 cm) letter after Row 12. One 160-stitch border round adds 0.25 in (0.6 cm) per side, for a finished keychain of 3.83 in (9.7 cm) x 4.5 in (11.4 cm). Check each stage, and the snowdrops will sit beautifully on a crisp, flat Z.
Happy crocheting!