

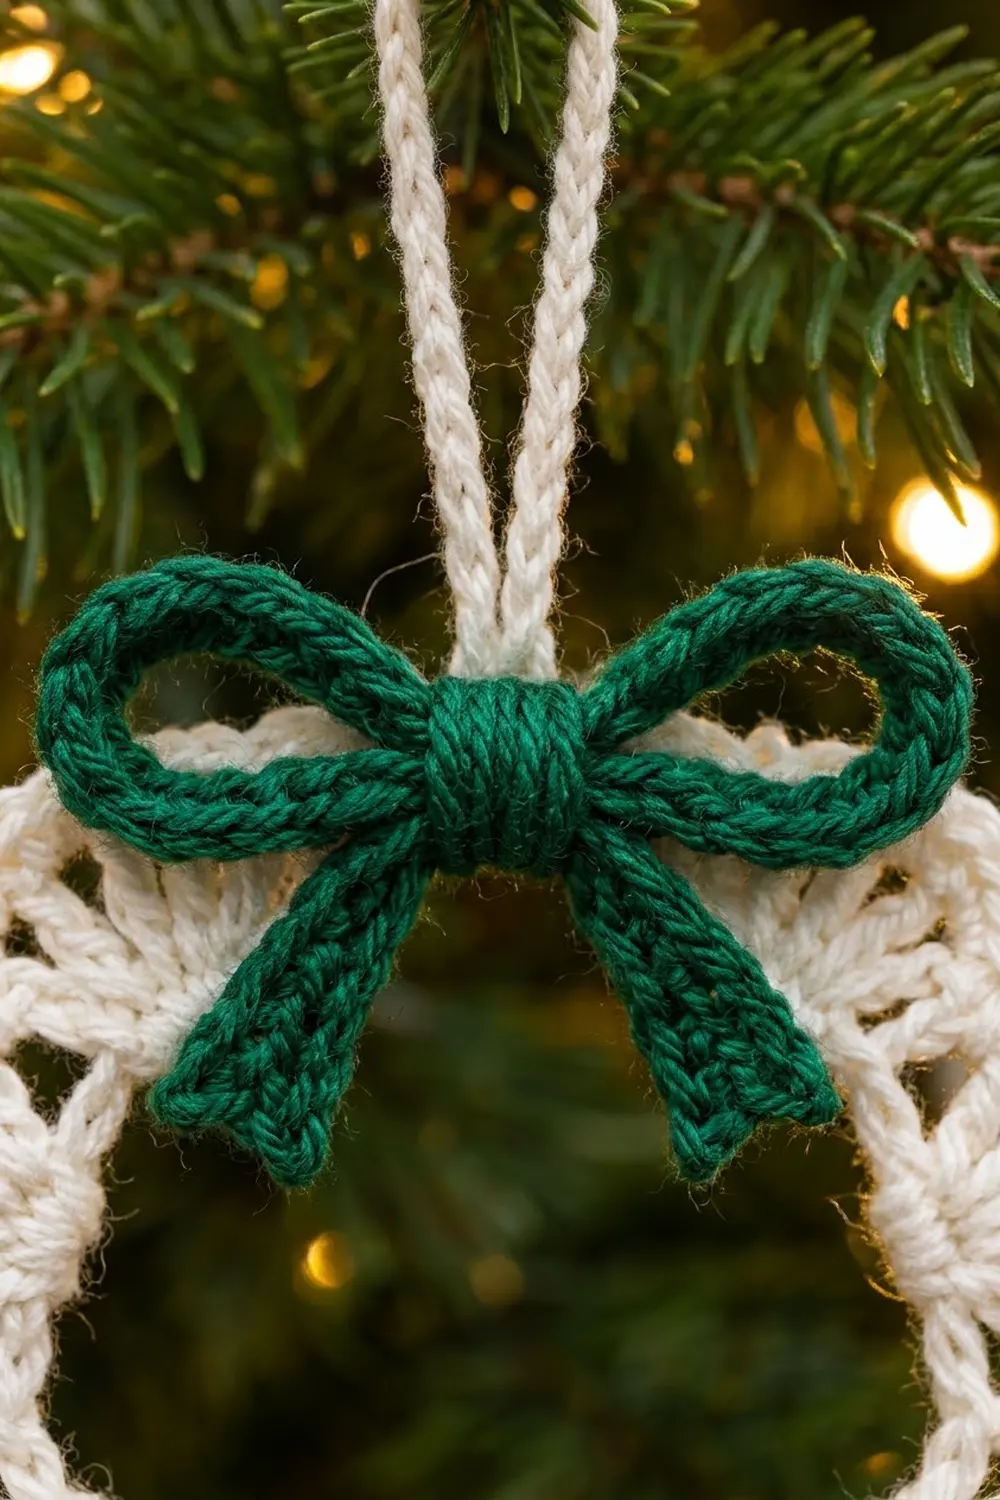
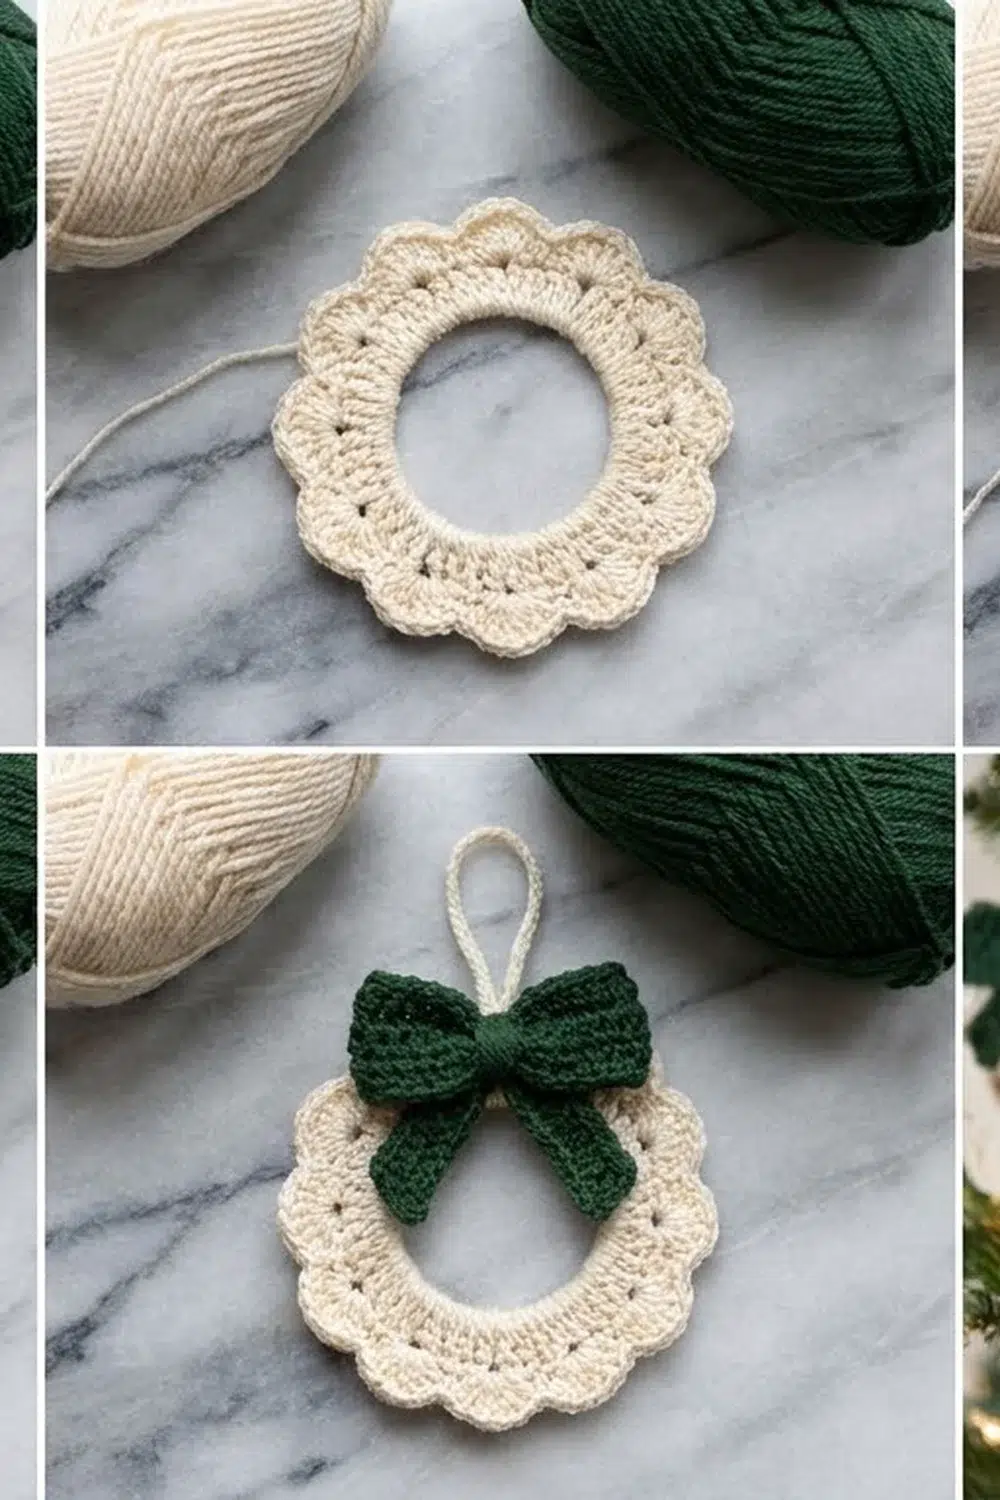
This little wreath ornament is a soft, lacy ring of cream fans finished with a crisp forest-green bow. It looks delicate on the tree but takes under an hour to make. That makes it a good choice for gift toppers, advent projects and last-minute handmade decorations.
The design uses two colors. Warm cream is used for the scalloped ring and its hanging loop, and deep green for the bow. Ten fan-shaped shells go around the ring. Each fan has open double-crochet spokes that let the tree lights show through. A plain single-crochet rim smooths the outer edge into neat, even scallops.
This pattern uses US crochet terms. The finished ornament measures about 3.5 in (8.9 cm) across, with a center opening of about 1.7 in (4.3 cm). The bow is about 1.8 in (4.6 cm) wide.
You make the ring in the round from a chain loop. Round 1 is a solid single-crochet base, Round 2 adds the ten fans, and Round 3 is the scalloped rim. The bow is a slip-stitch cord folded into shape and wrapped at the center. The hanging loop is a simple chain. You sew on the bow and the loop after blocking.
Finished Size and Construction
- Finished size: 3.5 in (8.9 cm) diameter
- Center opening: about 1.7 in (4.3 cm)
- Skill level: Easy
- Terminology: US crochet terms
- Yarn weight: DK (#3), cotton or cotton blend
- Hook: 3.5 mm (E-4)
- Number of pieces: 1 ornament (1 wreath ring, plus 1 bow and 1 hanging loop sewn on)
- Layout: single ring, bow at top center, loop behind the bow
- Piece size: 3.5 in (8.9 cm) across
- Size before border: 3.1 in (7.9 cm) after Round 2
- Border depth: 0.2 in (0.5 cm) on each side
Materials
Choose a smooth, tightly plied DK cotton or cotton blend. Mercerized cotton gives the cleanest stitch definition and helps the scallops keep their shape. A yarn with about 120 m per 50 g on the label is a good match.
- Color A, cream: 8 g (about 20 m) for the ring and hanging loop
- Color B, forest green: 3 g (about 7 m) for the bow and center wrap
These amounts include a small margin for testing your gauge and weaving in ends. If you’re making a set, one 50 g ball of cream makes about 6 ornaments.
Tools:
- 3.5 mm (E-4) crochet hook
- Tapestry needle
- Scissors
- 1 stitch marker
- Rustproof pins and a foam blocking mat
- Spray bottle of water, or fabric stiffener (optional)
Abbreviations (US Terms)
- ch – chain
- sl st – slip stitch
- sc – single crochet
- dc – double crochet
- st(s) – stitch(es)
- rnd – round
- rep – repeat
Special stitch – shell: 7 dc worked into the same stitch. The stitches fan out from one point and form the spokes of each scallop.
Back-bump slip stitch: Put the hook into the bump on the back of the chain (not the top two loops). Yarn over and pull through both the chain and the loop on the hook. This makes a firm, rounded cord.
Gauge and Checkpoints
Gauge: 10 sc = 2 in (5.1 cm) with a 3.5 mm hook. One dc is about 0.5 in (1.3 cm) tall.
For a small ornament, the ornament itself is the best gauge test. Make one ring and check it against the measurements below. Then decide whether to change hooks for the rest of the set.
Checkpoints:
- After Round 1: Outer diameter 2.1 in (5.3 cm), opening about 1.7 in (4.3 cm), and the ring lies flat.
- After Round 2: Diameter 3.1 in (7.9 cm). The fans may cup a little before the rim goes on.
- After Round 3: Diameter 3.5 in (8.9 cm), and the scallops lie flat after blocking.
- Bow cord: About 6 in (15.2 cm) long before shaping.
If your ring is too big: Go down to a 3.25 mm (D-3) hook, or work the dc a little tighter. A ring that comes out too big usually means the Round 1 chain is too loose.
If your ring is too small or the fans ruffle: Go up to a 3.75 mm (F-5) hook. If Round 2 ruffles, the base is too small to hold seven dc per shell.
Wreath Ring
Foundation and Round 1 (solid base)
With Color A, ch 30. Make sure the chain isn’t twisted, then join with a sl st to the first ch to form a ring.
Rnd 1: Ch 1 (does not count as a st), sc in each ch around. Join with a sl st to the first sc. (30 sc)
Work the chain loosely. Keep the ring flat on the table while you work Rnd 1 so it doesn’t pull into a cup. Check: diameter 2.1 in (5.3 cm).
Round 2 (fan shells)
Each repeat is worked over 3 sts of Rnd 1: one sc, one shell, then another sc. Each repeat starts and ends with a sc, so the dip between two fans has 2 sc side by side. That gives a clean, even dip on both sides of each fan.
Rnd 2: Ch 1 (does not count). Sc in next sc, 7 dc in next sc (shell), sc in next sc. Rep from * to * 9 more times. Join with a sl st to the first sc. (10 shells; 20 sc + 70 dc = 90 sts)
Place a marker in any dip between two fans to mark the top of the ornament. Check: diameter 3.1 in (7.9 cm). Each shell should spread into a half-fan with gaps between the dc. These gaps are the “spokes” you see in the finished piece.
Don’t fasten off. Round 3, the rim, is in the Border section below.
Bow
With Color B, ch 31.
Row 1: Sl st in the back bump of the 2nd ch from the hook and in the back bump of each ch across. (30 sl st)
Fasten off, leaving a 4 in (10.2 cm) tail at each end. The cord should be about 6 in (15.2 cm) long, firm and slightly rounded. For a plumper bow like the one in the photo, work the cord with two strands of Color B held together on a 4 mm (G-6) hook. Use the same stitch count.
Shaping the bow:
- Lay the cord flat, right side up. Measure 1 in (2.5 cm) in from one end. This is the first tail.
- Fold the cord up and back to make a loop about 0.8 in (2.0 cm) long, ending at the center point.
- Repeat on the other side to make a second loop of the same size, leaving the last 1 in (2.5 cm) as the second tail.
- Cross the two tails under the center so they angle down and out in an upside-down V.
- Cut 12 in (30.5 cm) of Color B. Wrap it tightly around the center 6 to 8 times to make a neat knot. Then stitch through the back to hold it in place.
- With the yarn tails left from fastening off, sew each end of the cord at a slight angle so the ends look notched. Then weave the tails in.
Finished bow: about 1.8 in (4.6 cm) wide, with tails hanging about 1 in (2.5 cm) below the knot. Keep the Color B wrap tail for sewing the bow on.
Hanging Loop
With Color A, ch 20, leaving a 6 in (15.2 cm) tail at the start and at the end. Fasten off.
The chain should be about 3.5 in (8.9 cm) long. Folded in half, it makes a loop about 1.75 in (4.4 cm) tall.
Border (Scalloped Rim)
Round 3 is the rim. You work one stitch into each stitch of Round 2, plus extra stitches at both ends of each shell so the sc can curve around the fan.
Border gauge: Same as the body, 5 sc per 1 in (2.5 cm). The rim adds 0.2 in (0.5 cm) all the way around, which adds 0.4 in (1.0 cm) to the total diameter.
Rnd 3: Ch 1 (does not count). Sl st in next sc, 2 sc in next dc, sc in each of next 5 dc, 2 sc in next dc, sl st in next sc. Rep from * to * 9 more times. Join with a sl st to the first sl st. (110 sts: 90 sts worked 1-per-existing-stitch + 20 extra sc)
Per scallop: You work into 9 sts (1 sc, 7 dc, 1 sc) and add 2 extra sc, for 11 sts. That’s 2 sl st + 9 sc.
Fasten off and weave in ends. Check: diameter 3.5 in (8.9 cm).
Why the math works:
- Rnd 1 has 30 sts. Ten repeats of 3 sts use exactly 30 sts, so nothing is skipped or crowded.
- Rnd 2 has 10 × 9 = 90 sts. The two sc in each dip line up with the two sl st in Rnd 3, so the dips stay low and flat.
- Rnd 3 has 10 × 11 = 110 sts. The extra sc at each end of a shell give the rim enough length to go around the curve. Each of the 5 middle dc gets 1 sc, so the top of each scallop stays smooth and doesn’t ripple.
- Sizes: the ring is 2.1 in (5.3 cm) after Rnd 1. Add two dc heights of 0.5 in (1.3 cm) each to get 3.1 in (7.9 cm). Add two rim depths of 0.2 in (0.5 cm) each to get 3.5 in (8.9 cm).
Final Blocking
- Lightly spray the ring with water until it’s damp, or dip it in diluted fabric stiffener and squeeze out the excess.
- Lay it right side up on the blocking mat. Gently pat it into a circle 3.5 in (8.9 cm) across.
- Check that the opening is round and about 1.7 in (4.3 cm) wide.
- Pin each dip between fans first (10 pins), spacing them evenly around the circle.
- Pin the tip of each scallop so the 7 spokes fan out evenly.
- Leave it to dry completely: about 4 to 6 hours, or overnight if you used stiffener.
- Hold the bow over steam for a moment, pinch the loops round, and let it cool flat.
- Attach the loop: Fold the chain in half. On the back of the ring, sew both ends to the marked top dip, stitching through Rnds 1 to 3 so the loop stands up straight.
- Attach the bow: Center the bow over the same dip on the front. Use the Color B tail to sew through the wrapped knot and into Rnds 2 and 3. The bow should cover where the loop is attached. Add one small stitch under each bow loop so the loops don’t flop forward.
- Weave in all remaining ends on the back.
Final Quality-Control Checklist
- Rnd 1 has 30 sc, Rnd 2 has 90 sts, and Rnd 3 has 110 sts.
- There are 10 even scallops, each with 7 visible spokes.
- Every dip between fans is the same depth, with 2 sl sts.
- The diameter is 3.5 in (8.9 cm) and the opening is about 1.7 in (4.3 cm).
- The ornament lies flat, without cupping or ruffling.
- The bow is centered at the top, with matching loops and tails.
- The hanging loop is straight and hidden behind the bow.
- No ends show on the front.
Troubleshooting
The ring twists into a figure eight. The foundation chain was twisted when you joined it. Undo it and rejoin with all the chain bumps facing the same way.
The fans ruffle. Rnd 1 is too tight. Rework it with a looser chain, or go up a hook size for Rnd 1 only.
The ornament cups like a bowl. Rnd 2 is too tight for its base. Loosen your dc, or block firmly with stiffener.
The scallops look pointed instead of round. Make sure you’re working 2 sc into the first and last dc of each shell.
The bow loops don’t match. Undo the wrap, measure each loop at 0.8 in (2.0 cm), and wrap again.
The ornament tilts on the tree. The loop is sewn off-center. Move both ends so they sit on the marked top dip.
Care
Hand wash in cool water with mild soap. Press out the water with a towel and lay the ornament flat in shape to dry. Store it flat, or hang it so the scallops don’t get crushed.
Final Notes
Here are all the measurements in order. With a gauge of 10 sc = 2 in (5.1 cm), the 30-sc base ring measures 2.1 in (5.3 cm). Ten 7-dc shells bring it to 3.1 in (7.9 cm), and the 110-st rim finishes it at 3.5 in (8.9 cm). The green cord has 30 sts and is about 6 in (15.2 cm) long, which makes a 1.8 in (4.6 cm) bow. The 20-ch cream loop folds into a 1.75 in (4.4 cm) hanger. If every checkpoint matches, all the wreaths in your set will come out the same size.
Happy crocheting!