

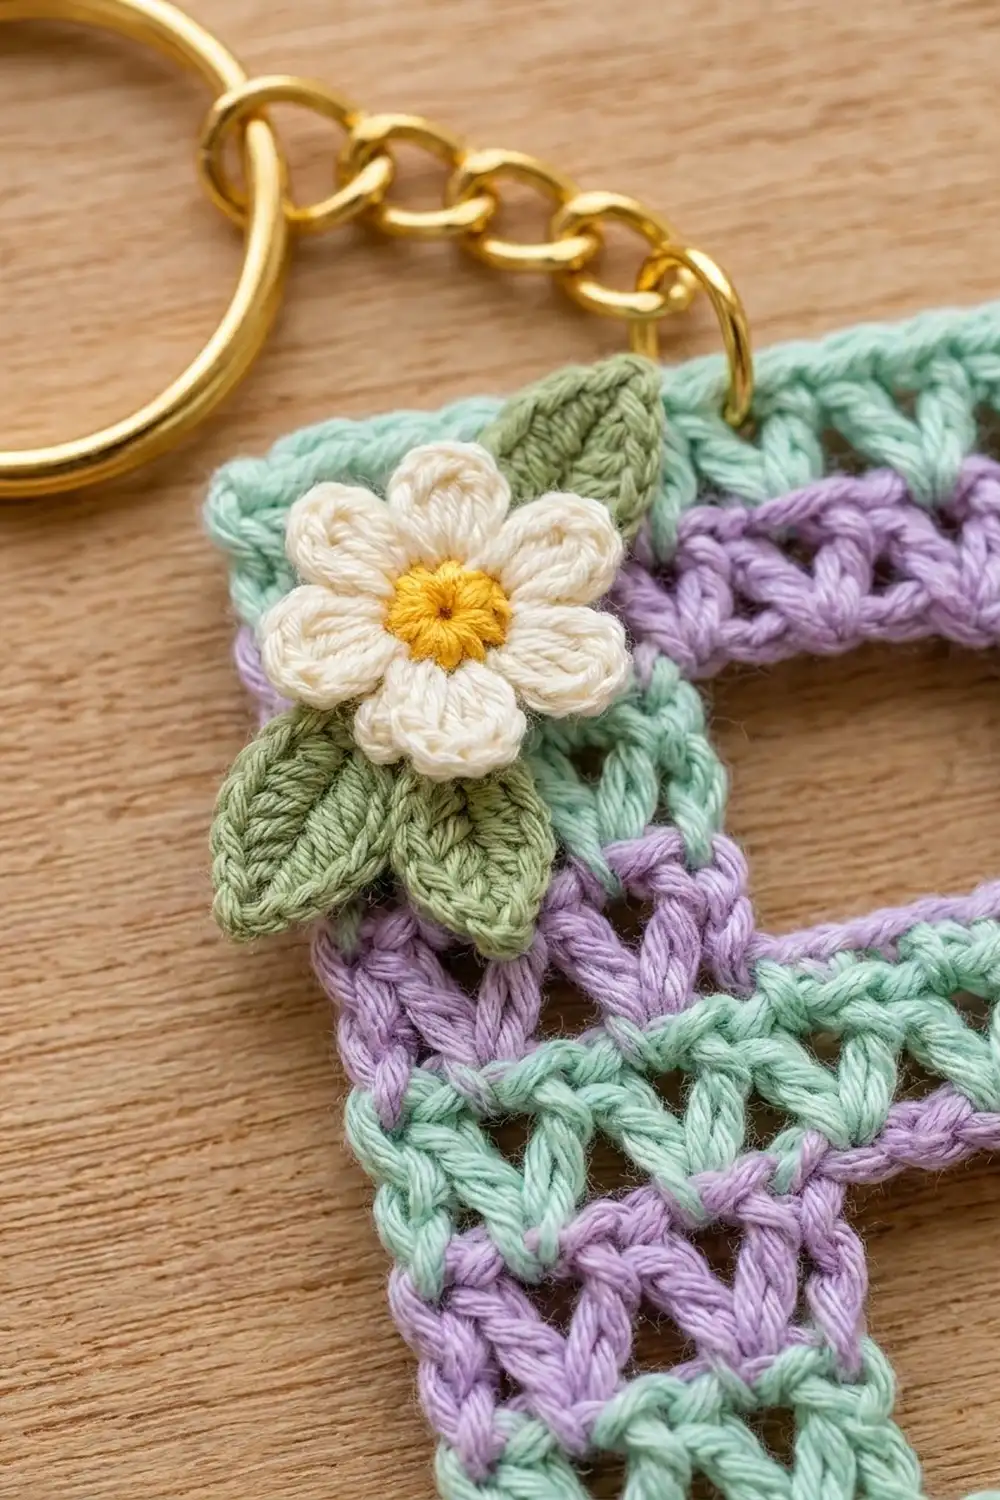
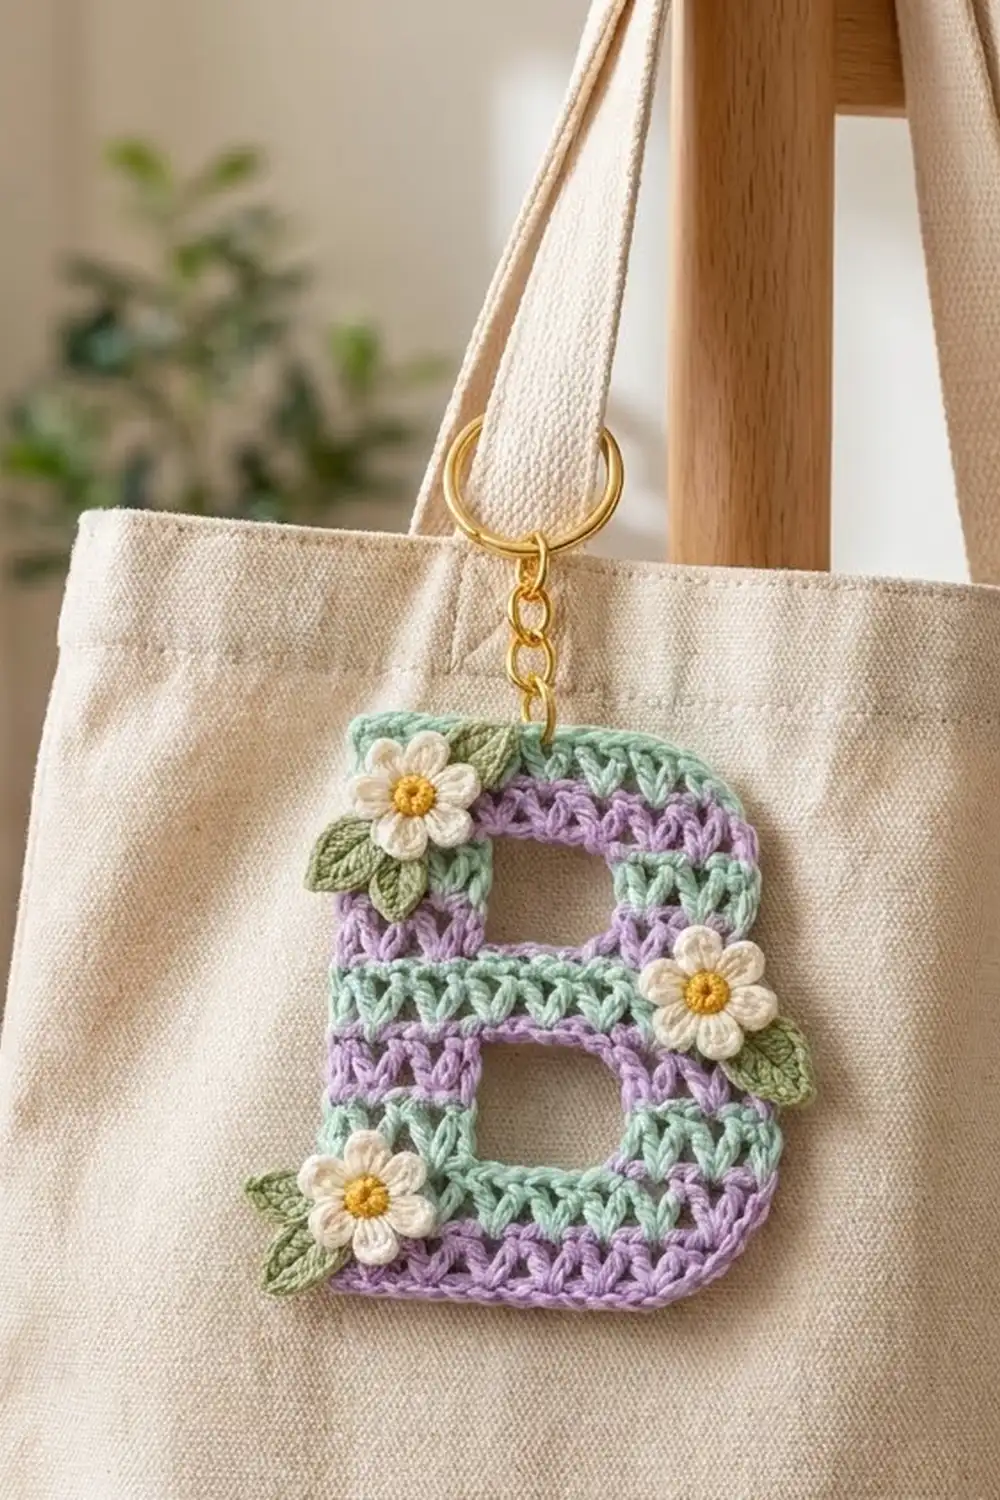
The Spring Meadow Letter B is a small, airy initial charm worked in open V-stitches. One-row stripes of soft lavender and fresh mint give it a woven texture, almost like a basket. Three tiny cream flowers with golden centers and sage-green leaves add a sweet garden touch.
The look is light and pastel. It works well clipped onto a tote bag, backpack, or set of keys, and it makes a quick personalized gift.
The pattern uses US crochet terms. The finished charm measures 3.2 in (8.1 cm) wide at the base and 4.4 in (11.2 cm) tall, not including the key ring.
You work the letter flat in 10 rows from the bottom up, starting every row with the right side facing. To make the two openings, you work the stem and bowl separately, then bridge the gap with a chain. One round of single crochet neatens the outline, and you sew the flowers and leaves on last.
Finished Size and Construction
- Finished size: 3.2 in (8.1 cm) wide at the base x 4.4 in (11.2 cm) tall
- Skill level: Easy to intermediate
- Terminology: US crochet terms
- Yarn weight: DK (light worsted, #3) cotton
- Hook: 3.5 mm (E-4)
- Number of pieces: 1 letter body, plus 3 flowers and 5 leaves as appliqués
- Layout: single piece, no joining
- Piece size before border: 2.8 in (7.1 cm) wide at the base, 2.4 in (6.1 cm) wide at the top, 4 in (10.2 cm) tall
- Border depth: 1 round of sc, about 0.2 in (0.5 cm) on each side
Materials
Choose a smooth, mercerized DK cotton or cotton blend. Cotton keeps the V-stitch openings crisp and holds up to daily handling on a bag. Avoid fuzzy yarns, which blur the open texture.
- Lavender: 6 g, about 13 m (Rows 1, 3, 5, 7, 9 and border)
- Mint green: 4 g, about 9 m (Rows 2, 4, 6, 8, 10)
- Cream: 2 g, about 4 m (flower petals)
- Golden yellow: 1 g, about 2 m (flower centers)
- Sage green: 1 g, about 3 m (leaves)
Tools:
- 3.5 mm (E-4) crochet hook
- Tapestry needle
- Scissors
- 1 in (2.5 cm) gold split key ring with a short chain and jump ring
- Rustproof pins and a blocking mat
- Small pliers (optional, for opening the jump ring)
All quantities include a small safety margin for tails and a gauge swatch.
Abbreviations (US Terms)
- ch – chain
- sl st – slip stitch
- sc – single crochet
- hdc – half double crochet
- dc – double crochet
- sp – space
- st(s) – stitch(es)
- RS – right side
- V-st – V-stitch: (dc, ch 1, dc) in the same st or sp
Standing V-st: With a slip knot of the new color on the hook, yo, insert the hook into the indicated sp, yo and pull up a loop, (yo and pull through 2 loops) twice, ch 1, dc in the same sp. This joins the new yarn and makes the first V-st in one step, without a bulky turning chain.
V-st positions: Each row has up to 7 V-sts, numbered V1 to V7 from left to right as you look at the RS. Work each new V-st into the ch-1 sp of the V-st with the same number in the row below.
Gauge and Checkpoints
Gauge: 5 V-sts and 5 rows = 2 in (5.1 cm) in V-st pattern. One V-st is 0.4 in (1.0 cm) wide and one row is 0.4 in (1.0 cm) tall.
Border gauge: 5 sc = 1 in (2.5 cm).
The letter is small enough to act as its own test piece. Work Rows 1 and 2 and measure before you continue.
Checkpoints:
- After Row 2: 2.8 in (7.1 cm) wide x 0.8 in (2.0 cm) tall
- After Row 6: 2.4 in (6.1 cm) tall
- After Row 10: 4 in (10.2 cm) tall, 2.4 in (6.1 cm) wide across the top
- After the border: 3.2 in (8.1 cm) x 4.4 in (11.2 cm)
If your piece is too big, go down to a 3.25 mm or 3 mm hook. If it is too small, go up to a 3.75 mm or 4 mm hook. If only the height is off, make sure you pull each dc up to full height rather than squeezing it.
Letter Body
Work every row with the RS facing, from right to left. Fasten off at the end of every row and every section, leaving a 3 in (7.6 cm) tail. The border will cover these tails, and you can weave them in as you go.
Foundation: With lavender, ch 23.
Row 1 (lavender, RS): V-st in 5th ch from hook, sk 2 ch, V-st in next ch 6 times. Fasten off. (7 V-sts)
Counting from the hook, the V-sts sit in chains 5, 8, 11, 14, 17, 20 and 23. The first V-st you make is V7 (right edge) and the last is V1 (left edge).
Row 2 (mint): Standing V-st in V7, V-st in each of V6 to V1. Fasten off. (7 V-sts)
Check: 2.8 in (7.1 cm) wide x 0.8 in (2.0 cm) tall.
Lower Opening
Row 3 (lavender): Standing V-st in V7, V-st in V6. Fasten off. Standing V-st in V2, V-st in V1. Fasten off. (4 V-sts: 2 on the bowl, 2 on the stem)
Leave V3, V4 and V5 unworked. This starts the lower opening, 3 V-sts (1.2 in / 3.0 cm) wide.
Row 4 (mint): Repeat Row 3. (4 V-sts)
Row 5 (lavender): Standing V-st in V7, V-st in V6, ch 9 loosely, V-st in V2, V-st in V1. Fasten off. (4 V-sts + 9-ch bridge)
Lay the bridge flat across the gap without stretching it. It forms the top edge of the lower opening, which is now 3 rows (1.2 in / 3.0 cm) tall.
Row 6 (mint): Standing V-st in V7, V-st in V6, V-st in 2nd ch of the bridge, V-st in 5th ch, V-st in 8th ch, V-st in V2, V-st in V1. Fasten off. (7 V-sts)
Count the bridge chains from the right end, next to V6. The 3 V-sts you work into the bridge become V5, V4 and V3 for the rows above.
Check: 2.4 in (6.1 cm) tall.
Upper Bowl
Row 7 (lavender): Standing V-st in V6, V-st in each of V5 to V1. Fasten off. (6 V-sts)
Leave V7 of Row 6 unworked. This makes the small step at the waist, so the upper bowl is 0.4 in (1.0 cm) narrower than the lower bowl.
Row 8 (mint): Standing V-st in V6, V-st in V5. Fasten off. Standing V-st in V2, V-st in V1. Fasten off. (4 V-sts)
Leave V3 and V4 unworked. This starts the upper opening, 2 V-sts (0.8 in / 2.0 cm) wide.
Row 9 (lavender): Standing V-st in V6, V-st in V5, ch 6 loosely, V-st in V2, V-st in V1. Fasten off. (4 V-sts + 6-ch bridge)
Row 10 (mint): Standing V-st in V6, V-st in V5, V-st in 2nd ch of the bridge, V-st in 5th ch, V-st in V2, V-st in V1. Fasten off. (6 V-sts)
Check: 4 in (10.2 cm) tall, 2.8 in (7.1 cm) wide at the base and 2.4 in (6.1 cm) wide across the top. The upper opening is 0.8 in (2.0 cm) square.
Weave in any tails along the outer edges now, or leave them for the border to enclose.
Flowers (make 3)
Center: With yellow, make a magic ring, ch 1, 5 sc in ring, sl st to first sc. Pull the ring tight and fasten off. (5 sc)
Petals: Join cream in any sc. (Ch 2, 2 dc, ch 2, sl st) in same sc, sl st in next sc 5 times, working the last sl st into the joining st. Fasten off, leaving a 6 in (15.2 cm) tail for sewing. (5 petals)
Each flower is about 0.8 in (2.0 cm) across.
Leaves (make 5)
With sage green, ch 5. Sl st in 2nd ch from hook, sc in next ch, hdc in next ch, sc in last ch. Ch 1, rotate to work along the other side of the foundation, sc in same ch, hdc in next ch, sc in next ch, sl st in last ch. Fasten off, leaving a 6 in (15.2 cm) tail. (8 sts)
Each leaf is about 0.6 in (1.5 cm) long with a pointed tip.
Border
Border gauge: 5 sc = 1 in (2.5 cm). That works out to 2 sc per V-st width and 2 sc per row of dc.
With lavender and the RS facing, work one round counterclockwise. The edge counts below are the stitches between corner groups. Corner stitches are listed separately.
Round 1:
- Join lavender at the bottom-left corner and work 3 sc into the corner. (Bottom-left corner: 3 sc)
- Bottom edge: 2 sc into the foundation ch at the base of each V-st, from V1 to V7. (14 sc)
- Bottom-right corner: 2 sc. (2 sc, softly rounded)
- Lower right side (Rows 1–6): 2 sc around the post of the edge dc on each row. (12 sc)
- Waist corner: 2 sc at the top-right corner of Row 6. (2 sc)
- Waist step: 2 sc in the ch-1 sp of the unworked V7 of Row 6. (2 sc)
- Inner corner: no extra sts. Go straight up the side of Row 7.
- Upper right side (Rows 7–10): 2 sc around the post of the edge dc on each row. (8 sc)
- Top-right corner: 2 sc. (2 sc, softly rounded)
- Top edge: 2 sc in the ch-1 sp of each V-st of Row 10, from V6 to V1. (12 sc)
- Top-left corner: 3 sc. (3 sc)
- Left side (Rows 10–1): 2 sc around the post of the edge dc on each row. (20 sc)
- Sl st to the first sc. Fasten off and weave in. (80 sc total)
Why the math works: Each V-st is 0.4 in (1.0 cm) wide and each row is 0.4 in (1.0 cm) tall. At 5 sc per inch, 0.4 in (1.0 cm) holds exactly 2 sc. So 2 sc per V-st and 2 sc per row keep every edge flat. The total checks out: 3 + 14 + 2 + 12 + 2 + 2 + 8 + 2 + 12 + 3 + 20 = 80 sc.
The left corners get 3 sc so they stay square, matching the straight stem. The right corners get only 2 sc, which softens them into the rounded curve of the bowls. The inner waist corner gets no extra stitch, so it stays crisp instead of puckering.
The border adds about 0.2 in (0.5 cm) on each side, bringing the charm to 3.2 in (8.1 cm) x 4.4 in (11.2 cm).
Final Blocking
- Weave in all remaining tails on the wrong side, through the border sc where possible.
- Pin the letter RS up on a blocking mat at 3.2 in (8.1 cm) wide at the base, 2.8 in (7.1 cm) wide at the top, and 4.4 in (11.2 cm) tall.
- Square the stem and openings. The lower opening should be about 1.2 in (3.0 cm) square and the upper one about 0.8 in (2.0 cm) square.
- Mist lightly with water until damp, not soaked.
- Let it dry completely, about 2–4 hours.
- Unpin, then sew on the appliqués:
- Top-left corner: one flower with two leaves, one to the left and one to the upper right.
- Right-hand waist: one flower with one leaf pointing down and out.
- Bottom-left corner: one flower with two leaves, one to the left and one below.
- Tuck each leaf’s base under its flower. Stitch through the yellow center and the tip of each petal, keeping the stitches small so they disappear into the V-sts.
- Open the jump ring, attach it through 2 sc of the border at the top-left corner, and close it firmly.
Final Quality-Control Checklist
- 10 rows alternating lavender and mint, starting with lavender and ending with mint
- Row counts: 7, 7, 4, 4, 4, 7, 6, 4, 4, 6 V-sts
- Lower opening 3 V-sts wide x 3 rows tall; upper opening 2 V-sts wide x 2 rows tall
- Left stem is straight; the waist step appears only on the right
- Border has 80 sc and lies flat with no ruffling or cupping
- 3 flowers and 5 leaves are sewn on securely with no loose petals
- Jump ring is fully closed and anchored through the border
- Finished size is 3.2 in (8.1 cm) x 4.4 in (11.2 cm)
Troubleshooting
Openings look narrow or slanted: The bridge chain was too tight. Rework it a little looser, or go up one hook size for the chain only.
Bridge V-sts don’t line up with the V-sts below: Count the bridge chains from the end next to the bowl, not the stem.
Edges wave or ruffle: There are too many border sc. Stay at exactly 2 per V-st and 2 per row.
Edges cup or pull in: Your sc gauge is tight. Use a 3.75 mm hook for the border round only.
Stripes look bumpy at the joins: Pull each tail snug before working the border, then hide it inside the border stitches.
Flowers curl: Pin them flat and mist them before sewing.
Care
Hand wash in cool water with mild soap, press the water out in a towel, and dry flat. Check the jump ring now and then, and close it again if it starts to open.
Final Notes
The measurement chain is simple: 1 V-st and 1 row each equal 0.4 in (1.0 cm). Seven V-sts make the 2.8 in (7.1 cm) base, six make the 2.4 in (6.1 cm) top, and 10 rows make the 4 in (10.2 cm) height. One round of 80 sc at 5 sc per inch adds 0.2 in (0.5 cm) on every side, for a finished charm of 3.2 in (8.1 cm) x 4.4 in (11.2 cm).
Once you know the method, you can plan other initials the same way, using stem, bowl and bridge sections on the same 7-V-st grid.
Happy crocheting!