
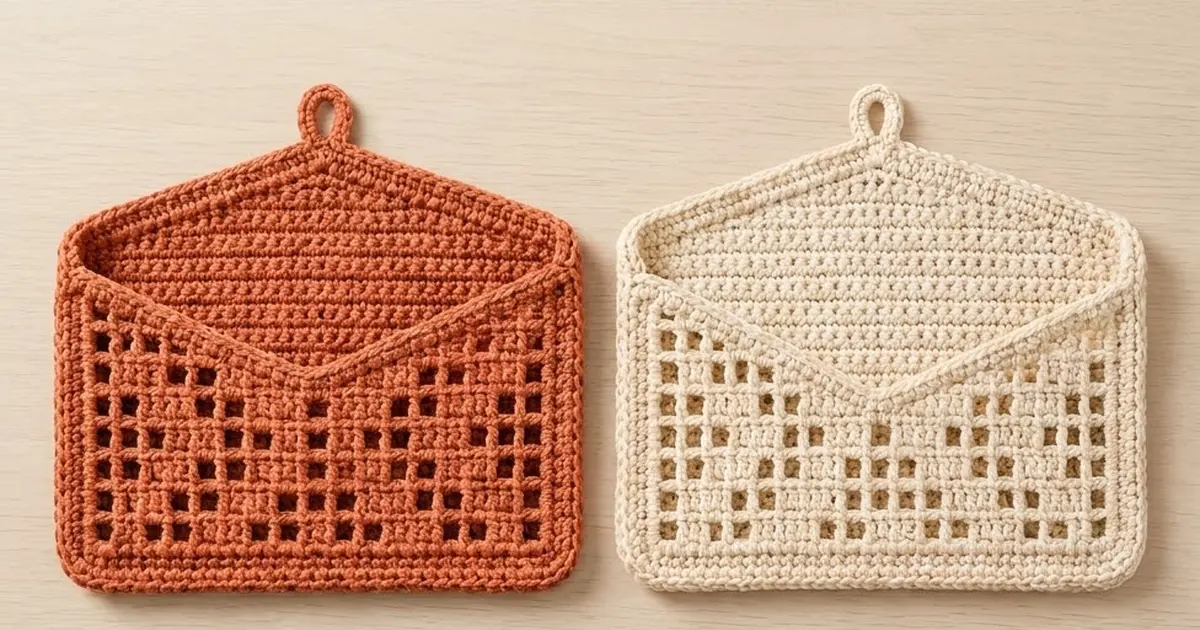
The Postmark Wall Pocket looks like a letter pinned to the wall. A solid back panel rises to a soft peak with a small hanging loop. A filet-mesh front pocket dips into a wide V like the opening of an envelope.
The sample is in warm terracotta cotton, and the pocket works just as well in cream. On the front, open spaces and solid blocks form a scattered X design. A rounded single-crochet rim frames the V and the outer edge.
This pattern uses US terms. The finished pocket is 11 in (27.9 cm) wide and 9.75 in (24.8 cm) tall, plus a 1.25 in (3.2 cm) loop. The front pocket is 7 in (17.8 cm) deep at the sides.
You work the front in filet rows, then split it into two wings to shape the V. The back is worked in single-crochet rows and decreased to a peak. One single-crochet border round joins the panels, and a second round finishes the edge.
Finished Size and Construction
- Finished size: 11 × 9.75 in (27.9 × 24.8 cm), plus loop
- Skill level: Intermediate
- Terminology: US
- Yarn weight: Worsted (#4) cotton
- Hook: 5.0 mm (H-8)
- Number of pieces: 2 (front pocket, back panel)
- Layout: front over the lower part of the back, wrong sides together
- Front size: 10 in (25.4 cm) wide; 6.5 in (16.5 cm) tall at the sides, 4.5 in (11.4 cm) at the V point
- Back size: 10 × 8.75 in (25.4 × 22.2 cm)
- Size before border: 10 × 8.75 in (25.4 × 22.2 cm)
- Border depth: 0.5 in (1.3 cm), 2 rounds of sc
Materials
Choose a smooth, firm worsted cotton or cotton blend. It keeps the filet squares crisp and helps the pocket hold its shape. Fuzzy or stretchy yarns blur the mesh and sag.
- Terracotta: 130 g / 221 m (use cream instead for the alternate version)
These amounts include about a 15% margin for swatching and differences in tension.
Tools: 5.0 mm (H-8) hook, tapestry needle, 4 locking stitch markers, scissors, measuring tape, blocking mat and pins, spray bottle, optional spray starch.
Abbreviations (US Terms)
ch (chain), sl st (slip stitch), sc (single crochet), dc (double crochet), sc2tog (sc 2 together), sc3tog (sc 3 together), st(s) (stitch(es)), sp (space), RS/WS (right side/wrong side).
Filet squares: Each filet row starts with ch 3, which counts as a dc. Each square adds 3 sts and ends in a dc.
- Block (B): dc in each of the next 3 sts. Over a ch-2 sp, work 2 dc in the sp and 1 dc in the next dc.
- Space (S): ch 2, skip 2 sts, dc in the next st.
A ch-2 sp counts as 2 sts, so a full front row is 1 + (13 × 3) = 40 sts.
Gauge and Checkpoints
- Filet: 16 sts (5 squares) and 8 rows = 4 in (10.2 cm)
- Single crochet: 16 sc and 18 rows = 4 in (10.2 cm)
Both fabrics need the same stitch width so the panels match stitch for stitch. Use the front as your test piece: Row 1 should be 10 in (25.4 cm) wide. If it is, keep going.
Checkpoints:
- Front after Row 8: 4 in (10.2 cm) tall
- Front after Row 12: 6 in (15.2 cm) tall at the sides
- Front after the trim: 6.5 in (16.5 cm) at the sides
- Back after Row 29: 10 × 6.5 in (25.4 × 16.5 cm)
- Back after Row 39: 8.75 in (22.2 cm) tall
Too big? Go down to a 4.5 mm hook. Too small? Go up to 5.5 mm. If only the back is off, change the hook for the back alone.
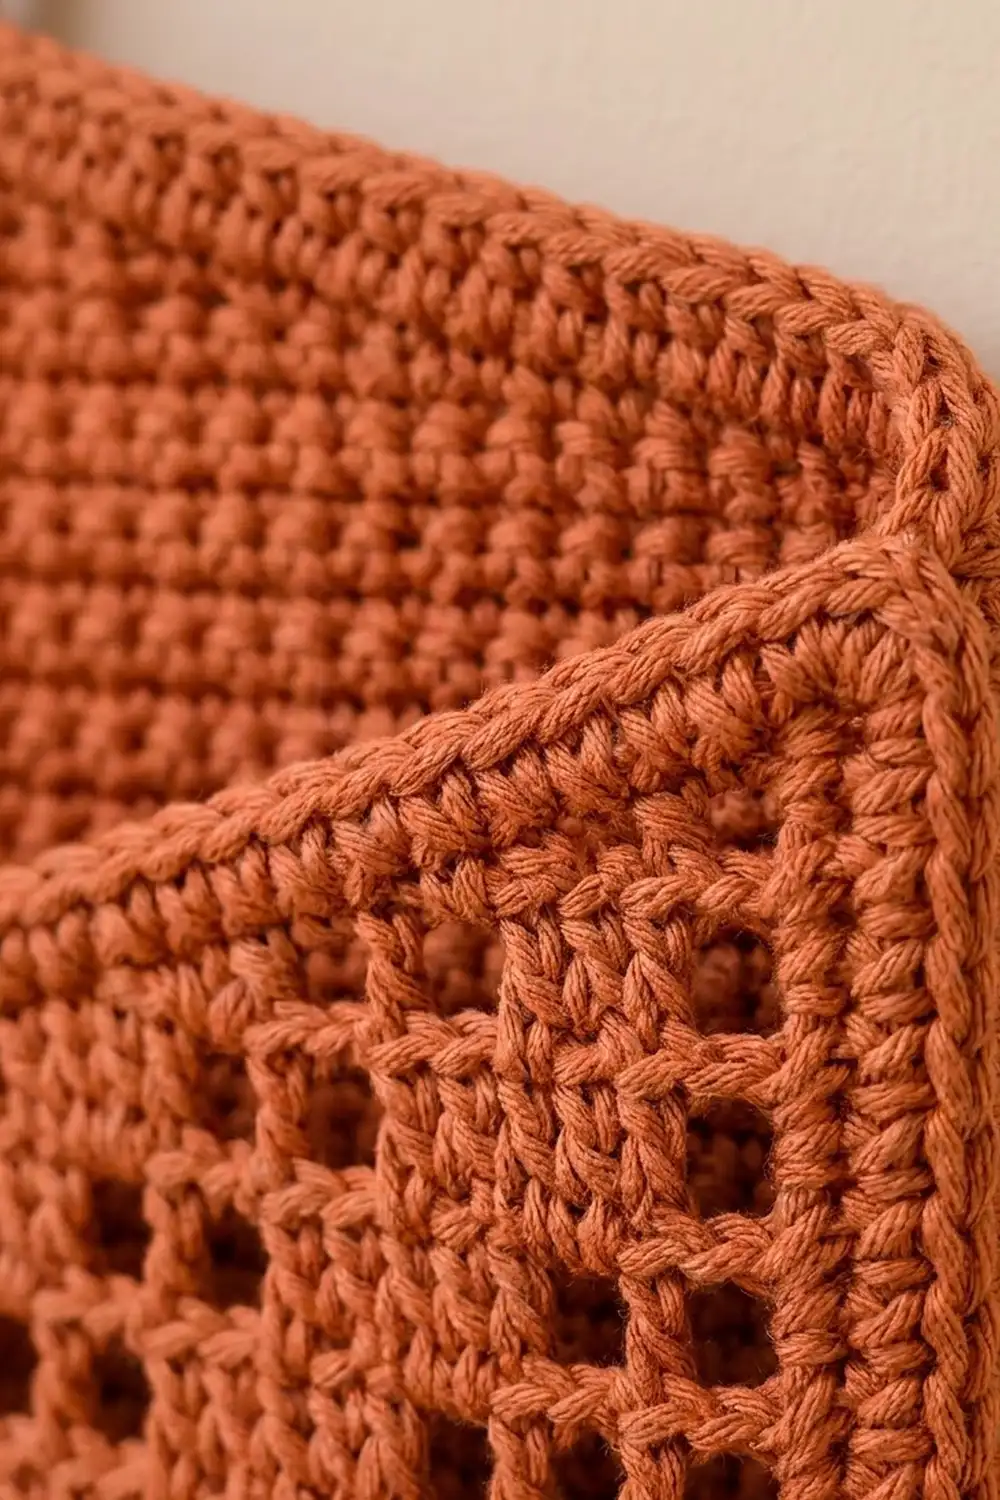
Front Pocket (Filet Panel)
With terracotta, ch 42.
Row 1 (RS): Dc in the 4th ch from the hook and in each ch across. The skipped ch count as a dc. (40 sts = 13 blocks)
Rows 2–8: Ch 3, turn (counts as dc), then work the squares listed.
- Row 2: B, S × 11, B. (40 sts)
- Row 3: B, S, B, S × 7, B, S, B. (40 sts)
- Row 4: B, S × 2, B, S × 5, B, S × 2, B. (40 sts)
- Row 5: B, S × 3, B, S × 3, B, S × 3, B. (40 sts)
- Row 6: B, S × 4, B, S, B, S × 4, B. (40 sts)
- Row 7: B, S × 5, B, S × 5, B. (40 sts)
- Row 8: Repeat Row 6. (40 sts)
The diagonals meet at the center square in Row 7, framed by the solid side columns. The panel now measures 10 × 4 in (25.4 × 10.2 cm).
First Wing
The center square is square 7 (sts 19–22). Each wing uses 6 squares.
- Row 9: Ch 3, turn. B, S × 3, B, S. Turn, leaving the remaining sts unworked. (19 sts)
- Row 10: Sl st in each of the first 4 sts, ch 3 (counts as dc). S, B, S × 2, B. (16 sts)
- Row 11: Ch 3, turn. B, S, B, S. Turn, leaving the last 3 sts unworked. (13 sts)
- Row 12: Sl st in each of the first 4 sts, ch 3 (counts as dc). B × 3. (10 sts)
Fasten off. Each row loses one square at the inner edge, and the outer edge stays straight.
Second Wing
Join yarn in the beginning ch-3 at the other outer edge of Row 8, then ch 3 (counts as dc). Work Rows 9–12 as for the first wing. Row 9 ends in st 22, which leaves sts 20–21 unworked as the V point. Fasten off.
The front is now 6 in (15.2 cm) tall at the sides and 4 in (10.2 cm) at the center.
V-Edge Trim
Each step of the V has 1 dc row-end and 3 exposed sts.
Trim Row 1: With the RS facing, join yarn at the top outer corner of one wing and ch 1. Then:
- Sc in each of the 10 sts of Row 12.
- (2 sc in the row-end, 3 sc across the exposed sts) 3 times.
- 2 sc in the inner row-end of Row 9. That makes 27 sc for this wing.
- Sc2tog over the 2 center sts of Row 8.
- Mirror the steps on the second wing: 2 sc, then (3 sc, 2 sc) 3 times, then 10 sc.
Count: 27 + 1 + 27 = 55 sts.
Trim Row 2: Ch 1, turn. Sc in each of the next 26 sts, sc3tog, sc in each of the last 26 sts.
Count: (52 sts worked 1-per-stitch) + (1 sc3tog over the 3 center sts) = 53 sts.
Fasten off. The sc rows smooth the steps into a clean diagonal, and the sc3tog sharpens the point. The front is now 6.5 in (16.5 cm) tall at the sides and 4.5 in (11.4 cm) at the V point, so the V dips 2 in (5.1 cm).
Back Panel
With terracotta, ch 41.
Row 1: Sc in the 2nd ch from the hook and in each ch across. (40 sts)
Rows 2–29: Ch 1, turn, sc in each st across. (40 sts)
Checkpoint: 10 × 6.5 in (25.4 × 16.5 cm). This matches the height of the front at its sides.
Row 30: Ch 1, turn, sc3tog, sc in each of the next 34 sts, sc3tog. (36 sts)
Rows 31–38: Ch 1, turn, sc3tog, sc to the last 3 sts, sc3tog. Each row is 4 sts shorter: 32, 28, 24, 20, 16, 12, 8, 4 sts.
Row 39: Ch 1, turn, sc2tog twice. (2 sts)
Loop: Ch 14, then sl st in the first st of Row 39 to form a ring. Fasten off.
The peak adds about 2.25 in (5.7 cm), so the back measures 10 × 8.75 in (25.4 × 22.2 cm), not counting the loop.
Make All Pieces
Make 1 front and 1 back, both in terracotta (or both in cream). Weave in all ends on the WS before joining.
Layout, front facing:
+---------------------------+
|   BACK peak + loop        |
|---------------------------|
|   FRONT filet pocket      |
|   (V opening at top)      |
+---------------------------+
Joining
Lay the back RS down and place the front on top RS up, so the wrong sides touch. Line up the bottom edges and sides, and clip the 4 corners with markers. Border Round 1 joins the layers: work each sc through both layers along the bottom and sides.
Stitch-to-stitch logic:
- Bottom: Front Row 1 has 40 sts and back Row 1 has 40 sts. Work 1 sc into each matching pair.
- Sides: The front has 12 dc row-ends (2 sc each = 24) plus 2 trim row-ends (1 sc each), for 26 sc. The back has 29 row-ends over the same 6.5 in (16.5 cm). Skip 1 back row-end about every 9 rows so the 26 sc catch the back evenly.
Keep your tension relaxed. Tight stitches through two layers make the edge pucker. If the bottom edge curves up, loosen your tension rather than adding stitches.
Size checkpoint: After Round 1, the bottom edge measures about 10.5 in (26.7 cm).
Border
Border gauge: 4 sc per 1 in (2.5 cm) along straight edges, the same as your sc gauge.
Round 1 (joining round): With the front facing, join yarn through both layers at the bottom left corner and ch 1. Then:
- 3 sc in the corner st.
- Sc in each of the next 38 st pairs along the bottom.
- 3 sc in the bottom right corner st.
- 26 sc up the right side, through both layers.
- Back only: 2 sc in each of the 10 row-ends of Rows 30–39 (20 sc) up the right slope.
- 18 sc in the loop.
- 20 sc down the left slope.
- 26 sc down the left side, through both layers.
Sl st to the first sc.
Count: 3 + 38 + 3 + 26 + 20 + 18 + 20 + 26 = 154 sts.
Round 2: Ch 1. Sc in each st around, with two changes:
- Work 3 sc in the center st of each bottom corner.
- On the loop, work (sc in the next 2 sts, 2 sc in the next st) 6 times.
Sl st to the first sc and fasten off.
Count: (154 sts worked 1-per-stitch) + (4 corner sts + 6 loop sts added) = 164 sts.
Round 2 by section:
- Bottom between corner centers: 40
- Each corner: 3
- Each side: 27
- Each slope: 20
- Loop: 24
Why the math works: The bottom starts at 1 panel × 40 sts, and each side at 1 panel × 26 row-end sts, with nothing added at the seams. At 4 sc per inch, 40 sts span 10 in (25.4 cm) and 26 sts span 6.5 in (16.5 cm), so the edges lie flat. Each slope is about 5.4 in (13.7 cm) long, and its 20 sc are slightly fewer than that length calls for, which keeps the peak from ruffling. The increases on the loop keep the ring round. The two rounds add 0.5 in (1.3 cm) to each edge, for a final size of 11 × 9.75 in (27.9 × 24.8 cm).
Final Blocking
- Weave in the remaining ends inside the border stitches.
- Mist the pocket until it is evenly damp.
- Pin it RS up with the bottom corners 11 in (27.9 cm) apart.
- Pin the front corners 7 in (17.8 cm) above the bottom edge and the peak 9.75 in (24.8 cm) above it.
- Pin the V point 5 in (12.7 cm) above the bottom edge. Open each filet space with a fingertip.
- For a stiffer pocket, apply a light spray starch.
- Let it dry completely (12–24 hours) before unpinning.
Final Quality-Control Checklist
- Full front rows have 40 sts, and the wing rows have 19, 16, 13 and 10.
- The trim rows have 55 and 53 sts.
- The back has 40 sts through Row 29 and ends at 2.
- The border rounds have 154 and 164 sts.
- The sides are straight, the bottom is level, and the V is centered.
- The loop is round and centered on the peak.
- The finished pocket measures 11 × 9.75 in (27.9 × 24.8 cm).
Troubleshooting
- Front is narrower than the back: Filet can pull in. Go up a hook size for the front.
- Squares look like tall rectangles: Pull up shorter dc loops, or use a 4.5 mm hook.
- V edge looks stepped: Check that you worked 2 sc in each row-end, then block the diagonal firmly.
- Slopes ruffle: Work 18 sc per slope instead of 20. Rounds 1 and 2 then have 150 and 160 sts.
- Bottom puckers: Rework Round 1 more loosely.
- Pocket sags when full: Starch it, or slip a 9.5 × 6 in (24.1 × 15.2 cm) card inside.
Care
Hand wash in cool water with mild soap, roll it in a towel to remove water, and dry flat. Re-starch after washing if needed.
Final Notes
Each measurement builds on the one before it:
- 40 sts make a front and back 10 in (25.4 cm) wide.
- 12 filet rows plus the trim match 29 sc rows at 6.5 in (16.5 cm).
- The 10-row peak brings the back to 8.75 in (22.2 cm).
- Two border rounds add 0.5 in (1.3 cm) to each edge, for a finished pocket of 11 × 9.75 in (27.9 × 24.8 cm).
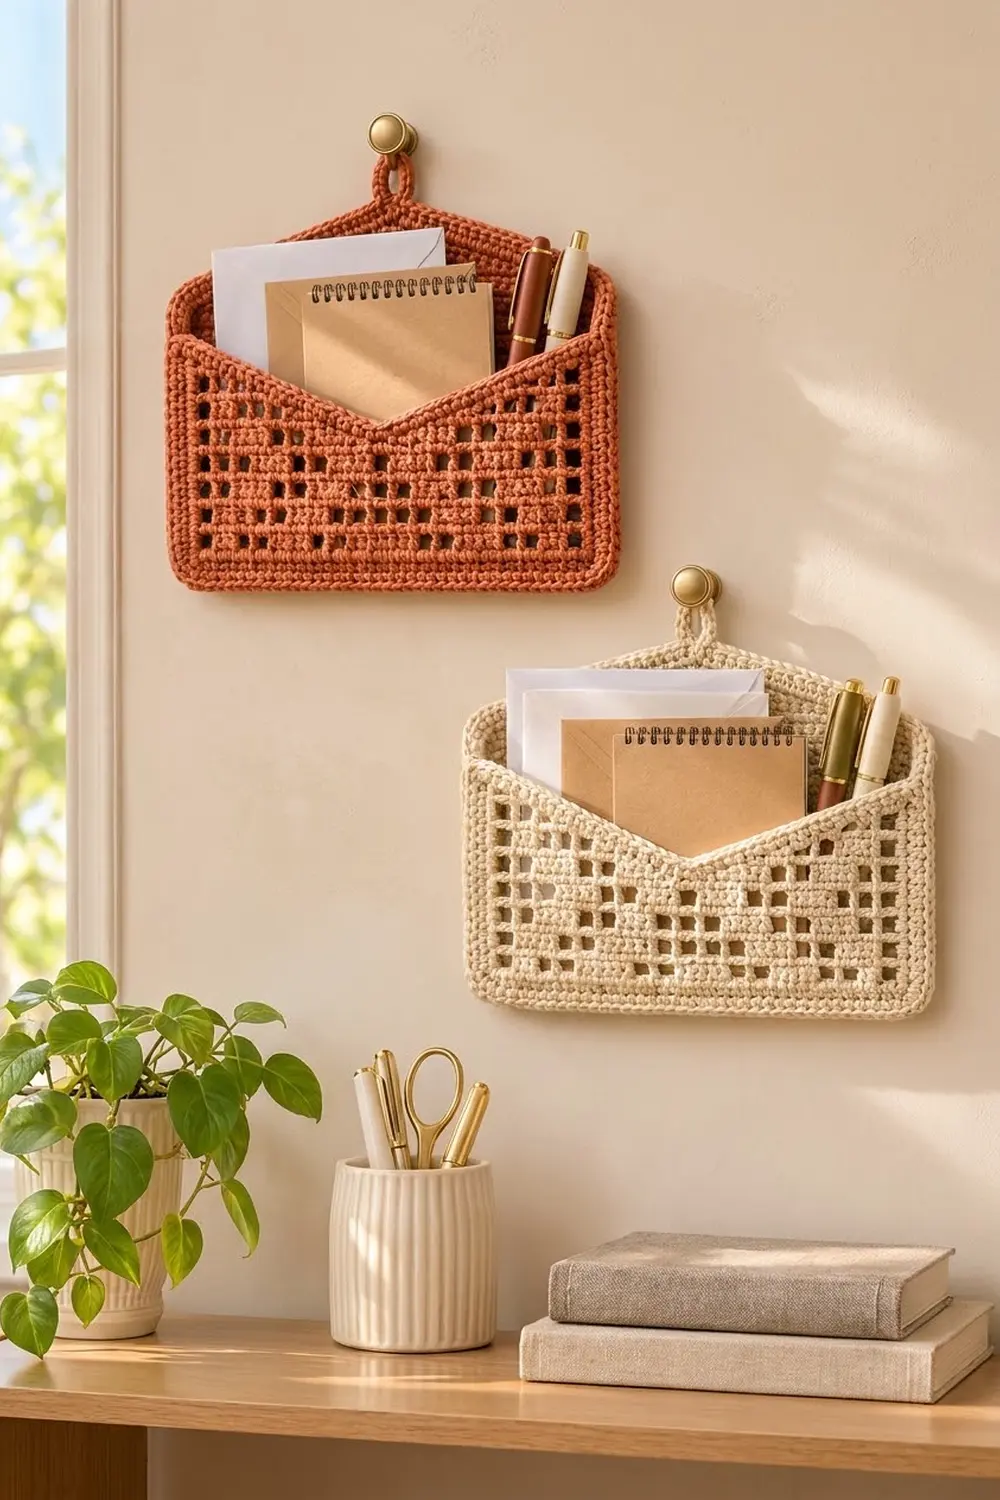
Check each stage as you go, and your envelope will hang straight and be ready for mail.
Happy crocheting!