
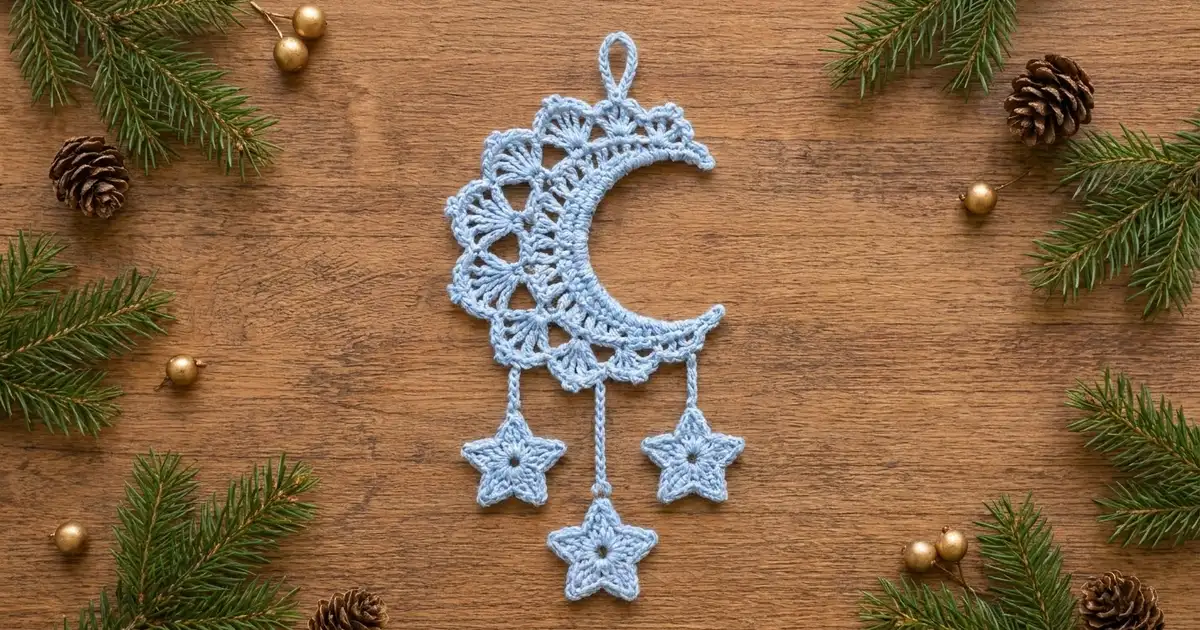
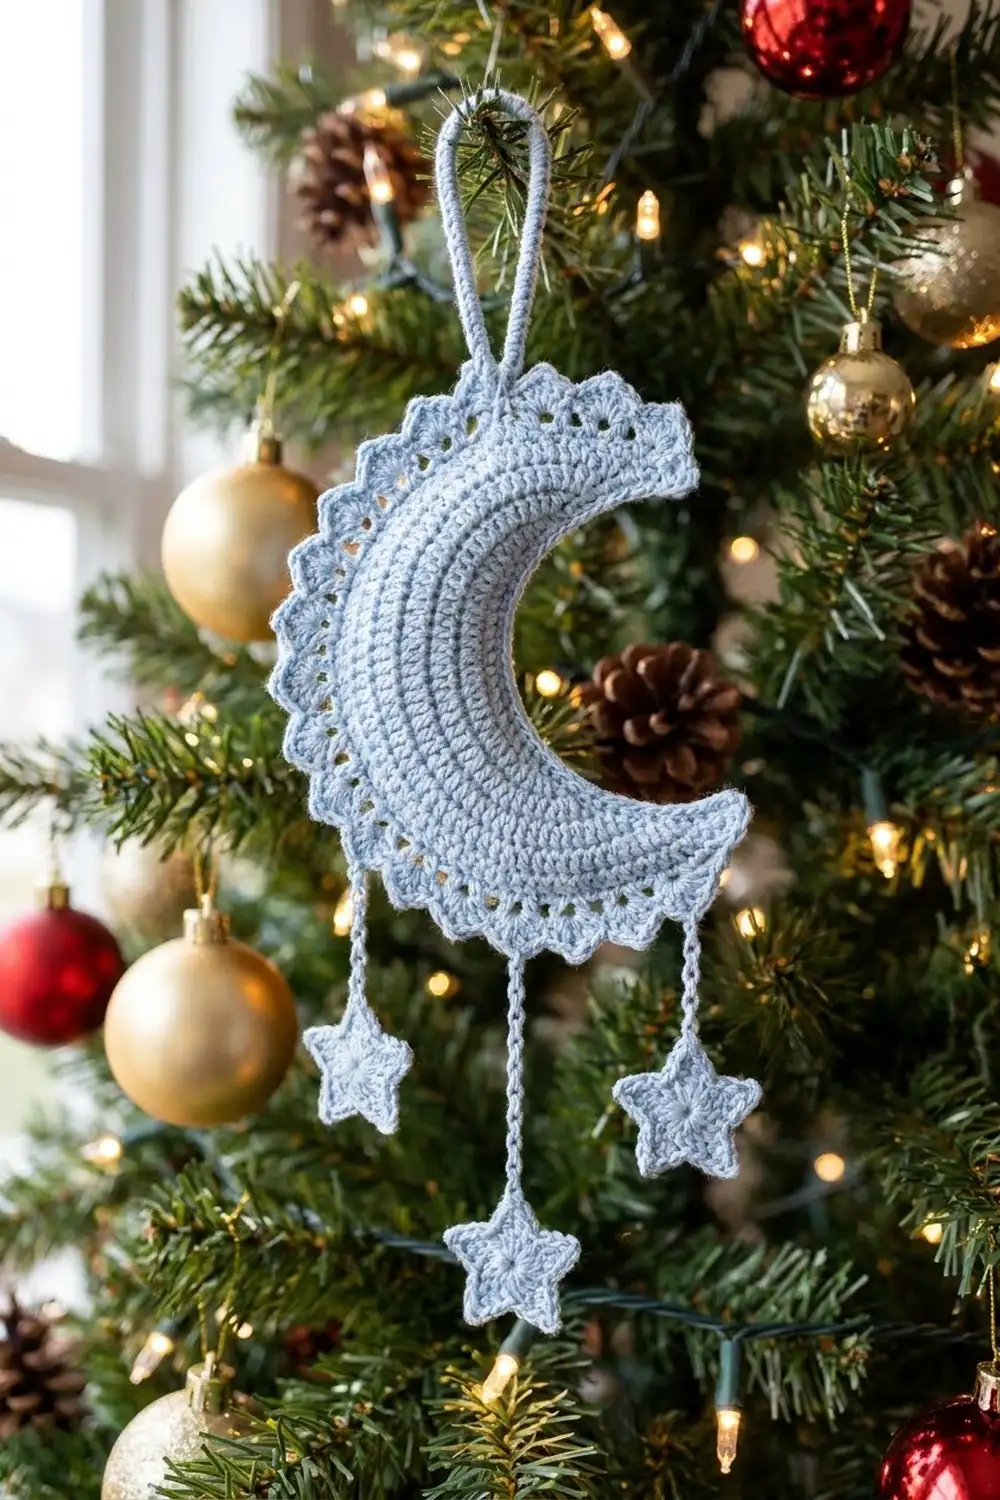
This crescent moon ornament has a solid curved moon, a lacy fan edge on its outer curve and three small stars hanging below. It is light and delicate, and it looks lovely on a tree, in a window or above a crib.
The sample uses one soft powder-blue cotton, which gives it a frosty, winter-night look. Pale yellow, silver-grey or white would also work well. All terms in this pattern are US crochet terms.
The finished ornament is about 7 in (17.8 cm) long from the top of the hanging loop to the tip of the lowest star. The moon alone is about 3.5 in (8.9 cm) tall and 2.75 in (7.0 cm) wide.
The moon is worked flat in rows from a foundation chain. Graded stitch heights taper the tips, and increases curve the outer edge. A three-row fan edging finishes the outer curve. You then make three stars in the round and hang them from the moon on chains.
Finished Size and Construction
- Finished ornament length: about 7 in (17.8 cm) including the loop and stars
- Moon: 3.5 in (8.9 cm) tall x 2.75 in (7.0 cm) wide
- Skill level: Easy-intermediate
- Terminology: US
- Yarn weight: Fingering / #1 super fine mercerized cotton
- Hook: 2.25 mm (US B-1)
- Number of pieces: 4 (1 moon, 3 stars)
- Layout: Moon on top, three stars hanging below in a V shape (the center star is lowest)
- Star size: 1.25 in (3.2 cm) from point to point
- Moon size before edging: 3 in (7.6 cm) from tip to tip, band 0.75 in (1.9 cm) deep at its widest
- Edging depth: about 0.5 in (1.3 cm) at the center of the outer curve
Materials
Use a smooth mercerized cotton for this ornament. It shows stitch detail clearly, blocks crisply and holds the fans open. A soft acrylic will work, but the lace will look fuzzier and the moon will be floppier.
- Light blue fingering cotton: 15 g (about 50 m) for one ornament
The quantity includes a margin for your gauge swatch, joining tails and the hanging loop. One ornament actually uses about 10 g (about 34 m).
Tools:
– 2.25 mm (US B-1) crochet hook
– Tapestry needle
– Small scissors
– Rustproof pins and a foam blocking mat
– Optional: fabric stiffener or spray starch
– Optional: a ruler or tape measure marked in inches and cm
Abbreviations (US Terms)
- ch – chain
- sl st – slip stitch
- sc – single crochet
- hdc – half double crochet
- dc – double crochet
- sk – skip
- sp – space
- st(s) – stitch(es)
- MR – magic ring
Special stitch:
– Fan: Work 7 dc in the same ch-3 sp.
Gauge and Checkpoints
Gauge is not critical for an ornament, but it decides whether your moon and stars come out in proportion. Make one star first, since it is the quickest test.
- Star Round 1: 0.5 in (1.3 cm) across.
- Finished star: 1.25 in (3.2 cm) from point to point.
- Moon after Row 1: The foundation edge measures about 3 in (7.6 cm).
- Moon after Row 4: 3 in (7.6 cm) from tip to tip, band 0.75 in (1.9 cm) deep.
- Moon after edging: 3.5 in (8.9 cm) tall x 2.75 in (7.0 cm) wide.
If your star is larger than 1.25 in (3.2 cm), switch to a 2.0 mm hook. If it is smaller than 1.25 in (3.2 cm), try a 2.5 mm hook. Being off by about 0.25 in (0.6 cm) is fine, as long as the moon and stars come out the same way.
The Moon
The tips are shaped by short stitches at the ends of each row and tall stitches in the middle. The increases in Rows 2 and 4 make the outer edge longer than the inner edge, which bends the band into a crescent.
Foundation: Ch 26.
Row 1 (shaping row): Starting in the 2nd ch from the hook, sl st in 1 ch, sc in next 2 ch, hdc in next 3 ch, dc in next 13 ch, hdc in next 3 ch, sc in next 2 ch, sl st in last ch. (25 sts)
Check: 1 + 2 + 3 + 13 + 3 + 2 + 1 = 25. The foundation chain becomes the inner curve of the moon.
Row 2 (first curve increase): Ch 1, turn. Sc in first 6 sts, [2 sc in next st, sc in next st] 6 times, 2 sc in next st, sc in last 6 sts. (32 sc)
Check: this row works into 6 + 12 + 1 + 6 = 25 sts and makes 6 + 18 + 2 + 6 = 32 sc.
Row 3 (ribbed dc band): Ch 1, turn. Sl st in first st, sc in next 3 sts, hdc in next 3 sts, dc in next 18 sts, hdc in next 3 sts, sc in next 3 sts, sl st in last st. (32 sts)
Check: 1 + 3 + 3 + 18 + 3 + 3 + 1 = 32. This makes the radiating row of posts in the middle of the moon.
Row 4 (second curve increase): Ch 1, turn. Sc in first 7 sts, [2 sc in next st, sc in next 2 sts] 6 times, sc in last 7 sts. (38 sc)
Check: this row works into 7 + 18 + 7 = 32 sts and makes 7 + 24 + 7 = 38 sc.
Do not fasten off. Checkpoint: The piece should curve into a crescent about 3 in (7.6 cm) from tip to tip. If it lies straight, your increases are too tight. If it ruffles, your sc are too loose.
Make All Pieces
Make 1 moon (above) and 3 stars (below), all in light blue.
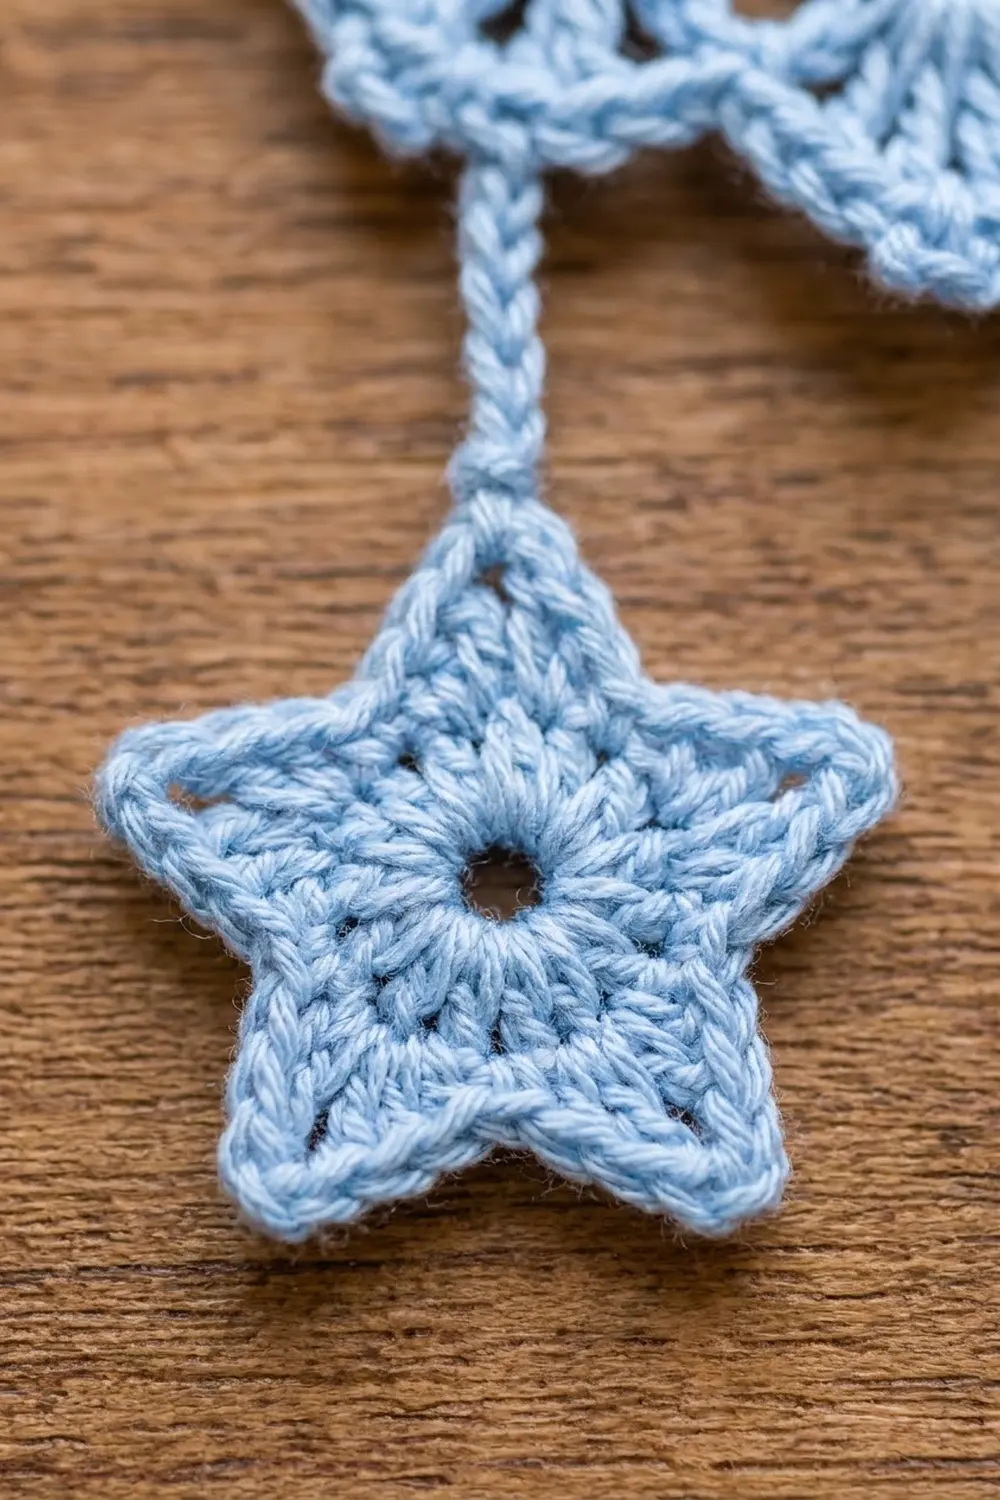
Star (make 3):
Round 1: In a MR, ch 3 (counts as dc), 9 dc in ring. Pull the ring snug, leaving a small center hole. Join with sl st to the top of the beginning ch-3. (10 dc)
Round 2 (points): [Ch 4, starting in the 2nd ch from the hook, sc in next ch, hdc in next ch, dc in next ch, sk next dc, sl st in next dc] 5 times. Work the last sl st into the joining st at the base of the first point. (5 points)
Check: each point uses 2 dc of Round 1, and 5 x 2 = 10 dc. Fasten off and weave in the tails.
Layout grid (ornament as it hangs):
            [ hanging loop ]
     [ crescent moon, opening right ]
       |            |            |
   short chain  long chain   short chain
   (from Fan 4) (from Fan 5) (from lower tip)
       |            |            |
     STAR           |          STAR
                  STAR
Joining
Each star hangs from one stitch on the moon by a single chain. Make the joins after the edging and hanging loop are done (see the Border section).
Stitch-to-stitch logic: One sl st into the moon, a set number of chains, then one sl st through the tip of a star point. There is one anchor stitch at each end, and nothing is added to the moon’s edge.
- Left star: Join yarn with a sl st into the center (4th) sc of Fan 4 in Row 7. Ch 10. Sl st through the tip ch of any point of a star. Fasten off. (Chain about 1.25 in / 3.2 cm)
- Center star: Join yarn with a sl st into the center (4th) sc of Fan 5. Ch 16. Sl st through the tip of a star point. Fasten off. (Chain about 2 in / 5.1 cm)
- Right star: Join yarn with a sl st into the last sl st at the lower tip of the moon. Ch 10. Sl st through the tip of a star point. Fasten off. (Chain about 1.25 in / 3.2 cm)
Tension advice: Make the hanging chains with relaxed, even tension. Tight chains twist and make the stars spin and hang crooked. Run each tail back up through its own chain so it doesn’t add bulk.
Checkpoint: Hold the ornament up by its loop. The two outer stars should hang at about the same height, and the center star should sit about 0.75 in (1.9 cm) lower. The total length should be about 7 in (17.8 cm).
Border (Fan Edging and Finishing)
The edging is worked only along the outer curve. It continues straight from Row 4, without fastening off. The inner curve gets a plain sc trim at the end.
Border gauge: One ch-3 loop covers 3 sts of Row 4, and one Fan plus its sc covers about 0.5 in (1.3 cm) of the outer curve.
Row 5 (loop foundation): Ch 1, turn. Sl st in first 2 sts, sc in next st, [ch 3, sk 2 sts, sc in next st] 11 times, sl st in last 2 sts. (11 ch-3 loops)
Check: 2 + 1 + (11 x 3 = 33) + 2 = 38. This uses every stitch of Row 4 exactly once.
Row 6 (fans): Ch 1, turn. Sl st in first 2 sts, sl st in next sc, sc in next ch-3 sp, [Fan in next ch-3 sp, sc in next ch-3 sp] 5 times, sl st in next sc, sl st in last 2 sts. (5 Fans = 35 dc, plus 6 sc)
Check: the 11 loops alternate sc, Fan, sc, Fan and so on, so there is an sc at each end and 1 sc + 2 loops per Fan: 1 + (5 x 2) = 11 loops.
Row 7 (picot scallops): Ch 1, turn. Sl st in first 3 sts, sl st in next sc, [sc in first dc of Fan, (ch 3, sc in next dc) 6 times, sl st in next sc] 5 times, sl st in last 3 sts. Fasten off. (35 sc, 30 ch-3 picots)
Check: each Fan gets 7 sc and 6 picots, and 5 x 7 = 35 sc. The center sc of each Fan is its 4th sc.
Why the math works: Row 4’s 38 sts are exactly enough for 11 loops of 3 sts plus a 2-stitch sl st taper at each end. An odd number of loops puts an sc at both ends, which leaves 5 symmetrical Fans in the middle of the curve. The sl st tapers keep the edging off the tips, so the moon’s points stay sharp.
Hanging loop: Lay the moon as a “C” with its opening facing right. The Fan nearest the top tip is Fan 1, and the Fan nearest the bottom tip is Fan 5. Join yarn with a sl st into the center (4th) sc of Fan 1. Ch 15, then sl st in the same sc. Work 20 sc into the ch-15 loop and sl st into the base. Fasten off. (Loop stands about 0.75 in / 1.9 cm)
Inner trim: Join yarn at one tip on the foundation side. Sc in each unused loop of the foundation chain. (25 sc) Fasten off. This makes the inner curve smooth and firm.
Now complete the Joining section.
Final Blocking
- Weave in any remaining tails, hiding them inside the dc band.
- Wet the ornament in cool water and gently press out the extra water in a towel.
- Pin the moon onto the mat as a “C” that is 3.5 in (8.9 cm) tall and 2.75 in (7.0 cm) wide.
- Pin each Fan open into a neat half-circle, and put a pin in the center of each picot.
- Pin each star point outward so the star measures 1.25 in (3.2 cm).
- Lay the chains straight, at 1.25 in (3.2 cm), 2 in (5.1 cm) and 1.25 in (3.2 cm).
- Optional: brush or spray on stiffener, especially on the Fans.
- Let it dry completely before unpinning, which usually takes 6 to 12 hours.
Final Quality-Control Checklist
- The moon is 3.5 in (8.9 cm) x 2.75 in (7.0 cm) and both tips are pointed.
- There are 5 even Fans with 7 dc each and 6 picots each.
- The sc trim along the inner curve has 25 sc and lies flat.
- The hanging loop is centered on Fan 1 and is firm.
- All 3 stars have 5 matching points and measure 1.25 in (3.2 cm).
- The chains are 10, 16 and 10 ch, and the center star hangs lowest.
- There are no visible tails or knots.
Troubleshooting
The moon lies straight instead of curving. Your Row 2 and Row 4 increases were worked too tightly. Loosen up on those rows or go up half a hook size for them.
The moon cups or ruffles. The outer rows are too loose. Use a smaller hook for Rows 2 and 4.
The Fans overlap. Check that each Fan has exactly 7 dc and that you skipped 2 sts in Row 5.
The star points are uneven. Make all four chains of each point with the same tension before working back down them.
The stars spin. Re-block the chains straight and add a little stiffener to them.
The center hole is too big. Pull the magic ring tighter before joining Round 1.
Care
Hand wash in cool water, press out the water gently and dry flat, pinned to shape. If you used stiffener, re-starch after washing.
Final Notes
The measurements build on each other in this order:
- A star measures 0.5 in (1.3 cm) after Round 1 and 1.25 in (3.2 cm) when finished.
- The moon’s 25-st foundation measures 3 in (7.6 cm).
- The increases in Rows 2 and 4 take it to 38 sts, enough to curve it into a crescent 3 in (7.6 cm) from tip to tip.
- Row 5 divides those 38 sts into 11 loops for 5 symmetrical Fans, which brings the moon to 3.5 in (8.9 cm) tall.
- The 10-, 16- and 10-ch hangers make the finished ornament about 7 in (17.8 cm) long.
If each checkpoint matches, the finished ornament will too. Happy crocheting!