
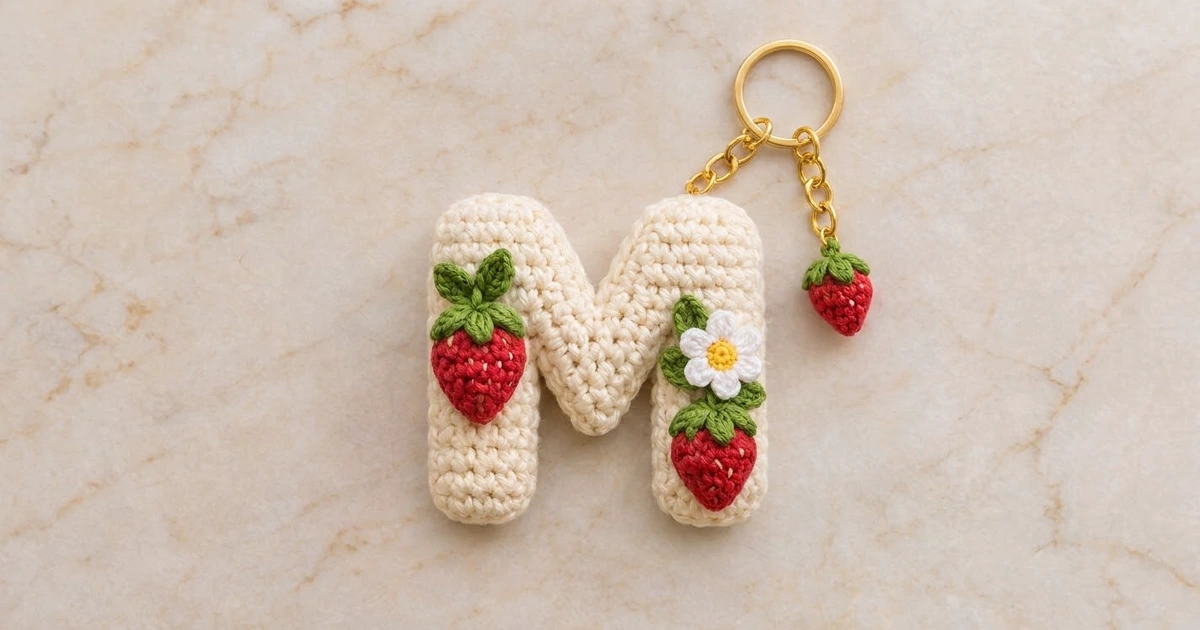
This little keychain is a soft, puffy letter M in creamy off-white. It is trimmed with two bright red strawberries, green leaves, and a tiny white daisy with a sunny yellow center. A gold keyring and short chain finish it, and a matching mini strawberry charm hangs beside the letter.
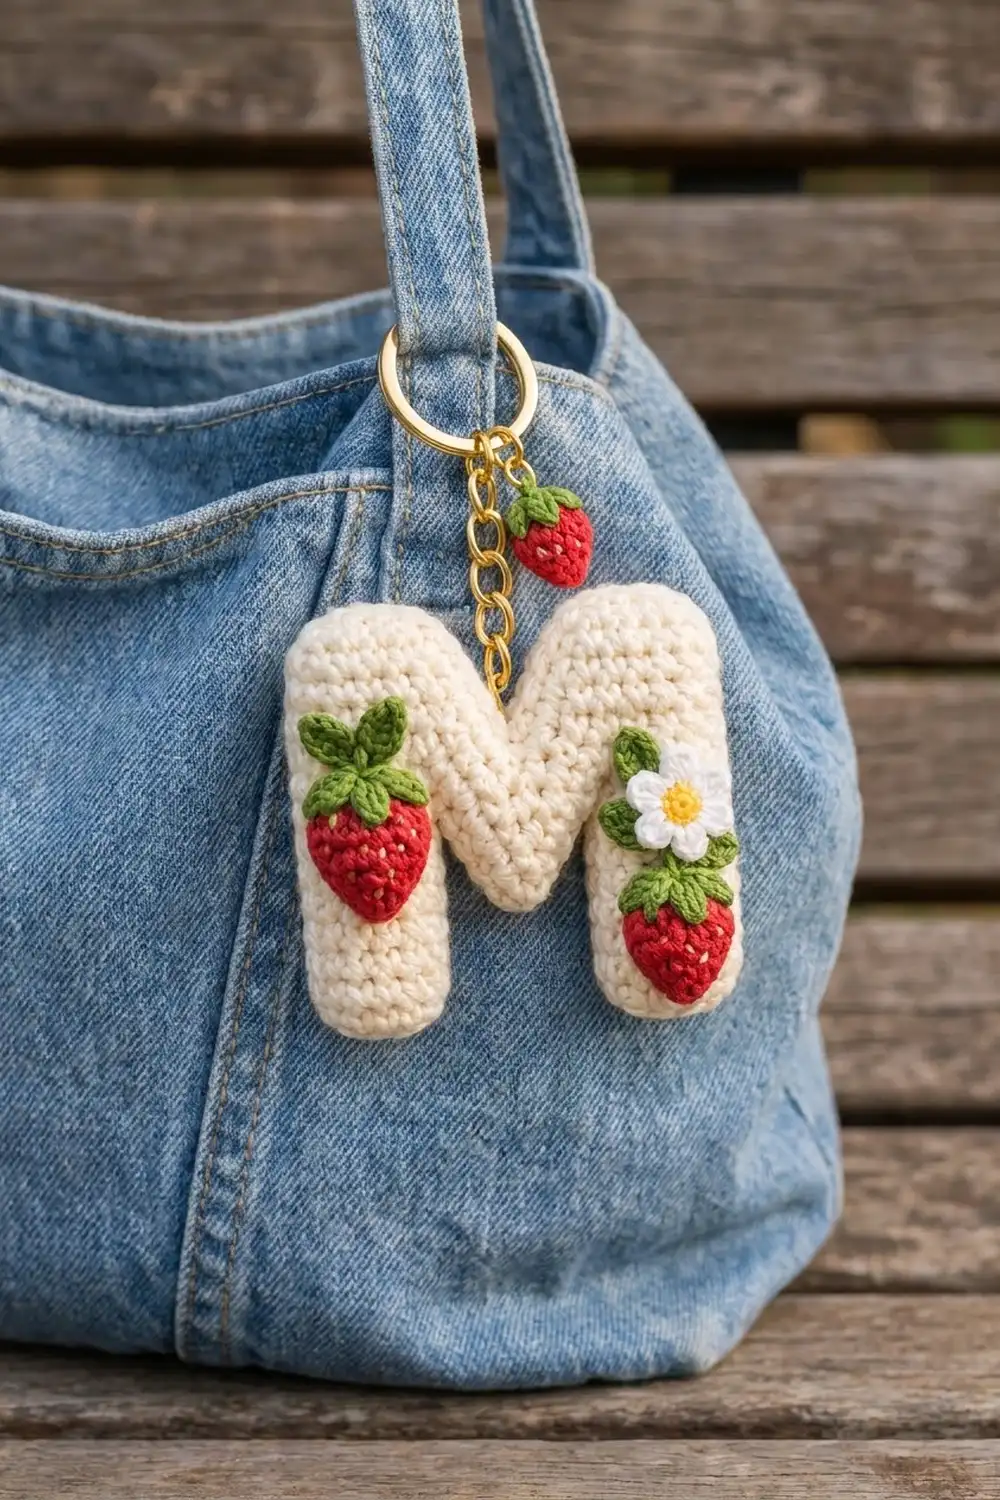
The look is sweet and cottage-style. Tight single crochet gives a neat, even texture, and the stuffing rounds every edge into a pillowy shape. It clips onto a tote strap, backpack, or set of keys and makes a lovely personalized gift.
The pattern uses US crochet terms. After stuffing, the letter measures about 2.9 in (7.4 cm) wide by 2.4 in (6.1 cm) tall and about 0.75 in (1.9 cm) thick.
Construction is simple. You crochet two identical flat M panels in rows and place them back to back. One round of single crochet joins them and also forms the border, and you stuff the letter as you go. Then you sew on the small flat appliqués and attach the hardware last.
Finished Size and Construction
- Finished size (stuffed): about 2.9 in (7.4 cm) wide x 2.4 in (6.1 cm) tall x 0.75 in (1.9 cm) thick
- Skill level: Easy+ (rows, simple shaping, sewing small pieces)
- Terminology: US crochet terms
- Yarn weight: DK (light worsted, #3) cotton
- Hook: 2.75 mm (US C-2)
- Number of pieces: 1 finished keychain made from 2 letter panels plus 10 small appliqué and charm pieces
- Layout: front panel and back panel stacked wrong sides together
- Panel size: 2.75 in (7.0 cm) wide x 2.3 in (5.8 cm) tall
- Size before border: 2.75 in (7.0 cm) x 2.3 in (5.8 cm), the same as the panel
- Border depth: one round of sc, about 0.2 in (0.5 cm), giving 3.1 in (7.9 cm) x 2.7 in (6.9 cm) flat before stuffing
Materials
Choose a smooth mercerized or combed DK cotton. Cotton holds crisp edges, resists fuzzing on a keychain, and makes the strawberries look glossy. Acrylic also works but looks slightly softer.
- Cream (letter): 12 g, about 29 m
- Red (strawberries): 4 g, about 10 m
- Green (sepals and leaves): 3 g, about 7 m
- White (daisy petals): 2 g, about 5 m
- Yellow (daisy center): 1 g, about 2 m
These amounts include a margin of roughly 20 percent for swatches, tails, and sewing.
Tools
- 2.75 mm (US C-2) crochet hook
- Small amount of polyester fiberfill
- Gold keyring, 1 in (2.5 cm), with a 1.5 in (3.8 cm) chain and jump ring
- One extra jump ring and a 0.75 in (1.9 cm) chain for the charm
- Tapestry needle, scissors, stitch markers
- Two pairs of flat-nose pliers
Abbreviations (US Terms)
- ch – chain
- sl st – slip stitch
- sc – single crochet
- hdc – half double crochet
- dc – double crochet
- sc2tog – single crochet 2 together
- st(s) – stitch(es)
- MR – magic ring
- RS / WS – right side / wrong side
Special stitch – corner (3 sc in one st): Work 3 sc into the same stitch to turn an outward corner. The middle sc is the corner point.
Gauge and Checkpoints
Gauge: 11 sc and 12 rows = 2 in (5.1 cm) in sc rows. That is 5.5 sts and 6 rows per inch.
Make one panel first and treat it as your swatch. It is small, and it tells you the exact size your letter will be.
Checkpoints
- After leg Row 6: each leg is 4 sts, about 0.75 in (1.9 cm) wide and 1 in (2.5 cm) tall.
- After Row 10: the panel is 15 sts, 2.75 in (7.0 cm) wide and about 1.7 in (4.3 cm) tall.
- Finished panel: 2.75 in (7.0 cm) x 2.3 in (5.8 cm).
- After border: 3.1 in (7.9 cm) x 2.7 in (6.9 cm), laid flat.
Tolerance is ±0.1 in (0.3 cm). If your panel is too big, switch to a 2.5 mm hook. If it is too small, switch to a 3.0 mm hook. Keep your tension tight so no stuffing shows through the stitches.
Letter Panel (Make 2)
Use cream. The turning ch-1 does not count as a stitch anywhere in this pattern.
First Leg
Ch 5.
Row 1: Sc in 2nd ch from hook and in each ch across. (4 sts)
Rows 2–6: Ch 1, turn, sc in each st across. (4 sts)
Fasten off and set aside.
Second Leg
Work Rows 1–6 exactly as for the first leg. Do not fasten off.
Join the Legs
Row 7: Ch 1, turn, sc in each of the 4 sts of the second leg, ch 7. Pick up the first leg with its Row 6 facing the same way, then sc in each of its 4 sts. (8 sc + 7 ch)
The ch-7 bridges the 1.25 in (3.2 cm) gap between the legs. Make sure both legs line up at the bottom and the chain is not twisted.
Row 8: Ch 1, turn, sc in 4 sts, sc in each of the 7 ch, sc in 4 sts. (15 sts)
Rows 9–10: Ch 1, turn, sc in each st across. (15 sts)
The panel now has its full-width center band, which forms the point of the M’s V.
First Peak
Row 11: Ch 1, turn, sc in first 7 sts, leave remaining 8 sts unworked. (7 sts)
Row 12: Ch 1, turn, sc2tog, sc in next 5 sts. (6 sts)
Row 13: Ch 1, turn, sc in next 4 sts, sc2tog. (5 sts)
Row 14: Ch 1, turn, sc in each st across. (5 sts)
Fasten off. All decreases sit on the inner edge, so the outer side of the peak stays straight.
Second Peak
Row 11: Skip the next unworked st of Row 10 (the center st). Join cream in the following st, ch 1, sc in same st and in each remaining st across. (7 sts)
Row 12: Ch 1, turn, sc in next 5 sts, sc2tog. (6 sts)
Row 13: Ch 1, turn, sc2tog, sc in next 4 sts. (5 sts)
Row 14: Ch 1, turn, sc in each st across. (5 sts)
Fasten off. The skipped center st and the decreases together form the V notch. It is 1 st wide at Row 11 and widens to 5 sts at the top. The top edge reads 5 sts + 5-st notch + 5 sts = 15, matching the panel width.
Weave in all tails on both panels. Smooth tails help the join stay tidy.
Strawberries, Leaves, and Daisy
Large Strawberry (make 1, red)
Row 1: Ch 2, 3 sc in 2nd ch from hook. (3 sts)
Row 2: Ch 1, turn, 2 sc in first st, sc in next st, 2 sc in last st. (5 sts)
Rows 3–5: Ch 1, turn, sc in each st across. (5 sts)
Row 6: Ch 1, turn, sc2tog, sc in next st, sc2tog. (3 sts)
Fasten off, leaving a 10 in (25.4 cm) tail. It measures about 0.9 in (2.3 cm) wide x 1 in (2.5 cm) tall. The point is at the bottom.
Small Strawberry (make 3, red)
Work Rows 1–2 of the large strawberry. (5 sts)
Rows 3–4: Ch 1, turn, sc in each st across. (5 sts)
Row 5: Ch 1, turn, sc2tog, sc in next st, sc2tog. (3 sts)
Fasten off with a long tail. Each measures about 0.9 in (2.3 cm) x 0.8 in (2.0 cm). One goes on the right leg; the other two become the charm.
Sepal (make 3, green)
MR, ch 3, sl st in 2nd ch from hook, sl st in next ch, sl st in ring; repeat from * 4 more times. (5 points)
Pull the ring closed and fasten off with a long tail.
Leaf (make 2, green)
Ch 5. Sc in 2nd ch from hook, hdc in next 2 ch, then (sc, ch 2, sl st in 2nd ch from hook, sc) in last ch for the tip. Rotate and work along the other side of the chain: hdc in next 2 ch, sc in next ch, sl st in first sc. (8 sts + picot)
Fasten off. Each leaf is about 0.6 in (1.5 cm) long.
Daisy (make 1)
With yellow, MR, 8 sc in ring, sl st to first sc. (8 sts) Fasten off. The center is about 0.35 in (0.9 cm) across.
With white, join in any sc. (Sl st, ch 2, dc, ch 2, sl st) in same st, then move to next st; repeat from * around. (8 petals)
Fasten off. The daisy is about 0.9 in (2.3 cm) across.
Make All Pieces
Piece count by color:
- Cream: 2 letter panels
- Red: 1 large strawberry, 3 small strawberries
- Green: 3 sepals, 2 leaves
- Yellow + white: 1 daisy
Placement layout on the front panel, with the top of the letter at the top:
[ left peak ]  V  [ right peak ]  <- keyring here
[ 2 leaves  ]     [  daisy     ]
[ sepal     ]     [  sepal     ]
[ LARGE     ]     [ small      ]
[ strawberry]     [ strawberry ]
[ left leg  ]     [ right leg  ]
The large strawberry sits centered on the left leg, with its top just below Row 10. The daisy sits at the top of the right leg, overlapping the small strawberry’s sepal.
Joining
Hold the two panels wrong sides together, with the leg bottoms lined up exactly. Every edge stitch and row end on the front should have a matching one directly behind it on the back.
Work the border round through both layers at once, one sc per matched pair. Never skip a layer. Insert the hook under the matching stitch or row end on the front, then on the back, and complete the sc.
Keep the same tight tension you used for the panels. If the edge ripples, your border stitches are too loose. If the letter cups or puckers, they are too tight.
Stuff the legs and center as you go, pushing in small tufts with a chopstick. Aim for firm but not hard, about 0.75 in (1.9 cm) thick at the center band.
Size checkpoint: Before stuffing the last section, lay the letter flat. It should measure 3.1 in (7.9 cm) x 2.7 in (6.9 cm).
Border
Border gauge: Same as the panel: 5.5 sc per inch along stitch edges and 1 sc per row end along the sides.
Border round (joining round): With the RS of the front panel facing, join cream through both layers in the first foundation st at the left leg’s outer corner. Ch 1, then work:
- Left leg bottom: 3 sc in first st, sc in next 2 sts, 3 sc in last st. (8 sc)
- Left leg inner side: 1 sc in each of 6 row ends. (6 sc)
- Gap top: 1 sc in each of the 7 free loops of the ch-7. (7 sc)
- Right leg inner side: 1 sc in each of 6 row ends. (6 sc)
- Right leg bottom: 3 sc in first st, sc in next 2 sts, 3 sc in last st. (8 sc)
- Right outer side: 1 sc in each of 14 row ends. (14 sc)
- Right peak top: 3 sc in first st, sc in next 3 sts, 3 sc in last st. (9 sc)
- Right peak inner edge: 1 sc in each of 4 row ends. (4 sc)
- Notch: 1 sc in the skipped center st of Row 10. (1 sc)
- Left peak inner edge: 1 sc in each of 4 row ends. (4 sc)
- Left peak top: 3 sc in first st, sc in next 3 sts, 3 sc in last st. (9 sc)
- Left outer side: Stuff firmly, then work 1 sc in each of 14 row ends. (14 sc)
Sl st to the first sc. Total: (74 sc worked 1 per edge position) + (16 sc added at 8 outer corners) = 90 sts.
Why the math works: The panel’s perimeter has 74 edge positions: 4 + 6 + 7 + 6 + 4 + 14 + 5 + 4 + 1 + 4 + 5 + 14 = 74. Each of the 8 outward corners is already counted once in its side and gets 2 extra sc to turn cleanly. Inward corners (the gap and the notch) get no extra stitches, so they stay crisp. The fabric has 6 rows per inch but only 5.5 sts per inch, so working 1 sc per row end gathers the sides very slightly. That helps the stuffing round them out.
Fasten off and hide the tail inside the stuffing.
Final Blocking
- Do not wet-block a stuffed piece. Steam it lightly instead.
- Hold a steam iron 1 in (2.5 cm) above the letter for 2–3 seconds per side. Never press down.
- While the letter is still warm, pinch the outer corners into neat, rounded points and push the notch and gap edges inward with a fingertip.
- Steam each appliqué flat separately, pinning it to a foam mat at its finished size.
- Let everything cool and dry fully before sewing.
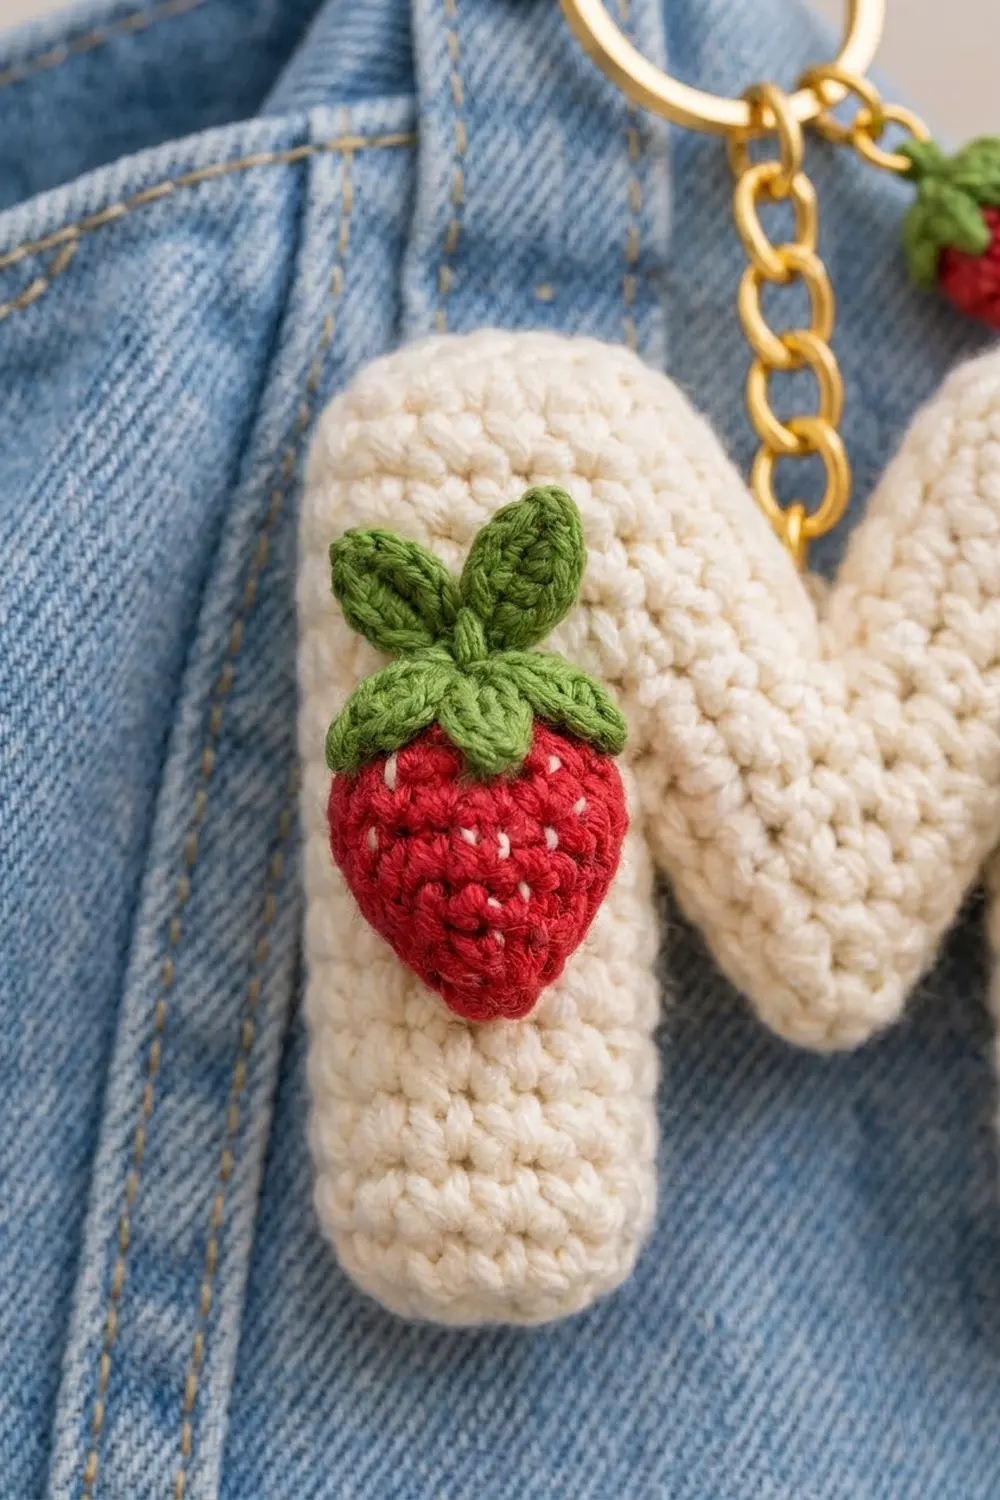
- Sew a sepal to the top edge of each strawberry, then sew the 2 leaves above the large strawberry’s sepal.
- Sew the appliqués onto the front panel with small stitches through the outer loops only, following the layout.
- For the charm, sew two small strawberries back to back with a small pinch of stuffing between them, then add the last sepal.
- Open the keyring’s jump ring, pass it through 2 border sc at the top of the right peak, and close it fully. Attach the charm to the keyring with the extra jump ring and chain.
Final Quality-Control Checklist
- Both panels have 15 sts in Rows 8–10 and 5 sts on each peak at Row 14.
- The border round has exactly 90 sts.
- The letter measures about 2.9 in (7.4 cm) x 2.4 in (6.1 cm) after stuffing.
- No stuffing shows through the stitches or along the seam.
- The V notch is centered and both legs are the same length.
- The appliqués are flat, secure, and match the layout.
- The jump rings are fully closed, with no gaps to snag fabric.
- All tails are hidden.
Troubleshooting
- Legs are different lengths: Count rows. Both legs need exactly 6 rows before Row 7.
- Chain twisted at Row 7: Undo it and chain again, keeping the front of each ch facing you.
- Peaks lean inward: Check that every sc2tog is on the inner edge, not the outer edge.
- Border ruffles: Go down one hook size for the border round only.
- Corners look blunt: Make sure you worked 3 sc in each outer corner st.
- Stuffing shows through: Use a smaller hook or a slightly heavier cotton.
- Appliqués curl: Steam and pin them before sewing.
Care
Spot clean with mild soap and cool water, then pat dry and let it air-dry flat. Don’t put it in the dryer, which can tarnish the gold hardware and distort the stuffing.
Final Notes
The measurements build step by step. A gauge of 11 sc and 12 rows to 2 in (5.1 cm) gives a 15-st by 14-row panel measuring 2.75 in (7.0 cm) x 2.3 in (5.8 cm). One 90-st border round joins the two panels into a letter measuring 3.1 in (7.9 cm) x 2.7 in (6.9 cm) flat. After stuffing, it measures about 2.9 in (7.4 cm) x 2.4 in (6.1 cm). Check your gauge and count each border side, and the rest falls into place.
Happy crocheting!