
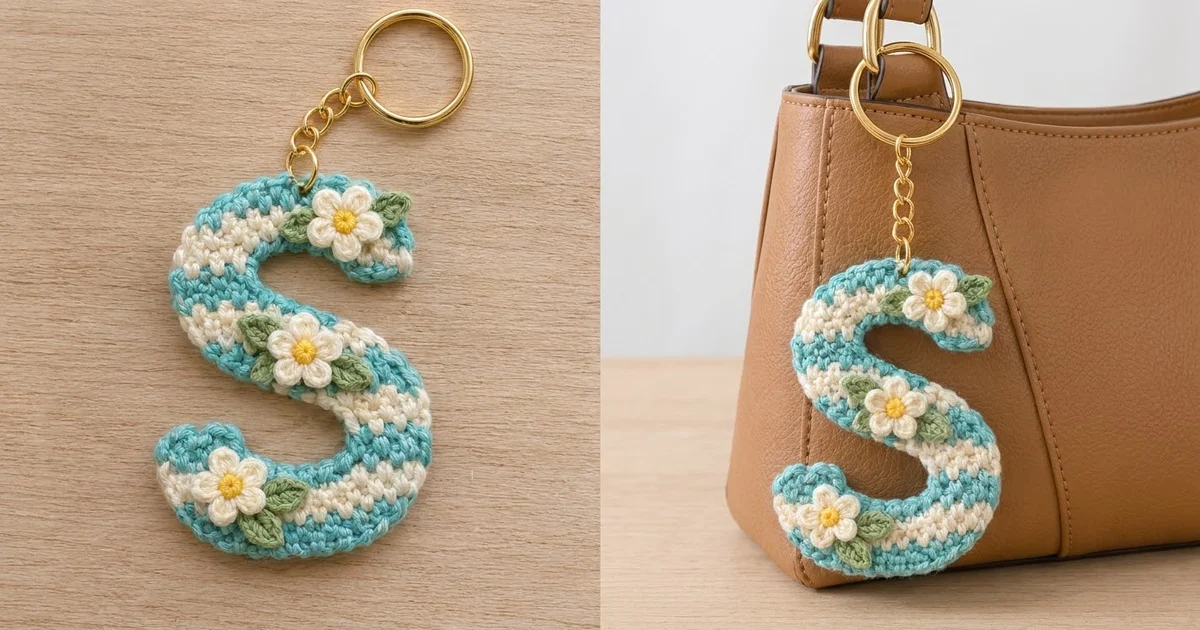
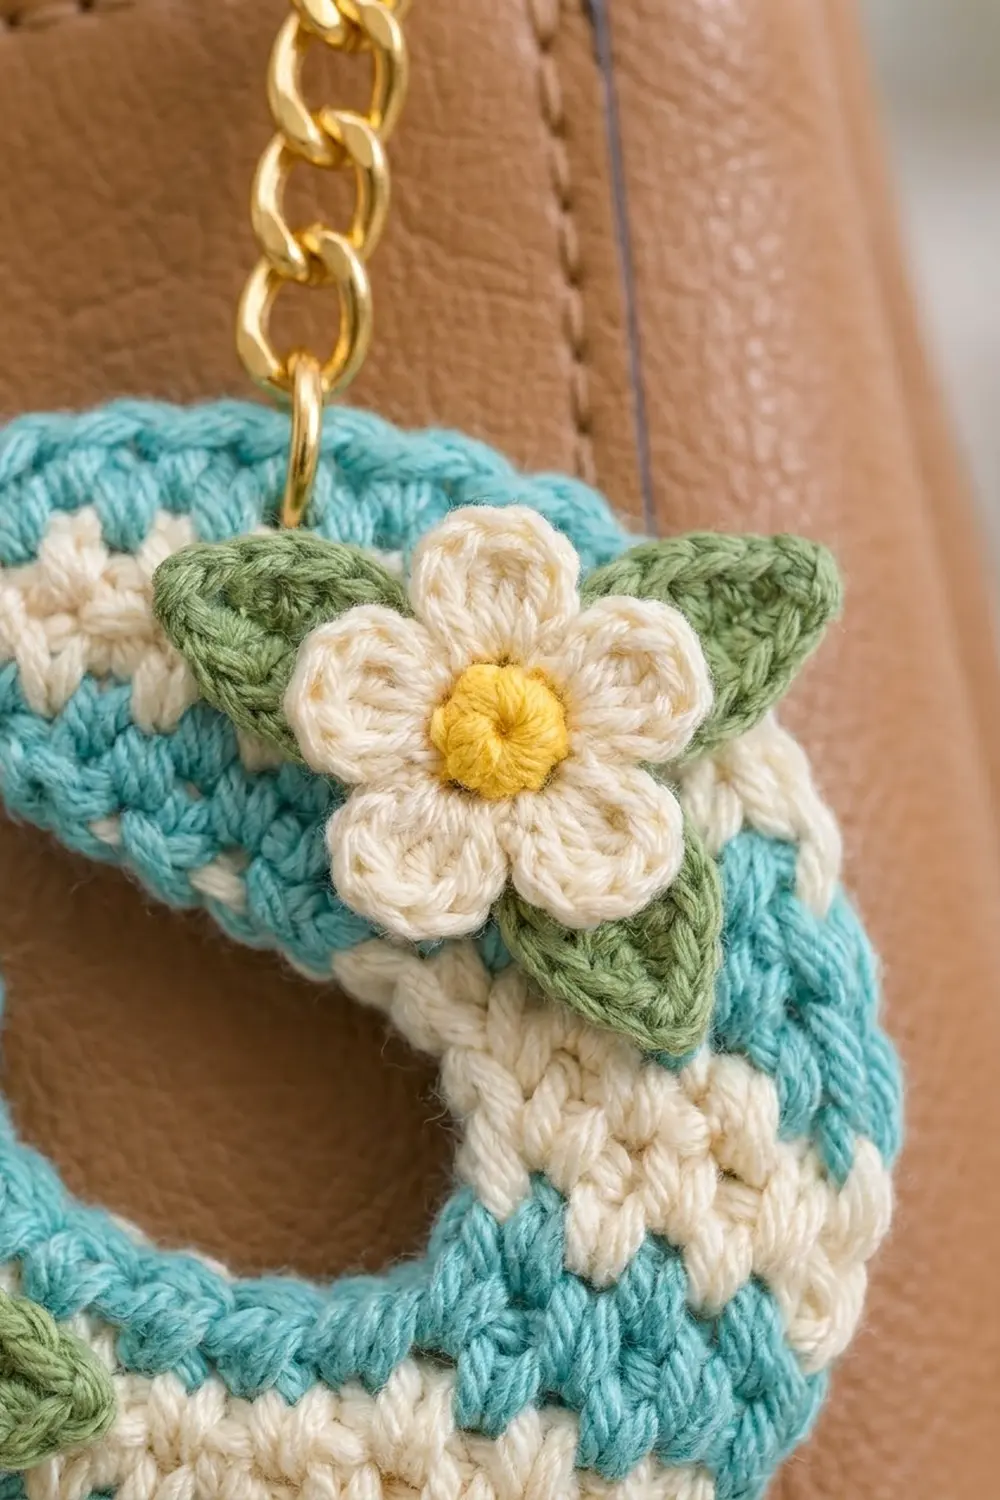
This little letter S is a cheerful, personal bag charm. It is one striped strip of single crochet shaped into a smooth S, outlined in turquoise, and finished with three tiny cream flowers and green leaves. A gold split ring and short chain turn it into a keychain or purse charm.
The palette is soft and fresh: turquoise and cream bands, a sunny yellow in each flower center, and leaf green. On the curves the stripes fan out like slices of a wheel, which gives the letter its rounded look.
The pattern uses US crochet terms. The finished letter is about 2.7 in (6.9 cm) wide and 3.9 in (9.9 cm) tall.
The body is worked in short rows across a 4-stitch strip from the top end of the S to the bottom end. Short-row wedges on the outer edge bend the strip around each curve. One round of border evens out the edges, then you sew on the flowers and leaves and attach the hardware.
Finished Size and Construction
- Finished size: 2.7 in (6.9 cm) wide x 3.9 in (9.9 cm) tall
- Skill level: Easy-intermediate (short rows, color changes)
- Terminology: US crochet terms
- Yarn weight: Fine / sport (#2) cotton
- Hook: 2.5 mm (US B/1 or C/2)
- Number of pieces: 1 letter body, plus 3 flowers and 5 leaves as appliqués
- Layout: a single S-shaped strip; no joining
- Strip width: 4 sc = 0.67 in (1.7 cm)
- Size before border: 2.4 in (6.1 cm) x 3.6 in (9.1 cm)
- Border depth: 1 round of sc, about 0.15 in (0.4 cm) per side
Materials
Use a smooth mercerized or matte cotton in sport weight. Cotton holds the letter’s shape, keeps the stitches crisp and stands up to wear on a bag. Avoid fuzzy yarns, because they blur the stripes.
- Color A, Turquoise: 4 g / 12 m (stripes and border)
- Color B, Cream: 4 g / 12 m (stripes and flower petals)
- Color C, Yellow: 1 g / 2 m (flower centers)
- Color D, Leaf Green: 1 g / 3 m (leaves)
Tools:
– 2.5 mm crochet hook
– Tapestry needle
– Scissors
– Stitch markers (2)
– 1 in (2.5 cm) gold split key ring
– Gold chain about 1.5 in (3.8 cm) long, with 2 jump rings
– 2 pairs of flat-nose pliers
– Pins and a blocking mat
– Spray bottle
All quantities include a generous margin for swatching and weaving in ends.
Abbreviations (US Terms)
- ch: chain
- sc: single crochet
- hdc: half double crochet
- dc: double crochet
- sl st: slip stitch
- st(s): stitch(es)
- RS: right side
- MR: magic ring
Special technique: short-row wedge. Ch 1, turn, sc in the next 2 sts only. Then ch 1, turn, and sc in those same 2 sts back to the edge. One wedge = 2 short rows. Each wedge adds 2 extra rows to one edge only, which bends the strip.
Color change: Work the last sc of a stripe until 2 loops remain on the hook. Yarn over with the new color and pull through. Carry the unused color loosely up Edge B, where the border will hide it.
Gauge and Checkpoints
Gauge: 12 sc x 13 rows = 2 in (5.1 cm) in sc worked in rows, which is 6 sc and 6.5 rows per inch.
Test the strip itself first. Work Rows 1–6 below and check them before going on.
- Checkpoint 1 (after Row 6): The strip is 4 sc wide, measuring 0.67 in (1.7 cm), and 0.92 in (2.3 cm) long.
- Checkpoint 2 (after Row 30): The strip has turned about 180 degrees. The inner edge measures about 1.23 in (3.1 cm) and the outer edge about 3.69 in (9.4 cm). The gap inside the curve (the counter) is about 0.8 in (2.0 cm) across.
- Checkpoint 3 (after Row 70): The letter measures about 2.4 in (6.1 cm) x 3.6 in (9.1 cm).
- Checkpoint 4 (after the border): The letter measures 2.7 in (6.9 cm) x 3.9 in (9.9 cm).
If your strip is too wide (more than 0.75 in / 1.9 cm), go down 0.25 mm in hook size. If it is too narrow (less than 0.6 in / 1.5 cm), go up 0.25 mm. Row gauge matters most on the curves. If your rows are much shorter than the gauge, the curves will turn too little and the letter will look stretched.
Letter Body
The strip has two long edges. Edge A is the outer edge of the top curve. Edge B is the outer edge of the bottom curve. Every stripe ends on Edge B, so all color changes and carried yarns stay on one side.
Top End (Rows 1–6)
With Color A, ch 5.
Row 1: Sc in 2nd ch from hook and in each of next 3 ch. Row 1 ends at Edge A. (4 sc)
Row 2: Ch 1, turn, sc in each st across. Row 2 ends at Edge B. Change to B. (4 sc)
Rows 3–4 (B): Repeat Row 2. Change to A at the end of Row 4. (4 sc)
Rows 5–6 (A): Repeat Row 2. Change to B at the end of Row 6. (4 sc)
Place a marker in the first row-end of Edge A so you can tell the edges apart.
Top Curve (Rows 7–30)
The top curve has 4 stripes of 6 rows each. Every stripe starts and ends at Edge B and adds 2 wedges on Edge A.
Stripe pattern for the top curve:
– Row a: Ch 1, turn, sc in each st across, ending at Edge A. (4 sc)
– Rows b–c: Work 1 short-row wedge on Edge A. (2 sc each row)
– Rows d–e: Work 1 more short-row wedge on Edge A. (2 sc each row)
– Row f: Ch 1, turn, sc in all 4 sts, ending at Edge B. (4 sc)
In Row f, the last 2 sts are the inner sts of Row a. Pull snugly at the step between the short-row sts and those sts so you don’t leave a hole.
- Rows 7–12: Stripe pattern in B. Change to A.
- Rows 13–18: Stripe pattern in A. Change to B.
- Rows 19–24: Stripe pattern in B. Change to A.
- Rows 25–30: Stripe pattern in A. Change to B.
Edge counts for this section: Edge A gains 24 row-ends (8 full rows and 16 short rows). Edge B gains 8 row-ends (full rows only).
Check Checkpoint 2 now. The strip should form a neat U, with the stripes fanned out like wedges.
Spine (Rows 31–40)
The spine has 5 stripes of 2 rows each. Every row is: ch 1, turn, sc in each st across. (4 sc)
- Rows 31–32: B
- Rows 33–34: A
- Rows 35–36: B
- Rows 37–38: A
- Rows 39–40: B. Change to A.
The spine measures 10 rows, about 1.54 in (3.9 cm). It runs diagonally across the finished letter.
Bottom Curve (Rows 41–64)
The bottom curve bends the opposite way, so the wedges now go on Edge B. Row 40 ended at Edge B, so you start the wedges right away.
Stripe pattern for the bottom curve:
– Rows a–b: Work 1 short-row wedge on Edge B. (2 sc each row)
– Rows c–d: Work 1 more short-row wedge on Edge B. (2 sc each row)
– Row e: Ch 1, turn, sc in all 4 sts, ending at Edge A. (4 sc)
– Row f: Ch 1, turn, sc in all 4 sts, ending at Edge B. (4 sc)
- Rows 41–46: Stripe pattern in A. Change to B.
- Rows 47–52: Stripe pattern in B. Change to A.
- Rows 53–58: Stripe pattern in A. Change to B.
- Rows 59–64: Stripe pattern in B. Change to A.
Edge counts for this section: Edge B gains 24 row-ends. Edge A gains 8.
Bottom End (Rows 65–70)
Work every row as: ch 1, turn, sc in each st across. (4 sc)
- Rows 65–66: A
- Rows 67–68: B
- Rows 69–70: A
Fasten off B. Fasten off A, leaving a 6 in (15.2 cm) tail.
Stripe check: There are 19 stripes in all, alternating A and B: 3 in the top end, 4 in the top curve, 5 in the spine, 4 in the bottom curve and 3 in the bottom end. Both ends of the letter are turquoise.
Lay the strip flat. If it forms a mirror-image S, flip it over. Single crochet looks nearly the same on both sides, and the flipped side becomes the RS.
Total rows: 70, of which 38 are full rows and 32 are short rows.
Border
Border gauge: Work 1 sc per row-end along the long edges and 1 sc per stitch across the two short ends. One sc row-end matches one row height, so the border neither pulls in nor ruffles.
Edge counts:
– Edge A: 38 full rows + 16 short rows (top curve) = 54 row-ends
– Edge B: 38 full rows + 16 short rows (bottom curve) = 54 row-ends
– Each short end: 4 sts
Border Round (A): With the RS facing, join A in the last st of Row 70.
1. Ch 1. Work 3 sc in that st, sc in the next 2 sts, and 3 sc in the last st. (8 sc on the bottom end)
2. Work along Edge A with 1 sc in each row-end. (54 sc)
3. Across the foundation chain, work 3 sc in the first ch, sc in the next 2 ch, and 3 sc in the last ch. (8 sc on the top end)
4. Work along Edge B with 1 sc in each row-end. (54 sc)
5. Sl st to the first sc. Total: 124 sc.
Why the math works: The two long edges give 54 + 54 = 108 sc, and the two ends give 8 + 8 = 16, for a total of 108 + 16 = 124 sc. Each 8-st end already includes its 2 corner groups, so no corner sts are counted twice.
On each inner curve, the 8 row-ends sit close together. Work those sc tightly so the counter stays round. On each outer curve, the 24 row-ends spread out naturally and lie flat.
Fasten off and weave in all ends behind same-color sts. The border adds 0.15 in (0.4 cm) on every side, bringing the letter to 2.7 in (6.9 cm) x 3.9 in (9.9 cm).
Flowers (Make 3)
Rnd 1 (C): MR, ch 1, 5 sc in the ring. Pull the ring closed and sl st to the first sc. Fasten off. (5 sc)
Rnd 2 (B): Join B in any sc. In the same st, work (ch 2, 2 dc, ch 2, sl st). In the next st, work (sl st, ch 2, 2 dc, ch 2, sl st). Repeat from * 3 more times. (5 petals)
Fasten off, leaving an 8 in (20.3 cm) tail for sewing. Each flower is about 0.75 in (1.9 cm) across.
Leaves (Make 5)
With D, ch 5. Starting in the 2nd ch from hook, work along the chain: sl st, sc, hdc, sc in the last ch. Ch 1 for the tip. Working down the other side of the chain: sc, hdc, sc, sl st.
Fasten off, leaving an 8 in (20.3 cm) tail. Each leaf is about 0.5 in (1.3 cm) long.
Assembly
- Top flower: Pin it to the upper right of the top curve, near the top end. Tuck 2 leaves behind it, one on each side.
- Middle flower: Pin it to the center of the spine. Tuck 2 leaves behind it, angled left and right.
- Bottom flower: Pin it near the lower left end. Tuck 1 leaf behind its lower right edge.
- Sew the leaves: Stitch each leaf down along its center line with small stitches.
- Sew the flowers: Stitch each flower down around its center. Then add one tack stitch under each petal so the petals stay flat.
- Hardware: Open a jump ring and pass it through 2 border sts at the highest point of the top curve. Hook on one end of the chain and close the ring. Attach the split ring to the other end of the chain with the second jump ring.
Final Blocking
- Mist the letter lightly until it is damp but not wet.
- Lay it RS up on a blocking mat.
- Pin the outer curves first, smoothing them into even arcs.
- Ease each counter open to about 0.8 in (2.0 cm) across.
- Pin the two ends so they are square and the letter measures 2.7 in (6.9 cm) x 3.9 in (9.9 cm).
- Lift each petal gently and shape it round with your fingertip.
- Let it dry completely, then unpin.
Block before sewing on the flowers if you want the flattest possible letter.
Final Quality-Control Checklist
- 70 rows: 38 full rows of 4 sc and 32 short rows of 2 sc
- 19 stripes, alternating colors, with turquoise at both ends
- Each curve turns about 180 degrees, with wedges on its outer edge
- No holes at the short-row steps
- 124 sc in the border: 54 per long edge and 8 per end
- Size 2.7 in (6.9 cm) x 3.9 in (9.9 cm)
- 3 flowers with 5 petals each, and 5 leaves, sewn securely
- Jump rings fully closed and hardware attached through 2 border sts
Troubleshooting
The curves don’t turn far enough. Your rows are too short or the wedges too loose. Work the short rows more firmly, or add 1 extra wedge to the last stripe of the curve.
The curves buckle or cup. The outer edge is too tight. Loosen your tension on the short rows, or go up 0.25 mm in hook size for the curve sections only.
Holes at the short-row turns. When you work back across the step in Row f (top curve) or Row e (bottom curve), insert the hook under both the stitch and the side of the short row. Then pull the stitch snug.
The border ruffles. You worked more than 1 sc per row-end. Frog the border and recount: 54 sc per long edge.
The border puckers on the inner curves. That’s normal at first. Steam lightly and pin the counter open.
The carried yarn shows. Carry it loosely along Edge B only. The border sc covers it.
Care
Hand wash in cool water with mild soap, press out the water in a towel and dry flat. Remove the metal hardware before washing if possible.

Final Notes
The measurement chain is simple:
– Gauge: 12 sc x 13 rows = 2 in (5.1 cm)
– Strip width: 4 sc = 0.67 in (1.7 cm)
– Body: 70 rows shaped into a 2.4 in (6.1 cm) x 3.6 in (9.1 cm) S
– Border: 124 sc, adding 0.15 in (0.4 cm) per side
– Finished size: 2.7 in (6.9 cm) x 3.9 in (9.9 cm)
The same short-row method also works for other curved letters such as C, G or J. Happy crocheting!