

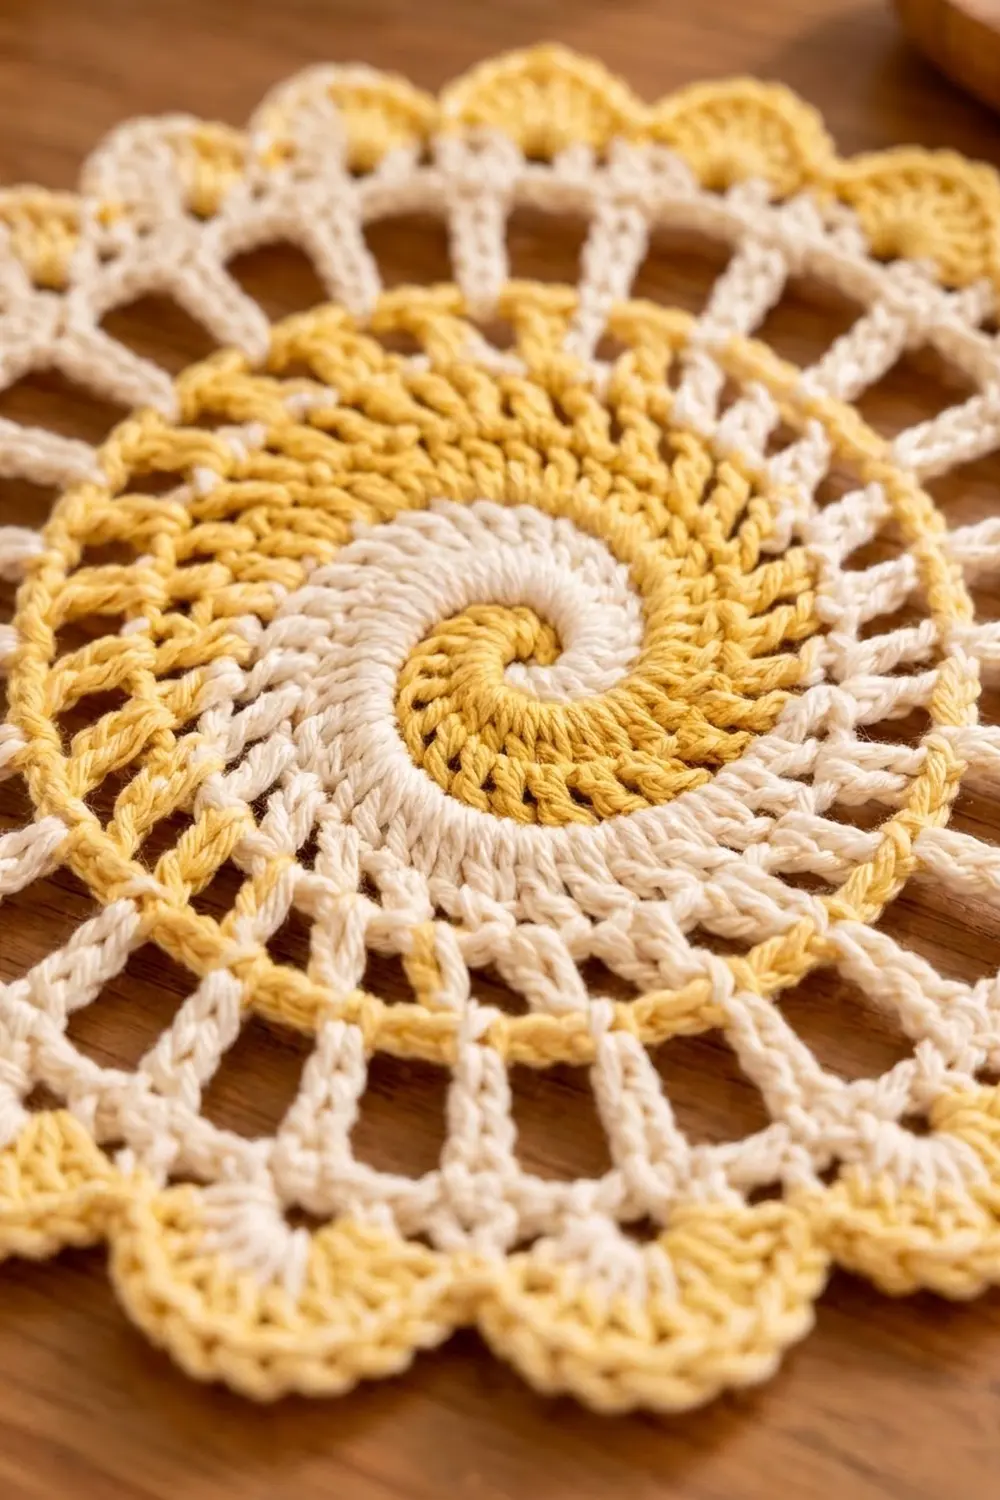
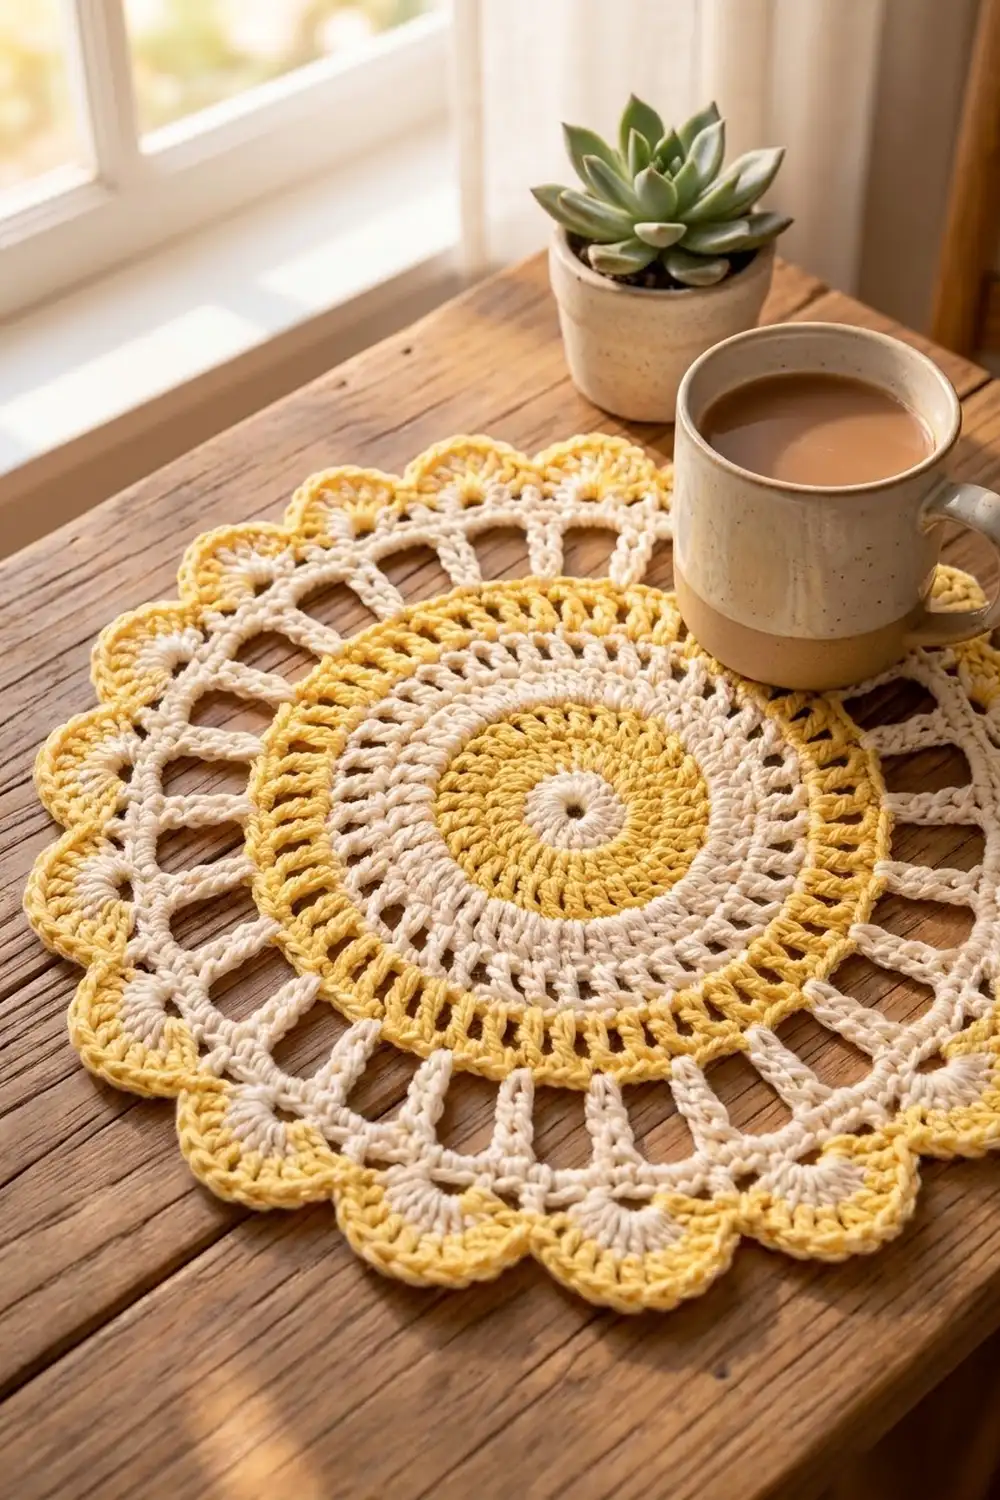
The Sunlit Spiral Doily Motif is one round lace piece with a swirling two-color center. Golden yellow and soft cream wind around each other like a seashell. A ring of tall open spokes surrounds the swirl, and the edge finishes in fourteen cream fans outlined in yellow scallops.
The style is bright, warm, and a little vintage. It looks good flat on a table, under a vase, or framed in a hoop. Because it uses only two colors and plain stitches, the pattern is relaxing once the spiral is set up.
This pattern uses US crochet terms. The finished motif measures 11 in (27.9 cm) across after blocking. Before the border it measures 9 in (22.9 cm).
Construction is simple. You work the spiral center with two balls at once, each color working over the other color’s stitches. Then you add a cream round and a yellow round, two rounds of cream spokes, a yellow solid round, and a two-round fan-and-scallop border. Everything is worked in the round as one piece. Nothing is sewn or joined.
Finished Size and Construction
- Finished size: 11 in (27.9 cm) diameter, blocked
- Skill level: Intermediate (two-color spiral technique)
- Terminology: US crochet terms
- Yarn weight: DK / light worsted (weight 3) cotton
- Hook: 4.0 mm (US G-6)
- Number of pieces: 1
- Layout: Single round motif, worked center out
- Piece size: 11 in (27.9 cm)
- Size before border (after Rnd 11): 9 in (22.9 cm)
- Border depth: 1 in (2.5 cm), Rnds 12-13
Materials
Choose a smooth mercerized or combed cotton in DK weight. Cotton gives crisp stitch definition, holds the spiral lines clearly, and blocks flat. Avoid fuzzy or very stretchy yarn, because the open spokes will sag.
- Color A, golden yellow: 25 g, about 58 m
- Color B, cream: 30 g, about 69 m
These quantities include a margin of roughly 20 percent for your gauge check and weaving in ends.
Choose two colors with clear contrast. If the yellow is too pale against the cream, the spiral arms blur together, so check them side by side in daylight before you start.
Tools:
- 4.0 mm (US G-6) crochet hook
- 2 locking stitch markers
- Tapestry needle
- Scissors
- Blocking mat, rust-proof pins, and spray bottle
- Ruler or tape measure
Abbreviations (US Terms)
- ch – chain
- sl st – slip stitch
- sc – single crochet
- hdc – half double crochet
- dc – double crochet
- tr – treble crochet
- sk – skip
- st(s) – stitch(es)
- sp – space
- rnd – round
- A / B – Color A / Color B
Special technique – two-color spiral: Both colors stay attached during Rnds 1-6. When you finish a color’s section, take the hook out and put that loop on a stitch marker (“drop”). Pick up the other color’s loop and keep working. Each color always works into the stitches the other color just made, and it stops when it reaches the other color’s dropped loop.
Fan: 7 dc worked into the same stitch.
Gauge and Checkpoints
This is a single piece, so the motif itself is your test. Work Rnds 1-3 and measure before going further.
- Gauge: Rnds 1-3 of the spiral = 2.5 in (6.4 cm) across
- After Rnd 2: 1.75 in (4.4 cm)
- After Rnd 6 (spiral complete): 5 in (12.7 cm)
- After Rnd 8: 6.25 in (15.9 cm)
- After Rnd 10 (spokes): 8.75 in (22.2 cm)
- After Rnd 11: 9 in (22.9 cm)
- After Rnd 13, blocked: 11 in (27.9 cm)
If your circle is too big, go down to a 3.75 mm hook. If it’s too small, go up to a 4.5 mm hook. If the circle ruffles, your increases are adding width faster than your stitches add height, so go down a hook size. If it cups into a bowl, go up a hook size. Measure the piece patted flat, not stretched.
Pattern
Spiral Center (Rnds 1-6)
Both colors are used at once. Keep the two balls on opposite sides of you so they don’t twist.
Rnd 1: With A, make a magic ring. Ch 1, then work (sc, hdc, 4 dc) into the ring. That is 6 A sts. Drop A onto a marker. With B, attach to the ring with a sl st right after the last A dc, then work (sc, hdc, 4 dc) into the ring. Drop B onto a marker. Pull the ring closed. (12 sts: 6 A, 6 B)
The sc and hdc at the start of each section make the gradual step that becomes the spiral arm.
Rnd 2: Pick up B. Work 2 dc in each of the next 6 A sts. That is 12 B sts. Drop B. Pick up A. Work 2 dc in each of the next 6 B sts from Rnd 1. That is 12 A sts. Drop A. (24 sts: 12 A, 12 B)
Rnd 3: Pick up B. Working into A’s 12 sts, dc in next st, 2 dc in next st; repeat from * 6 times. That is 18 B sts. Drop B. Pick up A and repeat the same sequence into B’s 12 sts. That is 18 A sts. Drop A. (36 sts: 18 A, 18 B)
Checkpoint: 2.5 in (6.4 cm).
Rnd 4: Pick up B. Working into A’s 18 sts, dc in next 2 sts, 2 dc in next st; repeat from * 6 times. That is 24 B sts. Drop B. Pick up A and repeat into B’s 18 sts. That is 24 A sts. (48 sts: 24 A, 24 B)
Rnd 5: Pick up B. Working into A’s 24 sts, dc in next 3 sts, 2 dc in next st; repeat from * 6 times. That is 30 B sts. Drop B. Pick up A and repeat into B’s 24 sts. That is 30 A sts. (60 sts: 30 A, 30 B)
Rnd 6 (taper round): Pick up B. Working into A’s 30 sts, dc in next 4 sts, 2 dc in next st; repeat from * 5 times. For the 6th repeat, taper: dc in next st, hdc in each of next 2 sts, sc in next st, (sc, sl st) in last st. That is 36 B sts (30 + 6). Fasten off B.
Pick up A and work the same round, including the taper, into B’s 30 sts. That is 36 A sts. Fasten off A. (72 sts: 36 A, 36 B)
The taper brings each spiral arm smoothly down to the height of the next round. Checkpoint: 5 in (12.7 cm).
Framing Rounds (Rnds 7-8)
Rnd 7: Join B with a sl st in any st. Ch 1 (does not count as a st). Sc in next 11 sts, 2 sc in next st; repeat from * 6 times. Work into the sl sts and sc of the taper as normal sts. Join with a sl st to first sc. Fasten off. (78 sts = 72 worked 1-per-st + 6 added)
Rnd 8: Join A with a sl st in any st. Ch 3 (counts as first dc). Dc in next 11 sts, 2 dc in next st, dc in next 12 sts, 2 dc in next st; repeat from * 4 more times. Join with a sl st to top of ch-3. Fasten off. (84 sts = 78 worked 1-per-st + 6 added)
Checkpoint: 6.25 in (15.9 cm).
Spoke Rounds (Rnds 9-10)
Rnd 9: Join B with a sl st in any st. Ch 4 (counts as first tr), ch 2, sk 2 sts. Tr in next st, ch 2, sk 2 sts; repeat from * 26 more times. Join with a sl st to top of ch-4. (28 tr, 28 ch-2 sps)
Check: 28 repeats x 3 sts each = 84 sts, which uses all of Rnd 8 exactly.
Rnd 10: Don’t fasten off. Ch 4 (counts as first tr), ch 4. Tr in next tr, ch 4; repeat from * 26 more times. Join with a sl st to top of ch-4. Fasten off. (28 tr, 28 ch-4 sps)
The spokes now stand tall and straight, with wide open windows between them. Checkpoint: 8.75 in (22.2 cm).
Solid Ring (Rnd 11)
Rnd 11: Join A with a sl st in top of any tr. Ch 1 (does not count). Sc in same tr, 4 sc in next ch-4 sp, sc in next tr, 4 sc in next ch-4 sp; repeat from * 26 more times. Join with a sl st to first sc. Fasten off. (140 sc = 28 worked 1-per-tr + 112 in spaces)
Place a marker in the first sc. Each sc sitting on top of a tr is a “spoke sc.” There are 28 of them, 5 sts apart. Checkpoint: 9 in (22.9 cm). This is your size before the border.
Border
The border has two rounds: cream fans, then a yellow scallop outline. It adds 1 in (2.5 cm) all around, bringing the diameter from 9 in (22.9 cm) to 11 in (27.9 cm).
Border gauge: One finished scallop (fan plus outline) is about 2 in (5.1 cm) wide along the outer edge and 1 in (2.5 cm) deep.
A circle has no sides or corners, so the border is counted per repeat instead. Each repeat uses 10 sts of Rnd 11, which is exactly two spoke sections (5 sts per spoke section x 2).
Rnd 12: Join B with a sl st in any spoke sc. Ch 1 (does not count). Sc in same st. Sk next 4 sts, 7 dc in next st (the next spoke sc), sk next 4 sts, sc in next st (the following spoke sc); repeat from * 13 more times, leaving out the last sc on the final repeat. Join with a sl st to first sc. Fasten off. (14 fans, 14 sc; 112 sts)
Check: 14 repeats x 10 sts = 140, all of Rnd 11. Fans sit over every other spoke, and anchor sc sit over the spokes between them.
Rnd 13: Join A with a sl st in any anchor sc. Ch 1 (does not count). Sc in sc, dc in first dc of fan, 2 dc in each of next 5 dc, dc in last dc of fan; repeat from * 13 more times. Join with a sl st to first sc. Fasten off. (182 sts = 112 worked 1-per-st + 70 added)
Why the math works: Each repeat in Rnd 13 has 13 sts: 1 sc + 1 dc + 10 dc + 1 dc. Fourteen repeats x 13 = 182. The 5 increases per fan (14 x 5 = 70 added) let the outline curve around the fan without pulling it in. The sc between fans drops into the valley, which gives the scalloped outline. Because 140 divides evenly by 10, no stitches need to be fudged anywhere in the border.
Weave in all ends through stitches of the same color.
Final Blocking
- Soak the motif in cool water for 10 minutes. Press out the water gently in a towel, without wringing.
- Lay it on a blocking mat, right side up. Check that both spiral arms curve in the same direction.
- Pin the center flat and check that the spiral is 5 in (12.7 cm) across.
- Pin the top of each of the 28 spokes along a 9 in (22.9 cm) circle so the windows are evenly sized.
- Pin the center of each of the 14 scallops along an 11 in (27.9 cm) circle.
- Pin each anchor sc slightly inward to sharpen the valley between scallops.
- Mist lightly and let dry completely, about 12-24 hours. Take out the pins only when the piece is fully dry.
Final Quality-Control Checklist
- Diameter is 11 in (27.9 cm), measured across in three directions.
- Spiral center is 5 in (12.7 cm) and lies flat with no cone.
- Both spiral arms are the same width and taper smoothly at Rnd 6.
- Rnd 7 has 78 sts and Rnd 8 has 84 sts.
- There are 28 spokes, all straight and evenly spaced.
- Rnd 11 has 140 sc with no gaps over the spokes.
- There are 14 cream fans and 14 yellow scallops.
- No ends show on the front, and all are woven into matching colors.
Troubleshooting
The spiral looks like stripes instead of a swirl. You probably worked a color into its own stitches. Each color must always work into the other color’s newest stitches.
The yarns twist badly. Turn the work clockwise and counterclockwise in turn as you pick up each color, or keep the balls in separate bowls.
The center cups. The Rnd 1 ring is too tight or the hook is too small. Loosen the ring slightly or go up a hook size.
The spokes lean or twist. Make sure each tr in Rnd 10 goes into the top of a Rnd 9 tr, not into the chain space.
The stitch count is wrong in Rnd 12. Count Rnd 11 first. It must be 140, or the 10-st repeat won’t line up.
The scallops ruffle. Work the Rnd 13 dc slightly shorter, or use a hook 0.25 mm smaller for that round only.
The scallops look flat. Block with more tension at the scallop tips and pin the anchor sc inward.
Care
Hand wash in cool water with mild soap, roll in a towel, and dry flat. Re-pin to 11 in (27.9 cm) if the scallops relax.
Final Notes
The whole motif depends on a clear measurement chain. Rnds 1-3 reach 2.5 in (6.4 cm). The spiral finishes at 5 in (12.7 cm) with 72 sts. The framing rounds bring it to 6.25 in (15.9 cm) with 84 sts. Two spoke rounds open it to 8.75 in (22.2 cm), and the solid ring settles at 9 in (22.9 cm) with 140 sc. The fan-and-scallop border adds 1 in (2.5 cm) on every side, for a blocked 11 in (27.9 cm) motif with 182 edge stitches.
Check each number as you go, and the spiral will turn out round, flat, and bright.
Happy crocheting!