

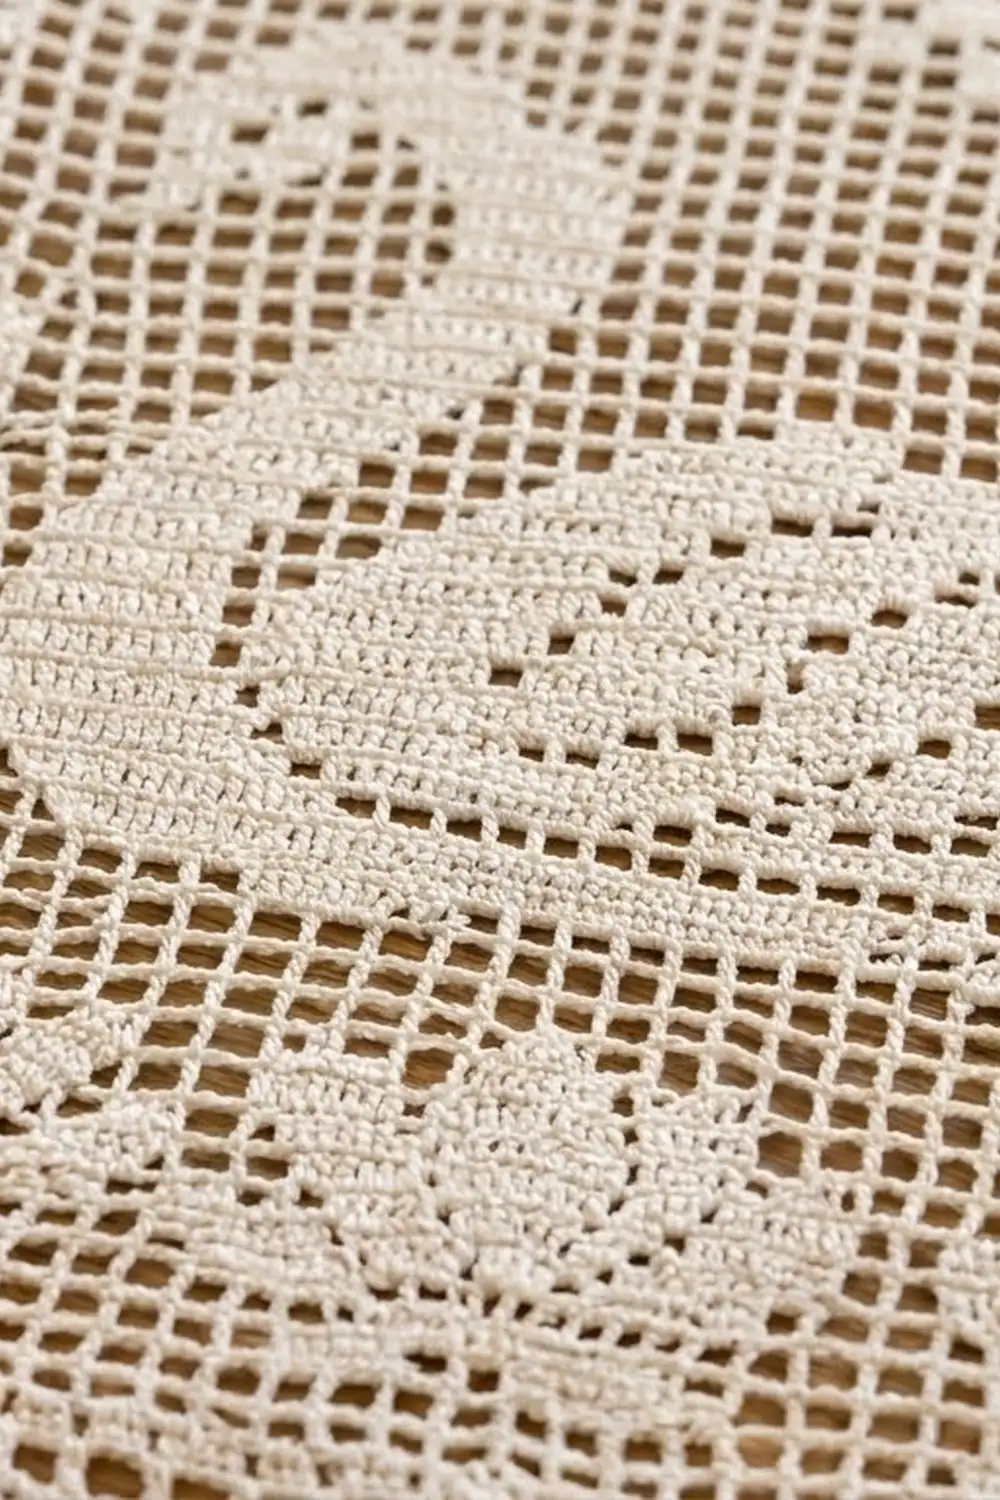
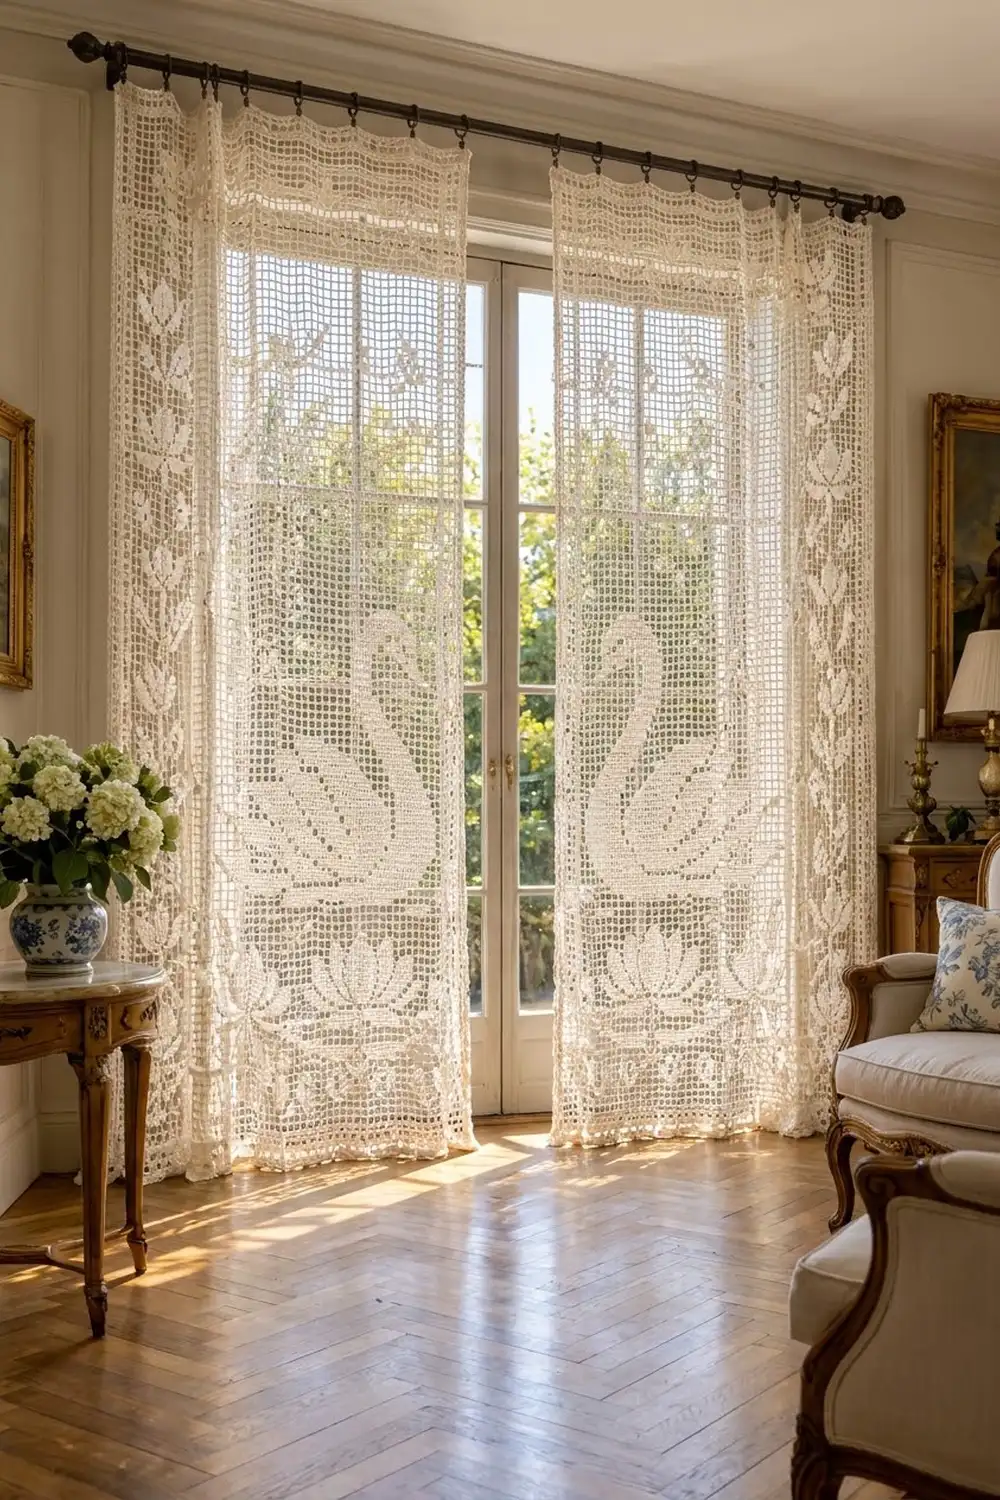
This curtain panel is worked in classic filet crochet. A swan with a long, curving neck glides across open mesh, with a lotus flower below it and a leafy vine climbing each side. In a sunny window, the open squares glow while the solid blocks read like a soft ivory silhouette.
The panel uses one color, ivory or cream cotton thread, so all the design comes from the contrast between open mesh and filled blocks. The style is vintage and romantic.
This pattern uses US crochet terms. One finished panel measures 28 in wide x 81 in long (71.1 cm x 205.7 cm) after blocking. The photo shows a pair, so you make two identical panels. They hang side by side and are not joined.
Each panel is worked flat in rows from the bottom edge up, following the mesh coordinates below. A three-round border then goes around the whole panel.
Finished Size and Construction
- Finished size (one panel): 28 in x 81 in (71.1 cm x 205.7 cm)
- Skill level: Intermediate (easy stitches, long chart-reading)
- Terminology: US
- Yarn weight: Size 3 crochet cotton (fine)
- Hook: 2.5 mm, or the size that gives gauge
- Number of pieces: 2 identical panels, each worked as one single piece
- Layout: Two panels hung side by side, not joined
- Panel grid: 81 meshes wide x 240 rows tall
- Size before border: 27 in x 80 in (68.6 cm x 203.2 cm)
- Border depth: 0.5 in (1.3 cm) on every side
Materials
Use a mercerized cotton thread in size 3. It shows crisp mesh, washes well, and doesn’t stretch much when the panel hangs. Avoid acrylic blends, because long panels in acrylic grow over time.
- Ivory/cream: 550 g (about 1,450 m) per panel; 1,100 g (about 2,900 m) for the pair. These amounts assume thread of about 260 m per 100 g.
- 2.5 mm crochet hook
- Tapestry needle
- Stitch markers (at least 10)
- Rustproof pins, a large blocking surface, and a spray bottle
- Curtain clip rings (about 12 per panel)
The amounts include a margin of roughly 15%. If you can, buy all the thread from one dye lot.
Abbreviations (US Terms)
- ch – chain
- sl st – slip stitch
- sc – single crochet
- dc – double crochet
- sk – skip
- st(s) – stitch(es)
- sp – space
- RS / WS – right side / wrong side
Special stitches:
- Open mesh (OM): ch 2, sk 2 sts, dc in next st.
- Block (BL): dc in each of the next 3 sts (or in 2 ch, then the dc).
- Picot: ch 3, sl st in the 3rd ch from the hook.
Each row starts with ch 3, which counts as the first dc. Every row has 244 sts: the first dc plus 3 sts for each of the 81 meshes (1 + 81 x 3 = 244).
Gauge and Checkpoints
Gauge: 15 meshes and 15 rows = 5 in (12.7 cm) square in filet mesh, after blocking. That’s 3 meshes and 3 rows per inch (2.5 cm).
Make a test swatch before you start. Ch 48, dc in the 4th ch from the hook and in each ch across (46 sts). Then work 14 rows of open mesh (15 OM each), so you have 15 rows in total. Wet block the swatch, let it dry, and measure it.
- Swatch too big: go down 0.25 mm in hook size.
- Swatch too small: go up 0.25 mm in hook size.
- Not square: adjust your dc height (pull up a slightly taller or shorter loop) until rows match meshes.
Checkpoints (measured flat):
- After Row 2: width 27 in (68.6 cm)
- After Row 45: 15 in (38.1 cm) tall
- After Row 150: 50 in (127.0 cm) tall
- After Row 240: 80 in (203.2 cm) tall, width still 27 in (68.6 cm)
If the width drifts by more than 0.5 in (1.3 cm), check that you have 81 meshes. If the length drifts, compare your row height with the swatch.
The Panel Grid
The meshes are numbered 1–81 from left to right with the RS facing you. Odd rows are RS rows and are worked from mesh 81 to mesh 1. Even rows are WS rows and are worked from mesh 1 to mesh 81. Each coordinate is a fixed position, so read it the same way on both sides.
Column layout across all rows from 3 to 238:
- Mesh 1: frame block
- Meshes 2–14: left vine column (vine meshes V1–V13)
- Mesh 15: divider block
- Meshes 16–66: center field (field meshes F1–F51; panel mesh = F + 15)
- Mesh 67: divider block
- Meshes 68–80: right vine column (vine meshes V1–V13)
- Mesh 81: frame block
Unless a mesh is listed as a block, work it as an open mesh. Meshes 1, 15, 67, and 81 are always blocks.
Foundation and Frame
Row 1 (RS): Ch 246. Dc in the 4th ch from the hook and in each ch across. The skipped ch 3 counts as a dc. (244 sts, 81 blocks)
Row 2: Ch 3, dc in each st across. (244 sts)
Rows 3–4: Work blocks at meshes 1, 15, 67, and 81. Every other mesh is open. (244 sts: 77 OM + 4 BL)
Side Vine Columns (Rows 5–238)
Both vine columns follow the same 26-row repeat. Work it 9 times, over Rows 5–30, 31–56, and so on up to Rows 213–238. In the list below, the repeat rows are numbered 1–26. The stem is V7, and it is a block in every row.
- Rows 1–2: V7
- Rows 3–4: V5–V7
- Rows 5–6: V4–V7
- Rows 7–8: V3–V7
- Rows 9–10: V2–V5, V7
- Rows 11–12: V2–V3, V7
- Rows 13–14: V7
- Rows 15–16: V7–V9
- Rows 17–18: V7–V10
- Rows 19–20: V7–V11
- Rows 21–22: V7, V9–V12
- Rows 23–24: V7, V11–V12
- Rows 25–26: V7
This gives you a left leaf and then a right leaf on each repeat, and the leaves lean out and up. Place a marker in the first row of each repeat.
Center Field: Lotus Band (Rows 5–46)
- Rows 5–8: all open
- Rows 9–10: F14–F38 (the water pad)
- Rows 11–12: F20–F32, plus buds F6–F8 and F44–F46
- Rows 13–14: F18–F34, plus buds F6–F8 and F44–F46
- Rows 15–16: F18–F34, plus buds F5–F9 and F43–F47
- Rows 17–20: F17–F21, F23–F29, F31–F35, plus buds F5–F9 and F43–F47
- Rows 21–24: F16–F20, F24–F28, F32–F36, plus buds F6–F8 and F44–F46
- Rows 25–26: F15–F18, F25–F27, F34–F37, plus buds F7 and F45
- Rows 27–28: F15–F18, F25–F27, F34–F37
- Rows 29–32: F14–F15, F26, F37–F38
- Rows 33–34: F26
- Rows 35–42: all open
- Rows 43–44: F1–F51 (solid water line)
- Rows 45–46: all open
The lotus has a center petal and two outer petals that flare out and up, with an open column between the petals. Checkpoint: at Row 45, the panel is 15 in (38.1 cm) tall.
Center Field: Swan (Rows 47–146)
The swan faces left. The breast and neck sit on the low F numbers. The wing is a set of stepped feather bands, with open meshes between the bands for the feather lines.
- Rows 47–50: F12–F40
- Rows 51–56: F9–F43
- Rows 57–62: F8–F45
- Rows 63–70: F8–F18, F22–F46
- Rows 71–78: F8–F16, F24–F47
- Rows 79–86: F8–F14, F27–F47
- Rows 87–94: F8–F13, F31–F46
- Rows 95–100: F9–F13, F36–F44
- Rows 101–120: F9–F13 (straight neck)
- Rows 121–130: F10–F14
- Rows 131–136: F12–F16 (neck curving forward)
- Rows 137–138: F12–F20
- Rows 139–140: F7–F20 (beak F7–F11 plus head)
- Rows 141–142: F7–F16, F18–F20 (F17 stays open for the eye)
- Rows 143–144: F12–F20
- Rows 145–146: F14–F18 (crown)
Checkpoint: at Row 150, the panel is 50 in (127.0 cm) tall. Keep the stitch count at 244 in every row.
Center Field: Upper Mesh and Diamonds (Rows 147–238)
- Rows 147–226: all open
- Rows 227–233: five small diamonds centered on F6, F16, F26, F36, and F46. For each center C:
- Row 227: C
- Rows 228–229: C-1 to C+1
- Row 230: C-2 to C+2
- Rows 231–232: C-1 to C+1
- Row 233: C
- Rows 234–238: all open
Top Frame
Rows 239–240: Ch 3, dc in each st across. (244 sts) Don’t fasten off.
Make Both Panels
For the pair, make 2 identical panels, using 550 g (about 1,450 m) of ivory per panel. Use the same hook and dye lot for both. The panels are not joined. Hang them like this:
[ Panel 1 ]   window   [ Panel 2 ]
  swan faces left        swan faces left
If you’d like the swans to face each other, hang Panel 2 with its WS facing the room. Filet mesh looks almost the same on both sides.
Border
Border gauge: 9 sc = 1 in (2.5 cm). Along the top and bottom edges, you work 1 sc per st (244 sts = 27 in, or 9 per inch). Along the long sides, you work 3 sc per dc row-end (3 rows per inch x 3 = 9 per inch). This keeps all four edges at the same tension, so nothing ruffles or pulls in.
In the counts below, “per side” means the sts between the corners. Corner sts and corner spaces are counted separately.
Round 1: Ch 1. Sc in each st across the top (244 sc). Ch 2 for the corner. Down the long side, work 3 sc in each row-end (240 rows x 3 = 720 sc). Ch 2. Across the bottom, sc into the base of each Row 1 st (244 sc). Ch 2. Up the second long side, work 3 sc in each row-end (720 sc). Ch 2, then sl st to the first sc.
- Per side: 244 / 720 / 244 / 720
- Round total: 1,928 sc + 4 ch-2 corner spaces
Round 2: Ch 1, sc in each sc. In each ch-2 corner space, work 3 sc. The middle sc of each 3-sc group is the corner st, and the outer two sc are added to the sides they touch.
- Per side: short 244 + 2 = 246; long 720 + 2 = 722
- Round total: 1,940 sc (2 x 246 + 2 x 722 + 4 corner sts)
Round 3 (picot edge): Ch 1. On each side, work sc in next sc, picot, sc in next sc, repeating across the side. Both counts are even (246 = 2 x 123, and 722 = 2 x 361), so the repeat ends exactly at the corner. In each corner st, work (sc, picot, sc).
- Picots per side: 123 / 361 / 123 / 361
- Round total: 968 side picots + 4 corner picots
Sl st to the first sc and fasten off.
Why the math works: the stitches on each side match the edge’s length at 9 sc per inch, so the border lies flat. It adds 0.5 in (1.3 cm) on each side. The width becomes 27 + 1 = 28 in (71.1 cm), and the length becomes 80 + 1 = 81 in (205.7 cm).
Final Blocking
- Weave in all ends along the solid blocks, where they hide best.
- Soak the panel in cool water with a little wool wash for 15 minutes.
- Press out the water gently. Don’t wring it. Roll the panel in towels.
- Lay it flat RS up on a covered mattress or floor.
- Pin the edges straight. Measure 28 in (71.1 cm) across at the top, middle, and bottom, and 81 in (205.7 cm) down both sides.
- Line up the mesh columns with a long ruler, then pin out each picot along the bottom.
- Let the panel dry completely. Then hang it for 24 hours before you set the spacing of the clip rings.
Final Quality-Control Checklist
- Each row has 244 sts (81 meshes).
- Meshes 1, 15, 67, and 81 are solid blocks from Row 3 to Row 238.
- The vine has 9 complete repeats on each side.
- The lotus petals have open columns between them, and the water line is solid.
- The swan’s eye mesh (F17, Rows 141–142) is open.
- The border counts are 244/720 in Round 1, 246/722 in Round 2, and 123/361 picots in Round 3.
- After blocking, the panel measures 28 in x 81 in (71.1 cm x 205.7 cm).
- Both panels match in length to within 0.5 in (1.3 cm).
Troubleshooting
- The mesh looks rectangular: your dc is too tall or too short. Adjust the loop height or change hooks.
- The motif is shifted by one mesh: count from the frame block, and place a marker every 10 meshes.
- The panel is slanting: you missed the last dc in the turning chain. Count 244 sts.
- The side border is wavy: you worked more than 3 sc per row-end. Take it out and rework it.
- The side border is pulling in: go up 0.5 mm in hook size for Round 1 only.
- The panels are different lengths: block the shorter panel slightly longer, by up to 1 in (2.5 cm).
Care
Hand wash in cool water with a mild detergent, then dry flat or rehang while damp. Don’t tumble dry. Press from the WS with a warm iron if needed.
Final Notes
At 3 meshes and 3 rows per inch, 81 meshes give a width of 27 in (68.6 cm) and 240 rows give a length of 80 in (203.2 cm). A 0.5 in (1.3 cm) border on each side brings the finished panel to 28 in x 81 in (71.1 cm x 205.7 cm). Check your swatch and Rows 45, 150, and 240 against these numbers, and both panels will hang straight and match.
Happy crocheting!