

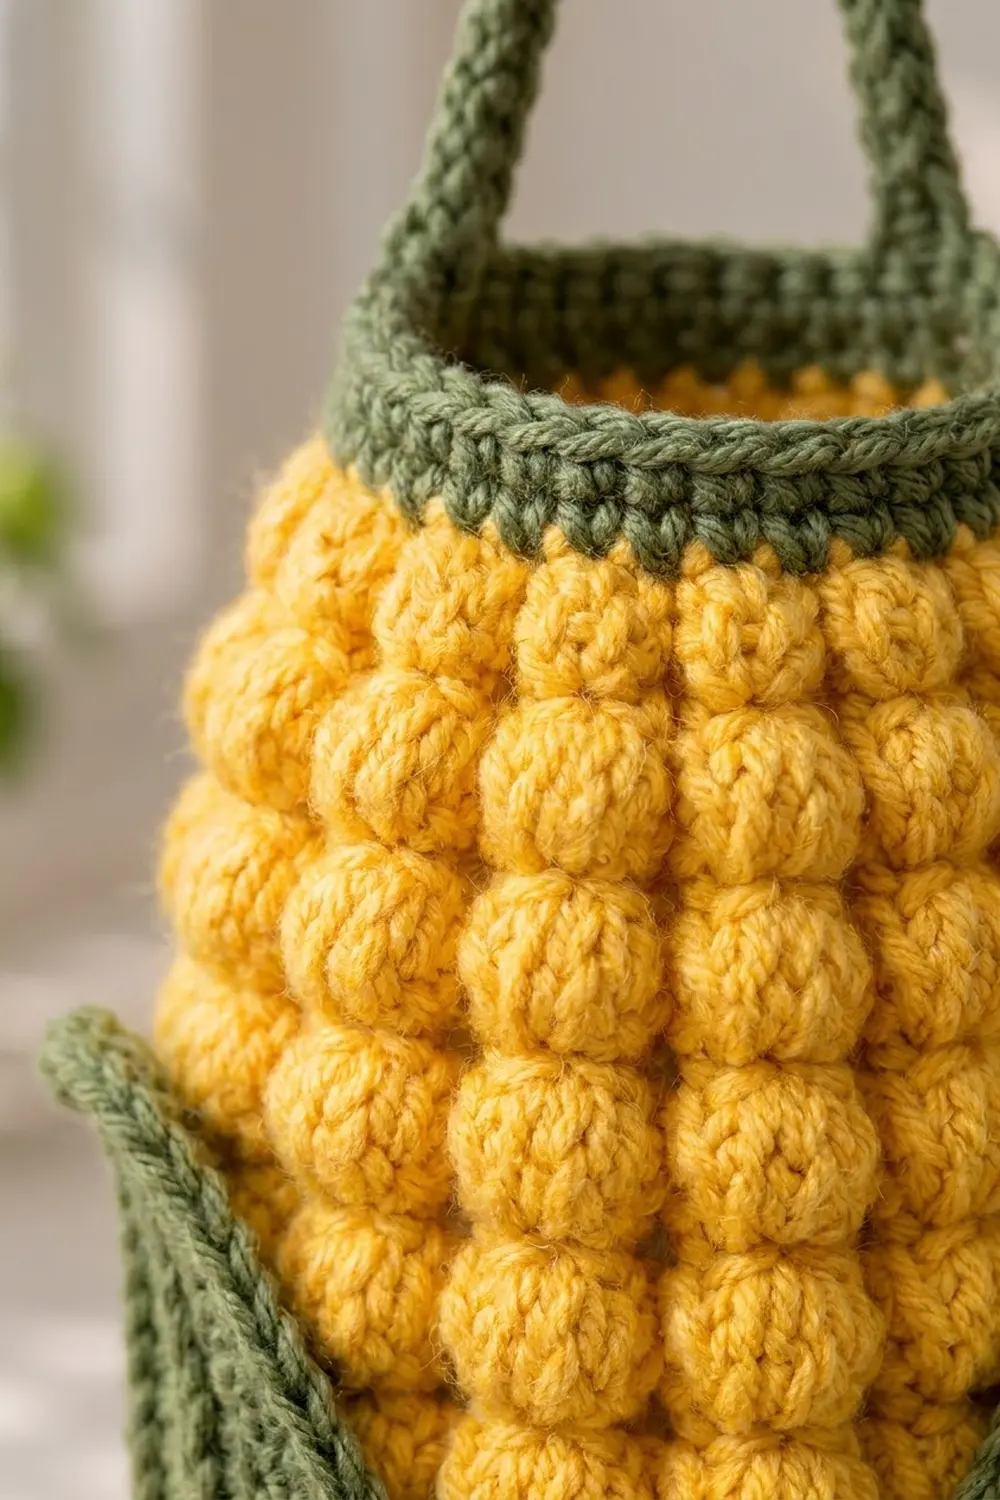
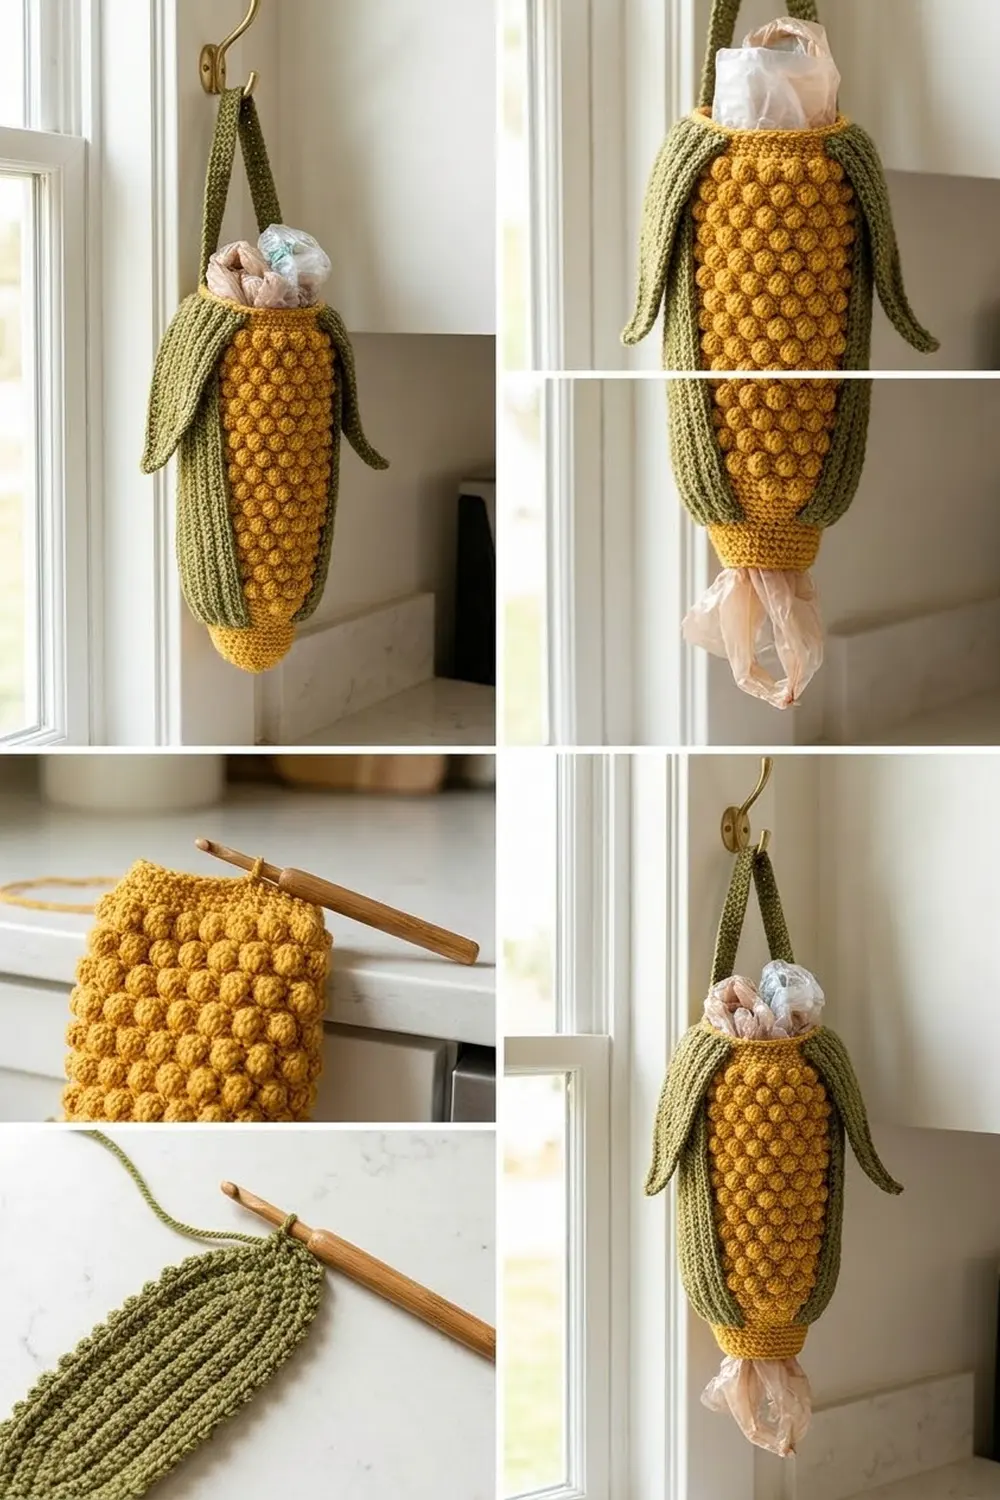
Turn your pile of plastic grocery bags into a cheerful kitchen accent with this corn cob bag holder. The body is a round tube of golden-yellow bobbles stacked in tidy columns, like kernels on a fresh ear of corn. Two olive green husk leaves frame the lower half, and a green strap at the top lets you hang it from any hook.
It uses two colors: a bright corn yellow and a soft olive green. The style is cute farmhouse, but it’s practical too. Stuff bags in through the wide top opening and pull them out one at a time from the narrow bottom.
This pattern uses US crochet terms throughout. The finished body measures about 16.25 in (41.3 cm) tall and 6 in (15.2 cm) wide when laid flat at its widest point. With the strap, it hangs about 19.25 in (48.9 cm) long.
Construction is straightforward. You work the yellow body from the bottom up in joined rounds, alternating bobble rounds and single crochet rounds. Then you add green rims at the top and bottom, work the strap directly off the top rim, make two husk leaves, and sew them on.
Finished Size and Construction
- Finished size: 6 in (15.2 cm) wide flat at widest, 16.25 in (41.3 cm) tall body, about 19.25 in (48.9 cm) hanging length
- Skill level: Easy / Intermediate
- Terminology: US crochet terms
- Yarn weight: Worsted (#4)
- Hook: 5.0 mm (H-8)
- Number of pieces: One finished holder, made from 1 body (strap worked directly on it) plus 2 husk leaves sewn on
- Layout: Vertical tube, hung from a strap at the top
- Yellow body size: 15 in (38.1 cm) tall, 12 in (30.5 cm) around at widest
- Size before green rims: 15 in (38.1 cm) tall
- Rim depth: Top rim 0.75 in (1.9 cm), bottom rim 0.5 in (1.3 cm)
Materials
Choose a smooth worsted weight acrylic or cotton-acrylic blend. Acrylic holds the bobble shape well and is easy to wipe clean. Avoid fuzzy or very splitty yarns, because bobbles need clear stitch definition.
- Color A, corn yellow: 150 g, about 285 m
- Color B, olive green: 50 g, about 95 m
Bobbles use a lot of yarn. These amounts include a margin of roughly 15 percent, so you shouldn’t run short even if your tension is a little loose.
Tools:
- 5.0 mm (H-8) crochet hook
- Stitch marker
- Yarn needle
- Scissors
- Measuring tape
- Rust-proof pins and a spray bottle for blocking
Abbreviations (US Terms)
- ch – chain
- sl st – slip stitch
- sc – single crochet
- hdc – half double crochet
- dc – double crochet
- sc2tog – single crochet 2 together
- BLO – back loop only
- st(s) – stitch(es)
- rnd(s) – round(s)
- bob – bobble (see below)
Special stitch – Bobble (bob): *Yarn over, insert hook in indicated st, yarn over and pull up a loop, yarn over and pull through 2 loops; repeat from * 3 more times in the same st (5 loops on hook), yarn over and pull through all 5 loops. A bobble counts as 1 st. Bobbles always pop out on the side facing away from you, so the inside of the tube faces you while you work (see the Body section).
Gauge and Checkpoints
Single crochet gauge: 14 sc and 16 rows = 4 in (10.2 cm).
Pattern gauge: 14 sts and 12 rnds = 4 in (10.2 cm) in the bobble pattern (alternating 1 bobble rnd and 1 sc rnd). That is 3.5 sts per inch and 3 rnds per inch.
Test before you commit. Rounds 1–8 of the body work as your swatch, so check the measurements below before you continue. Bobble fabric is hard to measure from a flat swatch, so measuring the real piece is more reliable.
Checkpoints:
- After Rnd 8: 6 in (15.2 cm) wide flat, about 2.7 in (6.9 cm) tall
- After Rnd 38: 6 in (15.2 cm) wide flat, about 12.7 in (32.3 cm) tall
- After Rnd 45: about 5.1 in (13.0 cm) wide flat at top, 15 in (38.1 cm) tall
If your piece is too big: go down to a 4.5 mm hook, or try a smaller 4-loop bobble (repeat 2 more times instead of 3).
If your piece is too small: go up to a 5.5 mm hook.
Being off by 0.2 in (0.5 cm) in width is fine. The holder doesn’t need exact sizing to work, but staying close keeps the bottom opening small enough to hold bags in and big enough to pull them out.
Body
Work in joined rounds and don’t turn. At the end of each round, join with a sl st to the first st, then ch 1 (does not count as a st). Always work the first st of the next round into the same st as the join. This keeps the bobble columns stacked straight.
Bobble tip: After Rnd 2, push the tube inside out so the bobbles sit on the outside. From then on, keep the inside of the tube facing you and work along the far edge. Every bobble will then pop to the outside of the cob.
With Color A, ch 24 and join with a sl st to the first ch to form a ring, being careful not to twist it.
Rnd 1: Ch 1, sc in each ch around, join. (24 sts)
Rnd 2 (bobble rnd): Ch 1, bob in next st, sc in next st; repeat from * around, join. (24 sts: 12 bob, 12 sc)*
Rnd 3 (increase rnd): Ch 1, sc in next 3 sts, 2 sc in next st; repeat from * 6 times, join. (30 sts)*
Rnd 4: Ch 1, bob in next st, sc in next st; repeat from * around, join. (30 sts: 15 bob, 15 sc)*
Rnd 5 (increase rnd): Ch 1, sc in next 4 sts, 2 sc in next st; repeat from * 6 times, join. (36 sts)*
Rnd 6: Ch 1, bob in next st, sc in next st; repeat from * around, join. (36 sts: 18 bob, 18 sc)*
Rnd 7 (increase rnd): Ch 1, sc in next 5 sts, 2 sc in next st; repeat from * 6 times, join. (42 sts)*
Rnd 8: Ch 1, bob in next st, sc in next st; repeat from * around, join. (42 sts: 21 bob, 21 sc)*
These first 8 rounds form the tapered tip of the cob. The bobbles shift slightly where the increases fall, which gives a natural kernel look. Check your first checkpoint now.
Rnds 9–38: Work these 2 rounds 15 times in total:
- Odd rnds (sc rnd): Ch 1, sc in each st around, join. (42 sts)
- Even rnds (bobble rnd): Ch 1, bob in next st, sc in next st; repeat from * around, join. (42 sts: 21 bob, 21 sc)*
Each bobble lands in the sc directly above the previous bobble, forming 21 straight kernel columns around the cob. Check your second checkpoint after Rnd 38.
Rnd 39 (decrease rnd): Ch 1, sc in next 5 sts, sc2tog; repeat from * 6 times, join. (36 sts)*
Rnd 40: Ch 1, bob in next st, sc in next st; repeat from * around, join. (36 sts: 18 bob, 18 sc)*
Rnd 41: Ch 1, sc in each st around, join. (36 sts)
Rnd 42: Repeat Rnd 40. (36 sts: 18 bob, 18 sc)
Rnd 43: Repeat Rnd 41. (36 sts)
Rnd 44: Repeat Rnd 40. (36 sts: 18 bob, 18 sc)
Rnd 45: Repeat Rnd 41. (36 sts)
Fasten off Color A. You now have 45 rounds, 22 of them bobble rounds, and the yellow body measures 15 in (38.1 cm) tall. Weave in the starting tail on the inside.
Husk Leaves (Make 2)
With Color B, ch 29. The end with the hook will be the pointed tip, and the slip knot end will be the wide base.
Rnd 1: Working in the back bumps of the chain, sl st in 2nd ch from hook, sc in next 5 ch, hdc in next 6 ch, dc in next 15 ch, 5 dc in last ch (base). Rotate and work along the other side of the foundation chain: dc in next 15 ch, hdc in next 6 ch, sc in next 5 ch, sl st in next ch. Then (sl st, ch 2, sl st) in the skipped tip ch. (59 sts plus a ch-2 tip)
Check the count: 27 sts on each long side (1 + 5 + 6 + 15) plus 5 base dc gives 27 + 5 + 27 = 59.
Rnd 2 (ridge round): Ch 1, working in BLO, sc in next 27 sts, 2 sc in each of next 5 base dc, sc in next 27 sts, then (sc, ch 2, sc) in the ch-2 tip space, join with a sl st to the first sc. (66 sc plus a ch-2 tip)
The count is 27 + 10 + 27 + 2 = 66. Working in the back loop leaves the front loops as a raised line around the leaf, which gives the ridged husk texture.
Fasten off, leaving a 20 in (50.8 cm) tail for sewing. Each leaf measures about 8.5 in (21.6 cm) long and 2.25 in (5.7 cm) wide at the base.
Green Rims and Strap
The green rims are the border of the holder. They’re worked in plain sc at the single crochet gauge of 14 sts and 16 rnds per 4 in (10.2 cm), so every 4 green rounds add 1 in (2.5 cm) of height.
Top Rim
Join Color B in the first st of Rnd 45.
Rnd 46: Ch 1, sc in each st around, join. (36 sts)
Rnd 47: Ch 1, sc in each st around, join. (36 sts)
Rnd 48: Ch 1, sc in each st around, join. (36 sts)
When you lay the tube flat, that’s 18 sts across the front and 18 sts across the back. The rim works 1 sc into each of the 36 body sts with nothing added, so the opening stays exactly the width of Rnd 45: 5.1 in (13.0 cm) flat. The rim is 0.75 in (1.9 cm) deep. Do not fasten off.
Strap
Lay the tube flat so the join sits at one side fold. Stitches 1–4 of Rnd 48 sit at that side, and stitches 19–22 sit directly opposite at the other fold.
Row 1: Ch 1, sc in first 4 sts of Rnd 48. (4 sts)
Rows 2–32: Ch 1, turn, sc in each st across. (4 sts)
The strap is 1.1 in (2.8 cm) wide and 8 in (20.3 cm) long. Keep it untwisted, bring the end across the opening, and sew the last row to sts 19–22 of Rnd 48 with the tail. When hung, the strap peaks about 3 in (7.6 cm) above the rim.
Bottom Rim
Turn the body upside down. Join Color B in any free loop of the foundation chain.
Rnd B1: Ch 1, sc in each free loop of the foundation chain, join. (24 sts)
Rnd B2: Ch 1, sc in each st around, join. (24 sts)
Laid flat, that’s 12 sts per side. One sc per foundation ch keeps the opening exactly the width of Rnd 1: 6.9 in (17.5 cm) around, or 3.4 in (8.6 cm) flat. The rim is 0.5 in (1.3 cm) deep and keeps the opening firm so bags slide out one at a time. Fasten off.
The total body height is 15 in + 0.75 in + 0.5 in = 16.25 in (41.3 cm).
Attaching the Husk Leaves
Place the base of one leaf on the left side and the other on the right side, directly below the strap ends. Set each base just above the bottom rim, angled slightly toward the front so the two bases nearly meet in a soft V.
Sew the 10 base sc and the lower 3 in (7.6 cm) of each long edge to the body. Leave the upper 5.5 in (14.0 cm) free so the tips flare slightly away from the cob. If you want the leaves to sit closer to the body, add one small tack stitch on the inner edge halfway up.
Final Blocking
- Weave in all remaining ends on the inside of the tube.
- Lightly mist the leaves and the green rims with water until damp, not soaked.
- Lay each leaf flat against the body and gently shape the points with your fingers.
- Stuff the tube loosely with a rolled towel to give it a round, full shape.
- Pat the bobbles outward so every column sits evenly.
- If needed, pin the leaf tips so they curve gently away from the cob.
- Let it dry completely, then remove the towel. Don’t steam-block the yellow body, because heat can flatten acrylic bobbles.
Final Quality-Control Checklist
- Body is 6 in (15.2 cm) wide flat at its widest point
- Yellow body is 15 in (38.1 cm) tall; full body is 16.25 in (41.3 cm)
- 21 straight bobble columns run up the middle section
- Top rim has 36 sts; bottom rim has 24 sts
- Strap reaches straight across the opening from side to side and isn’t twisted
- Both leaves have 66 sc plus a pointed ch-2 tip
- Leaves are mirrored on the left and right sides
- All ends are woven in on the inside
Troubleshooting
Bobbles pop to the inside. Turn the tube inside out and keep its inside facing you as you work. Bobbles always form on the side away from you.
Bobble columns spiral. You’re probably starting the round in the next st instead of the join st. Always work the first st into the same st as the join.
Bottom opening is too loose and bags fall out. Add a third green round, working sc2tog 4 times evenly spaced, for 20 sts.
Bottom opening is too tight. Rework the bottom rim with a 5.5 mm hook.
Leaves curl. Mist and pin them flat, then let them dry fully.
Strap stretches. Sew a strip of grosgrain ribbon to the inside of the strap, or rework it with a smaller hook.
Care
Spot clean, or hand wash in cool water and lay flat to dry. Reshape the bobbles and leaves while damp.
Final Notes
The measurement chain is simple. Your pattern gauge of 3.5 sts per inch makes 42 sts equal 12 in (30.5 cm) around, or 6 in (15.2 cm) flat. At 3 rnds per inch, 45 yellow rounds give 15 in (38.1 cm). The green rims add 0.75 in (1.9 cm) and 0.5 in (1.3 cm), for 16.25 in (41.3 cm) in total. The strap and leaves finish the look. Check each stage and your corn will come out just right.
Happy crocheting!