
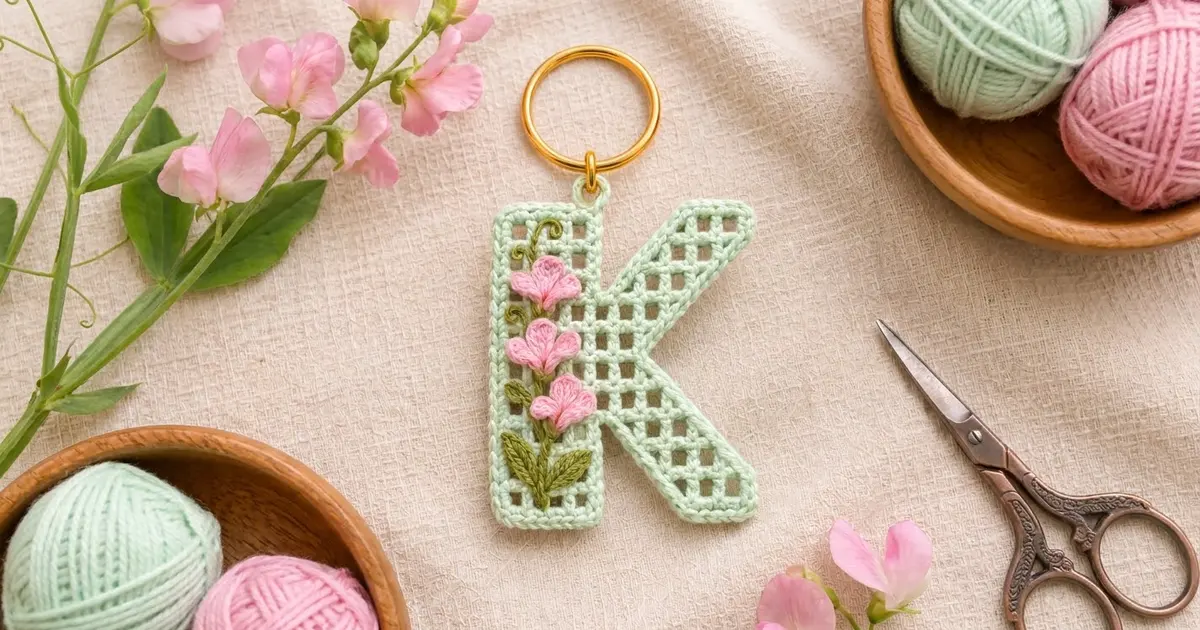
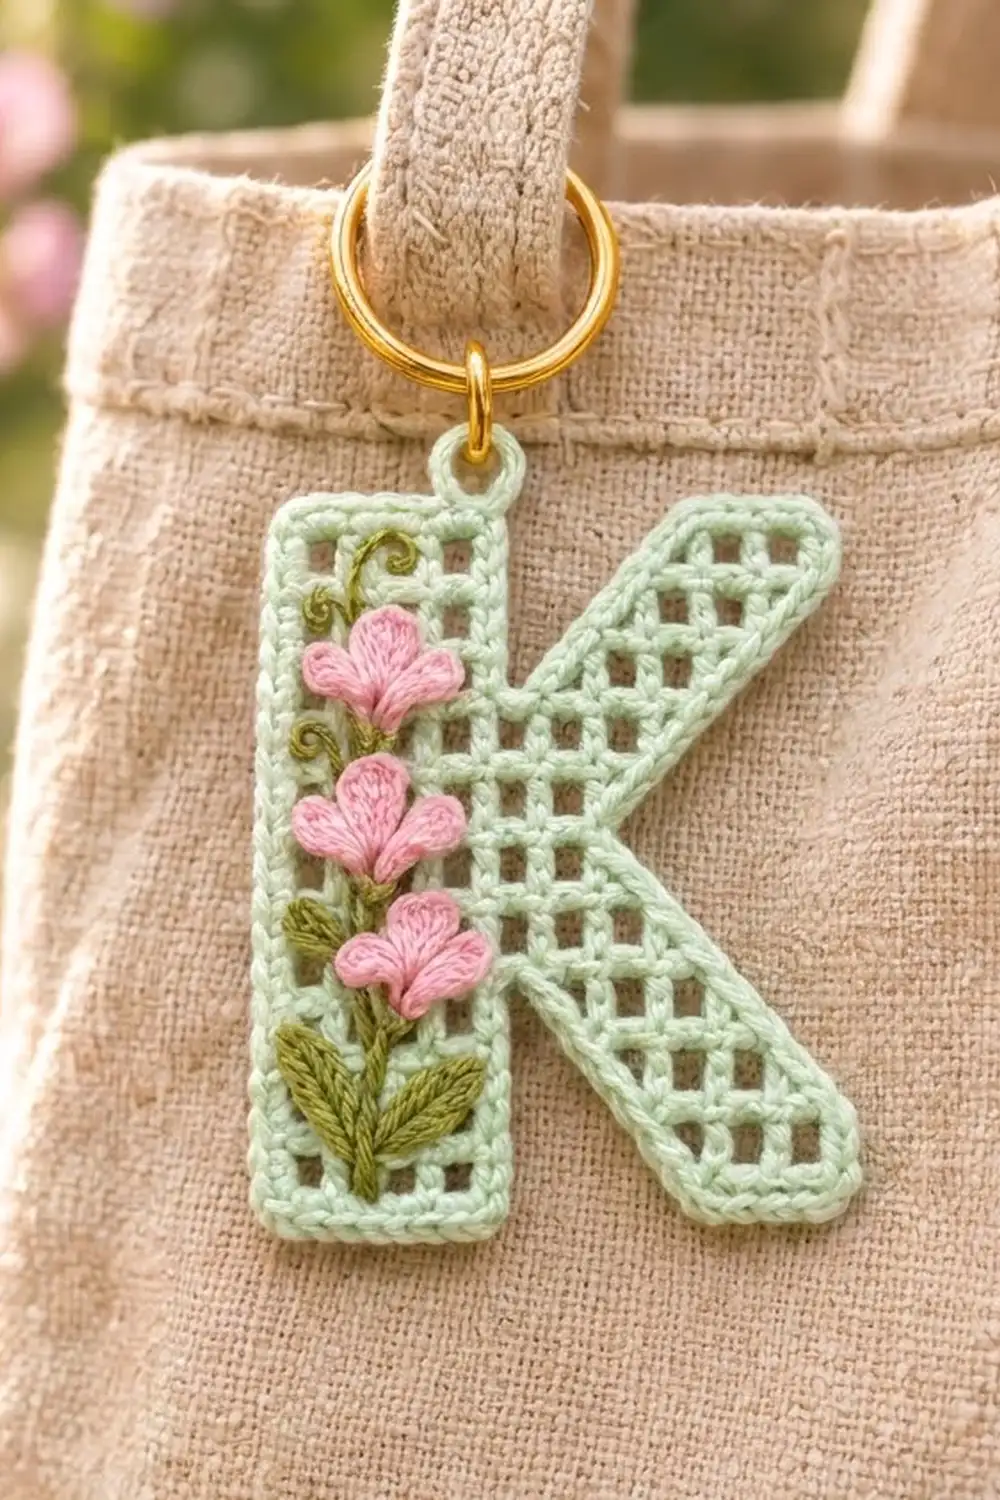
This little keychain is a capital “K” made in open filet mesh. A solid single-crochet outline keeps the edges clean, and a small sweet-pea spray is sewn up the stem. It is light and airy but still sturdy enough to hang from a bag handle.
The palette is soft and springlike. The letter is mint green, the three small blossoms are pink, and the plant stem and leaves are olive green. A gold split ring finishes it.
The pattern uses US crochet terms. The finished keychain measures 2.5 in (6.4 cm) wide by 3.25 in (8.3 cm) tall, not counting the hanging tab and ring.
Construction is simple and done in one piece. You crochet the stem base and the lower leg as two short sections. Row 5 joins them, and the rows above the junction split again into the top of the stem and the upper arm. Then you work a two-round border all the way around, add a hanging tab, block the piece, and sew on the flowers.
Finished Size and Construction
- Finished size: 2.5 in (6.4 cm) wide × 3.25 in (8.3 cm) tall
- Skill level: Intermediate (filet increases and decreases)
- Terminology: US crochet terms
- Yarn weight: Size 3 mercerized cotton crochet thread (Lace / light fingering)
- Hook: 2.0 mm steel hook
- Number of pieces: 1 letter, plus 3 flowers and 2 leaves sewn on
- Layout: Mesh grid 9 squares wide × 12 rows tall
- Mesh square size: 0.25 in (0.6 cm) each way
- Size before border: 2.25 in (5.7 cm) × 3 in (7.6 cm)
- Border depth: 0.125 in (0.3 cm) on every side
Materials
Use a smooth, mercerized cotton thread. It shows the mesh clearly, holds its shape after blocking, and stands up to being handled. Avoid fuzzy or very stretchy fibers, because they blur the squares.
- Mint green: 6 g, about 17 m
- Pink: 2 g, about 6 m
- Olive green: 2 g, about 6 m
These quantities include a margin for a gauge test and for weaving in ends.
Tools:
– 2.0 mm steel crochet hook
– Tapestry needle and a sharp embroidery needle
– 1 gold split ring, 1 in (2.5 cm) across
– 1 small gold jump ring
– Rustproof pins and a foam blocking mat
– Spray starch or a light fabric stiffener
– Scissors and 2 stitch markers
Abbreviations (US Terms)
- ch – chain
- sl st – slip stitch
- sc – single crochet
- hdc – half double crochet
- dc – double crochet
- tr – treble crochet
- sp – space
- sk – skip
- post – one vertical dc (or turning chain) in the mesh
Special techniques:
- Mesh: ch 1, dc in next dc. Each mesh row of n squares has n + 1 posts.
- Beg-inc (add 1 mesh at the start of a row): ch 6 (counts as 2 base ch, dc and ch-1 sp), turn, dc in the first dc.
- End-inc (add 1 mesh at the end of a row): ch 1, tr in the base of the last dc made.
- Beg-dec (drop 1 mesh at the start of a row): turn, sl st in the first ch-1 sp and in the next dc, ch 4 (counts as dc and ch-1 sp).
- End-dec (drop 1 mesh at the end of a row): leave the last mesh of the row unworked.
Gauge and Checkpoints
Gauge: 4 mesh squares and 4 rows = 1 in (2.5 cm), so each square is 0.25 in (0.6 cm). In the border, 8 sc = 1 in (2.5 cm).
Work the stem base first as your test piece (Rows 1–4 below). It should measure 0.75 in (1.9 cm) wide × 1 in (2.5 cm) tall. If you want more certainty, make a swatch 8 mesh by 8 rows. It should measure 2 in (5.1 cm) square.
Checkpoints:
– Stem base after Row 4: 0.75 × 1 in (1.9 × 2.5 cm)
– After Row 9: 1.5 in (3.8 cm) wide × 2.25 in (5.7 cm) tall
– After Row 12: 2.25 × 3 in (5.7 × 7.6 cm)
– After the border: 2.5 × 3.25 in (6.4 × 8.3 cm)
Too big? Go down to a 1.75 mm hook. Too small? Go up to a 2.25 mm hook. If your squares come out taller than they are wide, pull the yarn up less on each dc.
Pattern
Grid key: the columns are numbered 1–9 from left to right with the right side (RS) facing. Rows are numbered from the bottom up. Odd rows run right to left as seen from the RS. Even rows run left to right.
Section A – Stem Base (Mint)
Ch 10.
Row 1 (RS): Dc in the 6th ch from the hook (the first 5 ch count as dc, ch-1 sp and a skipped ch). [Ch 1, sk next ch, dc in next ch] twice. (3 mesh, 4 posts; columns 1–3)
Rows 2–4: Ch 4 (counts as dc and ch-1), turn. Dc in next dc, [ch 1, dc in next dc] across, working the last dc into the top of the turning chain. (3 mesh)
Fasten off. The last post of Row 4 sits on the right edge of column 3. Check the size: 0.75 × 1 in (1.9 × 2.5 cm).
Section B – Lower Leg (Mint)
Ch 10.
Row 1 (RS): Work as Row 1 of the stem. (3 mesh; columns 7–9) Lay this section to the right of the stem, with the RS facing.
Row 2: Beg-inc (adds column 6). [Ch 1, dc in next dc] twice, then end-dec (column 9 is not worked). (3 mesh; columns 6–8)
Row 3: Beg-dec (drops column 8). Dc in next dc, ch 1, dc in the top of the beg-inc chain, then end-inc. (3 mesh; columns 5–7)
Row 4: Beg-inc (adds column 4). [Ch 1, dc in next dc] twice, then end-dec. (3 mesh; columns 4–6)
Do not fasten off. The leg’s left post now sits right next to the stem’s right post at the column 3/4 boundary.
Joining Row and Junction
Row 5 (RS): Beg-dec (drops column 6). Dc in next dc (completes column 5).
– Ch 1, then insert the hook through the top of the leg’s beg-inc chain AND the stem’s last post together, and work 1 dc through both (completes column 4).
– [Ch 1, dc in next stem dc] twice. Ch 1, dc in the stem’s turning chain.
(5 mesh; columns 1–5)
Row 6: Ch 4, turn. Dc in next dc, [ch 1, dc in next dc] 3 times, then end-dec. (4 mesh; columns 1–4)
Row 7: Ch 4, turn. Dc in next dc, [ch 1, dc in next dc] across. (4 mesh; columns 1–4)
Row 8: Work as Row 7, then end-inc. (5 mesh; columns 1–5)
Row 9 (RS): Beg-inc (adds column 6). [Ch 1, dc in next dc] 5 times, ending in the turning chain. (6 mesh; columns 1–6)
Checkpoint: 1.5 in (3.8 cm) wide × 2.25 in (5.7 cm) tall.
Upper Stem (Mint, Continuing)
Rows 10–12: Ch 4, turn. Dc in next dc, ch 1, dc in next dc, ch 1, dc in next dc. (3 mesh each row; columns 1–3)
Fasten off. Column 4 above Row 9 stays empty and becomes the top notch of the K.
Upper Arm (Mint)
Row 10: With the wrong side facing, join the yarn with a sl st in the Row 9 post between columns 4 and 5. Ch 4 (counts as dc and ch-1). Dc in next dc, ch 1, dc in the top of the beg-inc chain, then end-inc. (3 mesh; columns 5–7)
Row 11: Beg-inc (adds column 8). [Ch 1, dc in next dc] twice, then end-dec. (3 mesh; columns 6–8)
Row 12: Beg-dec (drops column 6). Dc in next dc, ch 1, dc in the top of the beg-inc chain, then end-inc. (3 mesh; columns 7–9)
Fasten off. The mesh K is complete and measures 2.25 × 3 in (5.7 × 7.6 cm).
Mesh total: 12 (stem base) + 12 (leg) + 24 (Rows 5–9) + 9 (upper stem) + 9 (arm) = 66 squares.
Sweet Pea Flowers (Pink, Make 3)
Make a magic ring.
– Ch 2, then work 5 dc into the ring, ch 2, sl st into the ring. This is the upper fan petal.
– Ch 2, work 2 hdc into the ring, ch 2, sl st into the ring. This is the smaller lower petal.
Pull the ring tight and leave a 6 in (15.2 cm) tail. Each flower measures about 0.5 in (1.3 cm) wide × 0.375 in (1.0 cm) tall.
Leaves (Olive, Make 2)
Ch 6.
– Working in the chain: sc in the 2nd ch from the hook, hdc, dc, hdc, sc in the last ch.
– Ch 1 and rotate. Working along the other side of the chain: sc, hdc, dc, hdc, sc. Sl st to the tip.
The foundation chain down the middle looks like a center vein. Each leaf is about 0.5 in (1.3 cm) long.
Border
The border uses the gauge 8 sc = 1 in (2.5 cm), which works out to 2 sc for every 0.25 in (0.6 cm) mesh edge.
- Straight edges: work 2 sc per mesh square or per row end.
- Stair-stepped diagonal edges: work 3 sc per row. This smooths the steps into a straight line.
- Outer corners: work 1 extra corner sc at each of the 8 corner points. The segment counts below do NOT include these corner stitches.
- Inner corners: do not add any stitches.
Rnd 1 (mint): Join the yarn at the bottom-left corner of the stem. Work clockwise:
| Segment | sc |
|---|---|
| Stem outer left edge (12 rows) | 24 |
| Stem top (3 mesh) | 6 |
| Stem inner edge above the notch (3 rows) | 6 |
| Notch floor (1 mesh) | 2 |
| Arm inner diagonal (3 rows) | 9 |
| Arm top (3 mesh) | 6 |
| Upper outer diagonal (Rows 12–8, 5 rows) | 15 |
| Junction edge (Rows 7–6) | 4 |
| Lower outer diagonal (Rows 5–1, 5 rows) | 15 |
| Leg bottom (3 mesh) | 6 |
| Leg inner diagonal (3 rows) | 9 |
| Stem inner edge below the crotch (3 rows) | 6 |
| Stem bottom (3 mesh) | 6 |
Segment total: 114 sc. Add 8 corner sc for 122 sc. Sl st to the first sc to close.
Rnd 2: Loosely sl st in each sc around. (122 sl st) This makes the smooth, corded outer edge. Fasten off.
Why the math works: A straight edge 0.25 in (0.6 cm) long needs exactly 2 sc at 8 sc per inch. A diagonal step runs about 0.35 in (0.9 cm), which is about 2.8 sc, so 3 sc lies flat. The corner stitches let the border turn without cupping. Each side gains 0.125 in (0.3 cm), so the piece grows from 2.25 × 3 in to 2.5 × 3.25 in (6.4 × 8.3 cm).
Hanging tab: The stem top has 8 border stitches (6 sc plus 2 corner sc). Join mint in the 4th of these. Ch 7, sl st in the same stitch, work 10 sc into the ch-7 loop, then sl st in the base. The tab is about 0.25 in (0.6 cm) tall. Add the jump ring through the tab and the split ring through the jump ring.
Final Blocking
- Weave in all the mint ends before blocking.
- Dampen the letter and press out the extra water in a towel.
- Pin it to the mat at 2.5 × 3.25 in (6.4 × 8.3 cm), with a pin at each of the 8 corners.
- Straighten the mesh columns so the squares sit square.
- Mist the piece with starch or stiffener and let it dry completely.
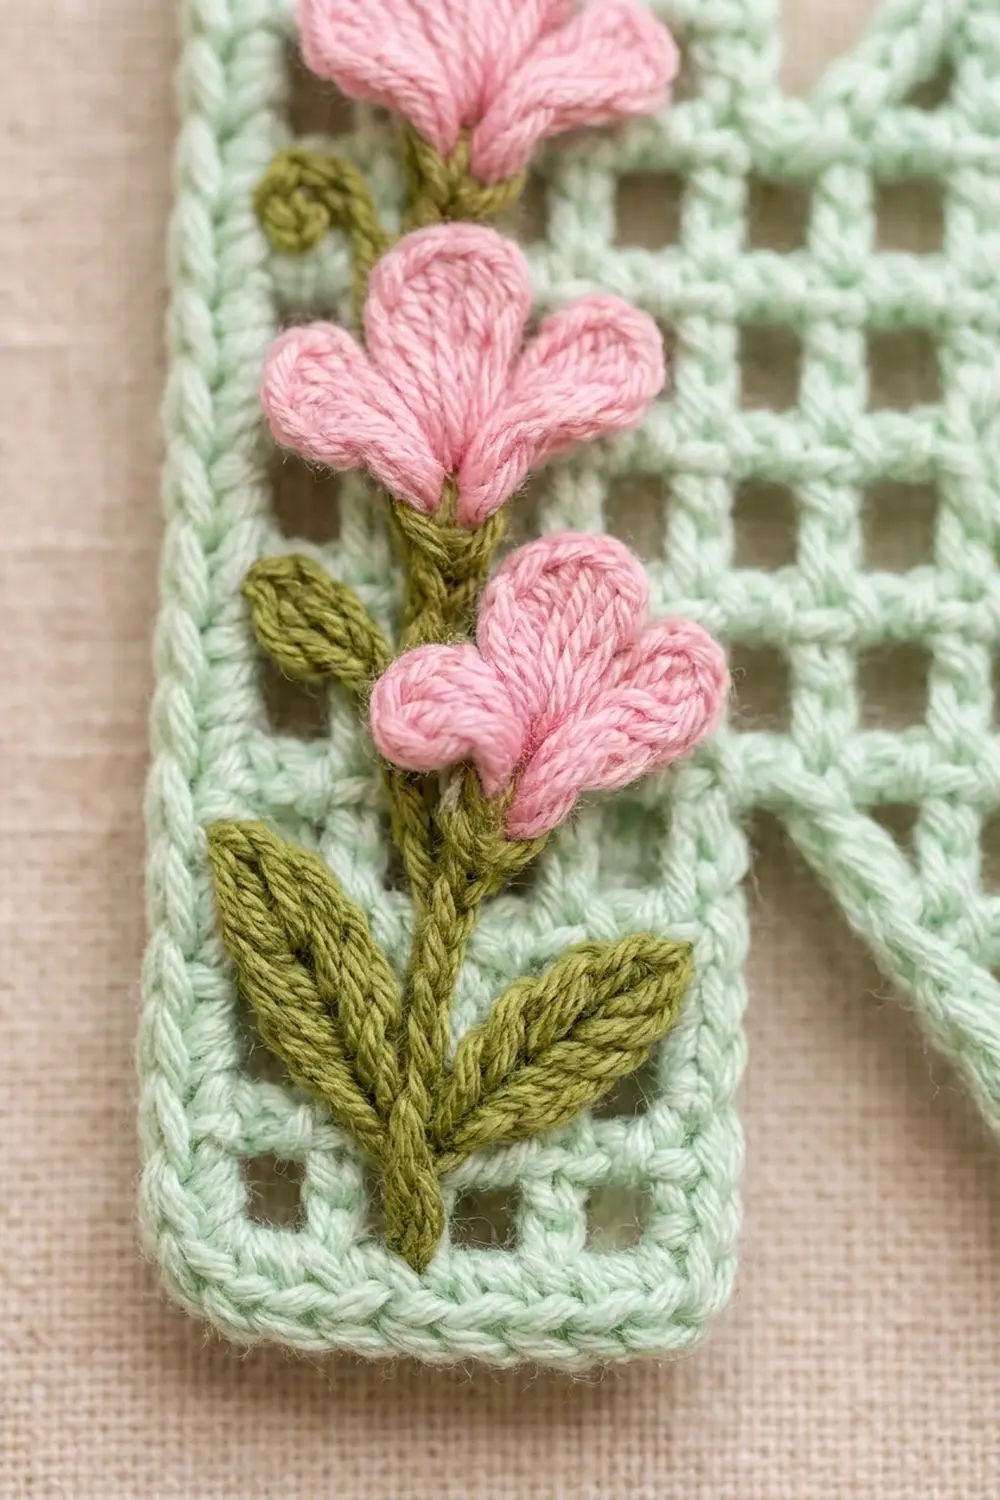
- Embroider: with olive thread, chain-stitch up through the mesh holes of column 2, from Row 1 to Row 11. Finish with a small curl of 3–4 chain stitches above Row 11.
- Sew the leaves in a V at Rows 2–3. Sew the flowers along the stem at Rows 5–6, 7–8 and 9–10, angling them slightly left and right in turn.
Final Quality-Control Checklist
- Size is 2.5 × 3.25 in (6.4 × 8.3 cm)
- All 66 mesh squares are open and even
- Border Rnd 1 has 122 sc, and Rnd 2 has 122 sl st
- Diagonal edges are straight, not stepped
- The top notch and lower crotch show a clean V
- The tab is secure and the rings are closed
- The flowers and leaves are sewn flat, with no loose tails
Troubleshooting
- Diagonal edges look jagged: work 3 sc per row on every diagonal, and do not skip the end-inc tr.
- Squares look like rectangles: your dc stitches are too tall. Change hooks or pull the loops up less.
- The junction seam gapes: make sure the Row 5 dc goes through both edge posts together.
- The border ruffles: you have added extra corner stitches. Count back to 122.
- The border cups: you missed corner stitches. Add 1 sc at each outer corner.
- The piece is too floppy: apply stiffener again and let it dry flat.
Care
Spot-clean with mild soap and cool water. Reshape the keychain, pin it, and let it dry flat. Reapply stiffener if it softens.
Final Notes
The measurements build on each other. Each mesh square is 0.25 in (0.6 cm), so the 9 × 12 mesh grid measures 2.25 × 3 in (5.7 × 7.6 cm). The 0.125 in (0.3 cm) border on every side brings the finished keychain to 2.5 × 3.25 in (6.4 × 8.3 cm). If you check your gauge on the stem base first, every later stage should land on its measurement.
Happy crocheting!