

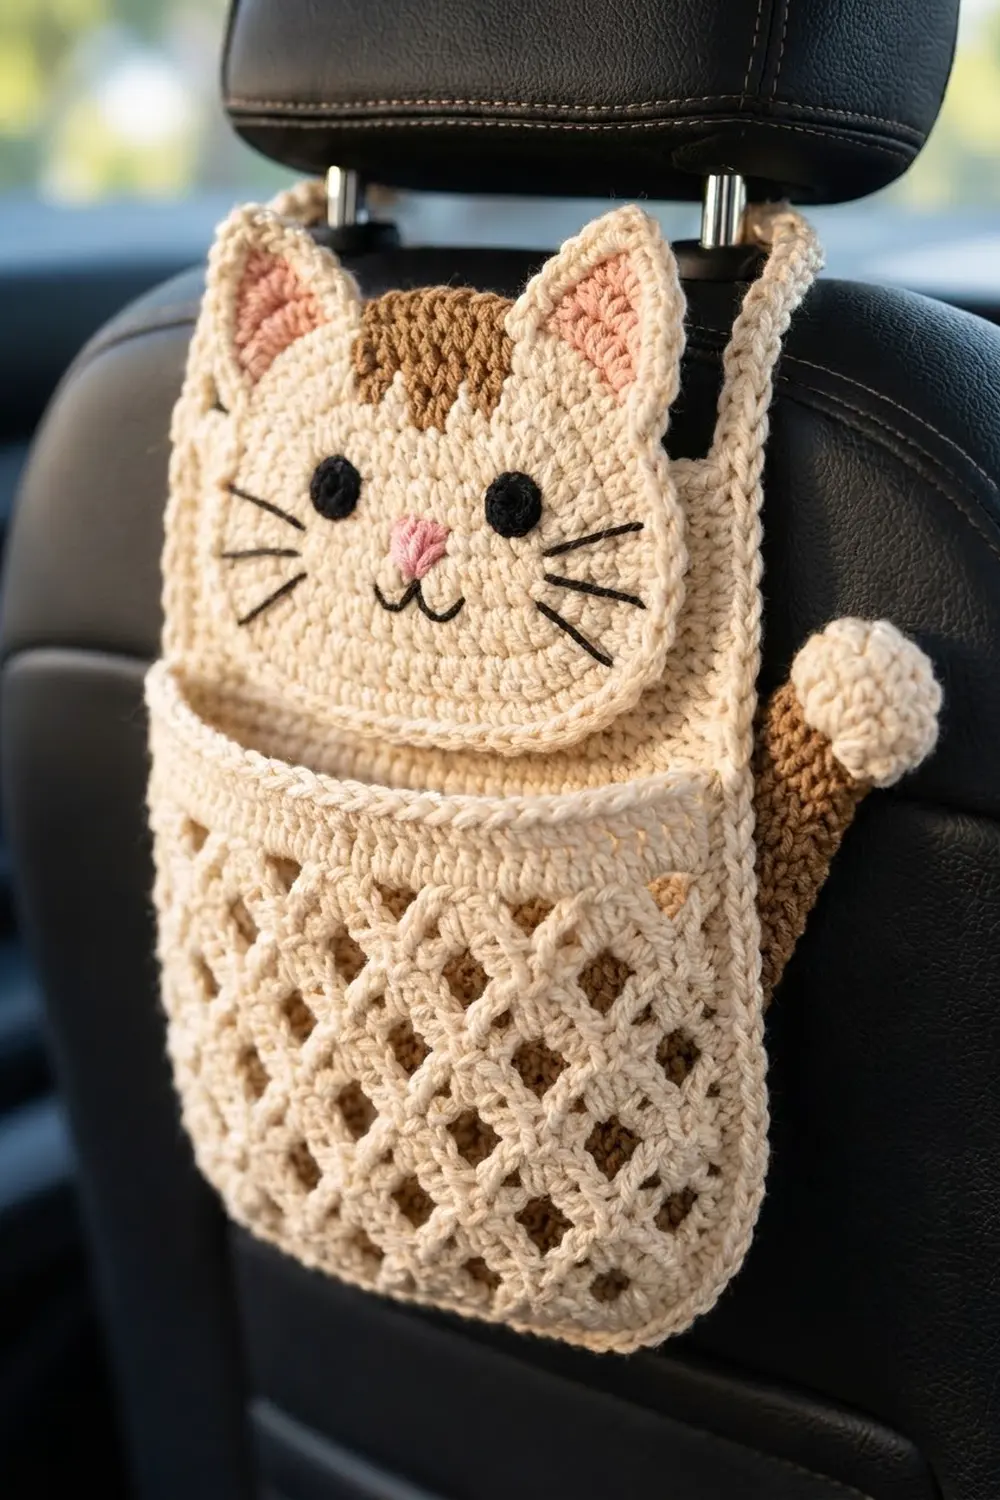
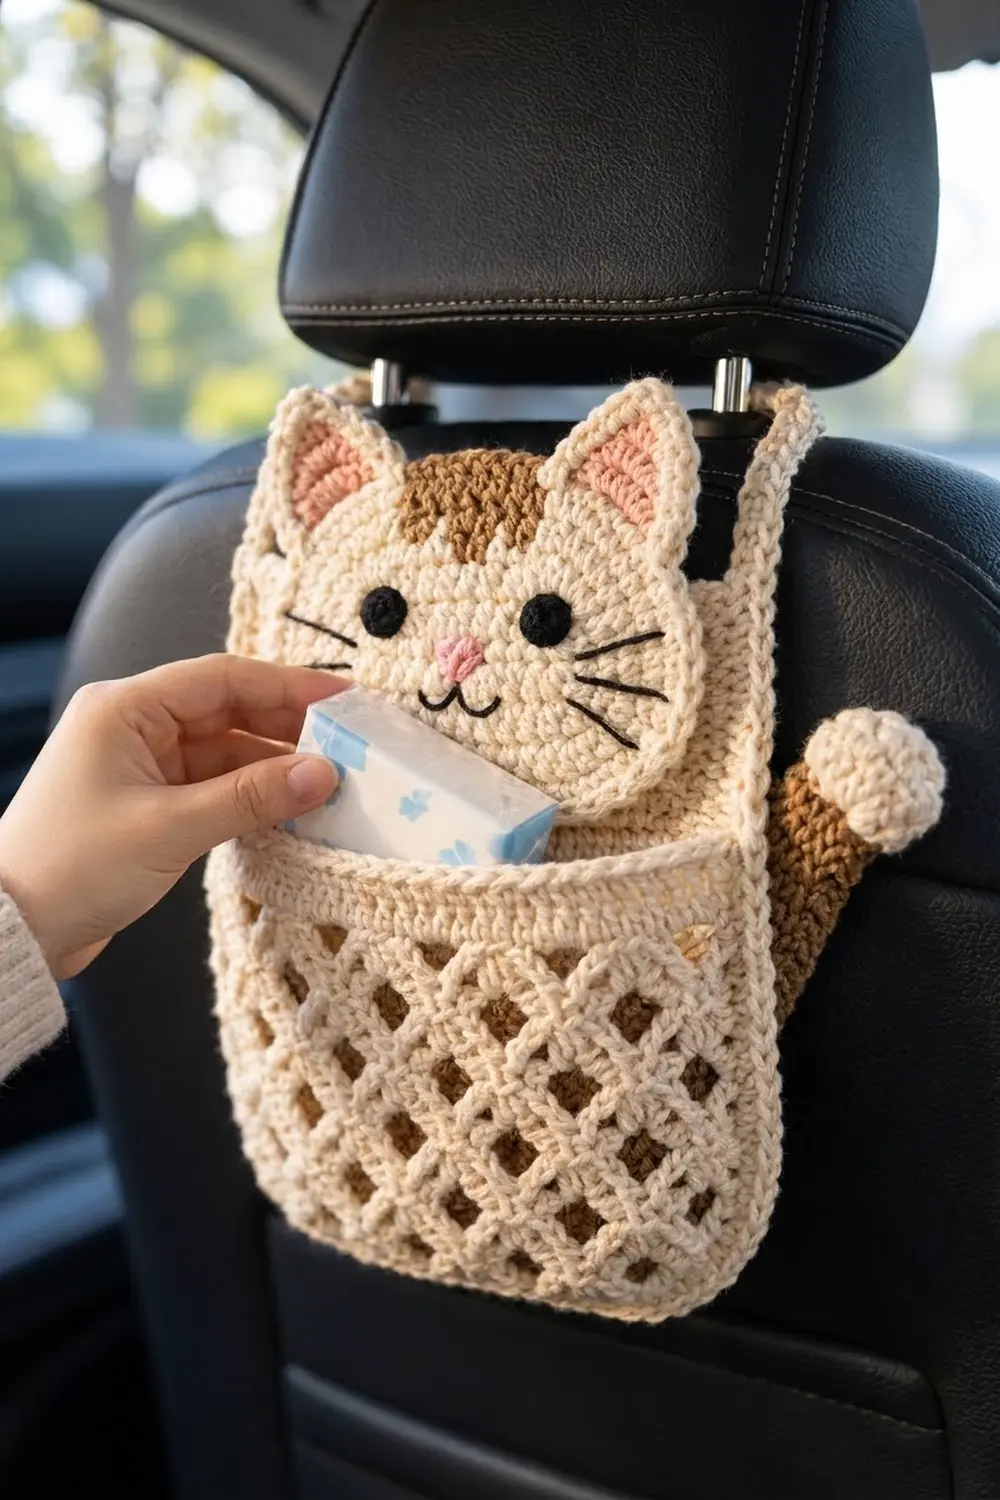
This organizer hangs on the back of a car seat. It gives you a roomy lattice pocket for tissues, wipes, or a small book, with a friendly tabby cat face on top. The face works as a soft flap over the pocket opening, and a brown tail with a round cream tip peeks out from the right side.
The colors are warm cream for the main body, brown for the forehead patch and tail, pink for the inner ears and nose, and black for the eyes and embroidery. The look is cozy and simple. It works well as a gift for a child’s car seat or for any cat lover who drives.
This pattern uses US crochet terms. The finished organizer measures 10.25 in wide x 14 in tall (26.0 x 35.6 cm), not counting the straps.
Construction is straightforward. You work a half double crochet back panel, a trellis pocket, and an oval single crochet face, plus small appliqué pieces. The panel and the pocket each get a two-round rope border. Then you sew everything together and add the straps and tail.
Finished Size and Construction
- Finished size: 10.25 x 14 in (26.0 x 35.6 cm)
- Skill level: Intermediate
- Terminology: US
- Yarn weight: Worsted (#4) cotton
- Hook: 4.5 mm (US 7)
- Number of pieces: 15 (1 panel, 1 pocket, 1 face, 1 patch, 2 ears, 2 inner ears, 2 eyes, 1 nose, 1 tail, 1 tail tip, 2 straps)
- Layout: The pocket covers the lower 8.25 in (21.0 cm) of the panel. The face is centered above it and overlaps the pocket by 1 in (2.5 cm).
- Panel size before border: 9.25 x 13 in (23.5 x 33.0 cm)
- Pocket size before border: 9.25 x 7.25 in (23.5 x 18.4 cm)
- Border depth: 0.5 in (1.3 cm) on every side
Materials
Use a smooth, firm worsted-weight cotton. Cotton holds its shape, resists pilling, and gives clean definition to the trellis bars and the rope edge. Avoid fuzzy blends, which blur the lattice.
- Cream: 200 g, about 320 m
- Brown: 25 g, about 40 m
- Pink: 5 g, about 8 m
- Black: 5 g, about 8 m (eyes and embroidery)
These quantities include a margin of about 20% for gauge swatching and differences in tension.
Tools:
– 4.5 mm (US 7) hook
– Tapestry needle
– 4 stitch markers
– Small handful of fiberfill
– Rust-proof pins
– Blocking mat and spray bottle
– Measuring tape
Abbreviations (US Terms)
- ch: chain
- sl st: slip stitch
- sc: single crochet
- hdc: half double crochet
- dc: double crochet
- sc2tog: single crochet 2 together
- sc3tog: single crochet 3 together
- inc: 2 sc in the same stitch
- dec: sc2tog
- sp: space
- st(s): stitch(es)
- MR: magic ring
- RS: right side
Special stitch: reverse single crochet (rsc). Keep the RS facing and work from left to right (right-handed). Insert the hook into the next stitch to the right, yarn over, and pull up a loop. Yarn over again and pull through both loops. This makes the twisted rope edge.
Gauge and Checkpoints
- hdc: 16 sts and 12 rows = 4 in (10.2 cm)
- sc: 16 sts and 16 rows = 4 in (10.2 cm)
- Trellis: each ch-5 loop spans 4 base stitches, which is 1 in (2.5 cm) across; 2 trellis rows = 1 in (2.5 cm) tall
Test one piece first. The back panel is the best test because it is large and simple. After Row 12 it should measure 9.25 in wide x 4 in tall (23.5 x 10.2 cm).
If your piece is too big, go down to a 4.0 mm hook. If it is too small, go up to a 5.0 mm hook. Recheck at the next checkpoint before you continue.
Back Panel (Cream)
Ch 39.
Row 1: Hdc in 3rd ch from hook and in each ch across. Turn. (37 hdc; the skipped ch do not count)
Rows 2–39: Ch 1 (does not count), hdc in each st across. Turn. (37 hdc)
- Checkpoint after Row 24: 9.25 x 8 in (23.5 x 20.3 cm)
- Checkpoint after Row 39: 9.25 x 13 in (23.5 x 33.0 cm)
Do not fasten off. Continue with the panel border below.
Front Pocket (Cream)
Ch 38.
Row 1 (RS): Sc in 2nd ch from hook and in each ch across. Turn. (37 sc)
Row 2: Ch 1, sc in first st, *ch 5, sk 3, sc in next st; repeat from * 8 more times. Turn. (9 loops, 10 sc)
Row 3: Ch 5 (counts as dc + ch 2), sc in first ch-5 loop, *ch 5, sc in next loop; repeat from * 7 more times, ch 2, dc in last sc. Turn. (9 sc, 8 full loops, 2 half loops)
Row 4: Ch 1, sc in first dc, *ch 5, sc in next ch-5 loop; repeat from * 7 more times, ch 5, sc in 3rd ch of turning ch. Turn. (9 loops, 10 sc)
Rows 5–14: Repeat Rows 3 and 4 five more times. Row 14 is a Row 4 repeat.
The sc in each row land in the centers of the loops below. That offset is what opens the diamond holes.
Checkpoint after Row 8: 9.25 x 3.75 in (23.5 x 9.5 cm)
Row 15: Ch 1, sc in first sc, *3 sc in next loop, sc in next sc; repeat from * 8 more times. Turn. This is a conversion row: (10 sc worked 1 per existing sc) + (27 sc worked into 9 loops) = 37 sc.
Row 16: Ch 1, sc in each st across. (37 sc)
Checkpoint: 9.25 x 7.25 in (23.5 x 18.4 cm). Rows 15–16 form the solid top band. Do not fasten off.
Cat Face (Cream)
Work in continuous rounds and place a marker in the first stitch of each round.
Ch 9.
Rnd 1: Sc in 2nd ch from hook and in next 6 ch, 3 sc in last ch. Working along the other side of the chain, sc in next 6 ch, 2 sc in the last ch (which already holds 1 sc). (18 sc)
Rnd 2: *Sc in next 6, 2 sc in each of next 3; repeat from * once. (24 sc)
Rnds 3–11: Sc in next 6, [sc in next (R − 2), 2 sc in next] 3 times; repeat from . Here R is the round number. Each round adds 6 stitches.
Round totals: Rnd 3: 30; Rnd 4: 36; Rnd 5: 42; Rnd 6: 48; Rnd 7: 54; Rnd 8: 60; Rnd 9: 66; Rnd 10: 72; Rnd 11: 78.
- Checkpoint after Rnd 6: 5 x 3 in (12.7 x 7.6 cm)
- Checkpoint after Rnd 11: 7.5 x 5.5 in (19.1 x 14.0 cm)
Sl st in the next st and fasten off.
Appliqué Pieces
Ears (make 2, cream): Ch 9.
– Row 1: Sc in 2nd ch from hook and in each ch across. (8)
– Row 2: Ch 1, sc across. (8)
– Row 3: Ch 1, sc2tog, sc 4, sc2tog. (6)
– Row 4: Ch 1, sc across. (6)
– Row 5: Ch 1, sc2tog, sc 2, sc2tog. (4)
– Row 6: Ch 1, sc across. (4)
– Row 7: Ch 1, sc2tog twice. (2)
– Row 8: Ch 1, sc2tog. (1)
Each ear is a triangle with a 2 in (5.1 cm) base and a height of 2 in (5.1 cm).
Inner ears (make 2, pink): Ch 5.
– Row 1: Sc in 2nd ch from hook and in each ch across. (4)
– Row 2: Ch 1, sc across. (4)
– Row 3: Ch 1, sc2tog twice. (2)
– Row 4: Ch 1, sc2tog. (1)
Each inner ear measures 1 x 1 in (2.5 x 2.5 cm).
Forehead patch (brown): Ch 10.
– Row 1: Sc in 2nd ch from hook and in each ch across. (9)
– Row 2: Ch 1, sc across. (9)
– Row 3: Ch 1, sc2tog, sc 5, sc2tog. (7)
– Row 4: Ch 1, sc across. (7)
– Row 5: Ch 1, sc2tog, sc 3, sc2tog. (5)
– Row 6: Ch 1, sc2tog, sc 1, sc2tog. (3)
The patch measures 2.25 in wide x 1.5 in tall (5.7 x 3.8 cm).
Eyes (make 2, black): Work 8 sc in a MR, pull the ring tight, and join with a sl st. (8) Each eye is about 0.6 in (1.5 cm) across.
Nose (pink): Ch 4.
– Row 1: Sc in 2nd ch from hook and in each ch across. (3)
– Row 2: Ch 1, sc3tog. (1)
Tail (brown): Start at the tip end.
– Rnd 1: 6 sc in a MR. (6)
– Rnd 2: Inc in each st. (12)
– Rnds 3–8: Sc around. (12)
– Rnd 9: (Sc 3, inc) 3 times. (15)
– Rnds 10–20: Sc around. (15)
The tail is 5 in (12.7 cm) long. Stuff it lightly, leaving the open base end unstuffed for 1 in (2.5 cm).
Tail tip (cream):
– Rnd 1: 6 sc in a MR. (6)
– Rnd 2: Inc in each st. (12)
– Rnd 3: (Sc, inc) 6 times. (18)
– Rnds 4–6: Sc around. (18)
– Rnd 7: (Sc, dec) 6 times. (12) Stuff firmly.
– Rnd 8: Dec 6 times. (6)
Close the hole. The ball is about 1.5 in (3.8 cm) across.
Straps (make 2, cream): Ch 7.
– Row 1: Hdc in 3rd ch from hook and in each ch across. (5)
– Rows 2–27: Ch 1, hdc across. (5)
Each strap measures 1.25 x 9 in (3.2 x 22.9 cm).
Make All Pieces
Totals by color:
– Cream: 1 panel, 1 pocket, 1 face, 2 ears, 1 tail tip, 2 straps (8 pieces)
– Brown: 1 patch, 1 tail (2 pieces)
– Pink: 2 inner ears, 1 nose (3 pieces)
– Black: 2 eyes (2 pieces), plus embroidery yarn
Layout (front view, top to bottom):
[ strap ]                        [ strap ]
+--------------------------------------+
|        [ear]  [patch]  [ear]         |
|      (   eye          eye    )       |
|      (   ===   nose   ===    )       |  <- face flap
|      (        mouth          )       |
|=============== pocket top ===========|  [tail ->
|  <> <> <> <> <> <> <> <> <>          |
|  trellis pocket, lower 8.25 in       |
+--------------------------------------+
Border
Border gauge: 16 sc = 4 in (10.2 cm). Each border round adds 0.25 in (0.6 cm) to every edge.
Panel Border
Continue from the last hdc row, with the RS facing.
Rnd 1: Ch 1. Along the top, sc in each of the 37 sts, then ch 1 for the corner. Down the side, work 52 sc evenly spaced along the row ends (4 sc for every 3 rows), then ch 1. Along the foundation edge, work 37 sc, then ch 1. Up the second side, work 52 sc, then ch 1. Join with a sl st.
That gives 37 + 52 + 37 + 52 = 178 sc, plus 4 corner ch-1 sps.
Rnd 2: Ch 1. Work 1 rsc in each sc and 1 rsc in each corner ch-1 sp. This is a trim round: (178 worked 1 per existing sc) + (4 added in the corners) = 182 rsc. That is 37 per short side and 52 per long side, between 4 separate corner stitches.
Fasten off. Checkpoint: 10.25 x 14 in (26.0 x 35.6 cm).
Pocket Border
Continue from Row 16 in the same way.
Rnd 1: Work 37 sc across the top, ch 1, 29 sc down the side, ch 1, 37 sc along the foundation edge, ch 1, 29 sc up the second side, ch 1. Join. That gives 37 + 29 + 37 + 29 = 132 sc, plus 4 corner sps.
Rnd 2: Work 1 rsc in each sc and in each corner sp: (132 worked 1 per existing sc) + 4 corners = 136 rsc.
Checkpoint: 10.25 x 8.25 in (26.0 x 21.0 cm).
Why the math works:
– 37 sc across 9.25 in, 52 sc along 13 in, and 29 sc along 7.25 in all equal exactly 16 sc per 4 in, so every edge lies flat.
– The pocket and panel have identical stitch counts across the bottom. Their side stitches also line up one for one.
Joining
Use whipstitch through the outer loops of the rsc rounds. Work with cream yarn and keep the tension even and snug, but not puckered.
- Pocket to panel. Lay the pocket on the panel with the bottom edges and side edges flush. Join the bottom stitch to stitch: corner + 37 + corner, which is 39 pairs. Then sew up each side, pairing the pocket’s 29 side rsc with the panel’s first 29 side rsc. Finish by joining the pocket’s top corner rsc to panel side stitch 30. Leave the top of the pocket open.
- Ears. Sew the ears behind the face, overlapping it by 0.75 in (1.9 cm) so that 1.25 in (3.2 cm) shows above the edge. Center each ear about 1.5 in (3.8 cm) in from its side of the face. Stack an inner ear on each ear with the bottom edges aligned and whipstitch it down.
- Patch. Sew the patch at the top center of the face, with its 9-stitch edge following Rnd 11.
- Eyes and nose. Sew the eyes 2.5 in (6.4 cm) apart, center to center, about 0.25 in (0.6 cm) above the horizontal center line of the face. Sew the nose centered, 0.5 in (1.3 cm) below the eye line.
- Embroidery. In black backstitch, work a “w” mouth just under the nose, with each curve 0.5 in (1.3 cm) wide. Then add 3 whiskers per side, each 1.75 in (4.4 cm) long, starting 0.75 in (1.9 cm) out from the nose and fanning slightly.
- Face to panel. Center the face with its bottom edge 7.25 in (18.4 cm) above the panel bottom. That places the ear tips flush with the panel top at 14 in (35.6 cm), because 7.25 + 6.75 = 14. Sew only the upper half of the face outline, from ear to ear. Leave the lower half free as a flap over the pocket.
- Tail. Sew the tip ball onto the narrow end of the tail. Flatten the open base and sew it to the back of the panel’s right edge, 6.5 in (16.5 cm) above the bottom, angled up and outward.
- Straps. Fold each strap into a loop. Sew both ends to the back of the panel at the top, 1 in (2.5 cm) in from each side, overlapping the panel by 1.5 in (3.8 cm).
Size checkpoint: 10.25 x 14 in (26.0 x 35.6 cm), with the pocket top 8.25 in (21.0 cm) above the bottom edge.
Final Blocking
- Mist the assembled organizer until it is damp, not soaked.
- Pin it flat to 10.25 x 14 in (26.0 x 35.6 cm).
- Open the trellis diamonds evenly with your fingertips.
- Smooth the face flap into a clean oval, 7.5 x 5.5 in (19.1 x 14.0 cm).
- Shape the tail and the tip ball by hand. Do not pin them.
- Let everything dry fully before you unpin.
Final Quality-Control Checklist
- [ ] The panel border has 182 rsc and the pocket border has 136 rsc.
- [ ] The pocket sides are flush with the panel edges.
- [ ] The face’s lower edge lifts freely to reach the pocket.
- [ ] The ear tips are level with the panel top.
- [ ] The eyes are level and the whiskers are symmetrical.
- [ ] The tail is secure and does not sag.
- [ ] The straps are firmly anchored with no visible stitching from the front.
- [ ] All ends are woven in.
Troubleshooting
- Pocket wider than the panel: Your trellis loops are too loose. Rework them with ch 4 instead of ch 5, or use a smaller hook for the pocket.
- Border ruffles: You have too many side stitches. Count again for exactly 52 on the panel sides and 29 on the pocket sides.
- Border cups: You have too few stitches, or your tension is too tight. Loosen up or go up a hook size for the border.
- Face curls: The increases are stacking. Stagger them by working 1 sc before the bracket on alternate rounds.
- Tail droops: Add a few stitches to tack its back to the panel, 1 in (2.5 cm) above the base.
Care
Hand wash in cool water with mild soap. Press out the water, reshape, and dry flat. Do not tumble dry.
Final Notes
The whole design follows one measurement chain. The 37-stitch width gives 9.25 in (23.5 cm), and the 0.5 in (1.3 cm) border brings it to 10.25 in (26.0 cm). The panel’s 39 rows make 13 in (33.0 cm), which becomes 14 in (35.6 cm) with the border. The pocket’s 16 rows make 7.25 in (18.4 cm), which becomes 8.25 in (21.0 cm). The 11-round face, 6.75 in (17.1 cm) tall with its ears, fills the space above the pocket exactly. Check each number as you go, and the pieces will line up when you sew them together.
Happy crocheting!