
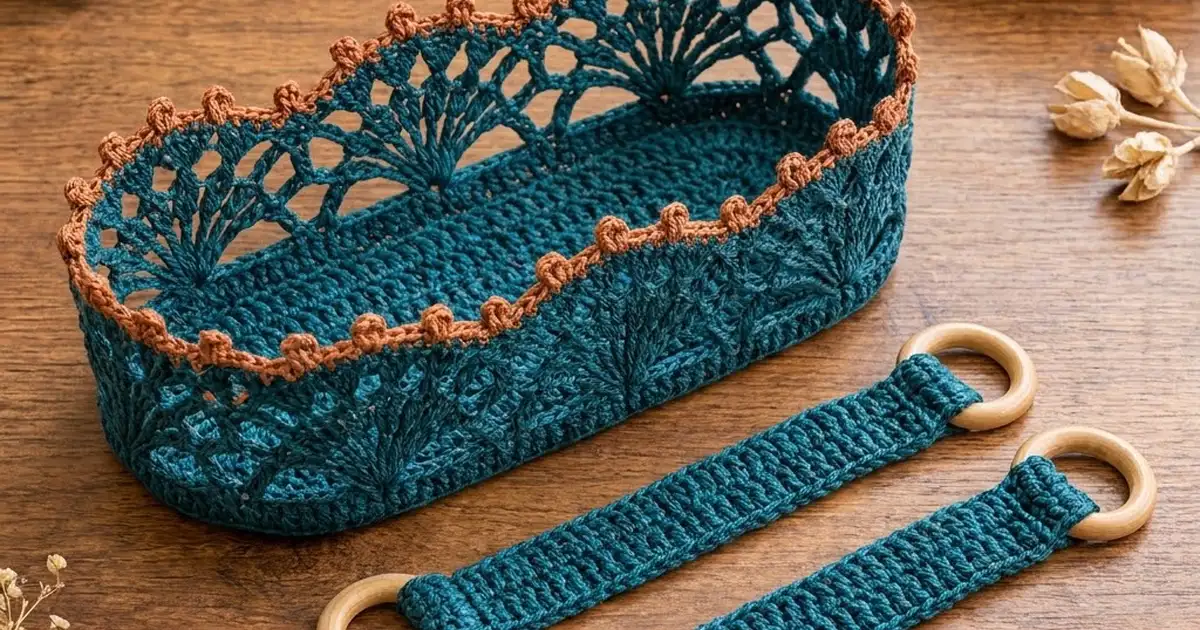
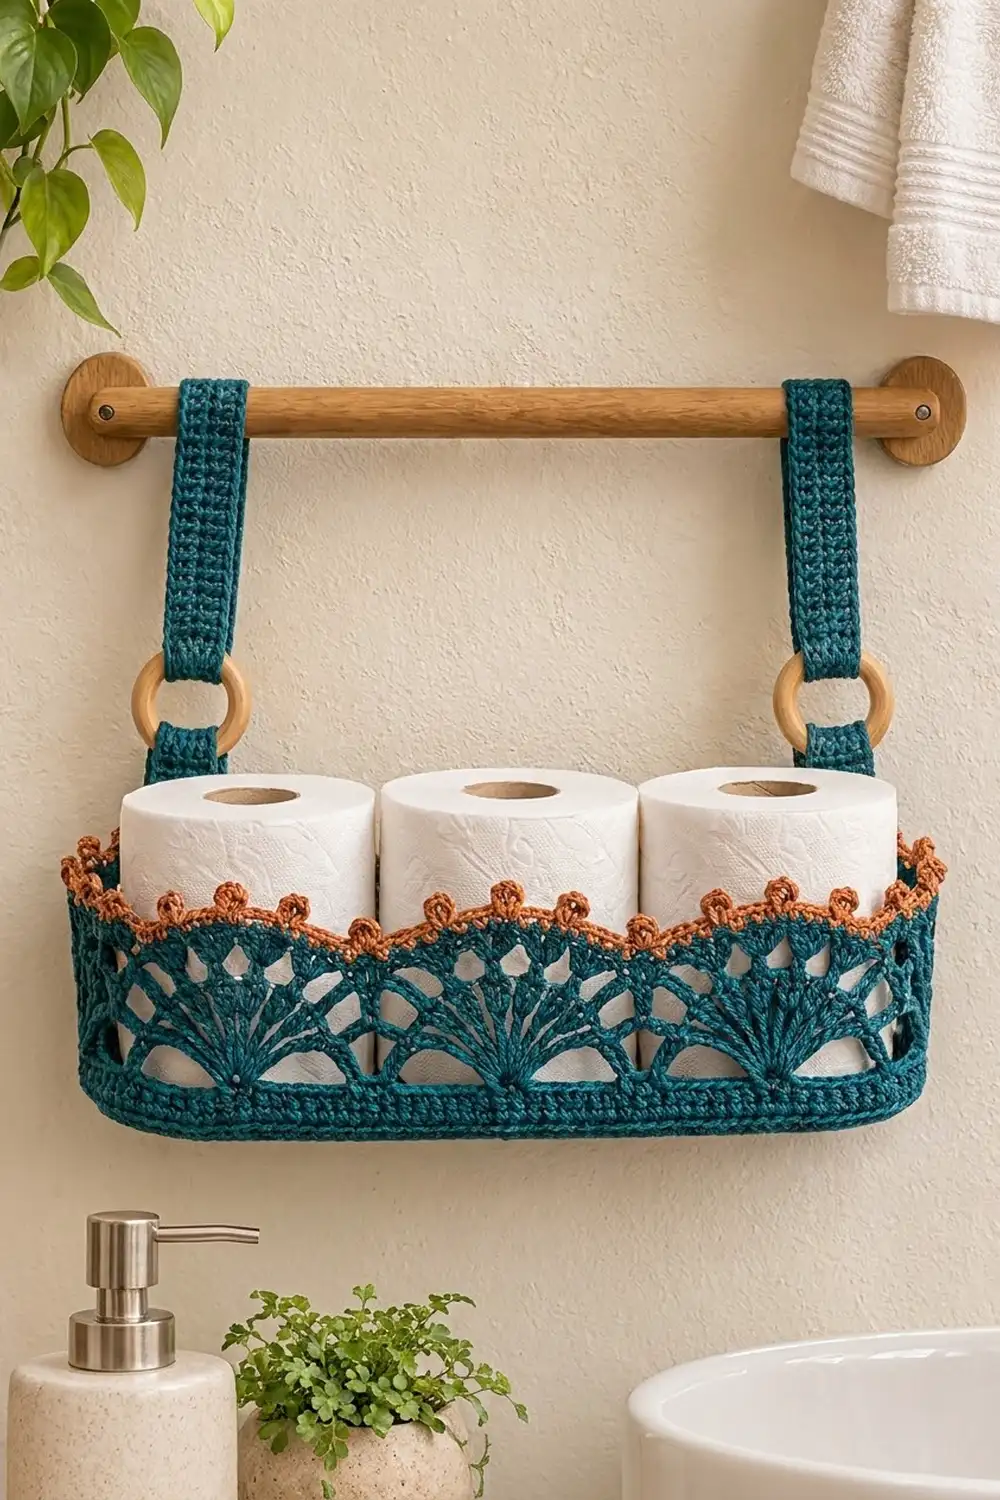
This hanging basket is a long, low oval with a solid base and openwork walls. The walls have two tiers of fan sprays, and the top edge is scalloped. It hangs from a towel rod on two ringed straps and holds three standard toilet paper rolls. It also works well for hand towels, washcloths, or small toiletries.
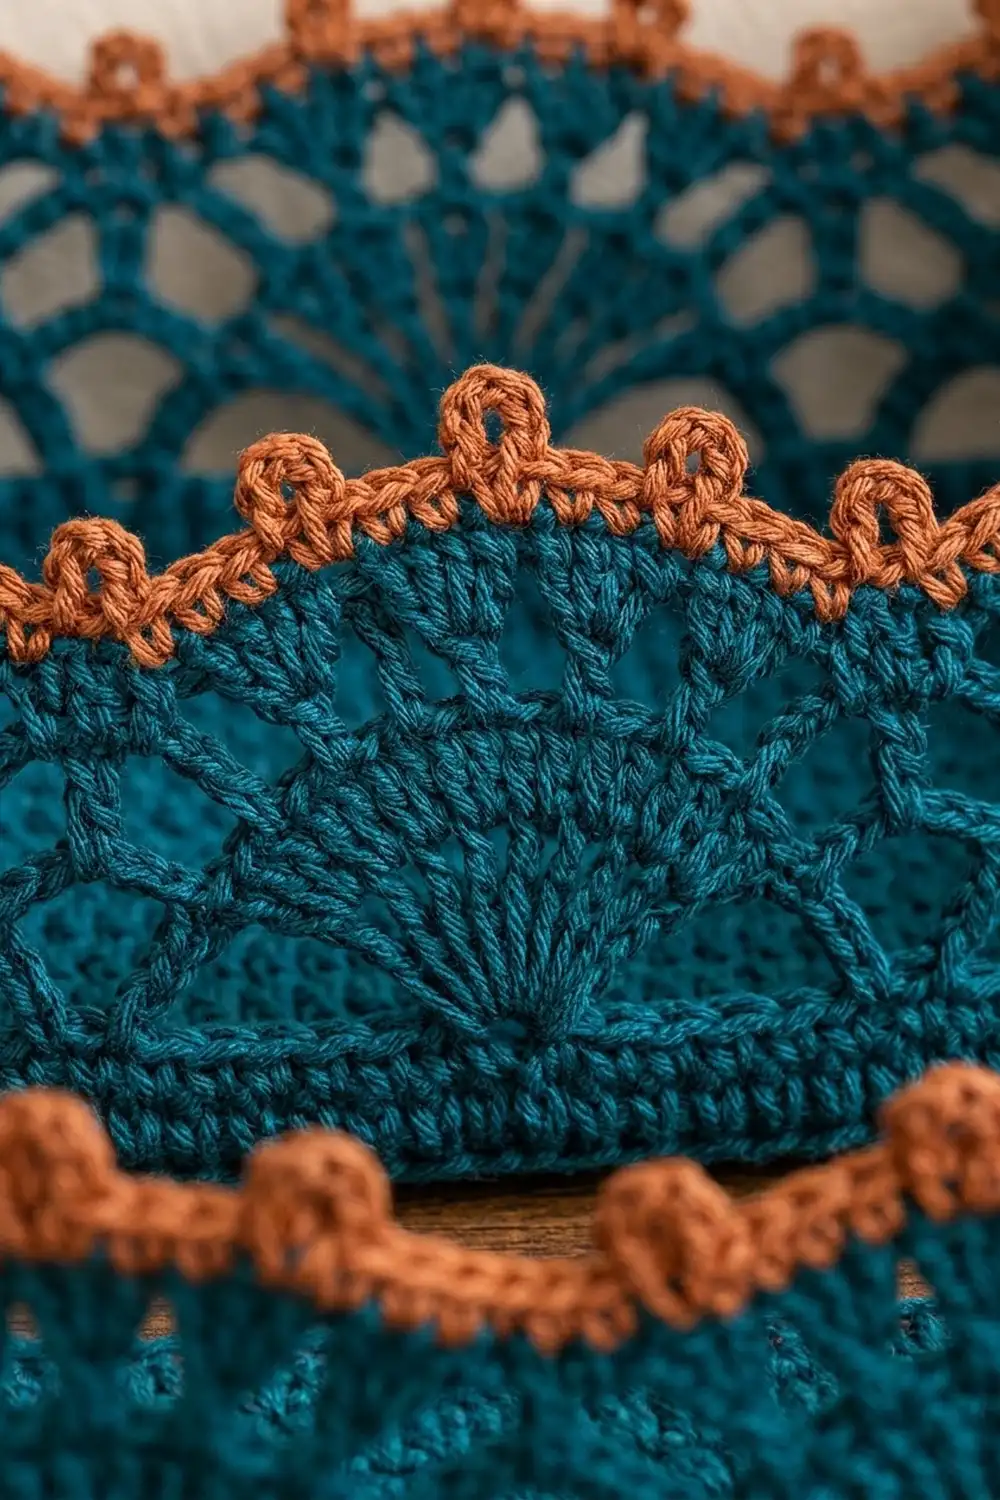
The sample is worked in deep teal cotton with rust-orange picot edging. The rust trim outlines the top scallops and the tops of the lower fans, which gives the lace a layered look. Wooden rings at the strap ends keep it natural and simple.
All instructions use US crochet terms. The finished basket measures 14 in (35.6 cm) long, 4.5 in (11.4 cm) wide, and 4.5 in (11.4 cm) tall. Each strap is 14 in (35.6 cm) long between rings and 1.25 in (3.2 cm) wide.
You start the oval base on a foundation chain and work it in joined rounds. The walls turn up from a back-loop round, then the two lace tiers are worked on a 17-stitch repeat. The rust trim is added last. The straps are simple single crochet rows, folded through the rings and sewn to the back wall.
Finished Size and Construction
- Finished size: 14 in x 4.5 in x 4.5 in tall (35.6 cm x 11.4 cm x 11.4 cm)
- Skill level: Intermediate
- Terminology: US
- Yarn weight: Worsted (#4) cotton
- Hook: 4.5 mm (US 7)
- Number of pieces: 3 crocheted (1 basket body, 2 straps) plus 4 wooden rings
- Layout: Straps sewn inside the back wall, one near each end
- Piece size: Base 14 in x 4.5 in (35.6 cm x 11.4 cm); strap 16 in x 1.25 in (40.6 cm x 3.2 cm) before folding
- Size before border: Wall height 4.25 in (10.8 cm)
- Border depth: 0.25 in (0.6 cm) of rust picot edging
Materials
Use a smooth, firm worsted-weight cotton or cotton blend. Cotton holds its shape and stands up to bathroom humidity. Acrylic gives a softer, floppier wall. Weights below assume about 190 m per 100 g.
- Teal (main color): 150 g, about 285 m
- Rust (trim): 30 g, about 57 m
The quantities include a margin of roughly 20 percent for your gauge and a gauge test.
Tools:
- 4.5 mm (US 7) crochet hook
- 4 wooden rings, 2 in (5.1 cm) outer diameter, about 1.5 in (3.8 cm) inner opening
- Tapestry needle
- Stitch markers (at least 3)
- Scissors and a measuring tape
- Rust-proof pins and a box or towels for blocking
Abbreviations (US Terms)
- ch – chain
- sc – single crochet
- dc – double crochet
- sl st – slip stitch
- sk – skip
- sp – space
- st(s) – stitch(es)
- BLO – back loop only
- inc – 2 sc in the same st
- rep – repeat
Special stitches
- V-st: (dc, ch 3, dc) in the same st.
- Picot: ch 3, sl st in the 3rd ch from the hook.
Gauge and Checkpoints
Gauge: 16 sc x 18 rounds = 4 in (10.2 cm) in sc worked in the round.
The base is your test piece. Work Rounds 1–5 and measure before you go any further.
- After Round 1: 10 in (25.4 cm) long.
- After Round 5: about 12 in x 2.5 in (30.5 cm x 6.4 cm).
- After Round 10: 14 in x 4.5 in (35.6 cm x 11.4 cm), lying flat.
- After Round 13: the solid wall band stands 0.75 in (1.9 cm) tall.
- After Round 19: the wall stands 4.25 in (10.8 cm) tall.
If the base is too big, go down 0.5 mm. If it is too small, go up 0.5 mm. If it cups, your end increases are too tight, so loosen up or go up a hook size. If it ruffles, check that each end gets exactly 3 increases per round.
Basket Body
Each round starts at End A, then works Side 1 (38 sts), End B, and Side 2 (38 sts). Join every round with a sl st to the first st. The beginning ch 1 does not count as a stitch.
Base
With teal, ch 41.
Rnd 1: 3 sc in the 2nd ch from hook (End A), sc in each of the next 38 ch (Side 1), 3 sc in the last ch (End B). Rotate and work along the other side of the chain: sc in each of the next 38 ch (Side 2). Join. (82 sts)
Rnd 2: Ch 1, inc in each of the next 3 sts, sc in the next 38, inc in each of the next 3 sts, sc in the next 38. Join. (88 sts)
Rnd 3: Ch 1, (sc in the next st, inc) 3 times, sc in the next 38, (sc in the next st, inc) 3 times, sc in the next 38. Join. (94 sts)
Rnd 4: Ch 1, (sc in the next 2, inc) 3 times, sc in the next 38, (sc in the next 2, inc) 3 times, sc in the next 38. Join. (100 sts)
Rnds 5–10: Keep the same pattern, working 1 more sc before each inc on every round. In Rnd 5 the end groups are (sc in the next 3, inc). In Rnd 10 they are (sc in the next 8, inc).
- Rnd 5: 106 sts
- Rnd 6: 112 sts
- Rnd 7: 118 sts
- Rnd 8: 124 sts
- Rnd 9: 130 sts
- Rnd 10: 136 sts (30 sts on each end, 38 on each side)
Each round adds 6 sts, 3 on each end. If the ends start to look pointed, move the incs around within each end group on alternate rounds. Check the Round 10 measurement now.
Wall Band
Rnd 11: Ch 1, sc BLO in each st around. Join. (136 sts) This round makes the fold where the wall turns up.
Rnds 12–13: Ch 1, sc in each st around. Join. (136 sts)
Lower Fan Tier
The 136 sts divide into 8 repeats of 17 sts, so the lace has 8 fans per tier.
Rnd 14: Ch 1, sc in the first st, ch 5, sk 7 sts, V-st in the next st, ch 5, sk 8 sts. Sc in the next st, ch 5, sk 7 sts, V-st in the next st, ch 5, sk 8 sts; rep from * 6 more times. Join to the first sc. (8 sc, 8 V-sts, 16 ch-5 sps)*
Rnd 15: Ch 1, sc in the same sc. Ch 3, sk the ch-5 sp, work (dc, ch 1) 6 times in the V-st ch-3 sp, then dc in the same sp. Ch 3, sk the ch-5 sp, sc in the next sc; rep from * around, leaving out the final sc. Join. (8 sc, 56 dc, 16 ch-3 sps)*
Rnd 16: Ch 1, sc in the same sc. Ch 3, dc in the first dc of the fan, (ch 2, dc in the next dc) 6 times, ch 3, sc in the next sc; rep from * around, leaving out the final sc. Join. (8 sc, 56 dc, 48 ch-2 sps, 16 ch-3 sps)* This round opens the fans into sprays.
Rnd 17: Ch 6 (counts as dc and ch 3), dc in the same sc for the first V-st. Ch 2, sk the ch-3 sp, sc in the next ch-2 sp, (ch 3, sc in the next ch-2 sp) 5 times, ch 2, sk the ch-3 sp. V-st in the next sc; rep from * around, ending the last rep at . Join to the 3rd ch of the beginning ch-6. (8 V-sts, 48 sc, 40 ch-3 loops, 16 ch-2 sps)*
The 5 ch-3 loops cap each lower fan with a small scallop.
Upper Fan Tier
The upper fans sit between the lower fans. This offset creates the layered look.
Rnd 18: Sl st into the first V-st ch-3 sp. Ch 3 (counts as dc), (ch 1, dc) 6 times in the same sp, ch 3, sk 2 ch-3 loops, sc in the 3rd (center) ch-3 loop, ch 3. In the next V-st sp work (dc, ch 1) 6 times, then dc. Ch 3, sk 2 ch-3 loops, sc in the center ch-3 loop, ch 3; rep from * around. Join to the top of the beginning ch-3. (56 dc, 8 sc, 16 ch-3 sps)*
Rnd 19: Ch 3 (counts as dc), (ch 2, dc in the next dc) 6 times, ch 3, sc in the next sc, ch 3. Dc in the next dc, (ch 2, dc in the next dc) 6 times, ch 3, sc in the next sc, ch 3; rep from * around. Join to the top of the beginning ch-3. Fasten off. (56 dc, 48 ch-2 sps, 8 sc, 16 ch-3 sps)*
The wall should measure 4.25 in (10.8 cm) from the fold to the top of the upper fans.
Straps (Make 2)
With teal, ch 6.
Row 1: Sc in the 2nd ch from hook and in each ch across. Turn. (5 sts)
Rows 2–72: Ch 1, sc in each st across. Turn. (5 sts)
Fasten off and leave a 12 in (30.5 cm) tail. Each strap should measure 16 in x 1.25 in (40.6 cm x 3.2 cm). At 18 rows per 4 in (10.2 cm), 72 rows gives 16 in (40.6 cm).
Attach the rings: Pass one end of the strap through a ring and fold 1 in (2.5 cm), about 5 rows, back onto the strap. Whipstitch across the fold and down both edges. Repeat at the other end with a second ring. After both folds, 14 in (35.6 cm) of strap shows between the rings.
Make All Pieces
- Basket body: 1, in teal with rust trim
- Straps: 2, in teal
- Wooden rings: 4, two per strap
Layout, seen from above with the back wall at the top:
 [Strap 1]                         [Strap 2]
    |                                  |
 ( ===========  BACK WALL  ============= )
 (                                       )
 ( End A        BASE 14 x 4.5 in   End B )
 (                                       )
 ( ===========  FRONT WALL ============= )
Joining
Each strap’s lower ring is sewn to the inside of the back wall.
- Find the back wall (Side 2 of the base). Measure 1.5 in (3.8 cm) in from each point where the straight side meets the curved end, and place a marker there.
- Inside the basket, set a lower ring against the wall at a marker. The ring should rest over Rounds 12–14, with the strap rising straight up.
- Use teal yarn to sew around the ring, taking 2 passes into each Round 12–14 sc behind it. Then whipstitch the strap fold to Rounds 14–15. Work stitch to stitch: one sewing pass into each wall stitch under the strap’s 5 stitches.
- Keep the sewing firm but not tight. Pulling too hard puckers the solid band.
Hanging: Bring each strap up over the rod and back down in front. Stop the upper ring about 3 in (7.6 cm) above the rim. Lash the ring to the strap body with teal yarn, wrapping 6–8 times and knotting on the back. This leaves a loop over the rod, the ring, and a single band down to the basket. Move the lashing up or down to change the hanging height.
Size check: Both straps should match in length, and the basket should hang level.
Border
Border gauge: Rust sc tension should match the teal gauge, 16 sc per 4 in (10.2 cm). If the edge ruffles, go down to 4 mm (US G-6). If it cups, go up to 5 mm (US H-8).
Top Picot Edge
Join rust with a sl st in the first dc of any upper fan on Rnd 19.
Rnd 20: Ch 1, sc in the same dc. [(Sc, picot, sc) in the next ch-2 sp, sc in the next dc] 6 times, 2 sc in the ch-3 sp, sc in the sc, 2 sc in the next ch-3 sp, sc in the next dc; rep from * around, ending at *. Join. Fasten off.
Per fan repeat: 1 + 18 + 2 + 1 + 2 = 24 sc and 6 picots.
Total: 8 repeats x 24 = 192 sc and 48 picots.
Mid-Wall Picot Trim
This trim is worked into the free ch-3 loops of Rnd 17, so it outlines the tops of the lower fans.
Join rust in the first ch-3 loop after any V-st. *(Sc, picot, sc) in each of the 5 ch-3 loops. Sc in the next ch-2 sp, ch 1, sk behind the V-st, sc in the next ch-2 sp; rep from * around. Join and fasten off. In the center loop, work around the sc from Rnd 18 that is already there.
Per repeat: 10 + 2 = 12 sc and 5 picots.
Total: 8 x 12 = 96 sc and 40 picots.
Why the math works: The wall carries the base’s 136 sts with no extra increases. 136 = 8 x 17, so every lace round and both trims have exactly 8 identical repeats. Nothing is added at seams or corners. The oval has no corners, so each repeat is the “side” count.
Final Blocking
- Weave in all ends, running them through the solid band or the strap backs.
- Soak the basket and straps in cool water for 10 minutes, then press out the water in a towel. Do not wring.
- Fill the basket with a box or rolled towels sized to 14 in x 4.5 in x 4.5 in (35.6 cm x 11.4 cm x 11.4 cm).
- Square up the solid band and pull each fan into a symmetric spray. Pin each picot upward.
- Lay the straps flat, pin them to 14 in (35.6 cm) between rings, and keep them straight.
- Let everything dry completely. For a stiffer wall, mist with a light fabric stiffener before drying.
Final Quality-Control Checklist
- Base measures 14 in x 4.5 in (35.6 cm x 11.4 cm) and lies flat
- Round 10 has 136 sts
- Wall stands at a clean right angle from the BLO fold
- 8 lower fans and 8 upper fans, with the upper fans centered between the lower ones
- Wall measures 4.25 in (10.8 cm) before trim and 4.5 in (11.4 cm) after
- Top edge has 192 sc and 48 picots; mid trim has 96 sc and 40 picots
- Both straps are 14 in (35.6 cm) between rings
- Rings are sewn securely, with no wobble
- Basket hangs level
Troubleshooting
- Base cups: Your end increases are too tight. Go up a hook size or ease your tension around the curves.
- Base ruffles: You probably added extra increases. Recount each end against the table.
- Fans lean sideways: Check that Rnd 14 skips 7 sts before each V-st and 8 after it.
- Walls flop outward: Use a firmer cotton, add a stiffener, or work 1 more sc round after Rnd 13.
- Picots flatten: Pin them upward while blocking.
- Basket tilts: Even out the strap lashing heights.
Care
Hand wash in cool water and lay flat to dry, reshaped over a box. Re-stiffen if needed. Do not tumble dry, because heat distorts the lace.
Final Notes
Everything follows from one measurement chain. Gauge of 16 sc per 4 in (10.2 cm) gives a 136-stitch base of 14 in x 4.5 in (35.6 cm x 11.4 cm). Those 136 stitches split into 8 fan repeats of 17, which build a 4.25 in (10.8 cm) wall. The rust trim brings the wall to 4.5 in (11.4 cm). Two 72-row straps hang the finished basket at whatever height suits your rod.
Happy crocheting!