
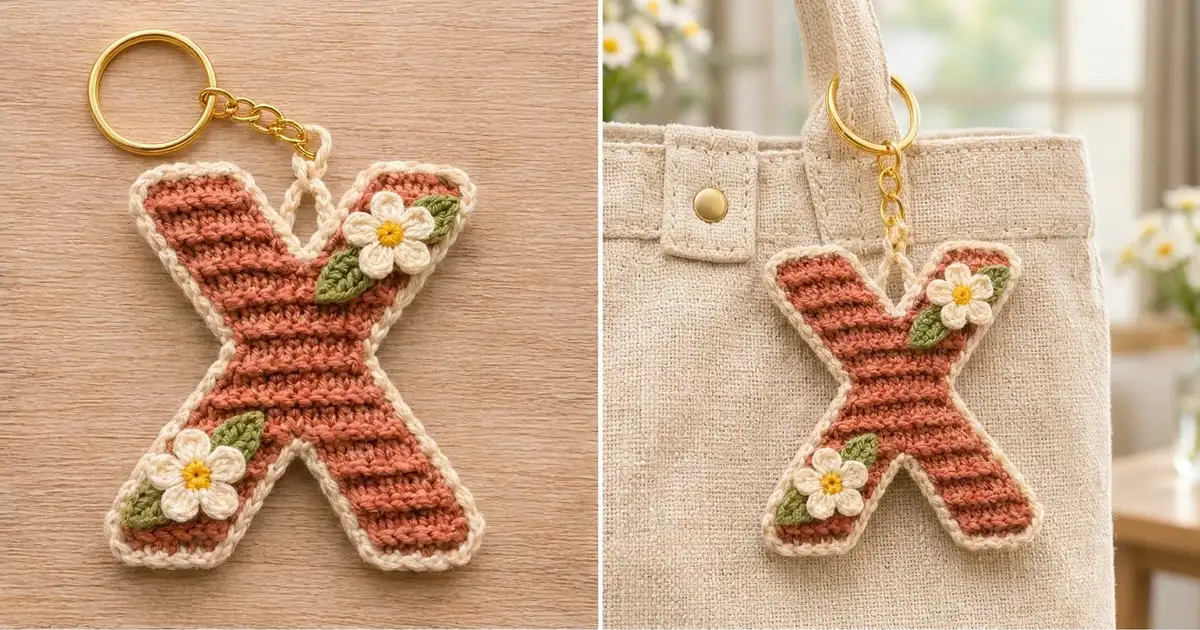
This little letter X is a quick, satisfying make that turns leftover yarn into a personal bag charm. The body is warm terracotta worked in rows with tight horizontal ridges, and a crisp cream border outlines every edge. Two cream daisies with sunny yellow centers and small green leaves add a cottage-garden touch.
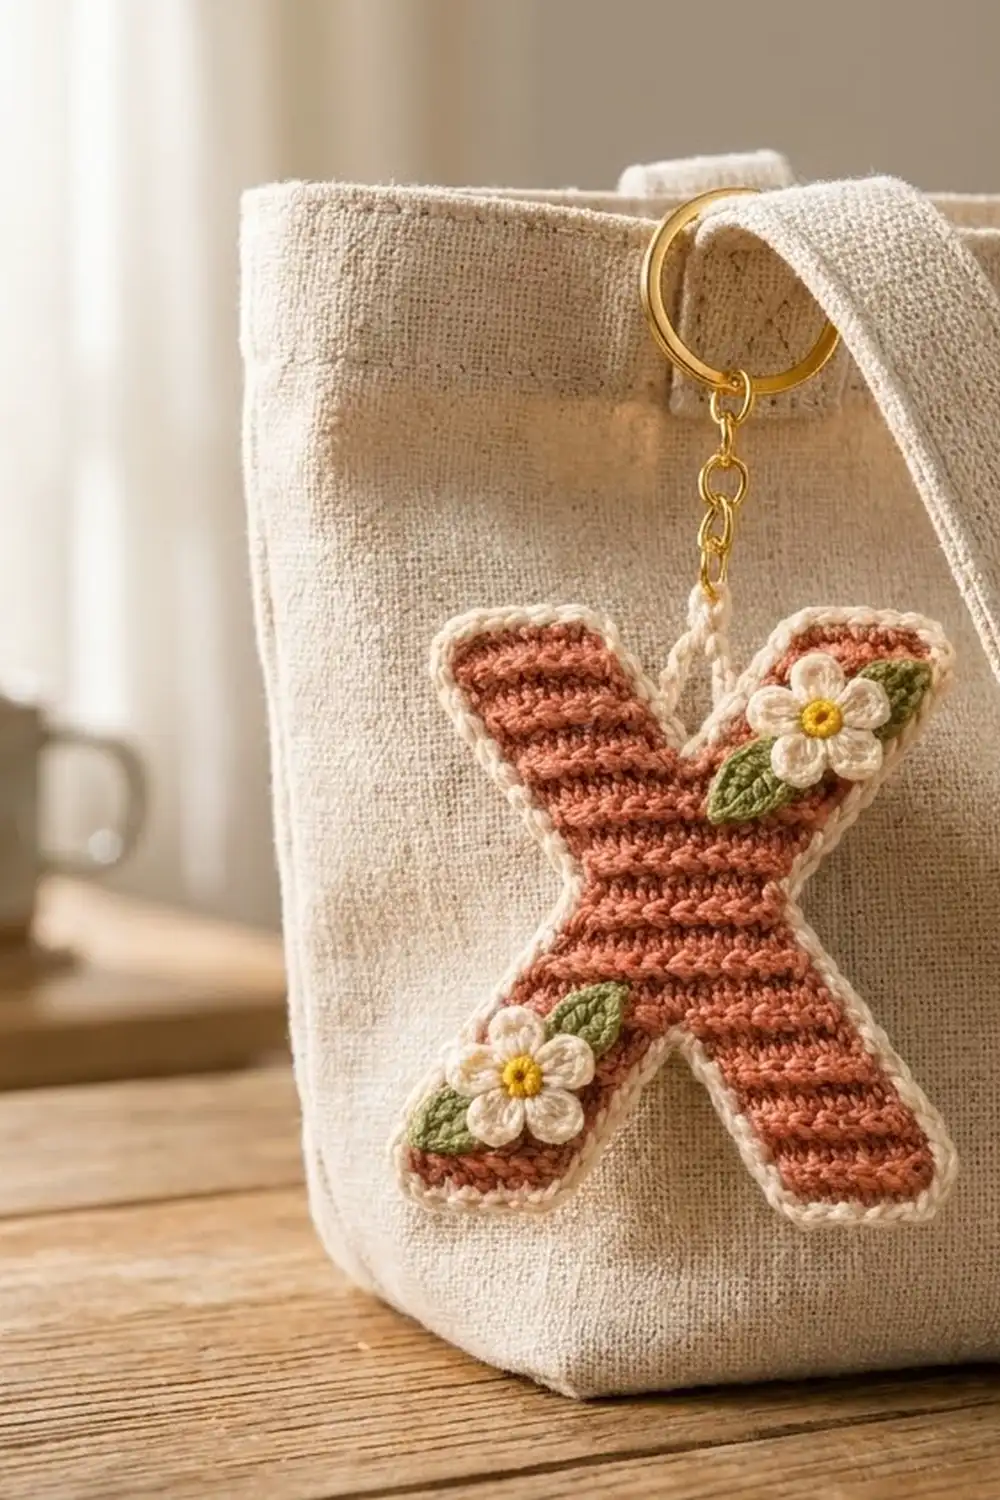
The style is soft, natural and a bit vintage. It looks good on a canvas tote, a backpack zipper or a set of keys, and it makes a thoughtful initial gift.
This pattern uses US crochet terms. The finished charm measures 3.6 in (9.1 cm) wide and 3.5 in (8.9 cm) tall, not counting the hanging loop.
You work the X flat in half double crochet through the back loop only. First you make the two bottom legs separately and join them across a shaped waist. Then you split the work again for the two top legs. A two-round border, a built-in hanging loop and the sewn-on appliqués finish the piece.
Finished Size and Construction
- Finished size: 3.6 in (9.1 cm) wide x 3.5 in (8.9 cm) tall
- Skill level: Easy-intermediate
- Terminology: US crochet terms
- Yarn weight: DK (#3), cotton or cotton blend
- Hook: 3.5 mm (E-4)
- Number of pieces: 1 letter body, plus 2 flowers and 4 leaves as appliqués
- Layout: Single piece, no joining
- Body size (before border): 3.1 in (7.9 cm) wide x 3 in (7.6 cm) tall
- Leg width: 4 stitches, 0.9 in (2.3 cm) measured horizontally
- Border depth: 0.25 in (0.6 cm) per side, which adds 0.5 in (1.3 cm) to each dimension
Materials
Choose a smooth DK cotton or cotton blend. Cotton holds the letter’s sharp angles and resists stretching on a keyring. Avoid fuzzy yarns, because they hide the ridges.
- Terracotta (body): 5 g, about 11 m
- Cream (border and petals): 4 g, about 9 m
- Yellow (flower centers): 1 g, about 2 m
- Green (leaves): 1 g, about 2 m
All quantities include a small margin for your gauge swatch, tails and weaving in.
Tools:
– 3.5 mm (E-4) crochet hook
– Tapestry needle
– Scissors
– Stitch markers (2)
– Gold split keyring, 1 in (2.5 cm), with a 1.5 in (3.8 cm) chain and jump ring
– Rustproof pins and a blocking mat or folded towel
– Spray bottle or steam iron
Abbreviations (US Terms)
- ch – chain
- sl st – slip stitch
- sc – single crochet
- hdc – half double crochet
- dc – double crochet
- BLO – back loop only
- st(s) – stitch(es)
- sc2tog – single crochet 2 together
- RS / WS – right side / wrong side
Special stitch – hdc2tog in BLO: Yarn over, insert the hook in the back loop of the next st, yarn over and pull up a loop. Yarn over, insert the hook in the back loop of the following st, yarn over and pull up a loop (5 loops on the hook). Yarn over and pull through all 5 loops.
Turning chain: The ch 2 at the start of each row does not count as a stitch.
Gauge and Checkpoints
Gauge: 18 hdc and 12 rows = 4 in (10.2 cm) in hdc BLO. That works out to 4.5 sts and 3 rows per inch.
Treat the first bottom leg as your test piece. After its Row 3, it should measure 1 in (2.5 cm) tall and 0.9 in (2.3 cm) wide.
Checkpoints:
– After Row 4 (joined): 1.3 in (3.3 cm) tall, with the joined row 1.8 in (4.6 cm) wide
– After Row 5 (waist): 1.3 in (3.3 cm) wide across the waist
– After Row 6: 2 in (5.1 cm) tall
– After Row 9: 3 in (7.6 cm) tall x 3.1 in (7.9 cm) wide
– After the border: 3.5 in (8.9 cm) tall x 3.6 in (9.1 cm) wide
If your piece is too big, change to a 3.25 mm hook. If it is too small, change to a 3.75 mm hook. Rip back and test the first leg again before you continue.
Body Pattern
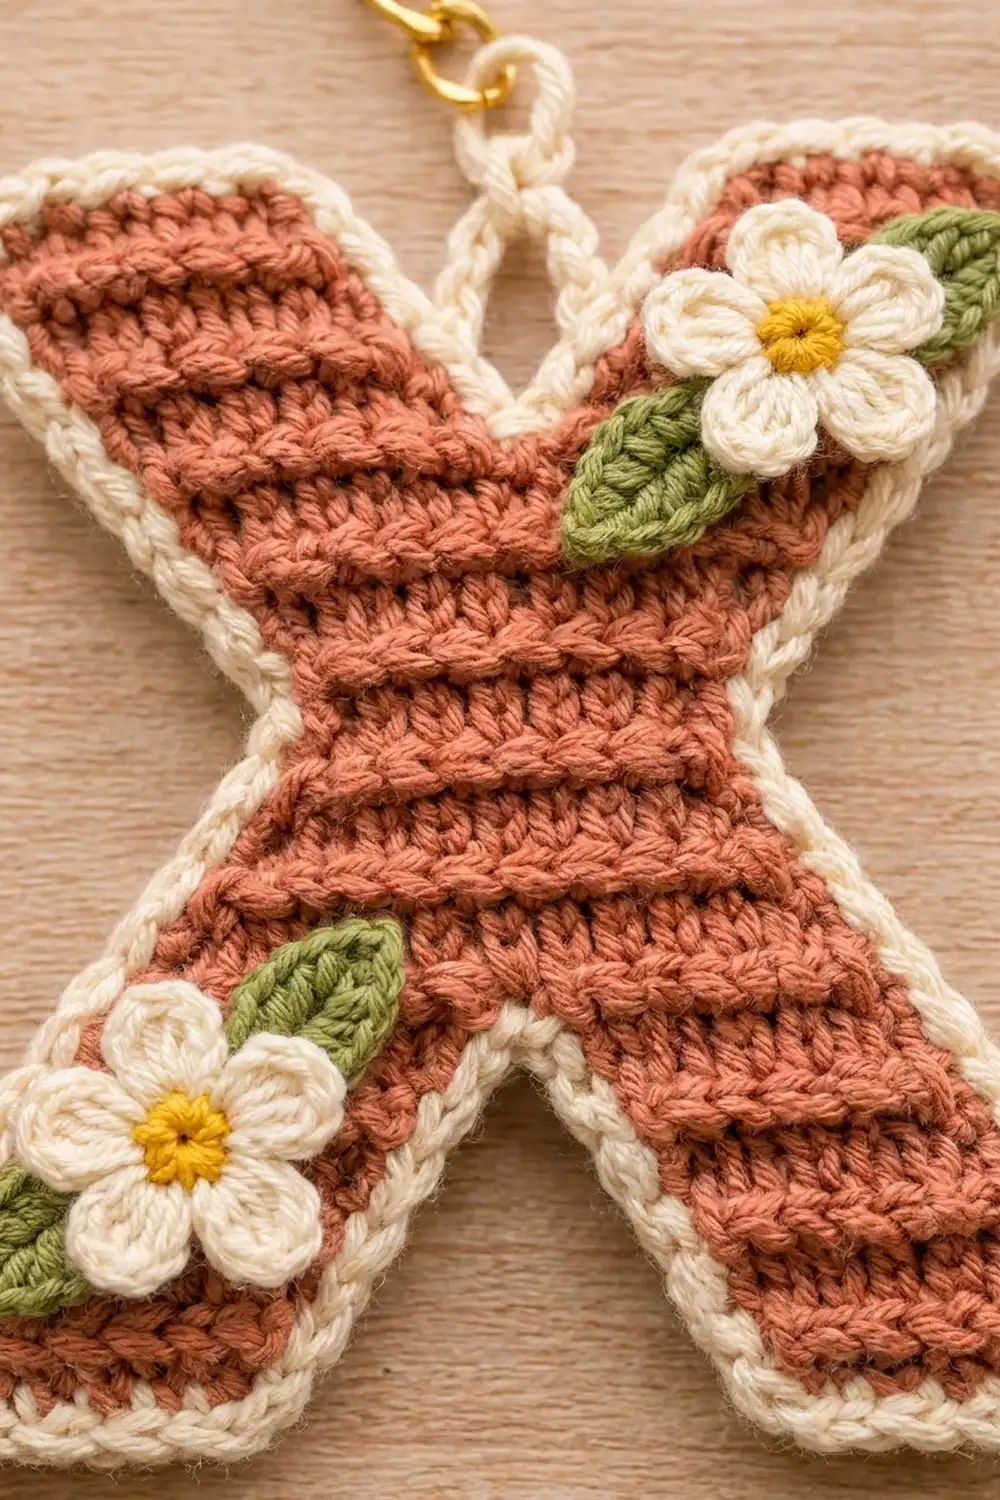
Hold the work so that Row 1 runs right to left. With every turn, the side you work on alternates. Odd rows run right to left, and even rows run left to right, as seen on the finished letter.
From Row 2 onward, work every stitch in BLO. Each leg leans by moving one stitch per row: you decrease on one edge and increase on the other, so the count stays at 4.
Bottom-Right Leg (Leg B)
Row 1: With terracotta, ch 6. Hdc in 3rd ch from hook and in the next 3 ch. Turn. (4 hdc)
Row 2: Ch 2, 2 hdc in first st (inner edge), hdc in next st, hdc2tog over the last 2 sts (outer edge). Turn. (4 hdc)
Row 3: Ch 2, hdc2tog over the first 2 sts (outer edge), hdc in next st, 2 hdc in last st (inner edge). (4 hdc)
Fasten off and leave a 6 in (15.2 cm) tail. This leg now leans toward the center.
Bottom-Left Leg (Leg A)
Row 1: With terracotta, ch 6. Hdc in 3rd ch from hook and in the next 3 ch. Turn. (4 hdc)
Row 2: Ch 2, hdc2tog over the first 2 sts (outer edge), hdc in next st, 2 hdc in last st (inner edge). Turn. (4 hdc)
Row 3: Ch 2, 2 hdc in first st (inner edge), hdc in next st, hdc2tog over the last 2 sts (outer edge). Turn. (4 hdc)
Do not fasten off. Your hook now sits at the outer edge of Leg A.
Lay Leg B to the right of Leg A, with the same side facing you and the tops of their Row 3 lined up. The inner edges should almost touch.
Joining and Waist
Row 4 (joining row): Ch 2. On Leg A, hdc2tog, hdc in next st, 2 hdc in last st. Move straight onto Leg B: 2 hdc in first st, hdc in next st, hdc2tog. Turn. (8 hdc: 4 over each leg)
Row 5 (waist): Ch 2, hdc2tog, hdc in next 4 sts, hdc2tog. Turn. (6 hdc)
Row 6: Ch 2, 2 hdc in first st, hdc in next 4 sts, 2 hdc in last st. Turn. (8 hdc)
Row 5 is the narrowest point, at 1.3 in (3.3 cm). Rows 4 and 6 mirror each other.
Top-Right Leg (Leg C)
Row 7: Ch 2, 2 hdc in first st (outer edge), hdc in next st, hdc2tog over the next 2 sts (inner edge). Turn and leave the remaining 4 sts unworked. (4 hdc)
Row 8: Ch 2, hdc2tog (inner edge), hdc in next st, 2 hdc in last st (outer edge). Turn. (4 hdc)
Row 9: Ch 2, 2 hdc in first st (outer edge), hdc in next st, hdc2tog (inner edge). (4 hdc)
Fasten off.
Top-Left Leg (Leg D)
Row 7: Keep the same side facing as for Leg C’s Row 7. Join terracotta with a sl st in the first unworked st of Row 6, next to Leg C. Ch 2, hdc2tog (inner edge), hdc in next st, 2 hdc in last st (outer edge). Turn. (4 hdc)
Row 8: Ch 2, 2 hdc in first st (outer edge), hdc in next st, hdc2tog (inner edge). Turn. (4 hdc)
Row 9: Ch 2, hdc2tog (inner edge), hdc in next st, 2 hdc in last st (outer edge). (4 hdc)
Fasten off. Weave in the terracotta tails, and use Leg B’s tail to close any small gap at the join.
Stitch total check: Legs A and B have 12 hdc each (24). Rows 4, 5 and 6 add 8 + 6 + 8 = 22. Legs C and D have 12 hdc each (24). The body holds 70 hdc in total.
The BLO ridges appear on both faces. Choose the face you like best as the front, and mark it with a stitch marker.
Border
Border gauge: Work 1 sc in each stitch top or foundation chain, and 2 sc in each hdc row end. One hdc row is about as tall as two sc, so the edge lies flat.
Work with the chosen front facing you. On each leg tip, the 4 stitches across become 8 sc: 3 sc in the first st, 1 sc in each of the next 2 sts, and 3 sc in the last st. Those 8 sc already include both corner groups.
Round 1: Join cream with a sc in the first st of Leg C’s Row 9 (outer corner), and work 2 more sc in the same st. Then work around the X as follows:
- Top tip of Leg C: sc in next 2 sts, 3 sc in last st. (8 sc on this side)
- Top notch: 2 sc in each of the Row 9 and Row 8 ends of Leg C. Sc2tog over the Row 7 end of Leg C and the Row 7 end of Leg D. 2 sc in each of the Row 8 and Row 9 ends of Leg D. (9 sc)
- Top tip of Leg D: 3 sc in first st, sc in next 2 sts, 3 sc in last st. (8 sc)
- Left side: 2 sc in each row end from Row 9 down to Row 1, except 1 sc in the Row 5 end. (8 x 2 + 1 = 17 sc)
- Bottom tip of Leg A: working in the foundation ch, 3 sc in first ch, sc in next 2 ch, 3 sc in last ch. (8 sc)
- Bottom notch: 2 sc in each of the Row 1 and Row 2 ends of Leg A. Sc2tog over the Row 3 end of Leg A and the Row 3 end of Leg B. 2 sc in each of the Row 2 and Row 1 ends of Leg B. (9 sc)
- Bottom tip of Leg B: 3 sc in first ch, sc in next 2 ch, 3 sc in last ch. (8 sc)
- Right side: 2 sc in each row end from Row 1 up to Row 9, except 1 sc in the Row 5 end. (17 sc)
Join with a sl st to the first sc. Round total: 4 tips x 8 + 2 notches x 9 + 2 sides x 17 = 32 + 18 + 34 = 84 sc.
Round 2 (rim and hanging loop): Sl st in BLO of each sc around. When you reach the top-notch sc2tog, sl st in it, ch 12, then sl st in the same st again. Keep going around, and join to the first sl st. (84 sl sts + one 12-ch loop)
Fasten off and weave in the ends. The loop should hang about 1 in (2.5 cm) above the notch.
Why the math works: Each side covers 9 hdc rows. At 2 sc per row, that would be 18 sc. Dropping to 1 sc at the waist (Row 5) pulls in the concave curve, so you work 17. The notches use a sc2tog at the deepest point so the inner V stays sharp and doesn’t ruffle. On the tips, 3-sc corners let the border turn the angle without cupping. The border adds 0.25 in (0.6 cm) on every edge. That takes the body from 3.1 in x 3 in (7.9 cm x 7.6 cm) to 3.6 in x 3.5 in (9.1 cm x 8.9 cm).
Daisy Appliqués (Make 2)
Round 1: With yellow, make a magic ring. Ch 1, 5 sc in the ring, and sl st to the first sc. Pull the ring closed. Fasten off. (5 sc)
Round 2: Join cream with a sl st in any sc. (Ch 2, 3 dc, ch 2, sl st) all in the same sc, then sl st in the next sc. Repeat from * 4 more times, ending with a sl st in the joining st. (5 petals)
Fasten off and leave an 8 in (20.3 cm) tail for sewing. Each flower measures about 0.9 in (2.3 cm) across.
Leaves (Make 4)
With green, ch 6.
Leaf round: Sc in 2nd ch from hook, hdc in next ch, dc in next ch, hdc in next ch, 3 sc in last ch. Rotate the work and continue along the other side of the chain: hdc in next ch, dc in next ch, hdc in next ch, sc in next ch. Sl st to the first sc. (11 sts)
Fasten off and leave a tail. Each leaf is about 0.8 in (2.0 cm) long.
Assembly of Appliqués
- Place one daisy on the upper half of Leg C, centered across the leg.
- Tuck two leaves under the petals on opposite sides of that daisy, one pointing toward the outer tip and one toward the waist.
- Place the second daisy on the lower half of Leg A, with two leaves set the same way.
- Sew each leaf with small running stitches through its center line.
- Sew each daisy with a stitch between every pair of petals, then a few stitches around the yellow center.
- Weave all tails into the back so they stay hidden.
- Open the jump ring, slide it through the cream loop, and close it firmly.
Final Blocking
- Lightly mist the charm with water, or hover a steam iron over it without touching the yarn.
- Pin it face up on the blocking mat at 3.6 in (9.1 cm) wide and 3.5 in (8.9 cm) tall.
- Pin each leg tip so the legs measure 0.9 in (2.3 cm) wide plus the border.
- Push a pin into each notch to sharpen the V shapes.
- Straighten the ridges so they run horizontally across all four legs.
- Lift the daisy petals gently with a fingertip so they stay dimensional.
- Leave it to dry completely before you unpin it.
Final Quality-Control Checklist
- The body measures 3 in (7.6 cm) tall x 3.1 in (7.9 cm) wide before the border.
- Each leg has 4 hdc in every row, and the waist row has 6.
- Border Round 1 totals 84 sc.
- Both notches are crisp, with no gaps at the sc2tog.
- The hanging loop is centered at the top notch.
- The flowers have 5 even petals, and the leaves are hidden at their bases.
- No tails show on either face.
- The jump ring is closed tightly.
Troubleshooting
Legs lean the wrong way: You swapped the increase and decrease edges. Check that the decrease always falls on the outer edge for the bottom legs.
The joining row has a gap: Pull the yarn snug when you move from Leg A to Leg B. Close any remaining hole with Leg B’s tail.
The border ruffles: You used too many sc in the row ends. Check the 17-sc side count.
The border cups: Go up a hook size for the border only.
Notches look rounded: Make sure you worked the sc2tog across both row ends, then pin tightly while blocking.
Petals curl: Steam them lightly and pat them flat.
Care
Hand wash in cool water with mild soap, press out the water in a towel, and dry flat. Avoid the dryer, which can distort the leg angles.
Final Notes
The measurement chain is simple. A 4-stitch leg at 4.5 sts per inch is 0.9 in (2.3 cm) wide. Nine rows at 3 rows per inch make the 3 in (7.6 cm) height. The 14-stitch span across the leg tips gives the 3.1 in (7.9 cm) width. The 0.25 in (0.6 cm) border brings everything to 3.6 in x 3.5 in (9.1 cm x 8.9 cm). Check your first leg, trust the counts, and the rest follows.
Happy crocheting!