
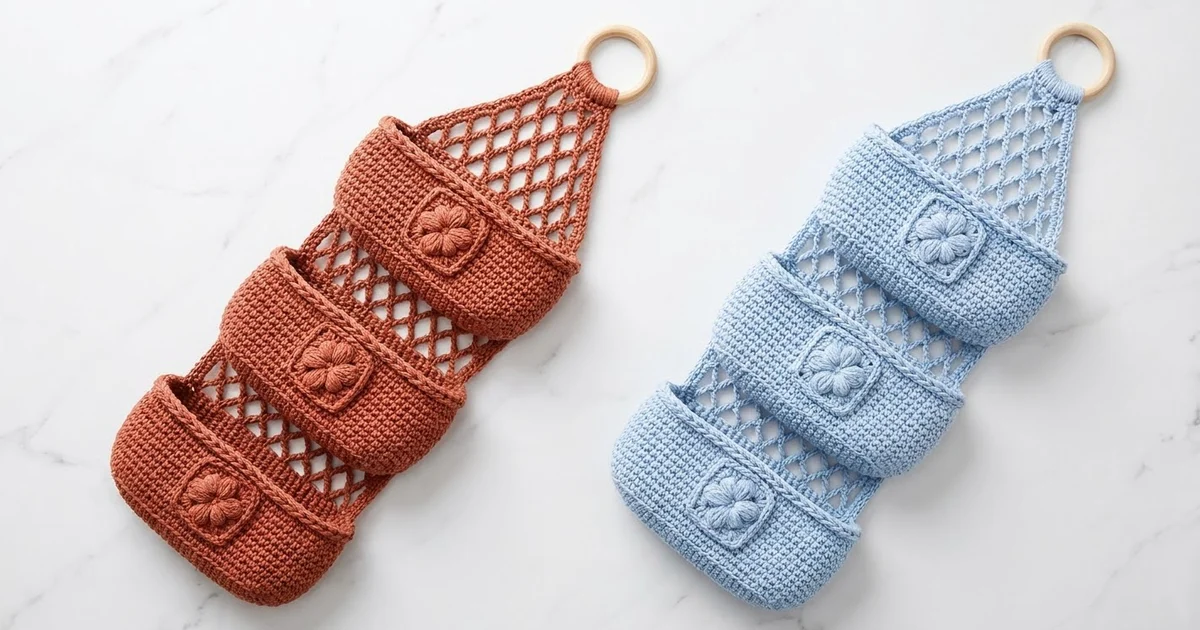
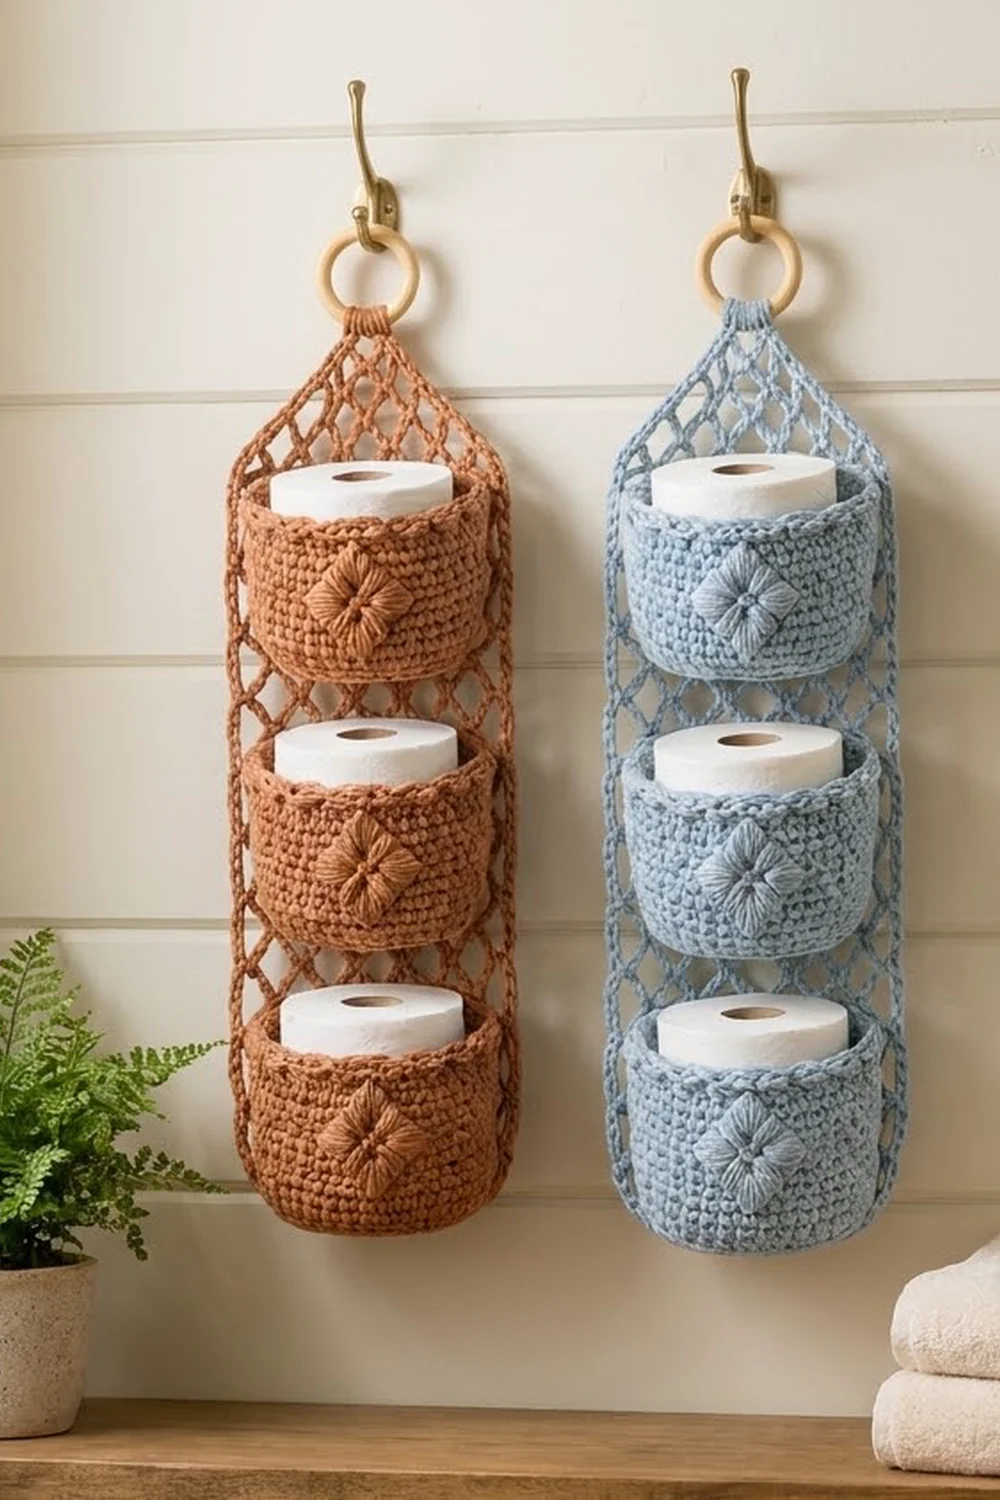
The Terracotta Trellis holder stores three spare rolls on a wall or door without taking up floor space. Three oval baskets sit one above the other on an open diamond-net panel. The panel narrows to a point at the top and hangs from a simple wooden ring.
The sample is worked in a warm terracotta cotton. Each basket has a twisted crab-stitch rim and a raised puff-flower diamond on the front. The same design also looks fresh in light powder blue. Choose one solid color for the whole holder so the texture does the decorating.
This pattern uses US crochet terms. The finished holder measures about 7 in (17.8 cm) wide and 19 in (48.3 cm) long from the bottom edge to the top of the tab. That is about 20.5 in (52.1 cm) to the top of the ring.
You will make three baskets, three puff-flower appliqués and one mesh panel. You then add a crab-stitch border to the panel, sew on the baskets and fold the top tab over the ring. Every stage has a measurement checkpoint, so you can catch size problems early.
Finished Size and Construction
- Finished size: 7 in (17.8 cm) wide × 20.5 in (52.1 cm) long to the top of the ring
- Skill level: Intermediate
- Terminology: US
- Yarn weight: Worsted (#4), cotton or cotton blend
- Hook: 5.0 mm (H-8)
- Number of pieces: 7 (1 panel, 3 baskets, 3 appliqués), plus a wooden ring
- Layout: 3 baskets stacked vertically in a single column
- Basket size: base 6.25 × 4.75 in (15.9 × 12.1 cm); height 3.75 in (9.5 cm) including the rim
- Panel size before border: 6 in (15.2 cm) wide; straight section 15 in (38.1 cm) long
- Border depth: about 0.5 in (1.3 cm) per edge
Materials
Yarn: Use a smooth worsted-weight cotton or cotton blend, about 190 m per 100 g. Cotton holds the basket shape and does not stretch much under the weight of the rolls. Avoid pure acrylic for the baskets, because it can sag over time.
- Main color (Terracotta), or the alternative Light Blue: 200 g, about 380 m
Each basket uses about 35 g, each appliqué about 2 g and the panel about 45 g. The quantity above includes a safety margin of about 25 percent.
Tools:
- 5.0 mm (H-8) crochet hook
- 1 wooden ring, 2 in (5.1 cm) outer diameter
- Tapestry needle
- 4 locking stitch markers
- Rust-proof pins
- Measuring tape
- Blocking mat and spray bottle
Abbreviations (US Terms)
- ch – chain
- sl st – slip stitch
- sc – single crochet
- BLO – back loop only
- sk – skip
- sp – space
- st(s) – stitch(es)
- rev sc – reverse single crochet (crab stitch): work sc from left to right (right to left for left-handed crocheters)
- inc – 2 sc in the same stitch
Puff stitch: (Yarn over, insert hook in the stitch, yarn over and pull up a loop to 0.5 in [1.3 cm] tall) 3 times. You now have 7 loops on the hook. Yarn over, pull through all 7 loops, then ch 1 to close.
Gauge and Checkpoints
Single-crochet gauge: 14 sc and 15 rounds = 4 in (10.2 cm)
Mesh gauge: 5 ch-5 loops across = 6 in (15.2 cm); 7 mesh rows = 4 in (10.2 cm)
Make one basket first and measure it before you go on. The basket is the best gauge swatch for this project.
Checkpoints:
- Basket after Rnd 9: the base measures 6.25 × 4.75 in (15.9 × 12.1 cm).
- Basket after Rnd 22: the wall is 3.5 in (8.9 cm) tall from the BLO ridge.
- Appliqué: 1.5 in (3.8 cm) per side, or 2 in (5.1 cm) point to point.
- Panel after Row 1: 6 in (15.2 cm) wide.
- Panel after Row 8: 4 in (10.2 cm) of mesh above Row 1.
If your piece is too big, go down a hook size, for example to 4.5 mm. If it is too small, go up to 5.5 mm. A standard roll is about 4.5 in (11.4 cm) wide, so a base narrower than 4.5 in (11.4 cm) front to back will not hold it.
Basket (Make 3)
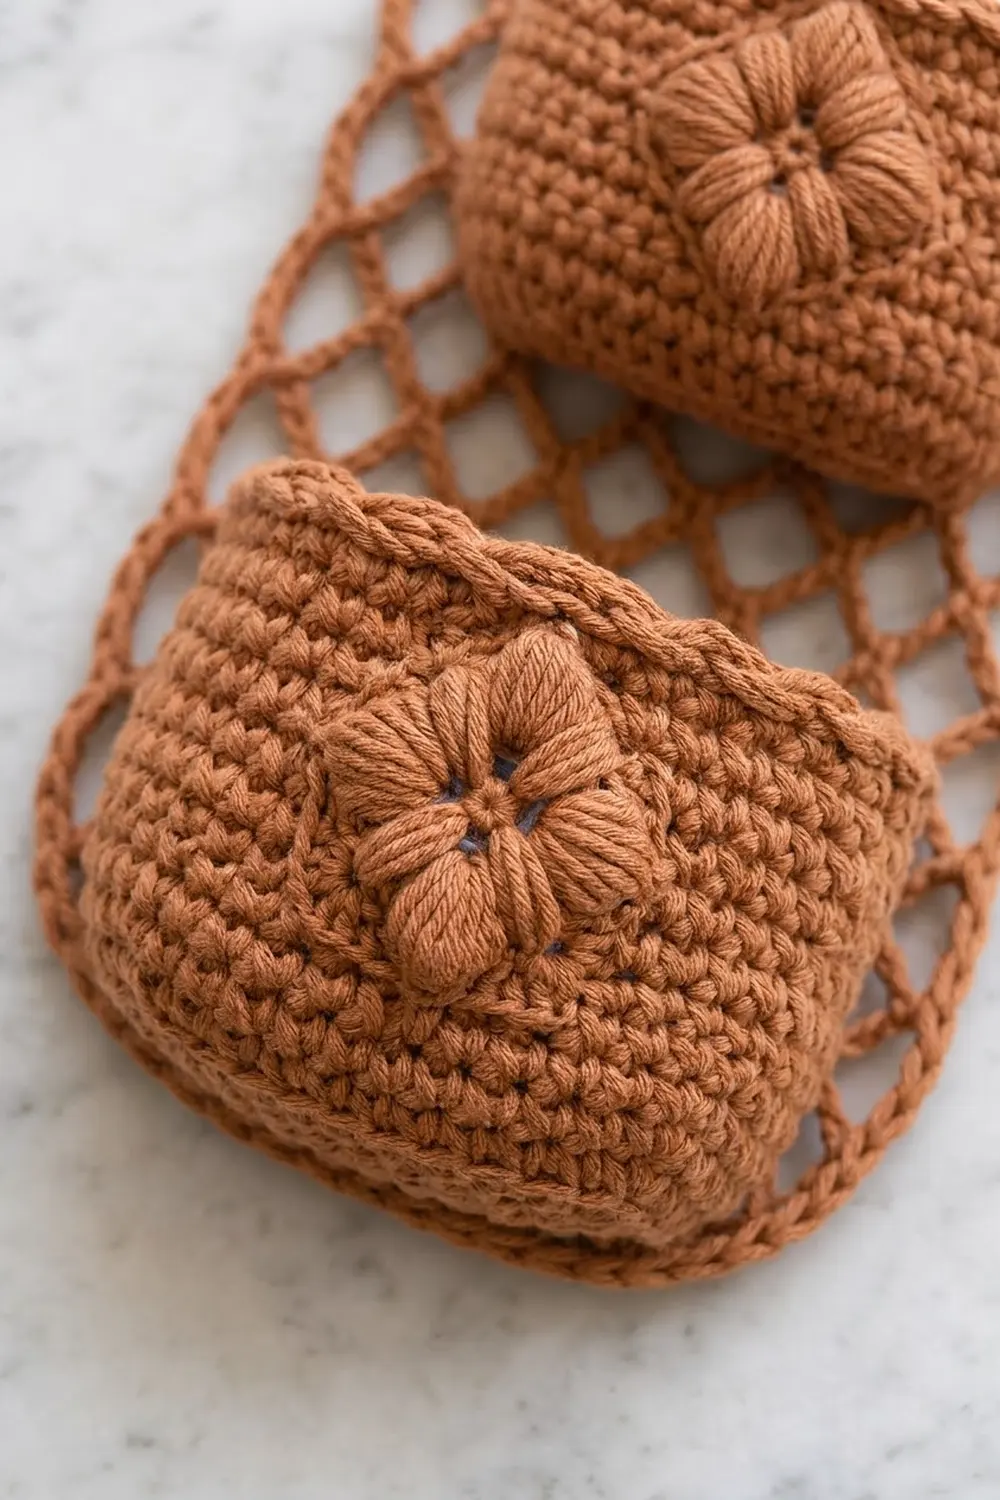
The base is worked in joined rounds around a foundation chain. Each round has two straight sections of 5 sts each and two curved ends. All the increases go in the curved ends.
Ch 8.
Rnd 1: Sc in 2nd ch from hook, sc in next 5 ch, 3 sc in last ch. Rotate the work and, along the other side of the chain, sc in next 5 ch, 2 sc in last ch. Sl st to first sc. (16 sts)
Rnd 2: Ch 1 (does not count as a stitch here or in later rounds), 2 sc in first st, sc in next 5, 2 sc in each of next 3, sc in next 5, 2 sc in each of last 2. Sl st to first sc. (22 sts)
Rnd 3: Ch 1, sc in first st, 2 sc in next, sc in next 5, (sc in next, 2 sc in next) 3 times, sc in next 5, (sc in next, 2 sc in next) 2 times. Join. (28 sts)
Rnd 4: Ch 1, sc in first 2, 2 sc in next, sc in next 5, (sc in next 2, 2 sc in next) 3 times, sc in next 5, (sc in next 2, 2 sc in next) 2 times. Join. (34 sts)
Rnd 5: Ch 1, sc in first 3, 2 sc in next, sc in next 5, (sc in next 3, 2 sc in next) 3 times, sc in next 5, (sc in next 3, 2 sc in next) 2 times. Join. (40 sts)
Rnd 6: Ch 1, sc in first 4, 2 sc in next, sc in next 5, (sc in next 4, 2 sc in next) 3 times, sc in next 5, (sc in next 4, 2 sc in next) 2 times. Join. (46 sts)
Rnd 7: Ch 1, sc in first 5, 2 sc in next, sc in next 5, (sc in next 5, 2 sc in next) 3 times, sc in next 5, (sc in next 5, 2 sc in next) 2 times. Join. (52 sts)
Rnd 8: Ch 1, sc in first 6, 2 sc in next, sc in next 5, (sc in next 6, 2 sc in next) 3 times, sc in next 5, (sc in next 6, 2 sc in next) 2 times. Join. (58 sts)
Rnd 9: Ch 1, sc in first 7, 2 sc in next, sc in next 5, (sc in next 7, 2 sc in next) 3 times, sc in next 5, (sc in next 7, 2 sc in next) 2 times. Join. (64 sts)
The base now has 5 straight sts on each side and 27 sts on each curved end. Check that it measures 6.25 × 4.75 in (15.9 × 12.1 cm).
Rnd 10: Ch 1, sc in BLO of each st around. Join. (64 sts) This makes a ridge that turns the base up into the wall.
Rnds 11–22: Ch 1, sc in each st around. Join. (64 sts in each round)
The wall should now be 3.5 in (8.9 cm) tall.
Rnd 23 (rim): Ch 1, rev sc in each st around. Join. (64 sts) The crab stitch makes the twisted, rope-like edge.
Fasten off, leaving an 18 in (45.7 cm) tail for sewing. Choose one straight section as the front and place a marker in the center of the front wall, between Rnds 16 and 17.
Puff-Flower Appliqué (Make 3)
Rnd 1: Make a magic ring. Ch 1, 8 sc in ring. Pull the ring closed and sl st to first sc. (8 sts)
Rnd 2: Ch 2 (does not count as a stitch), puff st in the same st, ch 3, sk next st, (puff st in next st, ch 3, sk next st) 3 times. Sl st to top of first puff. (4 puffs, 4 ch-3 sps)
Rnd 3: Ch 1, *(sc, ch 2, sc) in top of puff for the corner, 3 sc in next ch-3 sp; repeat from * 3 more times. Join. (20 sc, 4 ch-2 corner sps)
Each side has 5 sc: the 2 corner sc plus 3 sc between them. The puffs sit at the four points, so the petals point to the corners of the diamond.
Fasten off, leaving a 12 in (30.5 cm) tail. The appliqué should measure 1.5 in (3.8 cm) per side.
Attaching the appliqué: Turn the appliqué on point so one corner points straight up. Center it on the basket’s front marker. Whipstitch through the outer loops of Rnd 3 all the way around, catching only the outer layer of the wall. The motif should cover about Rnds 13–20.
Back Panel (Make 1)
Ch 22.
Row 1: Sc in 2nd ch from hook and in each ch across. (21 sc) The row should be 6 in (15.2 cm) wide.
Row 2: Ch 1, turn, sc in first st, (ch 5, sk 3 sts, sc in next st) 5 times. (5 ch-5 loops)
Rows 3–27: Ch 5 (counts as the first loop), turn, sc in first ch-5 sp, (ch 5, sc in next ch-5 sp) 4 times. (5 loops in each row)
The panel now has 26 mesh rows (Rows 2–27). This section is about 14.9 in (37.8 cm) tall, and about 15 in (38.1 cm) including Row 1.
Taper:
Row 28: Ch 5, turn, sk first ch-5 sp, sc in next sp, (ch 5, sc in next sp) 3 times. (4 loops)
Row 29: Ch 5, turn, sk first ch-5 sp, sc in next sp, (ch 5, sc in next sp) 2 times. (3 loops)
Row 30: Ch 5, turn, sk first ch-5 sp, sc in next sp, ch 5, sc in next sp. (2 loops)
Row 31: Ch 5, turn, sk first ch-5 sp, sc in next sp. (1 loop)
The taper adds about 2.25 in (5.7 cm) in height.
Hanging tab:
Row 32: Ch 1, turn, 5 sc in the ch-5 loop. (5 sc)
Rows 33–40: Ch 1, turn, sc in each st across. (5 sc in each row)
Fasten off. The tab should be about 2.1 in (5.3 cm) long.
Make All Pieces
Make the following, all in the main color:
- Baskets: 3
- Puff-flower appliqués: 3, sewn to the basket fronts
- Back panel: 1
Layout:
      [ ring ]
        |tab|
       / taper \
  |  [ Basket 3 ]  |
  |  [ Basket 2 ]  |
  |  [ Basket 1 ]  |
  |____ Row 1 _____|
Joining
Add the panel border first (next section), then sew on the baskets. Measure all basket positions from the bottom edge of Row 1, and mark the levels with pins.
- Basket 1: base ridge at 0.5 in (1.3 cm), rim at 4.25 in (10.8 cm)
- Basket 2: base ridge at 5.25 in (13.3 cm), rim at 9 in (22.9 cm)
- Basket 3: base ridge at 10 in (25.4 cm), rim at 13.75 in (34.9 cm)
That leaves a 1 in (2.5 cm) gap between baskets and about 1.4 in (3.6 cm) of mesh above Basket 3 before the taper.
Stitch-to-stitch logic: Find the 20 sts centered on the back straight section of each basket: the 5 straight sts plus 7.5 sts into each curve. At 3.5 sts per inch, 20 sts measure about 5.7 in (14.5 cm), which fits inside the 6 in (15.2 cm) panel body.
- Whipstitch those 20 rim sts to the panel along the rim line. Catch a mesh chain or sc at about every 2 rim sts.
- Whipstitch the matching 20 sts of the Rnd 10 base ridge along the base line.
- Add 3 tacking stitches straight up the center back to connect the two lines.
Tension: Sew firmly, but do not pull the mesh tight. The panel should stay flat and 7 in (17.8 cm) wide with the border. If it bunches between your stitches, loosen the seam.
Size checkpoint: With the panel laid flat, each basket should stand out about 4.75 in (12.1 cm) from the panel at its deepest point.
Border
Border gauge: 3.5 sc per inch, the same as the body gauge.
Join yarn at the base of the tab on the left taper edge. Work counterclockwise around the panel.
Border Row 1:
- Left taper: 3 sc in each row-end of Rows 31–28. (12 sc)
- Left side: 2 sc in each row-end of Rows 27–2. (52 sc)
- Bottom: working in the foundation chain, 3 sc in first ch, sc in next 19 ch, 3 sc in last ch. (25 sc, including both corners)
- Right side: 2 sc in each row-end of Rows 2–27. (52 sc)
- Right taper: 3 sc in each row-end of Rows 28–31. (12 sc)
Each side has 64 sc (12 + 52), not counting the corners. The corner sc are counted only in the bottom edge. Total: 64 + 25 + 64 = 153 sc.
Border Row 2: Ch 1, do not turn, rev sc in each st. (153 sts) Fasten off.
Why the math works:
- Straight sides: 26 mesh rows at 7 rows per 4 in (10.2 cm) measure 14.9 in (37.8 cm). At 3.5 sc per inch, that length needs 52 sc, which is exactly 2 sc per row.
- Taper: each taper edge runs diagonally for about 3.4 in (8.6 cm), so it needs about 12 sc, or 3 per row.
- Bottom: the 21 foundation sts match Row 1. The 2 extra sc in each corner let the corners turn without cupping.
Final Blocking
- Spray the whole holder until it is damp, not soaked.
- Pin the panel flat at 7 in (17.8 cm) wide. Open the diamond spaces evenly.
- Stuff each basket with a toilet roll wrapped in a plastic bag, so the baskets dry in shape.
- Pin the rims round and level.
- Let everything dry completely, which takes about 24 hours.
- Remove the pins. Fold the tab over the wooden ring and whipstitch Row 40 to the base of Row 32 on the back.
- Weave in all ends through solid sc, not through the mesh.
Final Quality-Control Checklist
- [ ] Each basket has 64 sts in Rnds 9–23.
- [ ] The base ridge is crisp, and the walls are 3.5 in (8.9 cm) tall.
- [ ] Each appliqué has 5 sc per side, sits on point and is centered on the front.
- [ ] The panel has 26 mesh rows and 4 taper rows.
- [ ] The border totals 153 sts in both rows.
- [ ] The baskets are level and evenly spaced 1 in (2.5 cm) apart.
- [ ] The tab holds the ring securely.
- [ ] No yarn tails show on the front.
Troubleshooting
The base ruffles. Your tension is loose at the curved ends. Use a smaller hook for Rnds 1–9.
The base cups upward. You skipped an increase. Recount each round against the stitch counts.
The walls flare outward. Make sure Rnd 10 went into the back loops only, and keep the wall tension even.
The rolls will not fit. Check the base against Rnd 9. If it is short, work one more increase round, Rnd 9a: (sc in next 8, 2 sc in next), for 70 sts. Then keep 70 sts through the walls.
The panel sags with rolls in it. Add extra tacking stitches between the rims and the panel.
The border waves. Undo it and work 1 fewer sc per 4 row-ends.
The border pulls the edge in. Add 1 sc per 4 row-ends.
Care
Hand wash in cool water, press out the water gently and dry flat with a roll inside each basket. Do not tumble dry. Heat can shrink cotton and pull the baskets out of shape.
Final Notes
The measurements build on each other:
- Gauge: 14 sc = 4 in (10.2 cm).
- Basket: a 64-st base of 6.25 × 4.75 in (15.9 × 12.1 cm) with 3.75 in (9.5 cm) walls including the rim.
- Appliqué: 1.5 in (3.8 cm) per side.
- Panel: 21 sts and 6 in (15.2 cm) wide, with 26 mesh rows measuring 14.9 in (37.8 cm).
- Border: 153 sts, bringing the width to 7 in (17.8 cm).
- Finished holder: about 20.5 in (52.1 cm) to the top of the ring.
Check each stage against its checkpoint and the whole holder will come out right.
Happy crocheting!