

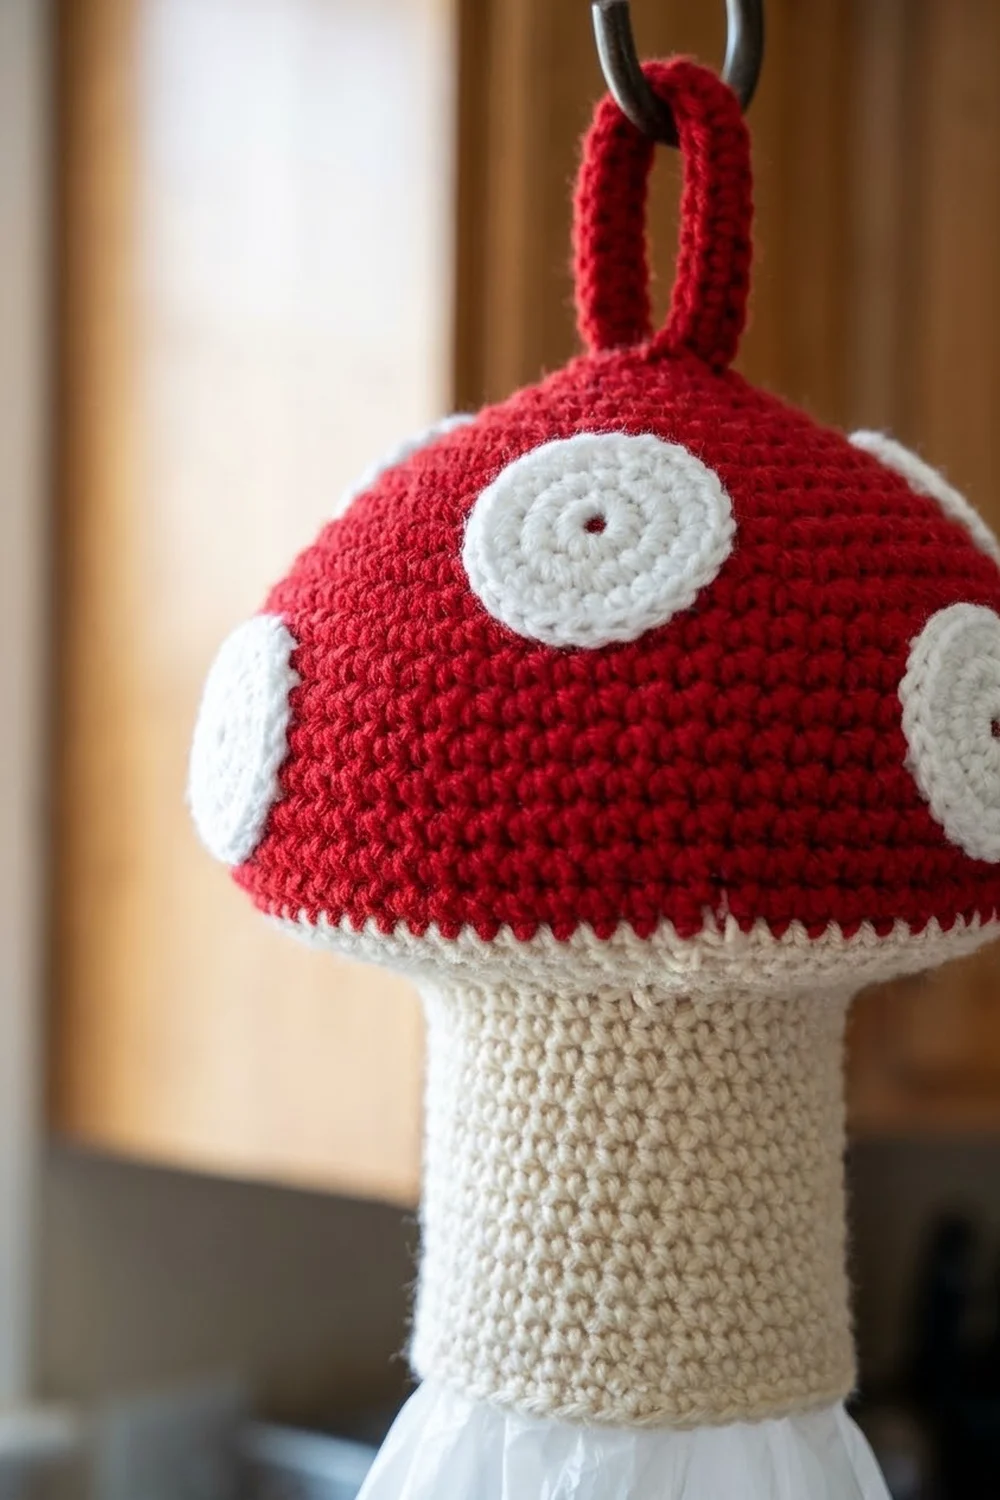
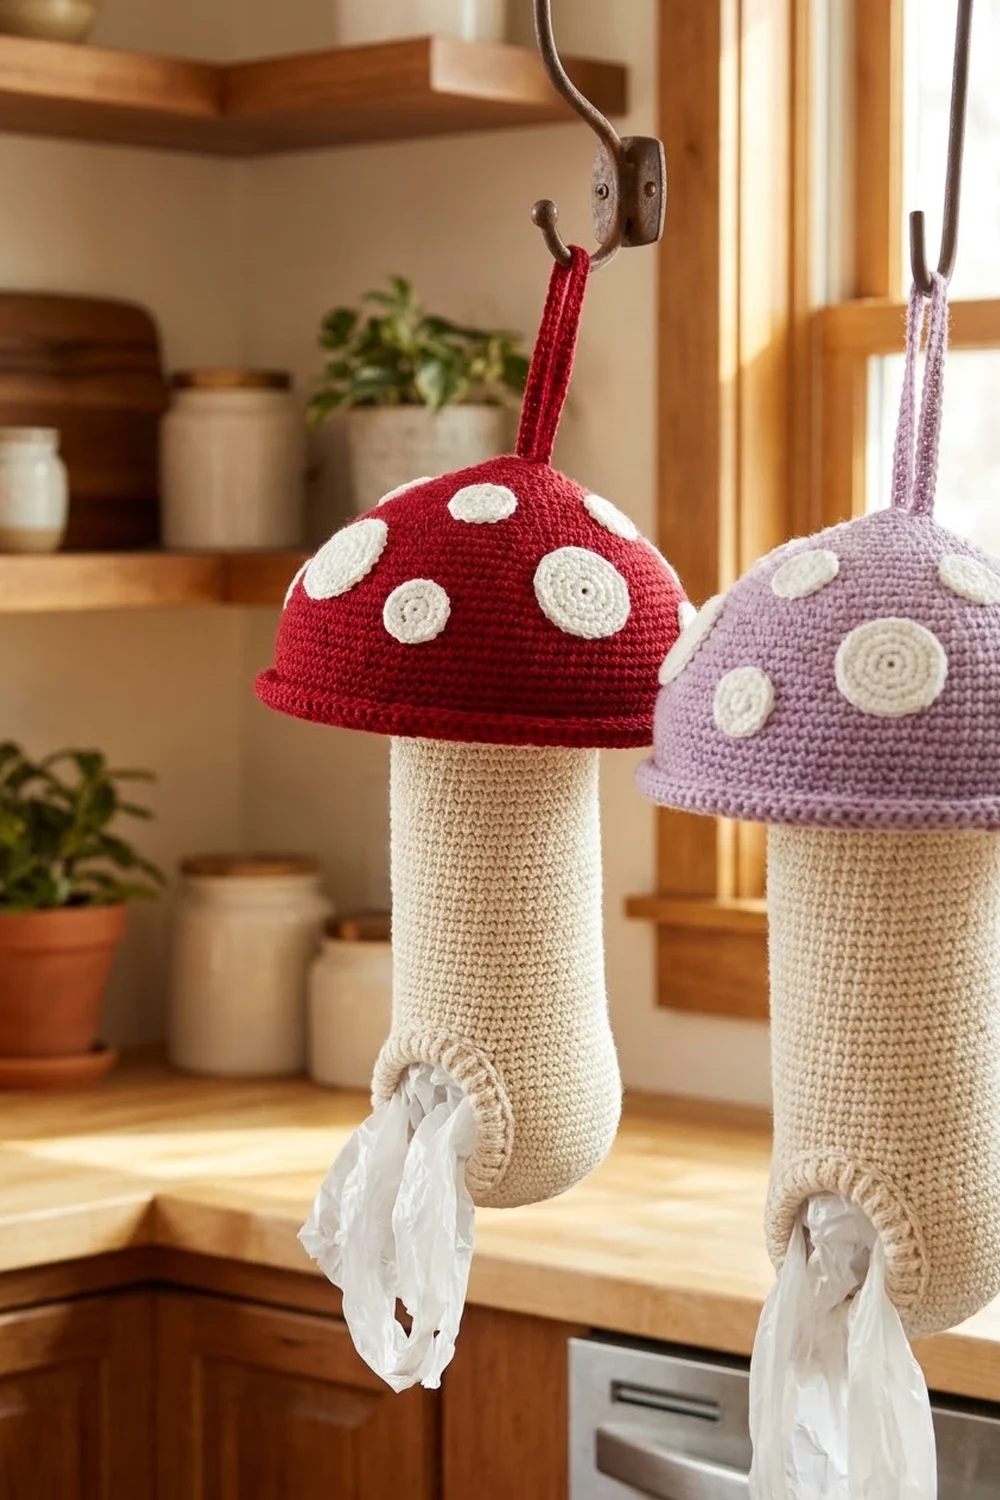
This cheerful toadstool keeps your plastic bags in one tidy spot. It has a cherry-red domed cap with white spots and a soft cream stem that holds the bags. To use it, you pull a bag out of the round hole at the bottom. To refill it, you lift the front of the cap and push new bags in from the top.
The look is classic cottagecore fly agaric: dense single crochet, crisp white spots, and a thick lip on the cap that turns under. It suits a farmhouse kitchen, a pantry door, or a utility room hook. If you want a softer look, swap the red for lilac and keep the cream stem and white spots.
The pattern uses US crochet terms. The finished holder is about 14 in (35.6 cm) tall without the loop, and the strap adds about 3.25 in (8.3 cm). The cap is about 7 in (17.8 cm) across and the stem is about 4.5 in (11.4 cm) across.
You’ll make the stem from the bottom up, starting at the dispensing hole, and the cap from the crown down. Then you’ll crochet the spots and the strap and sew everything together. All parts are worked in continuous single crochet, so the only skill you need is clean increasing and decreasing.
Finished Size and Construction
- Finished size: about 14 in (35.6 cm) tall, plus a 3.25 in (8.3 cm) loop
- Skill level: Easy
- Terminology: US crochet terms
- Yarn weight: Worsted (#4), 100% cotton
- Hook: 5.0 mm (H-8)
- Number of pieces: One holder made from 11 parts: 1 stem, 1 cap, 8 spots, 1 loop
- Layout: Parts stack vertically: the loop sits on the cap, and the cap sits on the stem
- Stem size: 14 in (35.6 cm) around and 12 in (30.5 cm) long. It measures 7 in (17.8 cm) wide when flattened.
- Size before border: The stem is 12 in (30.5 cm) long before you add the opening edging
- Border depth: The opening edging is 2 rounds deep and adds about 0.25 in (0.6 cm)
Materials
Use a smooth, firm worsted cotton or cotton blend, about 175 m per 100 g. Cotton holds the cap’s dome shape and doesn’t stretch out under the weight of the bags. Avoid fuzzy acrylic, because the opening needs to stay firm.
- Cream (stem): 120 g / 210 m
- Cherry red (cap and loop): 75 g / 131 m
- White (spots): 10 g / 18 m
All yarn amounts include a margin of about 15% for your gauge swatch and for sewing.
Tools:
- 5.0 mm (H-8) crochet hook
- Stitch marker
- Tapestry needle
- Scissors
- Measuring tape
- Pins
- Spray bottle for blocking
Abbreviations (US Terms)
- ch = chain
- sc = single crochet
- sl st = slip stitch
- inc = 2 sc in the same stitch
- sc2tog = single crochet 2 together (decrease)
- BLO = back loop only
- MR = magic ring
- st(s) = stitch(es)
- rnd = round
Special technique, continuous rounds: Unless the pattern tells you to join, don’t join at the end of a round. Work the first stitch of the next round straight into the first stitch of the last round. Move your marker up every round.
Gauge and Checkpoints
Gauge: 16 sc and 18 rnds = 4 in (10.2 cm) in continuous rounds.
Before you start, test your gauge on the first 8 rounds of the stem. Those rounds form the cupped base, so nothing is wasted.
- After stem Rnd 8: The base is 56 sts around and about 1.8 in (4.6 cm) deep. Flattened, it should measure 7 in (17.8 cm) across.
- After stem Rnd 27: The stem is about 6 in (15.2 cm) long.
- After cap Rnd 12: The flat crown is about 5.5 in (14.0 cm) across.
- After cap Rnd 24: The cap is 21 in (53.3 cm) around the widest edge.
Too big? Go down 0.5 mm. Too small? Go up 0.5 mm. If the fabric shows gaps that bags could poke through, go down a hook size even if your width is close.
Stem (Cream)
The stem starts at the dispensing hole and grows outward into a shallow cup. After that it is a straight tube.
Foundation: Ch 28. Sl st to the first ch to make a ring, taking care not to twist the chain. The ring is 7 in (17.8 cm) around.
Rnd 1: Ch 1. Work 1 sc in the back bump of each ch around. Don’t join. Place a marker. (28 sts)
The top loops of the chain stay free. You’ll use them for the edging later.
Rnd 2: (Sc 3, inc) 7 times. (35 sts)
Rnd 3: Sc in each st around. (35 sts)
Rnd 4: (Sc 4, inc) 7 times. (42 sts)
Rnd 5: Sc in each st around. (42 sts)
Rnd 6: (Sc 5, inc) 7 times. (49 sts)
Rnd 7: Sc in each st around. (49 sts)
Rnd 8: (Sc 6, inc) 7 times. (56 sts)
There is a plain round between each increase round. That makes the base curve up into a cup instead of lying flat, which gives the stem its rounded bottom.
Rnds 9–50: Sc in each st around. (56 sts in each of 42 rounds)
Rnd 51: (Sc 6, sc2tog) 7 times. (49 sts)
Rnds 52–54: Sc in each st around. (49 sts)
Sl st in the next st to smooth the step at the end of the round. Fasten off and leave a 24 in (61.0 cm) tail for sewing.
Checkpoint: The stem is 54 rounds long, which is 12 in (30.5 cm) at 18 rnds per 4 in. The top edge is 49 sts, or 12.25 in (31.1 cm) around. The slight narrowing at the top helps the stem sit neatly inside the cap.
Cap (Red)
The cap starts at the crown. You’ll work a flat circle first, then dome sides, then a lip that turns under.
Rnd 1: 6 sc in MR. (6 sts)
Rnd 2: Inc in each st. (12 sts)
Rnd 3: (Sc 1, inc) 6 times. (18 sts)
Rnd 4: (Sc 2, inc) 6 times. (24 sts)
Rnd 5: (Sc 3, inc) 6 times. (30 sts)
Rnd 6: (Sc 4, inc) 6 times. (36 sts)
Rnd 7: (Sc 5, inc) 6 times. (42 sts)
Rnd 8: (Sc 6, inc) 6 times. (48 sts)
Rnd 9: (Sc 7, inc) 6 times. (54 sts)
Rnd 10: (Sc 8, inc) 6 times. (60 sts)
Rnd 11: (Sc 9, inc) 6 times. (66 sts)
Rnd 12: (Sc 10, inc) 6 times. (72 sts)
Rnd 13: (Sc 11, inc) 6 times. (78 sts)
Rnd 14: Sc in each st around. (78 sts)
Rnd 15: (Sc 12, inc) 6 times. (84 sts)
Rnds 16–24: Sc in each st around. (84 sts in each of 9 rounds)
The cap sides are Rnds 13–24, which is 12 rounds or about 2.7 in (6.9 cm). Stagger your increases from round to round if you want a rounder dome. Shifting the start of each repeat by half a repeat keeps the cap from turning hexagonal.
Turning the lip under:
Rnd 25: Work in BLO for this round only. (Sc 12, sc2tog) 6 times. (78 sts)
The unused front loops of Rnd 24 form a sharp ridge on the outside. That ridge is the visible edge of the cap.
Rnd 26: (Sc 11, sc2tog) 6 times. (72 sts)
Rnd 27: (Sc 10, sc2tog) 6 times. (66 sts)
Rnd 28: (Sc 9, sc2tog) 6 times. (60 sts)
Sl st in the next st and fasten off. Weave in the end.
Checkpoint: The lip is 4 rounds, or about 0.9 in (2.3 cm), and curls inward. The inner opening is 60 sts, or 15 in (38.1 cm) around. That is wider than the 12.25 in (31.1 cm) top of the stem, so the stem tucks easily up into the cap.
Spots (White)
Large spot (make 4):
Rnd 1: 6 sc in MR. (6 sts)
Rnd 2: Inc in each st. (12 sts)
Rnd 3: (Sc 1, inc) 6 times. Sl st to the first st to join. (18 sts)
Each large spot is about 1.25 in (3.2 cm) across.
Small spot (make 4): Work Rnds 1–2 only, then sl st to the first st to join. (12 sts) Each small spot is about 0.9 in (2.3 cm) across.
Pull the MR closed but not completely tight. A tiny center hole is part of the look. Leave a 10 in (25.4 cm) tail on each spot for sewing.
Hanging Loop (Red)
Row 1: Ch 31. Sc in the 2nd ch from the hook and in each ch across. (30 sts)
Row 2: Ch 1, turn. Sc in each st across. (30 sts)
Fasten off and leave a 12 in (30.5 cm) tail. The strip is 7.5 in (19.1 cm) long and about 0.5 in (1.3 cm) wide.
Assembly
- Spots: Pin 1 large spot on the crown, just in front of the MR, between Rnds 5–8. Pin the other 3 large spots evenly around the cap between Rnds 13–17. Pin the 4 small spots in the gaps between them, between Rnds 18–21. Whip stitch around the edge of each spot through the outer loops only, so the stitches don’t show.
- Loop: Fold the strip into a U. Overlap 0.5 in (1.3 cm) of each end flat on either side of the MR and sew it down firmly. The loop stands about 3.25 in (8.3 cm) tall.
- Stem to cap: Push the top of the stem up inside the cap so that stem Rnd 54 lines up with cap Rnd 28. Sew only the back half. Take 24 sts of the stem’s top edge and whip stitch them to 30 sts of the cap lip. Work stitch to stitch, and pick up 1 extra cap stitch after every 4th stem stitch. That gives 24 + 6 = 30, a 4:5 ease.
- Keep the tension firm but don’t pull hard enough to pucker the lip. The front 25 stem sts and the front 30 cap sts stay free. That free front is the refill flap.
Size checkpoint: When you hang the holder by the loop, it should measure about 14 in (35.6 cm) from the top of the cap to the bottom of the stem.
Border: Opening Edging (Cream)
The edging is worked into the free top loops of the foundation chain. Border gauge is the same as the main gauge: 16 sts = 4 in (10.2 cm).
Edging Rnd 1: Join cream with a sl st in any free foundation chain. Ch 1. Work 1 sc in each foundation chain around. Sl st to the first sc. (28 sts)
Edging Rnd 2: Sl st loosely in each st around. Fasten off. (28 sts)
Why the math works: The hole is a single continuous edge, not a square, so there are no sides or corners to count. Edging Rnd 1 works 28 + 0: 1 sc in each of the 28 foundation chains, with no stitches added. The ring stays exactly 7 in (17.8 cm) around, or about 2.25 in (5.7 cm) across. The slip stitch round adds a firm ridge that keeps the hole from stretching as bags are pulled through.
Final Blocking
- Weave in all the remaining ends inside the stem and cap.
- Mist the cap lightly. Stuff it with a rolled towel to make a smooth dome, then press the lip so it turns under.
- Flatten the spots with your fingers so they sit snugly against the cap.
- Slide a rolled towel or cardboard tube into the stem. Ease it to an even 4.5 in (11.4 cm) across.
- Pat the opening into a round shape.
- Let everything dry completely. Don’t use heat on cotton spots that have a lot of dye.
Final Quality-Control Checklist
- Stem: 56 sts around the body, 49 sts at the top, and 54 rounds long
- Cap: 84 sts at the widest round and 60 sts at the lip
- Ridge from the BLO round shows evenly all the way around the cap
- 8 spots sewn on, with no stitches showing
- Loop is secure and centered on the crown
- Back half of the stem is sewn on and the front lifts freely
- Opening is round, firm, and 2.25 in (5.7 cm) across
Troubleshooting
- Bottom is flat or ruffled: Check that you worked the plain rounds between the stem increases.
- Cap looks pointy or hexagonal: Stagger the increase positions in the cap rounds.
- Lip flips out: Make sure Rnd 25 was worked in BLO, and steam the fold.
- Bags fall out: Your edging is too loose. Redo it with a smaller hook.
- Hard to see the stitches in red: Work in good daylight and use a contrasting marker.
Care
Hand wash in cool water and lay flat to dry, with a towel inside to keep the shape. Don’t tumble dry.
Final Notes
The measurement chain is short: 16 sts = 4 in (10.2 cm). A 56-st stem gives you 14 in (35.6 cm) around, 54 rounds give 12 in (30.5 cm) of length, and an 84-st cap is 21 in (53.3 cm) around. The 28-st opening and edging stay at a matching 7 in (17.8 cm). If your gauge matches at the first checkpoint, every later part will fit. Hang it up, fill it with bags, and enjoy your little kitchen toadstool.
Happy crocheting!