

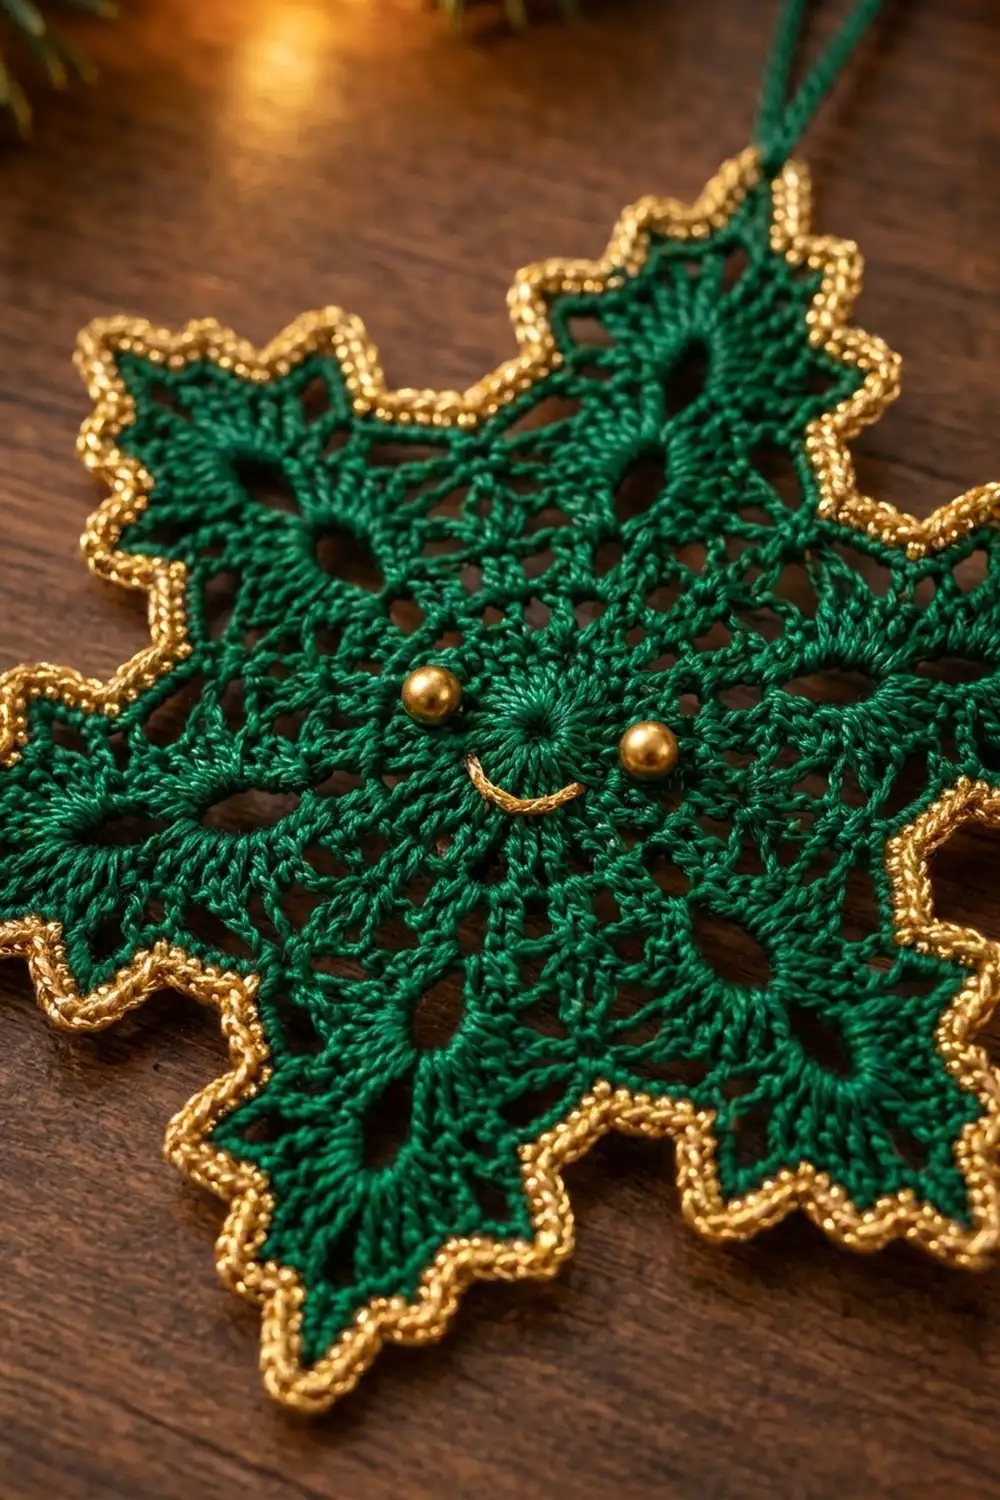
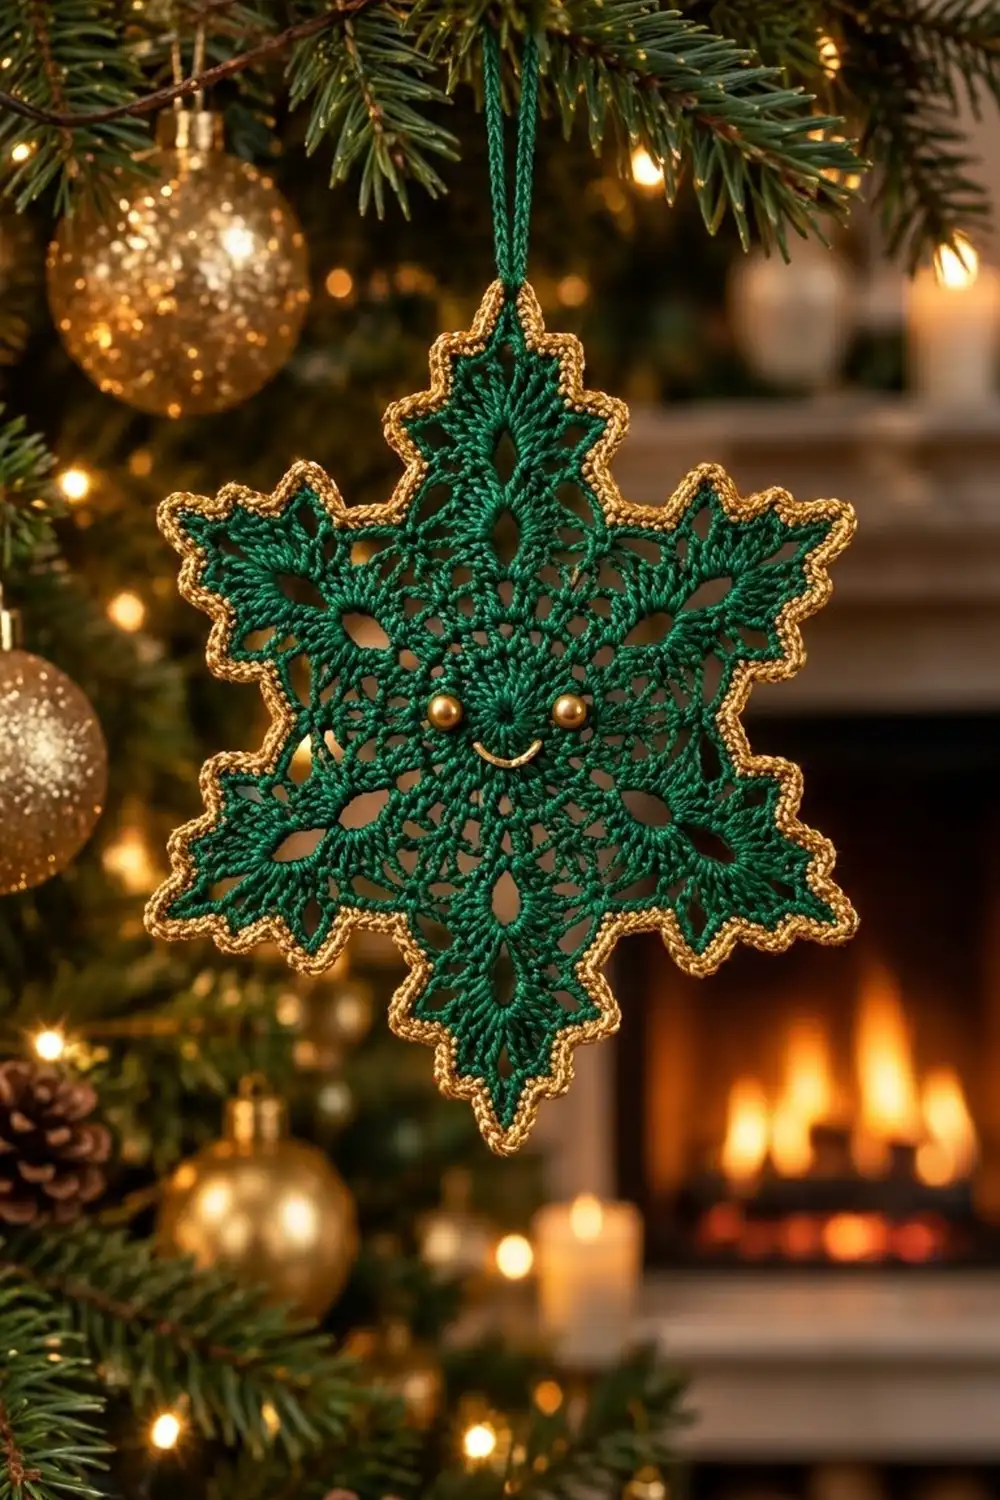
This little snowflake has a happy face. It’s a lacy six-pointed star in deep emerald green, edged in gold metallic thread, with two gold bead eyes and a stitched gold smile in the middle. Hang one on the tree or make a whole set as gifts.
The look is classic thread lace with a softer, more playful touch. Teardrop openings sit between the arms. Each arm has a long pointed opening at its base and ends in a stepped tip. The gold edge is worked in reverse single crochet, which makes a twisted, rope-like cord that catches the light.
This pattern uses US crochet terms. The finished ornament measures 5.5 in (14.0 cm) from tip to tip after blocking.
You’ll work one single piece in the round: 6 rounds in green make the snowflake, then 2 rounds in gold make the border. Last, you add the eyes, the smile and the hanging loop. There’s no joining and no assembly.
Finished Size and Construction
- Finished size: 5.5 in (14.0 cm) tip to tip
- Skill level: Intermediate
- Terminology: US crochet terms
- Yarn weight: Super fine (#1) cotton, fingering weight, plus a fine metallic gold thread
- Hook: 2.5 mm (US B-1/C-2)
- Number of pieces: 1
- Layout: Single motif, worked in the round
- Piece size before border: 5 in (12.7 cm) tip to tip
- Border depth: 0.25 in (0.6 cm) on each side, adding 0.5 in (1.3 cm) to the total width
Materials
Use a mercerized cotton for the green. It gives crisp stitch definition and blocks into sharp points. For the gold, choose a metallic thread or a fine metallic blend that’s about the same thickness as the green. If the gold is much thinner, the border will look sparse. If it’s much thicker, the edge will ruffle.
Yarn:
– Emerald green cotton, super fine (#1): 8 g / 28 m (31 yd). This includes the hanging loop.
– Metallic gold thread: 3 g / 15 m (16 yd). This includes the smile embroidery.
These quantities include a margin of about 25% for your gauge swatch and the tails.
Tools and notions:
– 2.5 mm (US B-1/C-2) crochet hook
– Two 4 mm round gold beads (or gold safety beads for a child-safe version)
– Fine beading needle or sharp sewing needle that fits through the beads
– Tapestry needle
– Scissors
– Blocking mat and rustproof pins
– Spray bottle and fabric stiffener or starch (optional)
Abbreviations (US Terms)
- ch – chain
- sl st – slip stitch
- sc – single crochet
- dc – double crochet
- sc2tog – single crochet 2 together
- rev sc – reverse single crochet (crab stitch)
- sp(s) – space(s)
- sk – skip
- st(s) – stitch(es)
- beg – beginning
Special stitch – reverse single crochet (rev sc): Work from left to right (right to left if you crochet left-handed). Insert the hook into the next stitch to the right, yarn over, pull up a loop, then yarn over and pull through both loops. This makes the twisted, corded gold edge.
Shell: (3 dc, ch 3, 3 dc) worked in the same space.
Gauge and Checkpoints
Gauge isn’t critical for an ornament, but it decides whether your snowflake turns out 5.5 in (14.0 cm) or something quite different. Make one test snowflake through Round 3 before you commit to a set.
Checkpoints (measured flat, unblocked, with light pressure):
– After Round 1: 1 in (2.5 cm) across
– After Round 3: 2.25 in (5.7 cm) across, from shell tip to shell tip
– After Round 5: 4 in (10.2 cm) from tip to tip
– After Round 6: 5 in (12.7 cm) from tip to tip
– After the border and blocking: 5.5 in (14.0 cm) from tip to tip
Too big? Go down to a 2.25 mm hook, or keep your chains snug. Loose ch-5 and ch-3 spaces are the most common cause of oversizing.
Too small, or the center cups? Go up to a 2.75 mm hook. Cupping at Round 2 usually means the ch-4 spaces are too tight.
Pattern
Round 1 – Center Ring
With green, make a magic ring.
Ch 3 (counts as dc), then work 17 dc into the ring. Pull the ring closed. Join with a sl st to the top of beg ch-3. (18 dc)
This makes the solid center ring.
Round 2 – Spokes
Ch 3 (counts as dc), dc in next 2 sts, ch 4. *Dc in next 3 sts, ch 4; repeat from * 4 more times. Join to the top of beg ch-3.
(18 dc in six 3-dc groups, 6 ch-4 sps)
Each 3-dc group is a spoke. Each ch-4 space is where an arm will grow.
Round 3 – Arm Bases and Teardrops
Sl st in next 2 dc and into the next ch-4 sp. Ch 3 (counts as dc), then work (2 dc, ch 3, 3 dc) in the same sp. Ch 3, then sk the next 3-dc group.
*Work a shell of (3 dc, ch 3, 3 dc) in the next ch-4 sp, ch 3, sk the next 3-dc group; repeat from * 4 more times. Join to the top of beg ch-3.
(36 dc in 6 shells, 6 shell ch-3 sps, 6 gap ch-3 sps)
The ch-3 that bridges each skipped 3-dc group forms the top of a teardrop opening between two arms.
Round 4 – Long Arm Openings
Sl st in next 2 dc and into the shell ch-3 sp. Ch 3 (counts as dc), then work (2 dc, ch 5, 3 dc) in the same sp. Ch 3, sc in the next gap ch-3 sp, ch 3.
*Work (3 dc, ch 5, 3 dc) in the next shell ch-3 sp, ch 3, sc in the next gap ch-3 sp, ch 3; repeat from * 4 more times. Join to the top of beg ch-3.
(36 dc, 6 sc, 6 ch-5 sps, 12 ch-3 sps)
The ch-5 in each arm pushes the two 3-dc groups apart. Round 5 closes over it to make the long pointed oval opening. The sc with a ch-3 on each side finishes the teardrop between the arms.
Round 5 – Fans and Side Eyelets
Ch 3 (counts as dc), dc in next 2 dc, ch 2. Work (3 dc, ch 3, 3 dc) in the ch-5 sp, ch 2, dc in next 3 dc. Ch 1, sk the ch-3 sp, sc in the next sc, ch 1, sk the next ch-3 sp.
*Dc in next 3 dc, ch 2, (3 dc, ch 3, 3 dc) in the ch-5 sp, ch 2, dc in next 3 dc, ch 1, sk ch-3 sp, sc in next sc, ch 1, sk ch-3 sp; repeat from * 4 more times. Join to the top of beg ch-3.
Per arm: 12 dc, 2 ch-2 sps, 1 tip ch-3 sp. Each valley has 1 sc with a ch-1 on each side.
Total: 72 dc, 6 sc, 12 ch-2 sps, 6 tip ch-3 sps, 12 ch-1 sps
The ch-2 spaces leave small eyelets along the sides of each arm. The fanned dc around the tip begin the point. Skipping the ch-3 spaces draws each valley inward, which sharpens the star shape.
Round 6 – Stepped Outline
Ch 1. Then work each arm like this:
- Sc in the same st and the next 2 dc (3 sc).
- Work 3 sc in the ch-2 sp.
- Dc in the next 3 dc.
- Work (2 dc, ch 3, 2 dc) in the tip ch-3 sp.
- Dc in the next 3 dc.
- Work 3 sc in the ch-2 sp.
- Sc in the next 3 dc.
- Sk the ch-1 sp, sl st in the valley sc, sk the next ch-1 sp.
Repeat the arm 5 more times, starting with an sc in the next dc. After the last valley sl st, join with a sl st to the first sc. Fasten off green and weave in the ends.
Per arm: 12 sc + 10 dc = 22 sts, plus 1 tip ch-3 sp
Total: 132 sts, 6 tip ch-3 sps, 6 valley sl sts (sl sts aren’t counted as stitches)
The short sc sections form a low shoulder on each side of the arm. The tall dc sections rise up to the tip. This height change gives the stepped silhouette. Checkpoint: 5 in (12.7 cm) from tip to tip.
Border
Border gauge: The two gold rounds together add 0.25 in (0.6 cm) beyond the green edge all the way around.
Round 7 – Gold Base
Join gold with a sl st in any tip ch-3 sp. Ch 1, then work (sc, ch 2, sc) in the same sp. Then work along the arm like this:
- Sc in each of the next 2 dc and the next 3 dc (5 sc).
- Sc in each of the next 3 sc and the next 3 sc (6 sc).
- Sc in each of the next 2 sc. This is 2 of the last 3 sc on this arm.
- Valley: sc2tog over the last sc of this arm and the first sc of the next arm, skipping the green sl st between them.
- Sc in each of the next 2 sc (the remaining shoulder sc).
- Sc in each of the next 6 sc, then in the next 3 dc and the next 2 dc.
- Work (sc, ch 2, sc) in the tip ch-3 sp.
Keep going around the snowflake the same way and join to the first sc.
Why the math works: each arm has 22 green sts. The 2 end sc of each arm are shared with the neighbouring arms through the valley sc2tog, so each arm keeps 20 sts worked singly. Add the 2 tip sc and 1 sc2tog for each arm, and you get 23 sts per arm + 1 tip ch-2 sp. Over 6 arms that’s 138 sts and 6 ch-2 sps.
Adding exactly 2 sc at each tip keeps the point sharp without making it flare. The sc2tog keeps the valley tight so it doesn’t pucker.
Round 8 – Corded Edge
Don’t turn. Ch 1, then work rev sc in each st around. Work 2 rev sc in each tip ch-2 sp, and 1 rev sc in each valley sc2tog. Join and fasten off.
Per arm: 23 + 2 = 25 rev sc. Total: 150 rev sc.
Rev sc doesn’t add much width, only about 0.125 in (0.3 cm), but it gives the twisted gold cord look. Checkpoint: about 5.5 in (14.0 cm) from tip to tip, before blocking.
Face and Hanging Loop
Eyes: Sew one 4 mm gold bead to each side of the center ring. Place them on the Round 2 spokes on either side of the top arm, about 0.75 in (1.9 cm) apart. Use green thread and go through each bead twice.
Smile: With a double strand of gold, backstitch a shallow curve of 3–4 stitches across Round 2 just below the center ring. Keep it centered between the eyes.
Hanging loop: Join green with a sl st in the tip ch-2 sp of the top arm. Ch 40, about 3.5 in (8.9 cm). Sl st back into the same sp, then fasten off and weave in the ends.
Final Blocking
- Weave in all ends before blocking. Leave the loop free.
- Wet the snowflake in cool water and gently squeeze it out. Don’t wring it.
- Pin the center to the mat, then pin each tip outward so the snowflake measures 5.5 in (14.0 cm) from tip to tip.
- Check that opposite tips line up across the center and that the arms are evenly spaced, about 60° apart.
- Put one pin in each valley and pull it gently toward the center so the inner corners stay sharp.
- Open each long arm opening and each teardrop opening with the tip of a pin.
- If you want a stiffer ornament, spray it lightly with starch or stiffener.
- Let it dry completely, about 12 hours, before you remove the pins.
Final Quality-Control Checklist
- Tip to tip measures 5.5 in (14.0 cm) on all three axes
- There are 6 arms, each with a stepped shoulder on both sides
- All 6 teardrop openings and 6 long arm openings are open and even
- The gold edge is continuous, with no gaps at the valleys
- Each gold tip is sharp, not rounded
- The eyes are level and the smile is centered under the ring
- The hanging loop is attached at the top tip and is secure
- No visible tails on the front or back
Troubleshooting
The center cups or bowls. Your ch-4 spaces in Round 2 are too short. Rework Round 2 with looser chains, or change to ch 5.
The arms ruffle. Your chains in Rounds 4–5 are too loose, or your hook is too big. Go down 0.25 mm.
The tips are blunt. Make sure you worked (2 dc, ch 3, 2 dc) at the tip in Round 6 and (sc, ch 2, sc) in Round 7. Pin the tips firmly when you block.
The valleys gape. You may have worked into the ch-1 sps in Round 6 or skipped the sc2tog in Round 7. Fix those, then pin the valleys inward.
The gold border ripples. Your gold thread is thicker than the green. Go down one hook size for Rounds 7–8.
The rev sc looks messy. Keep the loops loose and always insert the hook to the right of the previous stitch.
Care
Hand wash in cool water, then reshape and dry flat. Store flat between tissue paper to protect the beads and the gold edge.
Final Notes
The measurement chain is simple: 1 in (2.5 cm) after Round 1, 2.25 in (5.7 cm) after Round 3, 4 in (10.2 cm) after Round 5, and 5 in (12.7 cm) after Round 6. The gold border adds 0.25 in (0.6 cm) on each side, for a blocked 5.5 in (14.0 cm) snowflake. If you hit each checkpoint, every ornament in your set will match.
Happy crocheting!