

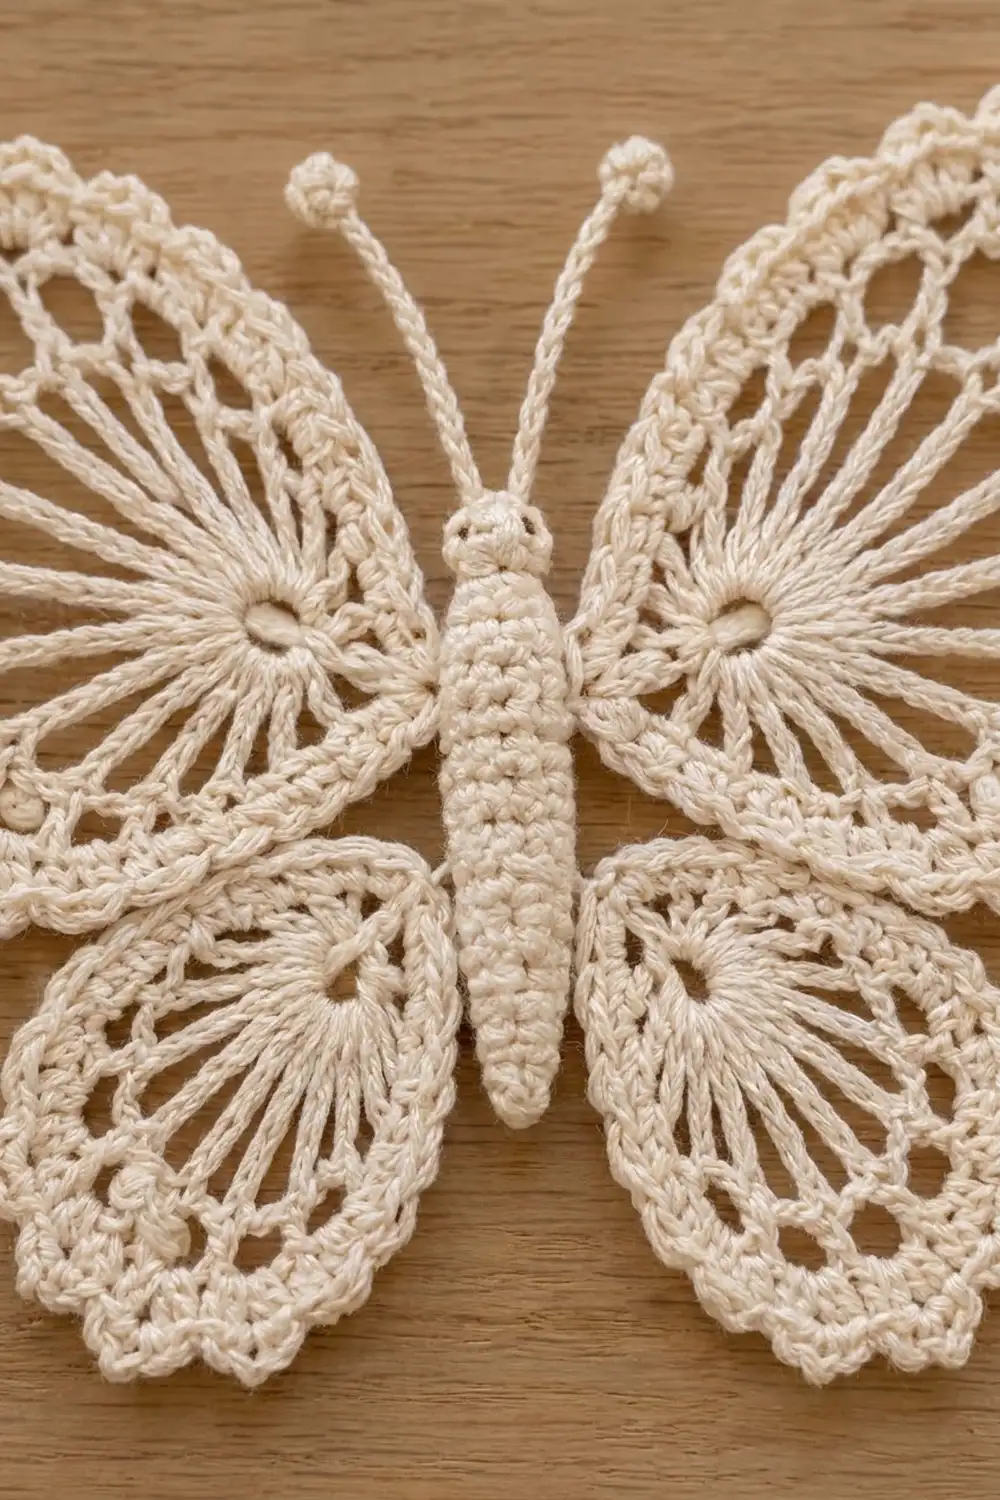
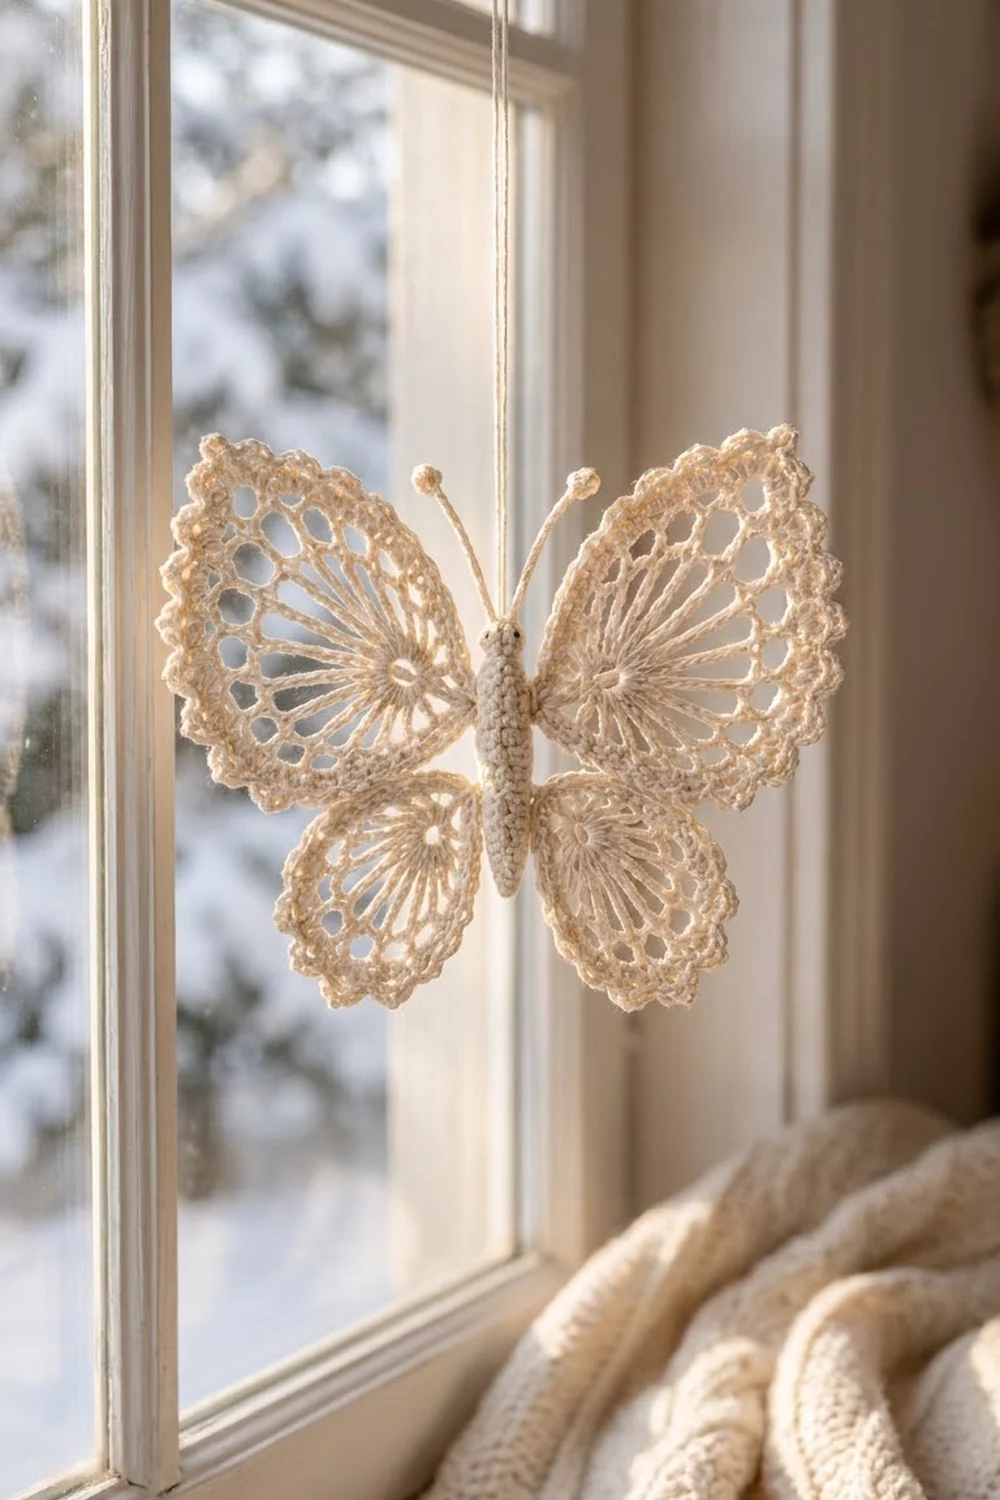
This butterfly is made of fine lace, like the lacy curtains in the photo. Each wing has a small open “eye” near the body and spokes that fan out from it like sunrays. Next comes a ring of oval mesh windows, and the edge is a soft scallop with small picots. The body is raised and bumpy, the head is round, and two thin antennae end in small knobs.
The sample is worked in one color: a warm cream cotton thread. A single color shows off the lace texture and suits a winter, cottage or wedding look. Once starched, the motif lies flat, so it works as an appliqué, an ornament or a gift-tag accent.
The pattern uses US crochet terms. The finished motif measures 7.5 in (19.1 cm) across the wingspan and 6.5 in (16.5 cm) tall including the antennae. The wing area alone is about 5 in (12.7 cm) tall.
Construction is simple. You crochet four wings in the round, each starting from a small ring, and add a picot border to each one. Then you work the body as a small amigurumi tube, add the antennae, and sew the wings to the body. A final starch-and-pin blocking sets the shape.
Finished Size and Construction
- Finished size: 7.5 in (19.1 cm) wingspan × 6.5 in (16.5 cm) tall with antennae
- Skill level: Intermediate
- Terminology: US crochet terms
- Yarn weight: Size 3 cotton crochet thread (Weight 0 lace to light fingering)
- Hook: 2.25 mm (US B/1)
- Number of pieces: 1 butterfly motif, built from 5 components (2 upper wings, 2 lower wings, 1 body with antennae)
- Layout: Upper wings angle up and out; lower wings angle down and out and overlap behind the upper wings by 0.25 in (0.6 cm)
- Upper wing size: 3.5 in × 3 in (8.9 cm × 7.6 cm)
- Lower wing size: 2.75 in × 2.25 in (7.0 cm × 5.7 cm)
- Body: 3.5 in (8.9 cm) long × 0.5 in (1.3 cm) wide
- Size before border: upper wing 3.25 in × 2.75 in (8.3 cm × 7.0 cm); lower wing 2.5 in × 2 in (6.4 cm × 5.1 cm)
- Border depth: 0.125 in (0.3 cm) on every edge
Materials
Thread advice: Choose a smooth, mercerized cotton thread in size 3. Mercerized cotton shows the stitches clearly, starches well and holds its picots. Avoid fuzzy or very stretchy fibers, which blur the mesh openings.
- Cream (one color only): 15 g, about 40 m (44 yd)
Tools:
- 2.25 mm (US B/1) crochet hook
- Tapestry needle with an eye small enough for thread
- 2 stitch markers
- A small pinch of polyester fiberfill
- Blocking mat or foam board
- Rust-proof pins
- Spray starch or a fabric stiffener (optional, for a crisp finish)
- Scissors
The quantity above includes a margin of about 25% for your gauge swatch and weaving in ends.
Abbreviations (US Terms)
- ch – chain
- sl st – slip stitch
- sc – single crochet
- hdc – half double crochet
- dc – double crochet
- tr – treble crochet
- sc2tog – single crochet 2 together
- MR – magic ring
- sp(s) – space(s)
- st(s) – stitch(es)
- rnd(s) – round(s)
Special stitches:
- Picot: Ch 3, sl st in the 3rd ch from the hook.
- 3-dc bobble: [Yarn over, insert hook in the stitch, pull up a loop, yarn over, pull through 2 loops] 3 times in the same stitch. Then yarn over and pull through all 4 loops on the hook.
Gauge and Checkpoints
Gauge in lace is measured by motif size, not by a stitch swatch. Make one upper wing first and check it at each stage before making the others.
Upper wing checkpoints:
- After Rnd 2: 2 in × 1.75 in (5.1 cm × 4.4 cm)
- After Rnd 3: 2.75 in × 2.25 in (7.0 cm × 5.7 cm)
- After Rnd 4: 3.25 in × 2.75 in (8.3 cm × 7.0 cm)
- After the border: 3.5 in × 3 in (8.9 cm × 7.6 cm)
Lower wing checkpoints:
- After Rnd 2: 1.5 in × 1.25 in (3.8 cm × 3.2 cm)
- After Rnd 3: 2 in × 1.5 in (5.1 cm × 3.8 cm)
- After Rnd 4: 2.5 in × 2 in (6.4 cm × 5.1 cm)
- After the border: 2.75 in × 2.25 in (7.0 cm × 5.7 cm)
Measure the long axis from the body-side tip of the wing to the farthest outer edge. Measure the short axis across the widest point.
If your wing is too big by more than 0.25 in (0.6 cm), go down to a 2.0 mm hook. If it is too small, go up to a 2.5 mm hook. Small differences are fine because blocking can adjust about 0.125 in (0.3 cm) in each direction.
Upper Wing (Make 2)
The short dc spokes face the body, and the long tr spokes form the broad outer part of the wing. This uneven spoke height is what makes the teardrop shape.
Ring: Ch 6, sl st to the first ch to form a ring.
Rnd 1: Ch 3 (counts as dc), 15 dc in the ring, sl st to the top of the beginning ch-3. (16 dc)
Rnd 2 (spokes): Ch 5 (counts as dc + ch 2). Then:
– [dc, ch 2] in each of the next 3 sts.
– [tr, ch 3] in each of the next 8 sts.
– [dc, ch 2] in each of the next 4 sts.
Sl st to the 3rd ch of the beginning ch-5. (16 spokes: 8 dc and 8 tr; 8 ch-2 sps and 8 ch-3 sps)
Place a marker in the beginning spoke. It marks the center of the body side, where the dc spokes meet.
Rnd 3 (mesh ring): Sl st into the first ch-2 sp, ch 1, sc in the same sp, ch 5. Work [sc in the next sp, ch 5] 15 times. Sl st to the first sc. (16 sc and 16 ch-5 loops)
These ch-5 loops become the oval openings you see around the wing.
Rnd 4 (scallops): Sl st into the first ch-5 loop, ch 1. In each ch-5 loop around work [2 sc, hdc, dc, hdc, 2 sc]. Sl st to the first sc. (16 scallops of 7 sts = 112 sts)
Check the upper wing measurement now. Do not fasten off; the border follows in the Border section.
Lower Wing (Make 2)
Ring: Ch 5, sl st to the first ch to form a ring.
Rnd 1: Ch 3 (counts as dc), 11 dc in the ring, sl st to the top of the beginning ch-3. (12 dc)
Rnd 2 (spokes): Ch 5 (counts as dc + ch 2). Then:
– [dc, ch 2] in each of the next 2 sts.
– [tr, ch 3] in each of the next 6 sts.
– [dc, ch 2] in each of the next 3 sts.
Sl st to the 3rd ch of the beginning ch-5. (12 spokes: 6 dc and 6 tr; 6 ch-2 sps and 6 ch-3 sps)
Place a marker in the beginning spoke to mark the body side.
Rnd 3 (mesh ring): Sl st into the first ch-2 sp, ch 1, sc in the same sp, ch 4. Work [sc in the next sp, ch 4] 11 times. Sl st to the first sc. (12 sc and 12 ch-4 loops)
Rnd 4 (scallops): Sl st into the first ch-4 loop, ch 1. In each ch-4 loop around work [sc, hdc, dc, hdc, sc]. Sl st to the first sc. (12 scallops of 5 sts = 60 sts)
Check the measurement. Leave the thread live for the border.
Body
The body is worked in a continuous spiral from the tail up to the head. Mark the first st of each round and move the marker up as you go.
Rnd 1: 4 sc in a MR. (4 sc)
Rnd 2: 2 sc in each st around. (8 sc)
Rnd 3: [sc in next st, dc in next st] 4 times. (8 sts)
Rnd 4: [dc in next st, sc in next st] 4 times. (8 sts)
Rnds 5–14: Repeat Rnds 3 and 4 five more times. (8 sts in each round)
The dc stitches are taller than their neighbors, so they pop outward. Because they shift by one stitch each round, they form the bumpy, segmented texture.
Stuff the tube lightly with a small pinch of fiberfill. The body should feel firm but still lie flat on the table.
Rnd 15 (neck): Sc2tog 4 times. (4 sts)
Rnd 16 (head): 2 sc in each st around. (8 sc)
Rnd 17: Sc in each st around. (8 sc)
Add a tiny wisp of fiberfill to the head.
Rnd 18: Sc2tog 4 times. (4 sts)
Fasten off, leaving a 6 in (15.2 cm) tail. Thread it through the front loops of the 4 remaining sts, pull tight to close, and hide the end inside the body.
Checkpoint: The body should measure 3.5 in (8.9 cm) long and 0.5 in (1.3 cm) wide at the widest round.
Antennae (Make 2 on the head)
Join the thread with a sl st at the top of the head, slightly to the left of center.
- Ch 14.
- Work a 3-dc bobble in the 3rd ch from the hook. This is the knob.
- Sl st in each of the remaining 11 ch, working back to the head.
- Sl st into the head to anchor the antenna.
Fasten off. Repeat slightly to the right of center for the second antenna.
Stitch check: The 14 ch are used as 2 skipped ch, 1 ch for the bobble and 11 sl sts.
Each antenna is about 1.75 in (4.4 cm) long.
Border
The border is one round of single crochet with a picot at the peak of every scallop. It adds 0.125 in (0.3 cm) to every edge, so each wing grows by 0.25 in (0.6 cm) in both length and width.
Border gauge: Each upper wing scallop with its border is about 0.6 in (1.5 cm) wide along the outer edge. The picot stands about 0.125 in (0.3 cm) proud of the scallop.
Upper Wing Border
Continue with the live thread from Rnd 4.
Border Rnd: Ch 1. Work sc in each of the next 3 sts, [sc, picot, sc] in the next dc, sc in each of the next 3 sts. Repeat from * 15 more times (16 scallops total). Sl st to the first sc. Fasten off.
Count: 112 sts worked 1-per-stitch + 16 extra sc (one extra at each dc peak) = 128 sc and 16 picots. Each scallop has 3 + 2 + 3 = 8 sc and 1 picot.
Lower Wing Border
Border Rnd: Ch 1. Work sc in each of the next 2 sts, [sc, picot, sc] in the next dc, sc in each of the next 2 sts. Repeat from * 11 more times (12 scallops total). Sl st to the first sc. Fasten off, leaving a 10 in (25.4 cm) tail for sewing.
Count: 60 sts worked 1-per-stitch + 12 extra sc = 72 sc and 12 picots. Each scallop has 2 + 2 + 2 = 6 sc and 1 picot.
Leave a 12 in (30.5 cm) sewing tail on each upper wing as well.
Why the Math Works
The outer edge of a curved round is always longer than the round below it. Adding exactly one extra sc at each peak gives the curve the extra length it needs. It does this without adding stitches in the valleys between scallops, where the edge has to stay snug.
With one extra stitch per scallop, the scallops keep their shape and the wing lies flat. The picot adds height only, not length, so it does not cause ruffling. Because both wing sizes use the same rule, they finish with the same border depth.
Assembly
- Lay the body flat with the head at the top and the bumpy side facing up.
- Upper wings: Position each upper wing with its marked body-side tip against the body between Rnds 9 and 14. Angle the wing up and out so the long tr section points toward the top corner.
- Sew each upper wing to the side of the body with the tail. Use small whipstitches through 3–4 border sc at the wing tip and the side loops of the body rounds.
- Lower wings: Position each lower wing between Rnds 4 and 9. Angle it down and out, and tuck its top edge 0.25 in (0.6 cm) behind the upper wing.
- Sew each lower wing to the body. Add 2 small tacking stitches where it overlaps the upper wing.
- Weave in all ends along the back of the border rounds.
Size checkpoint: The wingspan should now be 7.5 in (19.1 cm): 3.5 in + 0.5 in + 3.5 in. The height with antennae should be 6.5 in (16.5 cm).
Final Blocking
- Rinse the butterfly in cool water and gently press out the excess in a towel. Do not wring it.
- Lay it on the blocking mat, right side up.
- Pin the body straight first, then the tip of each wing closest to the body.
- Pin each wing open to its finished size: upper wings 3.5 in × 3 in (8.9 cm × 7.6 cm) and lower wings 2.75 in × 2.25 in (7.0 cm × 5.7 cm).
- Place a pin in every picot so the scallop edge is evenly spaced.
- Use a pin tip to open each oval mesh window and the center ring.
- Shape the antennae into gentle outward curves.
- Spray lightly with starch if you want a crisp finish.
- Let the butterfly dry completely, which takes about 12 hours, before unpinning.
Final Quality-Control Checklist
- Each upper wing has 16 spokes, 16 mesh loops, 16 scallops and 16 picots.
- Each lower wing has 12 spokes, 12 mesh loops, 12 scallops and 12 picots.
- The short spokes on every wing face the body.
- The body has an even bumpy texture and 8 sts in Rnds 3–14.
- Both antennae are the same length and have round knobs.
- The two sides of the butterfly mirror each other.
- The wingspan is 7.5 in (19.1 cm) and the height is 6.5 in (16.5 cm).
- No ends or fiberfill show on the right side.
Troubleshooting
The wing cups or curls up. Your Rnd 3 loops are probably too tight. Chain a little more loosely, or go up a hook size for Rnd 3 only.
The edge ruffles. Check that you added only one extra sc per scallop in the border, worked at the dc peak.
The wing is round instead of teardrop-shaped. Make sure Rnd 2 uses tr for the outer spokes and dc for the inner spokes, in the counts given.
The center ring has closed up. Start the ring with a slightly looser chain, and open it with a pin during blocking.
The body bulges or looks lumpy. Use less fiberfill and push it in evenly with the hook handle.
The antennae flop. Starch them, or run a short length of thread back through the sl sts to stiffen them.
Care
Hand wash in cool water with mild soap, press dry in a towel, and re-block flat. Re-starch after washing if you want a crisp finish.
Final Notes
The finished size is built step by step. Each upper wing grows from 2 in (5.1 cm) after Rnd 2 to 3.25 in (8.3 cm) after Rnd 4, then to 3.5 in (8.9 cm) with the 0.125 in (0.3 cm) picot border. Each lower wing grows from 1.5 in (3.8 cm) to 2.5 in (6.4 cm), then to 2.75 in (7.0 cm). Two upper wings plus the 0.5 in (1.3 cm) body give the 7.5 in (19.1 cm) wingspan.
If you check each stage against the checkpoints, the finished butterfly will match the measurements above.
Happy crocheting!