

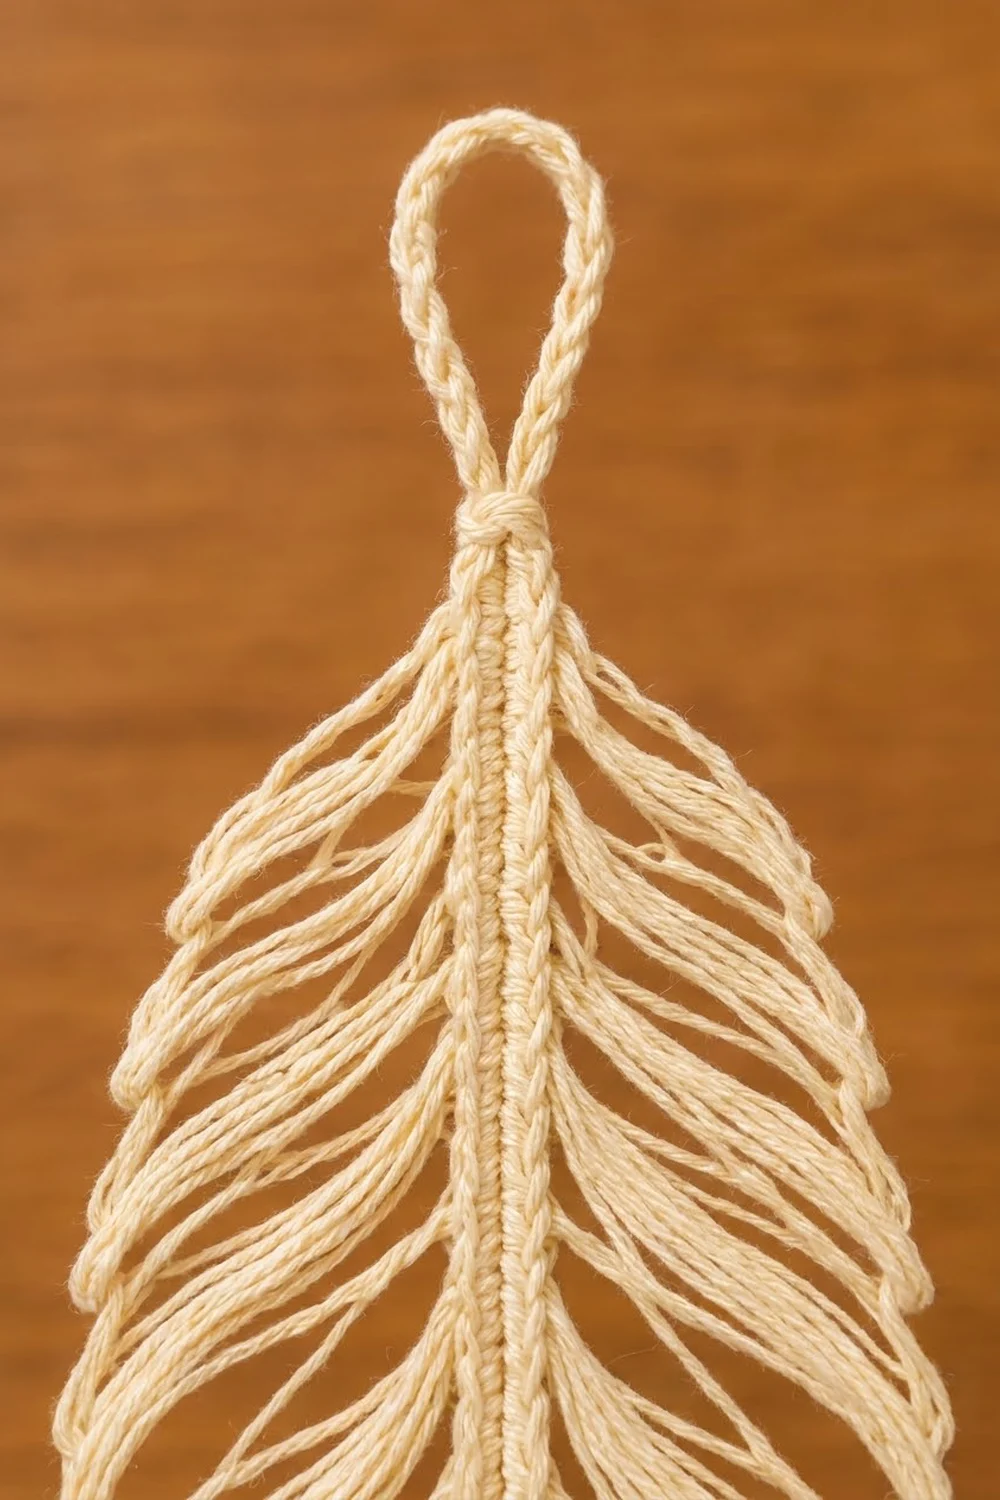
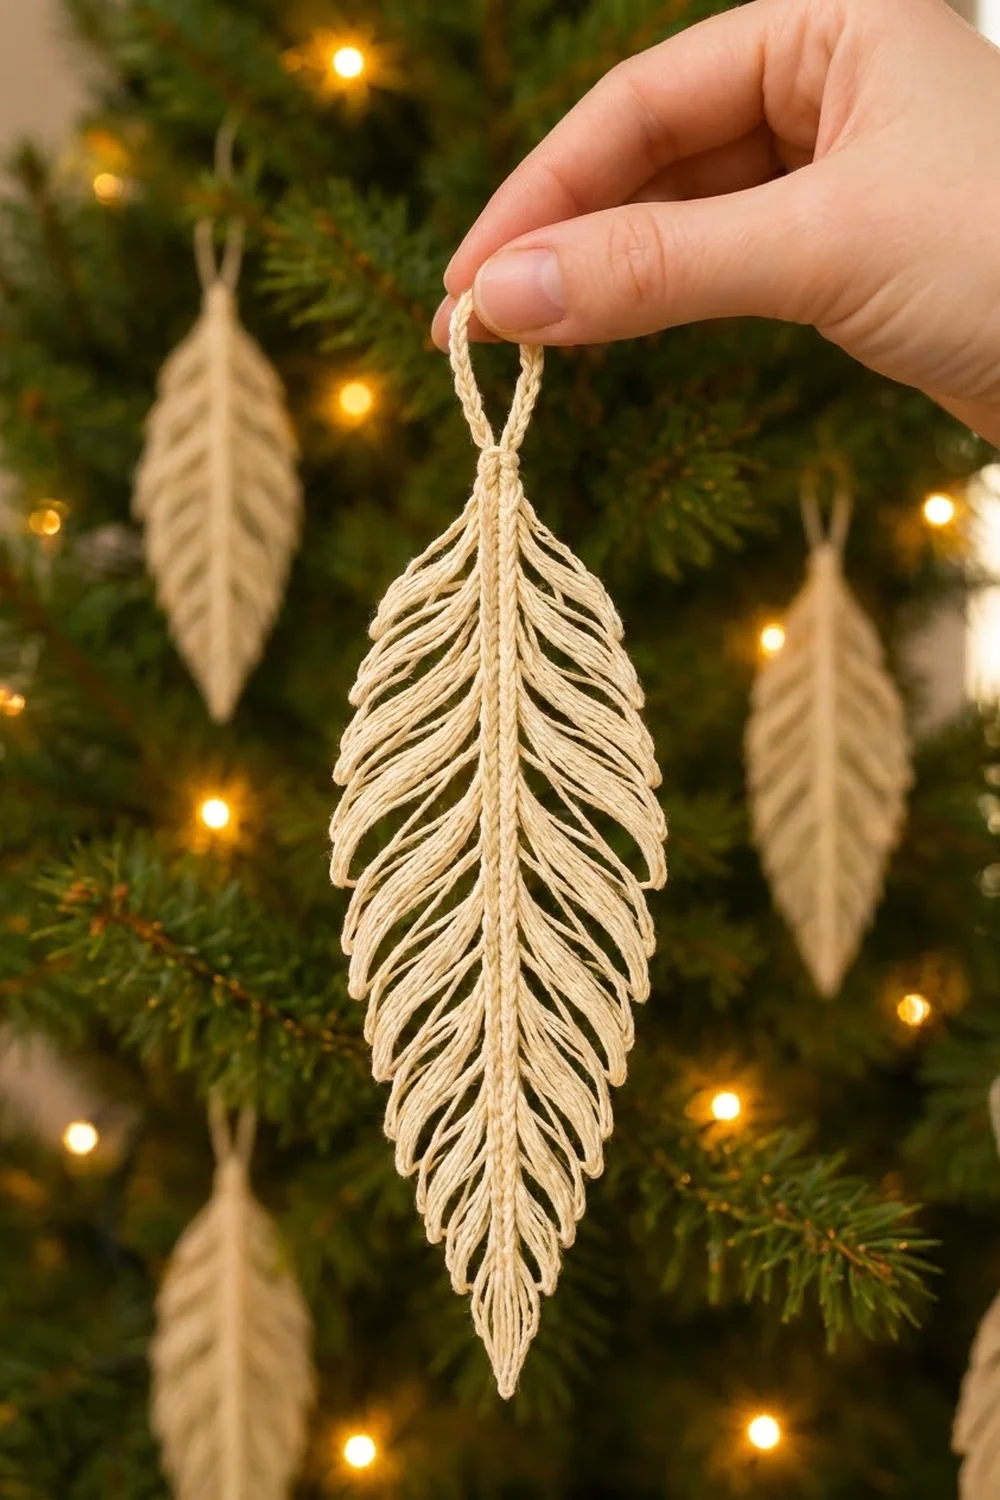
The Winter Plume Feather is a light, lacy ornament made from one strand of cream cotton. A firm slip stitch spine runs down the center. Open chain loops sweep out from both sides of the spine like the barbs of a real feather, and a braided-looking hanging loop sits at the top.
The design uses one color only, a soft cream or ivory. This keeps the look calm and natural, and it shows well against green branches, kraft paper gift wrap, or a white wall. The style is minimal and organic, close to macramé feathers, but every part is crocheted.
This pattern uses US crochet terms. The finished feather measures 6.5 in (16.5 cm) long and 2.25 in (5.7 cm) wide, plus a 1.5 in (3.8 cm) hanging loop, for a total hanging length of 8 in (20.3 cm).
Construction is simple. You chain a foundation and slip stitch back along it to make the spine. Then you work chain-loop barbs down one side, add a small pointed tip, work matching barbs up the other side, and finish with a reinforced hanging loop. The whole feather is one continuous piece, and there is no sewing.
Finished Size and Construction
- Finished size: 6.5 in (16.5 cm) long x 2.25 in (5.7 cm) wide, plus a 1.5 in (3.8 cm) loop
- Total hanging length: 8 in (20.3 cm)
- Skill level: Easy (advanced beginner)
- Terminology: US crochet terms
- Yarn weight: Fingering / super fine (#1) cotton
- Hook: 2.75 mm (US C-2)
- Number of pieces: 1
- Layout: One vertical feather with barbs on both sides of a central spine
- Spine length: 41 sl st = 6 in (15.2 cm)
- Size before border: 6 in (15.2 cm) long x 2.25 in (5.7 cm) wide (spine and barbs only)
- Border depth: The pointed tip adds 0.5 in (1.3 cm) at the bottom, and the hanging loop adds 1.5 in (3.8 cm) at the top
Materials
Yarn: Use a smooth, tightly plied fingering-weight cotton or cotton blend. Mercerized cotton shows the chain loops most clearly and holds its shape after blocking. Avoid fuzzy or loosely spun yarn, because the open loops will lose their definition.
- Cream / Ivory: 5 g, about 15 m (16.4 yd), per feather
One feather actually uses about 3 g (10 m). The amount above includes a margin for your gauge swatch, weaving in ends, and tension differences. A 50 g ball makes about ten feathers.
Tools:
– 2.75 mm (US C-2) crochet hook
– Tapestry needle
– Small scissors
– Blocking mat or folded towel
– Rust-proof pins (12 to 16)
– Spray bottle with water
– Optional: fabric stiffener or spray starch
– Ruler or tape measure
Abbreviations (US Terms)
- ch – chain
- sl st – slip stitch
- st(s) – stitch(es)
- sk – skip
- BB – back bump of a chain (the horizontal bar on the back of the chain)
- FL of ch – the free loops of the foundation chain left over after working into the back bumps
Special stitch – Barb: Ch the number given, sk next spine st, sl st in following spine st. Each barb is one closed chain loop anchored at 2 points, 2 spine sts apart. It counts as the given number of ch + 1 sl st.
Gauge and Checkpoints
Gauge matters here because barb length controls the feather’s outline. Make one feather first and check it at each stage before you make a set.
- Chain gauge: 8 ch = 1 in (2.5 cm), relaxed
- Spine gauge: 41 sl st = 6 in (15.2 cm)
Checkpoint 1 – Spine: After Row 1 the spine should measure 6 in (15.2 cm) when lightly straightened.
Checkpoint 2 – Longest barb: On Side A, Barb 8 (ch 20) should lie flat as a loop about 1.25 in (3.2 cm) long.
Checkpoint 3 – Width: With both sides done and smoothed out at an angle, the feather should measure about 2.25 in (5.7 cm) across at its widest point.
If your work is too big: Go down to a 2.5 mm hook, or keep the chains snugger. If only the barbs are too long, take 2 ch off every barb that is ch 8 or longer.
If your work is too small: Go up to a 3 mm hook. If only the barbs look short, add 2 ch to every barb that is ch 8 or longer. Make the same change on both sides.
Pattern
Section 1: Spine
Leave a 6 in (15.2 cm) tail.
Ch 42.
Row 1: Sl st in BB of 2nd ch from hook and in BB of each ch across. (41 sl st)
The skipped chain sits at the bottom of the feather. Your hook is now at the top. Number the spine sts 1 to 41, with st 1 at the top. Work firm, even slip stitches so the spine becomes the solid cord seen down the middle of the feather.
Do not fasten off. Check Checkpoint 1.
Section 2: Side A Barbs (Top to Bottom)
Turn so you can work into the tops of the Row 1 sl sts, moving from the top toward the bottom.
Set-up: Sl st in st 1. (1 sl st)
Now work 20 barbs. Each barb ends in the second st ahead, so the anchors fall on sts 3, 5, 7 … 41.
Growing barbs
– Barb 1: ch 6, sk st 2, sl st in st 3.
– Barb 2: ch 8, sk next st, sl st in next st (st 5).
– Barb 3: ch 10, anchor in st 7.
– Barb 4: ch 12, anchor in st 9.
– Barb 5: ch 14, anchor in st 11.
– Barb 6: ch 16, anchor in st 13.
– Barb 7: ch 18, anchor in st 15.
Widest section
– Barbs 8 to 11: ch 20 each, anchored in sts 17, 19, 21, and 23.
Check Checkpoint 2 after Barb 8.
Tapering barbs
– Barb 12: ch 18, anchor in st 25.
– Barb 13: ch 16, anchor in st 27.
– Barb 14: ch 14, anchor in st 29.
– Barb 15: ch 12, anchor in st 31.
– Barb 16: ch 10, anchor in st 33.
– Barb 17: ch 8, anchor in st 35.
– Barb 18: ch 6, anchor in st 37.
– Barb 19: ch 4, anchor in st 39.
– Barb 20: ch 4, anchor in st 41.
Side A count: 21 sl st (1 set-up + 20 anchors) and 256 ch.
Here is the chain total:
– Barbs 1–7: 6 + 8 + 10 + 12 + 14 + 16 + 18 = 84 ch
– Barbs 8–11: 4 x 20 = 80 ch
– Barbs 12–20: 18 + 16 + 14 + 12 + 10 + 8 + 6 + 4 + 4 = 92 ch
– Total: 84 + 80 + 92 = 256 ch
The barbs grow over 7 loops, stay at full length for 4, and then taper over 9. This puts the widest point just above the middle and gives the long, slim lower half and pointed tip seen in the photo.
Section 3: Side B Barbs (Bottom to Top)
Tip: First work the pointed tip described in the Border section, then come back here.
Rotate the work so the FL of ch, on the opposite edge of the spine, faces up. You will now work from the bottom toward the top.
Set-up: Sl st in FL of ch under st 41. (1 sl st)
Each barb now anchors 2 sts closer to the top, at sts 39, 37, 35 … 1. The barbs mirror Side A, so each one matches the barb directly across the spine from it.
- Barbs 1–2: ch 4 each, anchored in sts 39 and 37.
- Barb 3: ch 6, anchor in st 35.
- Barb 4: ch 8, anchor in st 33.
- Barb 5: ch 10, anchor in st 31.
- Barb 6: ch 12, anchor in st 29.
- Barb 7: ch 14, anchor in st 27.
- Barb 8: ch 16, anchor in st 25.
- Barb 9: ch 18, anchor in st 23.
- Barbs 10–13: ch 20 each, anchored in sts 21, 19, 17, and 15.
- Barb 14: ch 18, anchor in st 13.
- Barb 15: ch 16, anchor in st 11.
- Barb 16: ch 14, anchor in st 9.
- Barb 17: ch 12, anchor in st 7.
- Barb 18: ch 10, anchor in st 5.
- Barb 19: ch 8, anchor in st 3.
- Barb 20: ch 6, anchor in st 1.
Side B count: 21 sl st and 256 ch, the same as Side A. Your hook is at the top of the spine. Check Checkpoint 3.
Border
This feather has no traditional edging, because the barb loops form its outer edge. The “border” here is the two end finishes: the pointed tip at the bottom and the reinforced hanging loop at the top.
Border gauge: These sections use the same chain gauge as the barbs, 8 ch = 1 in (2.5 cm).
Tip (worked between Side A and Side B): After Barb 20 of Side A, ch 5. Sl st in BB of 2nd ch from hook and in BB of the next 3 ch, then sl st in the bottom skipped ch of the foundation. (5 sl st total)
The 4 sl st along the tail measure 0.5 in (1.3 cm). They make the narrow point seen at the bottom of the feather. Now return to Section 3.
Hanging loop (after Side B): Ch 24, then sl st in st 1 to close the loop. Turn, and sl st in each of the 24 ch around the loop. Sl st in st 1. Fasten off, leaving a 6 in (15.2 cm) tail. (24 ch + 26 sl st)
Counts per side: Each side has 20 barbs and 21 sl st. The tip adds 5 sl st at the bottom. The loop adds 24 ch and 26 sl st at the top.
Why the math works: Each barb uses 2 spine sts, and the set-up uses 1. So 1 + (20 x 2) = 41, which matches the spine exactly, and both sides end on a spine stitch with nothing left over. Because Side B uses the same lengths in mirror order, opposite barbs always match.
The loop’s 24 ch at 8 ch per inch make a circle 3 in (7.6 cm) around. Flattened, that is 1.5 in (3.8 cm) tall. Add the 6 in (15.2 cm) spine and the 0.5 in (1.3 cm) tip, and the total hanging length is 8 in (20.3 cm).
Final Blocking
- Weave in both tails along the spine, going through the slip stitches rather than the barbs, then trim.
- Soak the feather in cool water for 5 minutes. Gently press out the water in a towel without wringing.
- Lay the feather flat on the blocking mat with the spine perfectly straight. Pin the spine at the top, the middle, and the base.
- Smooth each barb loop outward and downward at about a 45-degree angle toward the tip. Let each loop overlap the next one slightly to create the layered look.
- Pin the outer end of the four longest barbs on each side so the width measures 2.25 in (5.7 cm).
- Shape the bottom loops into a narrow point so they meet at the tip.
- Pin the hanging loop into a neat teardrop shape 1.5 in (3.8 cm) tall.
- Optional: lightly mist with fabric stiffener or spray starch for a crisper ornament.
- Let the feather dry completely, usually 6 to 12 hours, before you unpin it.
Final Quality-Control Checklist
- Spine is straight and 6 in (15.2 cm) long, with no twisting.
- There are 20 barbs on each side, and opposite barbs match in length.
- The widest point sits just above the middle and measures 2.25 in (5.7 cm).
- The bottom tip comes to a clean point 0.5 in (1.3 cm) long.
- The hanging loop is firm, closed, and 1.5 in (3.8 cm) tall.
- The total hanging length is 8 in (20.3 cm).
- All tails are woven into the spine and invisible from the front.
- The loops lie flat, with no barb flipping up or folding under.
Troubleshooting
Spine curls or twists: Your slip stitches are too tight. Redo Row 1 with a looser hand, or with a hook one size larger for that row only.
Barbs look uneven: You probably miscounted a chain. Hold the feather up to check the matching barbs side by side, then undo and correct the barb that is off.
Feather is too wide or too round: Your chains are loose. Remove 2 ch from every barb that is ch 8 or longer, on both sides.
Barbs flop and lose their shape: Block again with stiffener, or switch to a firmer mercerized cotton.
Can’t see the foundation chain loops for Side B: Turn the spine so the Row 1 slip stitches face down. The free V loops of the chain will then be on top.
Hanging loop stretches: Make sure you worked all 24 reinforcing slip stitches, and keep them snug.
Last barb doesn’t land on st 41 or st 1: Every barb must skip exactly 1 spine stitch. Count your anchors, which should be every other stitch.
Care
Hand wash in cool water with mild soap, press dry in a towel, and reblock flat. Between seasons, store the feather flat or loosely wrapped in tissue so the loops don’t crush.
Final Notes
Each measurement depends on the one before it. If the chain gauge is 8 ch = 1 in (2.5 cm), the 41-stitch spine measures 6 in (15.2 cm). Twenty barbs on each side make the feather 2.25 in (5.7 cm) wide. The tip adds 0.5 in (1.3 cm), giving a 6.5 in (16.5 cm) feather. The 24-chain loop adds 1.5 in (3.8 cm), for a total hanging length of 8 in (20.3 cm).
Check the spine and the longest barb on your first feather. After that, each one takes only a short evening and comes out the same size every time.
Happy crocheting!