

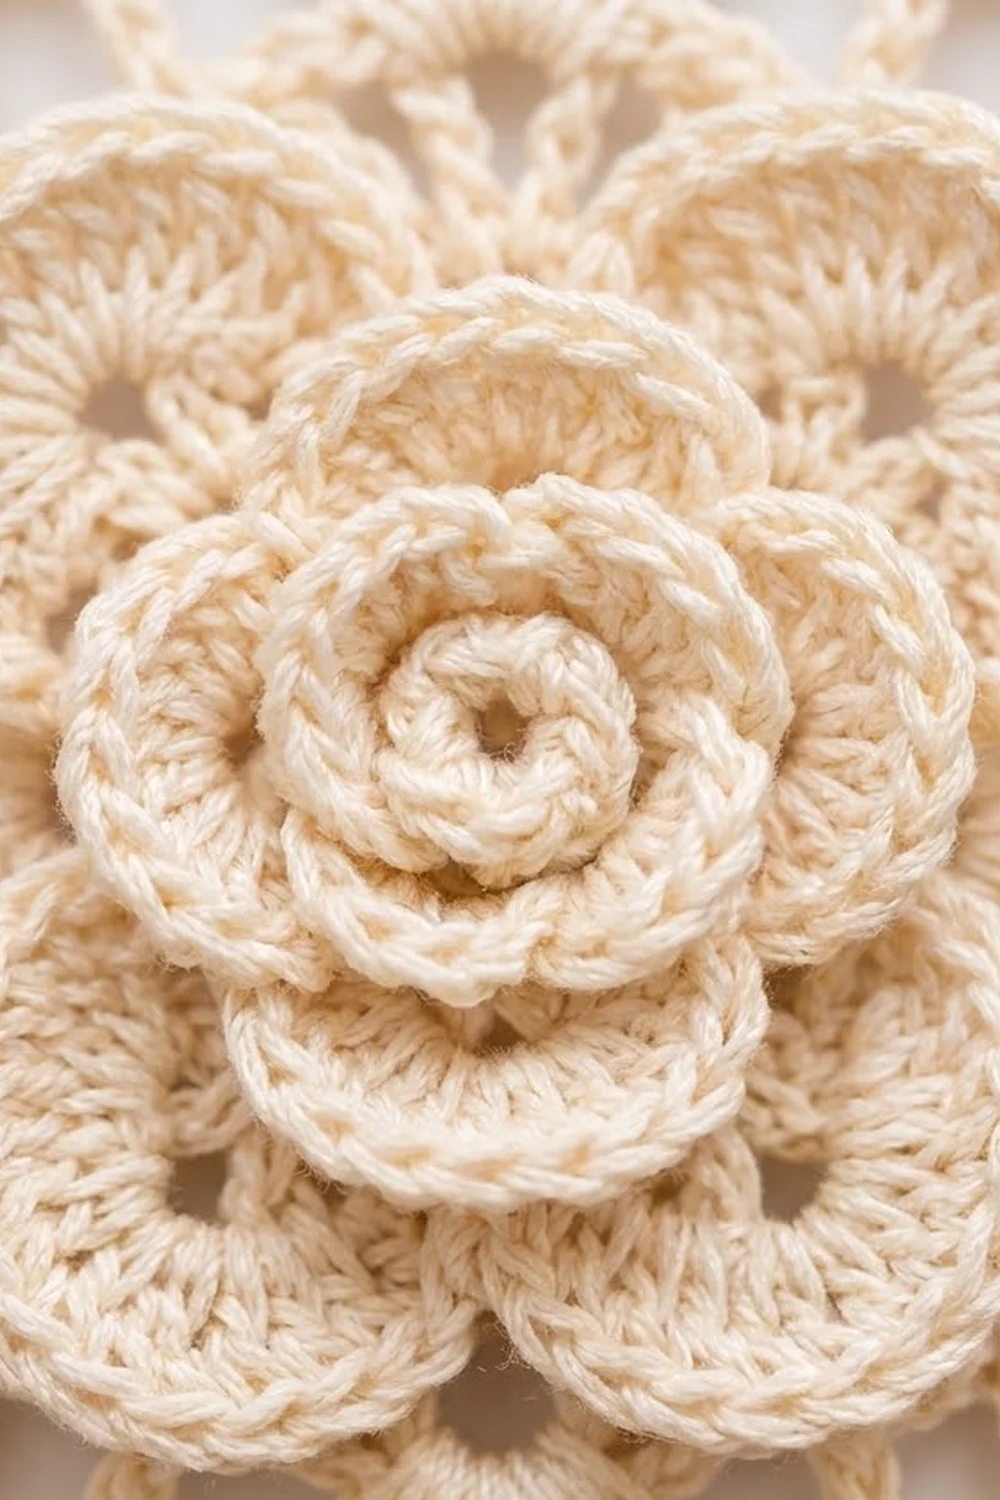
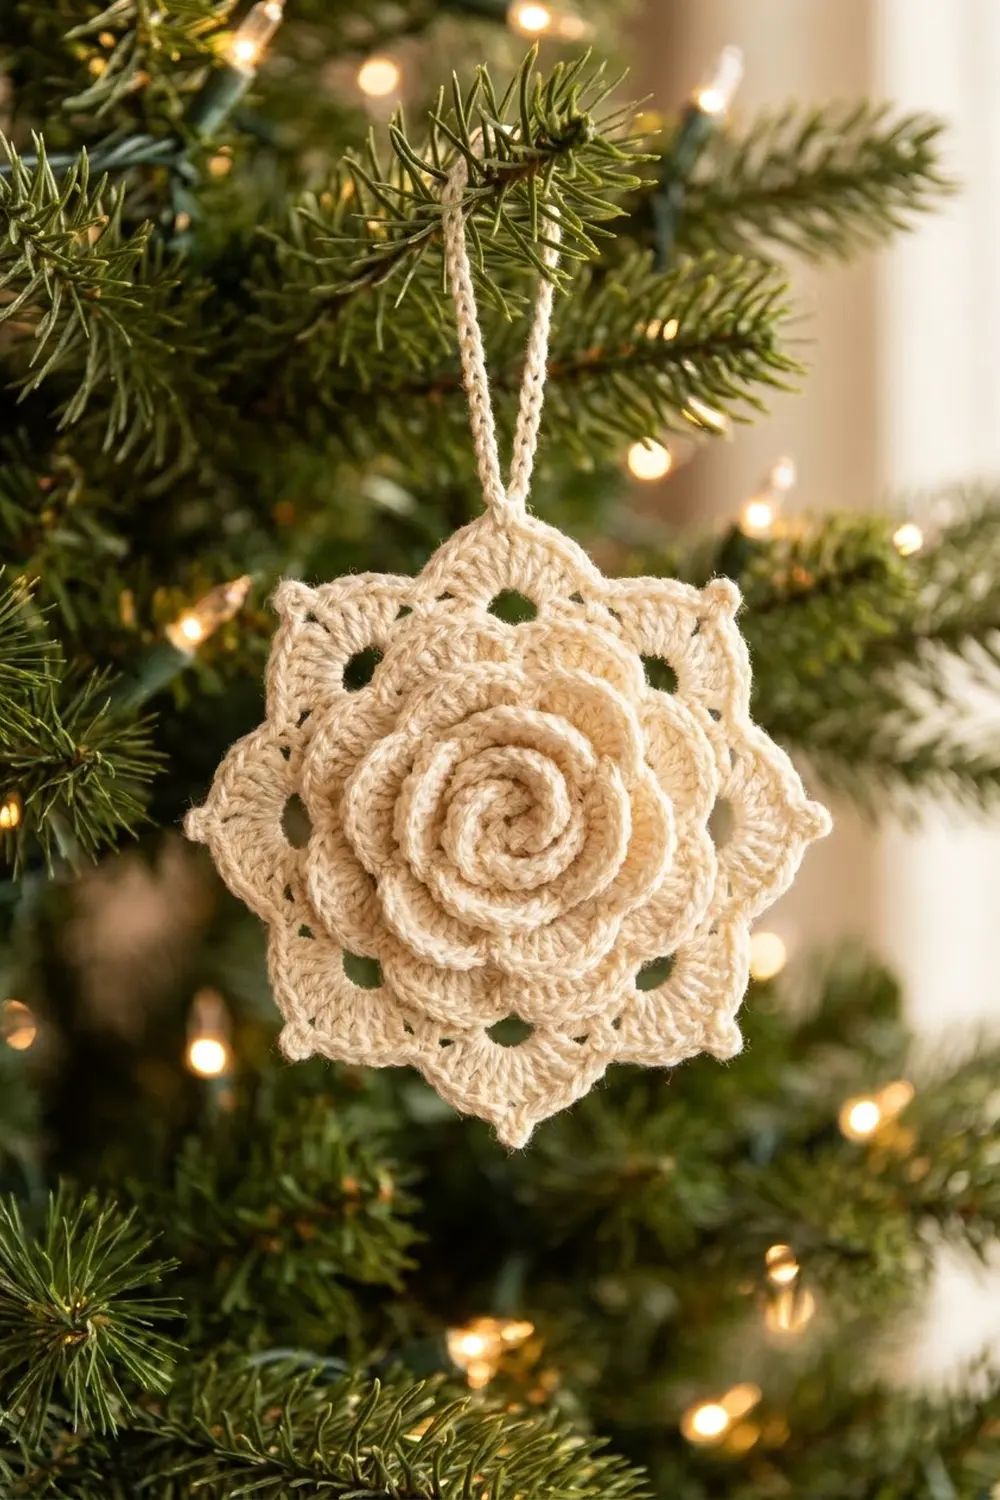
This ornament pairs a soft, layered rose with a lacy, scalloped base. Three rings of petals build up from a small center, and an open ring of eight fans frames them. The result looks like a heirloom snowflake that grew a flower in the middle.
It is worked in a single cream thread, so the texture does all the work. Cream reads warm against green branches and gold lights, and it matches vintage, farmhouse, and Victorian-style trees. Make one for a gift tag, or make a dozen for a matching tree.
This pattern uses US crochet terms. The finished ornament measures 4 in (10.2 cm) across, not counting the loop. With the hanging loop it is about 5.5 in (14.0 cm) tall.
Construction is one continuous piece worked in rounds. You crochet the rose first, adding each new ring of petals behind the last one using back post stitches. Then you work the lace base outward from the back of the rose, add a scalloped edging round, and finish with a covered hanging loop. Nothing is sewn on.
Finished Size and Construction
- Finished size: 4 in (10.2 cm) across, point to point
- Height with loop: about 5.5 in (14.0 cm)
- Skill level: Intermediate
- Terminology: US crochet terms
- Yarn weight: Size 3 cotton crochet thread
- Hook: 2.25 mm (US B-1)
- Number of pieces: 1
- Layout: Single round motif; no joining
- Rose size (after Round 7): 2.25 in (5.7 cm)
- Size before edging (after Round 11): 3.75 in (9.5 cm)
- Edging depth: 0.125 in (0.3 cm) per side, adding 0.25 in (0.6 cm) to the diameter
Materials
Yarn: Use mercerized cotton crochet thread in size 3. Mercerized cotton gives crisp stitch definition, holds starch well, and won’t fuzz on the tree. If you prefer a larger ornament, see the gauge notes below.
- Cream / Ivory: about 10 g, 27 m (30 yd)
This quantity includes a margin for the gauge swatch and the loop. One standard ball makes many ornaments.
Tools:
- 2.25 mm (US B-1) crochet hook
- Tapestry needle with an eye small enough for thread
- Small scissors
- Fabric stiffener or spray starch
- Blocking board or foam mat and rustproof pins
- Plastic wrap (to protect the board from stiffener)
Abbreviations (US Terms)
- ch – chain
- sl st – slip stitch
- sc – single crochet
- hdc – half double crochet
- dc – double crochet
- sp – space
- sk – skip
- MR – magic ring
- st(s) – stitch(es)
Special stitch:
- Back post single crochet (bpsc): Insert the hook from back to front to back around the post of the stated stitch, yarn over, pull up a loop, yarn over, and pull through both loops. Worked from the back, it places the new chain loops behind the petals you just made. This is what stacks the petal layers.
- Picot: Ch 3, sl st into the top of the sc just made.
Gauge and Checkpoints
Gauge is measured in rounds, not in a flat swatch. Work Rounds 1–3 first and measure:
- After Round 3: 1 in (2.5 cm) across the first petal ring.
Keep measuring at each checkpoint below:
- After Round 5: 1.5 in (3.8 cm)
- After Round 7: 2.25 in (5.7 cm)
- After Round 9: 2.75 in (7.0 cm)
- After Round 11: 3.75 in (9.5 cm)
- After Round 12: 4 in (10.2 cm)
If your piece is too big, change to a 2.0 mm hook, or tighten the chain loops in Rounds 4, 6, and 8. If it is too small, change to a 2.5 mm hook. Small differences of 0.125 in (0.3 cm) are fine, because blocking evens them out.
Sizing up: the same pattern in sport-weight cotton with a 3.0 mm hook makes an ornament about 5 in (12.7 cm) across.
Pattern: The Layered Rose
Join every round with a sl st to the first st unless stated otherwise. The ch 1 at the start of a round does not count as a stitch.
Round 1: Make an MR. Ch 1, work 16 sc into the ring. Pull the ring tight and join. (16 sc)
Round 2: Ch 1, sc in the first st, ch 2, sk 1 st. Sc in the next st, ch 2, sk 1 st. Repeat from * 6 more times. Join. (8 sc, 8 ch-2 sps)
Round 3 (Petal Layer 1): In each ch-2 sp, work (sc, hdc, dc, hdc, sc). Join to the first sc. (8 petals, 5 sts each = 40 sts)
The petals are small and cup slightly. Gently press them forward with your thumb.
Round 4: Fold the petals toward you so you can see the back. Ch 1, bpsc around the post of the first sc from Round 2. Ch 3. Bpsc around the next Round 2 sc, ch 3. Repeat from * 6 more times. Join to the first bpsc. (8 bpsc, 8 ch-3 loops)
The ch-3 loops should sit behind the petals and not show from the front.
Round 5 (Petal Layer 2): In each ch-3 loop, work (sc, hdc, 3 dc, hdc, sc). Join. (8 petals, 7 sts each = 56 sts)
Checkpoint: 1.5 in (3.8 cm) across.
Round 6: Working from the back again, ch 1, bpsc around the first bpsc from Round 4. Ch 5. Bpsc around the next Round 4 bpsc, ch 5. Repeat from * 6 more times. Join. (8 bpsc, 8 ch-5 loops)
Round 7 (Petal Layer 3): In each ch-5 loop, work (sc, hdc, 5 dc, hdc, sc). Join. (8 petals, 9 sts each = 72 sts)
Checkpoint: 2.25 in (5.7 cm) across. You now have three rings of petals, each ring peeking out beyond the one in front of it.
Round 8: From the back, ch 1, bpsc around the first bpsc from Round 6. Ch 6. Bpsc around the next Round 6 bpsc, ch 6. Repeat from * 6 more times. Join. (8 bpsc, 8 ch-6 loops)
These eight loops are the foundation for the lace base.
Pattern: The Lace Base
Round 9: Sl st into the first ch-6 loop. Ch 3 (counts as dc), 2 dc in the same loop, ch 3, 3 dc in the same loop. In the next ch-6 loop, work (3 dc, ch 3, 3 dc). Repeat from * 6 more times. Join to the top of the beginning ch-3. (48 dc, 8 ch-3 sps)
Checkpoint: 2.75 in (7.0 cm). The dc groups form a flat ring of eight V-shaped clusters behind the outer petals.
Round 10: Sl st in each of the next 2 dc and into the first ch-3 sp. Ch 1, sc in the same sp, ch 7. Sc in the next ch-3 sp, ch 7. Repeat from * 6 more times. Join to the first sc. (8 sc, 8 ch-7 arches)
Each arch spans from one cluster tip to the next, giving the open “windows” you see between the fans.
Round 11 (Fan Round): Ch 1, sc in the first sc. In the next ch-7 arch, work (dc, ch 1) 6 times, then 1 more dc. Sc in the next sc. Repeat from * around, but skip the final sc and join to the first sc instead. (8 sc, 56 dc, 48 ch-1 sps)
Each fan has 7 dc and 6 ch-1 sps. The dc spokes fan outward from the arch, which creates the radiating lines in each scallop. Checkpoint: 3.75 in (9.5 cm).
Edging Round
This round works as the border. It turns each open fan into a smooth scallop with a solid sc rim and a small point at the tip.
Border gauge: about 9 sc = 1 in (2.5 cm) along the outer edge. Each scallop takes 14 sc and covers an arc of about 1.5 in (3.8 cm).
Round 12: Sl st in the first sc (this is the valley between two fans). [Sc in the next dc, sc in the next ch-1 sp] 3 times. In the 4th (center) dc, work (sc, picot, sc). [Sc in the next ch-1 sp, sc in the next dc] 3 times. Sl st in the next sc (valley). Repeat from * around. On the last repeat, end with a sl st in the first sl st. (112 sc, 8 picots, 8 sl sts)
Per scallop: 14 sc + 1 picot + 1 valley sl st.
Why the math works: Each fan from Round 11 gives you 13 working positions (7 dc + 6 ch-1 sps). You work 1 sc into each position, which is 13 sc. The center dc gets 1 extra sc, so 13 + 1 = 14 sc per scallop. Eight scallops × 14 sc = 112 sc. The Round 11 sc between fans gets a sl st, not an sc, which pulls each valley in and makes the scallops rounder. The edging adds 0.125 in (0.3 cm) on each side, so the diameter goes from 3.75 in (9.5 cm) to 4 in (10.2 cm).
Hanging Loop
Do not fasten off. Sl st across to the picot of the scallop you want at the top. Count 4 scallops from it to make sure the bottom picot sits directly opposite.
- Sl st into the picot.
- Ch 30.
- Sl st into the same picot to form the loop.
- Work 40 sc over the chain loop to cover it fully.
- Sl st into the picot and fasten off.
The covered loop stands about 1.5 in (3.8 cm) tall and is strong enough to sit on a branch without twisting flat. Weave in all ends through the back of the dc spokes, where they won’t show.
Final Blocking
Blocking is what makes the lace crisp and opens the fans fully.
- Cover your blocking board with plastic wrap.
- Soak the ornament in fabric stiffener (or a mix of equal parts white glue and water). Squeeze out the excess gently. Do not wring it.
- Lay it face up on the board.
- Pin the 8 picots evenly around a 4 in (10.2 cm) circle. Pin opposite points first: top and bottom, then left and right, then the four diagonals.
- Pin each valley sl st slightly toward the center so the scallops stay rounded.
- Use a fingertip to open each fan so the dc spokes sit evenly.
- Shape the rose by hand. Push each petal ring forward and cup the petals so all three layers stand out.
- Straighten the hanging loop upward and pin it flat.
- Let it dry completely, for 12–24 hours.
- Remove the pins. If the edges curl, spray with starch and press under a book for an hour.
Final Quality-Control Checklist
- Round 3 has 8 petals; Round 5 has 8; Round 7 has 8.
- No chain loops from Rounds 4, 6, or 8 show from the front.
- Round 9 has 8 clusters of 3 + 3 dc.
- Each fan in Round 11 has 7 dc and 6 ch-1 sps.
- Round 12 has 14 sc per scallop and 8 evenly spaced picots.
- The diameter measures 4 in (10.2 cm) point to point.
- The loop sits at a picot, and the bottom picot is directly opposite.
- All ends are woven in and trimmed close.
- The ornament hangs straight without tilting.
Troubleshooting
The rose flops forward or looks flat. Your back-post loops are too loose. Tighten the ch-3, ch-5, and ch-6 loops, or go down a hook size for Rounds 4–8 only.
The petal layers are hidden behind each other. Make sure you work the bpsc around the stitch from two rounds below, not around stitches in the petals. Each new loop round must sit behind the petals.
The lace base ruffles. The arches in Round 10 are too long for your tension. Change them to ch 6 and keep the same counts in Round 11.
The lace base cups. Your arches are too tight. Change them to ch 8, or loosen your dc in Round 11.
The scallops look square. Make sure the valleys get a sl st, not an sc, and pin the valleys inward when blocking.
The ornament tilts when hung. The loop is off-center. Move it to a picot that sits directly opposite another picot.
Picots disappear. Pull the ch 3 snug before the sl st, and pin each picot out during blocking.
Care
Dust gently with a soft brush. If it needs cleaning, rinse it in cool water, then reshape it and stiffen it again before storing it flat in tissue paper.
Final Notes
Here is the measurement chain in one place. The first petal ring measures 1 in (2.5 cm). Petal Layer 2 measures 1.5 in (3.8 cm). The full rose measures 2.25 in (5.7 cm). The clusters measure 2.75 in (7.0 cm), and the fans measure 3.75 in (9.5 cm). The edging adds 0.125 in (0.3 cm) per side, bringing the ornament to 4 in (10.2 cm). If you measure at every checkpoint, the scallops will block evenly and the rose will sit centered in its frame of lace.
Make one as a quiet focal point, or work a whole set in matching cream for a tree that looks like it’s covered in frost and flowers.
Happy crocheting!