

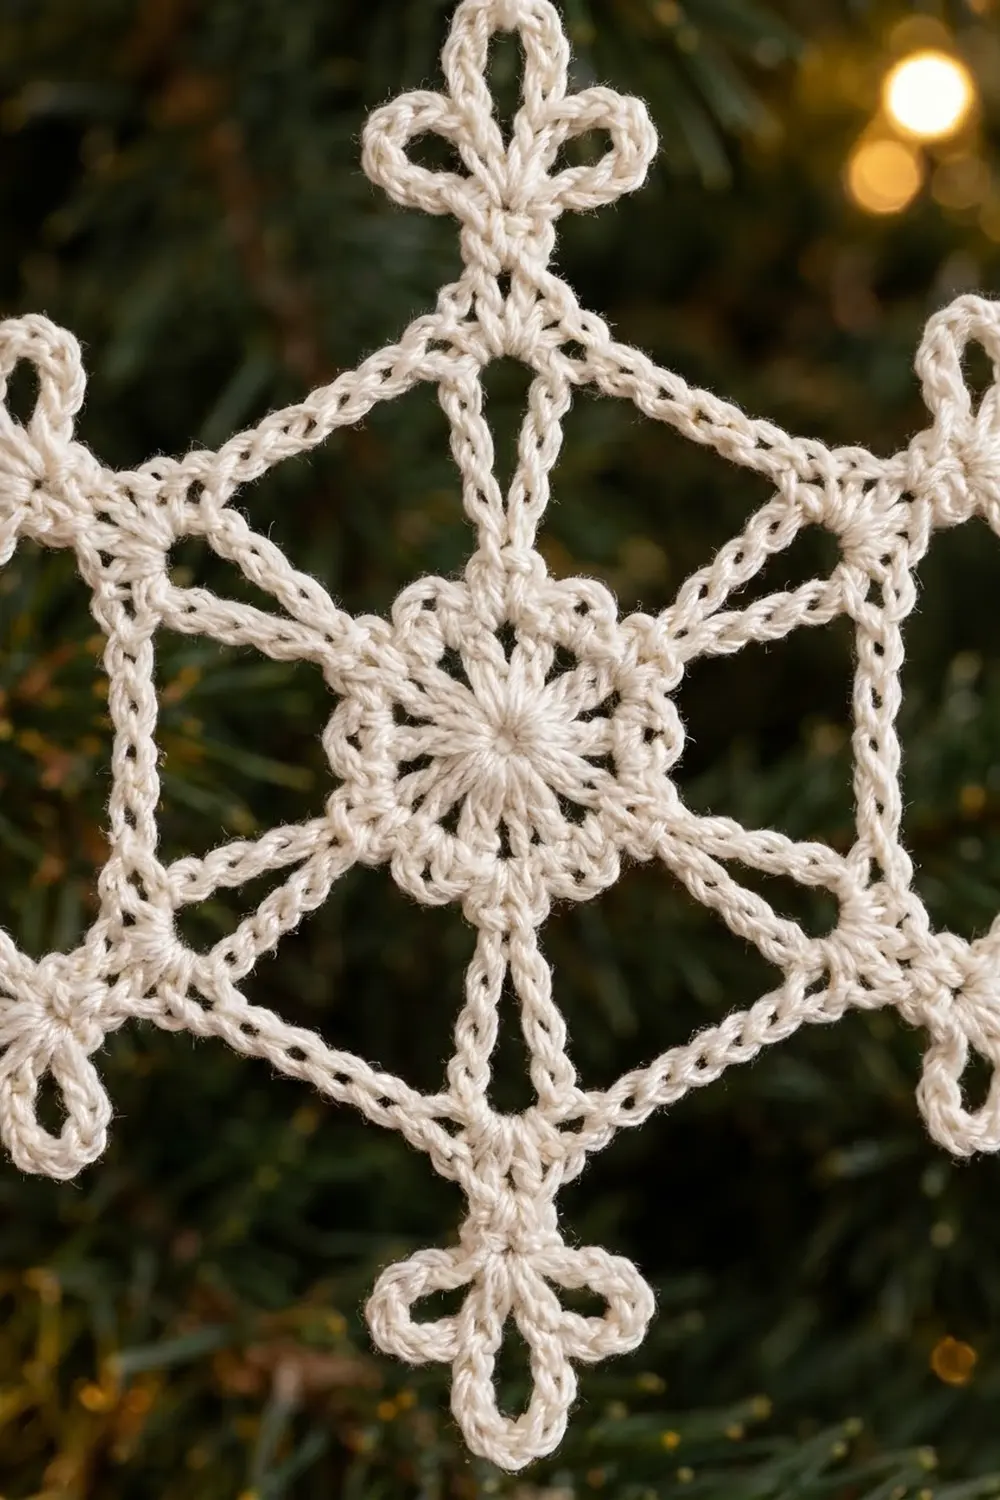
The Frost Clover Snowflake is a light, lacy ornament with a clean geometric shape. It has a small solid center disk, an open hexagon frame of straight chain lines, and six thick spokes that each end in a three-petal clover. Once it is starched, it hangs flat and holds its shape on the tree.
This sample is worked in a single ivory thread, which gives a soft, frosty look against green branches and warm lights. Plain white, silver-gray, or pale gold thread would also suit the design. Use one color only: the openwork is the main feature, and color changes would break up the lines.
The pattern uses US crochet terms. The finished snowflake measures 4.25 in (10.8 cm) from point to point after blocking.
The snowflake is made in one piece in four rounds. Rounds 1–2 form the solid center. Round 3 makes six long chain loops that become V shapes when blocked. Round 4 is the outer edge: in one pass it builds the hexagon frame, the doubled spokes and the clover tips. A chain hanging loop is added last.
Finished Size and Construction
- Finished size: 4.25 in (10.8 cm) point to point; about 3.75 in (9.5 cm) across the flat sides
- Skill level: Easy–Intermediate
- Terminology: US crochet terms
- Yarn weight: Size 10 cotton crochet thread (Lace, weight 0)
- Hook: 1.75 mm (US steel 6)
- Number of pieces: 1
- Layout: Single motif, six-point radial symmetry
- Piece size (center disk after Round 2): 1 in (2.5 cm) across
- Size before edging (after Round 3, pinned): 2 in (5.1 cm) from hexagon corner to opposite corner
- Edging depth (Round 4 spokes + clovers): about 1.125 in (2.9 cm) on each side
Materials
Thread: Mercerized cotton holds starch well and gives crisp stitch definition. Avoid acrylic or fuzzy blends, which will not block sharply.
- Ivory / cream, size 10 cotton thread: 2 g, about 8 m (8.7 yd) per snowflake
This amount includes a margin of about 25%. Allow a little more if you add a longer hanging loop.
Tools:
– 1.75 mm (US steel 6) crochet hook
– Fine tapestry needle for weaving in ends
– Scissors
– Blocking board or foam mat with plastic wrap
– Rustproof pins (at least 13)
– Fabric stiffener, liquid starch, or a 1:1 glue-and-water mix
– Ruler or tape measure
– Optional: printed circle 4.25 in (10.8 cm) across to use as a pinning guide
Abbreviations (US Terms)
- ch – chain
- sl st – slip stitch
- sc – single crochet
- dc – double crochet
- sp – space
- st(s) – stitch(es)
- rep – repeat
Special stitch – Clover (trefoil) tip: After the last chain of a spoke, ch 5, sl st into the top of that last spoke chain; repeat from * 2 more times. This makes 3 ch-5 loops that share one base stitch.
Doubled spoke: Chain outward, make the clover, then slip stitch back down every spoke chain. This lays the slip stitches over the chains, so the spoke looks thicker than the hexagon lines.
Gauge and Checkpoints
Exact gauge matters less in an ornament than in a garment. Still, the hexagon only lies flat if your chains match the planned lengths.
Chain gauge: 10 ch = 1 in (2.5 cm), measured without stretching.
Test first: Work Rounds 1–2 and measure before you continue. They take only a few minutes, and they tell you whether your thread and hook will give the right size.
Checkpoints:
– After Round 1: center disk about 0.6 in (1.5 cm) across
– After Round 2: about 1 in (2.5 cm) across
– After Round 3, loops pinned out: 2 in (5.1 cm) from corner to opposite corner
– After Round 4, blocked: 4.25 in (10.8 cm) point to point
If your center is too big (over 1.125 in / 2.9 cm after Round 2), go down to a 1.5 mm (US steel 7) hook. If it is too small (under 0.875 in / 2.2 cm), go up to a 2 mm (US steel 4) hook. If the disk is right but the chain lines are loose, pull each chain snugly against the hook shaft. Do not change the number of chains.
Center Disk
Round 1: Make a magic ring. Ch 3 (counts as dc), work 17 dc into the ring. Pull the ring tight. Sl st into the top of the beginning ch-3.
Count: 18 dc.
The disk should lie flat with no cupping. If it cups, the ring is pulled too tight before the last stitches settle. Loosen it slightly, then pull it closed again.
Round 2: Ch 3 (counts as dc), dc in next 2 dc, ch 2, dc in next 3 dc, ch 2. Rep from * 4 more times. Sl st into the top of the beginning ch-3.
Count: 18 dc and 6 ch-2 sps.
This round opens the small chain-space gaps around the solid center. Each group of 3 dc will sit under a hexagon corner, and each ch-2 space anchors the legs of two neighboring V loops.
Checkpoint: 1 in (2.5 cm) across.
V-Loop Round
Round 3: Sl st in next 2 dc, sl st into the next ch-2 sp. Ch 1, sc in same sp, ch 13, sc in next ch-2 sp, ch 13. Rep from * 4 more times. Sl st into the first sc.
Count: 6 sc and 6 ch-13 loops (78 ch); 84 sts in total.
Each ch-13 loop has a center chain: the 7th chain, with 6 chains on either side. In Round 4, this center chain becomes a hexagon corner.
When the loop is pulled outward at that chain, its two 6-chain legs form a V. The V runs from two neighboring ch-2 spaces out to a point above the dc group between them.
Why 13 chains: Each leg has to cover about 0.6 in (1.5 cm). That is the distance from the edge of the 1 in (2.5 cm) disk out to a corner set 1 in (2.5 cm) from the center, angled 30 degrees to the side. At 10 ch per inch, that is 6 chains per leg, plus 1 center chain: 6 + 1 + 6 = 13.
Checkpoint: Lay the piece flat and pull each loop outward at its center chain. Opposite corners should be 2 in (5.1 cm) apart.
Border: Hexagon Frame and Clover Points (Round 4)
On this single motif, Round 4 serves as the border. It is worked into the 6 loop centers and builds the outer outline all at once.
Border gauge: The same 10 ch = 1 in (2.5 cm) applies. Each hexagon side is 10 ch, for 1 in (2.5 cm). Each spoke is 8 ch, for 0.8 in (2.0 cm). Each clover loop adds about 0.25 in (0.6 cm).
Round 4:
Sl st in each of the first 7 ch of the first ch-13 loop. The hook is now in the center chain.
Ch 1, sc in the same ch. This sc is the first hexagon corner.
Spoke and clover: Ch 8. [Ch 5, sl st into the top of the 8th spoke ch] 3 times, which makes 3 clover loops. Sl st in each of the remaining 7 spoke ch back toward the center, then sl st into the corner sc. That is 8 sl st on the return.
Hexagon side: Ch 10, sc into the 7th (center) ch of the next ch-13 loop. This sc is the next corner.
Rep spoke and clover, then hexagon side, 4 more times.
Work the spoke and clover at the sixth corner. Then ch 10 and sl st into the first sc of the round instead of making a new sc. Fasten off, leaving a 6 in (15.2 cm) tail.
Counts for each corner:
– 1 sc (corner)
– 8 spoke ch + 8 return sl st
– 3 ch-5 clover loops (15 ch + 3 sl st)
– 1 hexagon side of 10 ch
Round totals: 6 corners, 6 doubled spokes, 18 clover loops, and 6 hexagon sides of 10 ch each (60 ch for the whole frame).
Why the math works: In a regular hexagon, each side is the same length as the distance from the center to a corner. The corners sit 1 in (2.5 cm) from the center, so each side must also be 1 in (2.5 cm), which is exactly 10 ch.
From the center, each spoke and clover then adds 0.8 in + 0.25 in = 1.05 in. Added to the 1 in corner radius, that gives about 2.05 in per side, or 4.1 in tip to tip. Light stretching during blocking brings the snowflake to the target 4.25 in (10.8 cm).
The return slip stitches are why the spokes look heavier than the hexagon lines. Keep them snug but not tight, or the spoke will curl.
Hanging loop: Join the thread with a sl st into the middle clover loop of any point. Ch 25 (about 2.5 in / 6.4 cm). Sl st into the same clover loop and fasten off.
You can also thread an 8 in (20.3 cm) length of matching thread through that clover loop and knot the ends.
Final Blocking
- Weave in all ends along chains or into the center disk. Do not trim them closely yet.
- Cover the blocking board with plastic wrap. If you are using a printed 4.25 in (10.8 cm) circle as a guide, put it under the wrap.
- Soak the snowflake in stiffener and squeeze out the excess gently. Do not wring it.
- Lay it face up. Pin the center disk flat with one pin through the middle.
- Pin the 6 hexagon corners. Opposite corners should be 2 in (5.1 cm) apart, with each side pulled straight.
- Pin the tip of each spoke at the base of its clover so the spoke runs straight out from its corner. Each tip should touch the 4.25 in (10.8 cm) circle.
- Open each clover loop with the tip of a pin or a toothpick so the three petals spread evenly.
- Check that all six V loops are straight and even. Adjust any slack at its corner pin.
- Let it dry completely, usually 12–24 hours. Unpin it, then trim the woven ends closely.
Final Quality-Control Checklist
- [ ] Center disk is flat and shows 18 dc with 6 even gaps
- [ ] All six V loops are the same length and meet the hexagon at a point
- [ ] All hexagon sides are straight and measure 1 in (2.5 cm)
- [ ] Opposite corners are 2 in (5.1 cm) apart
- [ ] All six spokes are doubled, straight, and the same length
- [ ] Each clover has 3 open loops of the same size
- [ ] The snowflake measures 4.25 in (10.8 cm) from point to point
- [ ] Hanging loop is secure and centered on one clover
- [ ] No loose ends or visible knots
Troubleshooting
The center disk cups or ruffles. Cupping means the stitches are too tight or the ring was closed too hard. Ruffling usually means the stitches are too loose. Count again to make sure you have 18 dc, not 17 or 19.
The hexagon sides sag after blocking. The chains are looser than 10 per inch. Rework Round 4 with tighter chains, or go down half a hook size for that round only.
The hexagon pulls into a star shape. The chains are tight, or a side is short. Count each side’s chains, which should be exactly 10.
The spokes curl or twist. The return slip stitches are too tight. Work them loosely, and block the spokes pinned straight.
The clover loops are different sizes. Work every loop as exactly ch 5, and slip stitch into the same spoke chain each time.
The snowflake goes limp later. It did not get enough stiffener. Re-dip it, pin it again, and let it dry fully.
Care
Store flat between sheets of tissue paper in a box. If the snowflake gets dusty, rinse it gently in cool water and re-block it with fresh stiffener.
Final Notes
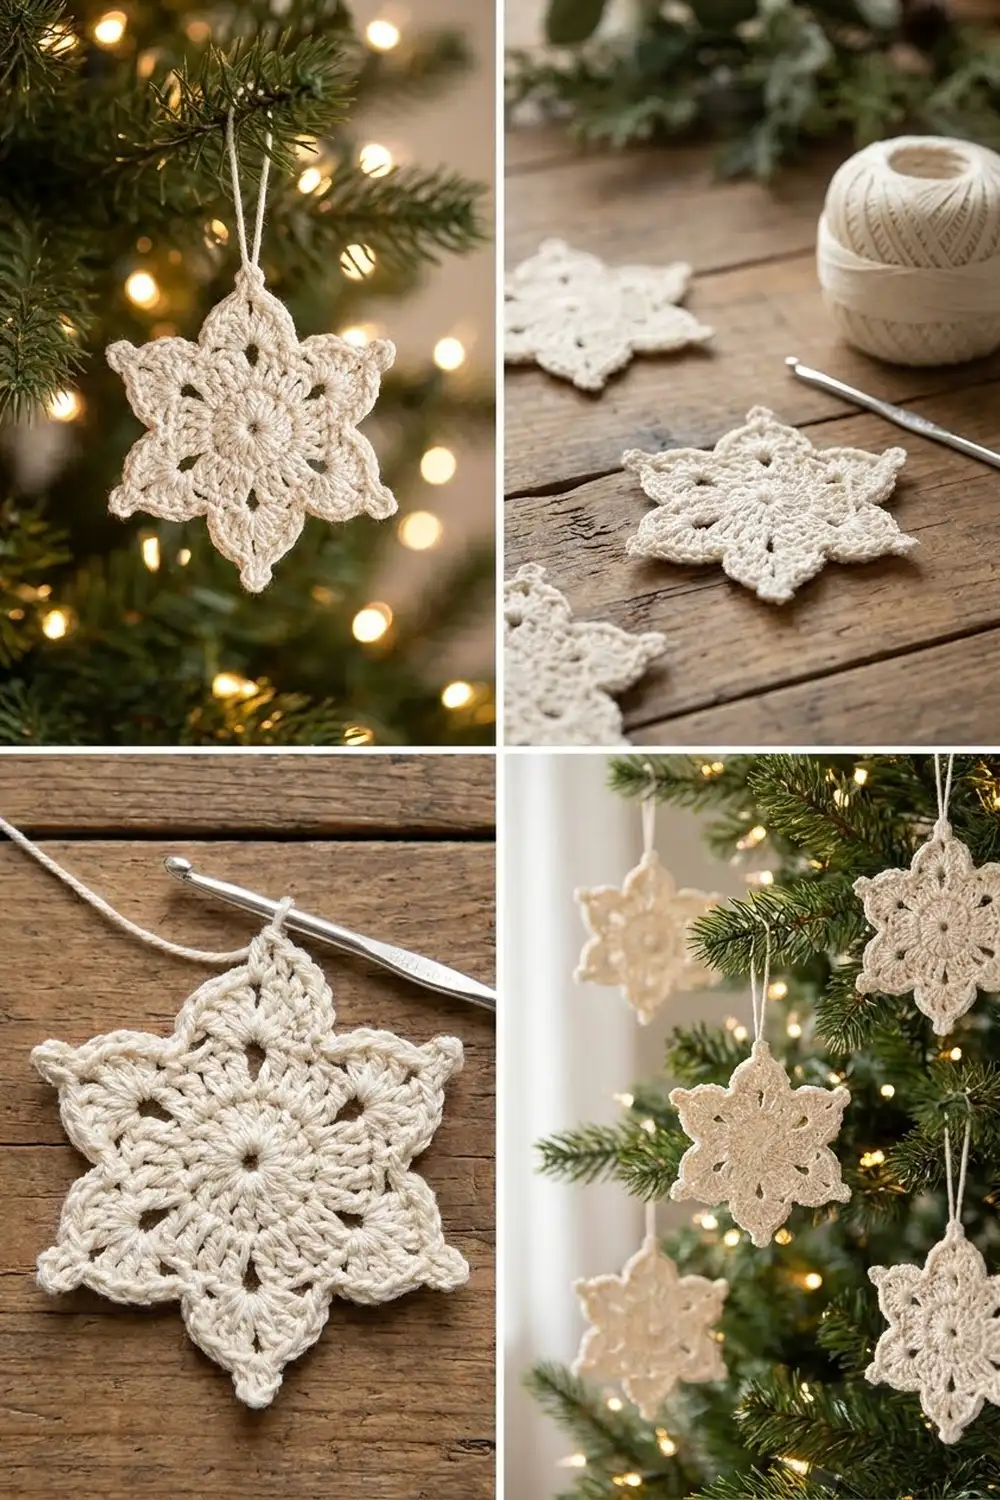
Everything in this snowflake follows one measurement chain. Start from a 0.6 in (1.5 cm) disk after Round 1 that grows to 1 in (2.5 cm) after Round 2. The 13-chain V loops of Round 3 place the six hexagon corners 2 in (5.1 cm) apart. Round 4’s 10-chain sides lock the frame in place, and the 8-chain spokes with their ch-5 clovers carry the points out to 4.25 in (10.8 cm).
If each checkpoint matches, the finished snowflake will too. Make one, measure it, then make a whole flurry for the tree.
Happy crocheting!