

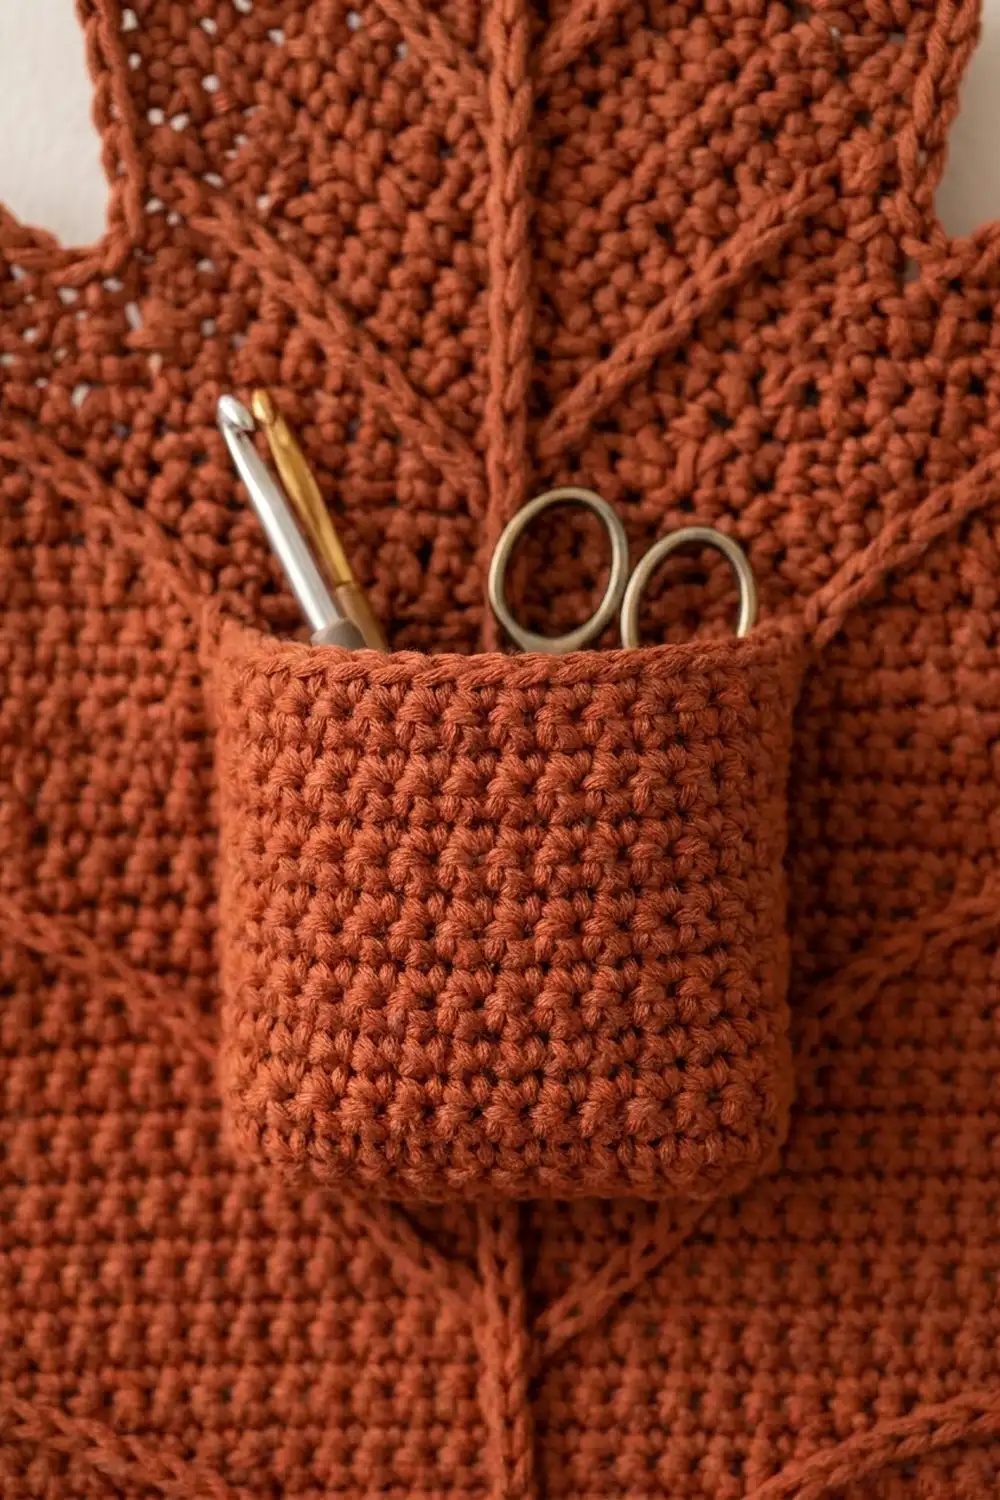
This maple leaf wall organizer is a large leaf-shaped panel in warm terracotta. It has raised slip-stitch veins, three small pockets for hooks and scissors, and a wide curved basket below for yarn balls. A short tab at the top wraps around a wooden ring so the organizer hangs flat on a wall hook.
The whole piece uses one color, a rust-terracotta cotton blend. All the texture comes from the stitches: dense single crochet for the leaf, surface slip stitch for the veins, and a small pointed-tooth border that gives the leaf its serrated edge.
This pattern uses US crochet terms. The finished leaf is about 16.6 in (42.2 cm) wide and 16.25 in (41.3 cm) tall, measured from the bottom tooth to the base of the tab. The tab adds 1.5 in (3.8 cm), and the ring hangs above it.
You work the leaf flat in rows from the bottom tip upward, shaping the lobes as you go, and finish with the tab. Then you add the veins and a two-round border. The pockets and basket are worked in the round from oval bases and sewn onto the front.
Finished Size and Construction
- Finished size: 16.6 in (42.2 cm) wide x 16.25 in (41.3 cm) tall, plus a 1.5 in (3.8 cm) tab
- Skill level: Intermediate
- Terminology: US
- Yarn weight: Worsted (#4)
- Hook: 5.0 mm (H-8)
- Number of pieces: 5 (1 leaf panel with built-in tab, 3 small pockets, 1 basket)
- Layout: 3 small pockets side by side across the middle, with the basket centered below them
- Piece sizes: each small pocket is 3.1 in (7.9 cm) wide x 3 in (7.6 cm) tall when flattened; the basket is 9.7 in (24.6 cm) wide x 3.75 in (9.5 cm) tall
- Leaf size before border: 15.1 in (38.4 cm) wide x 15.5 in (39.4 cm) tall
- Border depth: 0.75 in (1.9 cm) to the tooth tips
Materials
Choose a smooth worsted-weight cotton or cotton blend. Cotton holds the leaf shape and keeps the pockets firm when they’re full. Avoid fuzzy yarns, because they blur the vein lines.
- Terracotta (rust): 175 g, about 330 m (361 yd)
Tools:
- 5.0 mm (H-8) crochet hook
- Tapestry needle
- 6 locking stitch markers
- Wooden ring, 3 in (7.6 cm) in diameter
- Optional: a leather strap, 10 in (25.4 cm) long, and a wall hook
- Rust-proof pins and a blocking mat
- Measuring tape
The yarn amount includes a margin of about 25 g for a swatch and for differences in tension.
Abbreviations (US Terms)
- ch – chain
- sc – single crochet
- sc2tog – single crochet 2 together
- sl st – slip stitch
- BLO – back loop only
- st(s) – stitch(es)
- RS – right side
Point (pt): Ch 3, sl st in 2nd ch from hook, sc in next ch. This makes one pointed tooth about 0.5 in (1.3 cm) long. A point is worked between stitches and does not count as a stitch.
Surface slip stitch: Hold the yarn behind the fabric. Insert the hook from front to back between stitches, pull up a loop, and draw it through the loop on the hook. Repeat to build a raised chain line on the front.
Gauge and Checkpoints
Gauge: 14 sc and 16 rows = 4 in (10.2 cm).
Make one small pocket first. It’s quick and checks your gauge in the round. Flattened, it should measure 3.1 in (7.9 cm) wide.
Leaf checkpoints:
- After Row 14: 29 sts, 8.3 in (21.1 cm) wide, 3.5 in (8.9 cm) tall
- After Row 34: 53 sts, 15.1 in (38.4 cm) wide, 8.5 in (21.6 cm) tall
- After Row 62: 15.5 in (39.4 cm) tall
If your work is too big, go down one hook size. If it’s too small, go up one size. An error of 1/4 in (0.6 cm) at Row 14 grows to about 1/2 in (1.3 cm) by Row 34, so measure early.
Leaf Panel
The ch 1 at the start of a row does not count as a stitch. Turn at the end of every row.
Bottom Point and Lower Lobes
Row 1 (RS): Ch 2, 3 sc in 2nd ch from hook. (3 sts)
Row 2: Ch 1, 2 sc in first st, sc in next st, 2 sc in last st. (5 sts)
Rows 3–20: Ch 1, 2 sc in first st, sc in each st to last st, 2 sc in last st. (Row 3: 7 sts. Row 14: 29 sts. Row 20: 41 sts)
Row 20 forms the tips of the lower lobes.
Rows 21–24: Ch 1, sc2tog, sc in each st to last 2 sts, sc2tog. (Row 21: 39 sts. Row 24: 33 sts)
Main Side Lobes
Row 25: Ch 7, sc in 2nd ch from hook and in next 5 ch, sc in each of next 33 sts. (39 sts = 33 worked into existing sts + 6 new)
Row 26: Ch 7, sc in 2nd ch from hook and in next 5 ch, sc in each of next 39 sts. (45 sts = 39 worked into existing sts + 6 new)
Row 27: Ch 1, 2 sc in first st, sc in each st to last st, 2 sc in last st. (47 sts)
Row 28: Ch 1, sc in each st across. (47 sts)
Rows 29–34: Repeat Rows 27–28 three more times. (Row 29: 49 sts. Row 31: 51 sts. Row 33: 53 sts. Row 34: 53 sts)
Row 34 is the widest row. It forms the main lobe tips.
Rows 35–42: Ch 1, sc2tog, sc in each st to last 2 sts, sc2tog. (Row 35: 51 sts. Row 42: 37 sts)
Top Lobe
Row 43: Do not ch 1. Sl st in first 7 sts, ch 1, sc in same st as last sl st and in next 24 sts. Leave the last 6 sts unworked. (25 sc)
On one side, the first 6 sl sts form a notch between the side lobe and the top lobe. On the other side, the 6 unworked sts form the matching notch.
Rows 44–52: Ch 1, sc in each st across. (25 sts)
Rows 53–62: Ch 1, sc2tog, sc in each st to last 2 sts, sc2tog. (Row 53: 23 sts. Row 62: 5 sts)
Hanging Tab
Rows 63–74: Ch 1, sc in each st across. (5 sts)
The tab is 1.4 in (3.6 cm) wide and 3 in (7.6 cm) long. Fasten off, leaving a 12 in (30.5 cm) tail.
Veins
Work all the veins in surface slip stitch on the RS. Every row from 1 to 62 has an odd stitch count, so the center stitch always falls in a single straight column.
- Center vein: Start in the center column at Row 2. Work 1 surface sl st per row straight up to Row 62.
- Lower lobe veins: Start at the center vein at Row 10. Move 2 sts outward per row, ending at the edge stitch of Row 20. Repeat on the other side.
- Main lobe veins: Start at the center vein at Row 16. Move 3 sts outward every 2 rows until you reach the edge at Row 34. Repeat on the other side.
- Top lobe veins: Start at the center vein at Row 46. Move 1 st outward per row for 8 rows, ending 2 sts in from the edge at Row 54. Repeat on the other side.
Keep the loops relaxed so the panel stays flat. Weave in the ends on the wrong side.
Small Pockets (make 3)
Rnd 1: Ch 8, sc in 2nd ch from hook and in next 5 ch, 3 sc in last ch. Working along the opposite side of the chain, sc in next 5 ch, 2 sc in last ch. Join with sl st to first sc. (16 sts)
Rnd 2: Ch 1, 2 sc in first st, sc in next 5 sts, 2 sc in each of next 3 sts, sc in next 5 sts, 2 sc in each of last 2 sts. Join. (22 sts)
Rnd 3: Ch 1, sc in BLO of each st around. Join. (22 sts) Working in the back loops turns the base upward into the wall.
Rnds 4–14: Ch 1, sc in each st around. Join. (22 sts)
Rnd 15: Sl st in each st around to make a firm rim. (22 sl sts)
Fasten off, leaving an 18 in (45.7 cm) tail. Flatten the pocket so the long side of the oval base runs left to right. It should measure 3.1 in (7.9 cm) wide and 3 in (7.6 cm) tall.
Basket Pocket (make 1)
Rnd 1: Ch 31, sc in 2nd ch from hook and in next 28 ch, 3 sc in last ch. Working along the opposite side of the chain, sc in next 28 ch, 2 sc in last ch. Join. (62 sts)
Rnd 2: Ch 1, 2 sc in first st, sc in next 28 sts, 2 sc in each of next 3 sts, sc in next 28 sts, 2 sc in each of last 2 sts. Join. (68 sts)
Rnd 3: Ch 1, sc in BLO of each st around. Join. (68 sts)
Rnds 4–17: Ch 1, sc in each st around. Join. (68 sts)
Rnd 18: Sl st in each st around. (68 sl sts)
Fasten off, leaving a 30 in (76.2 cm) tail. Flattened, the basket measures 9.7 in (24.6 cm) wide and 3.75 in (9.5 cm) tall.
Make All Pieces
All pieces are worked in Terracotta:
- Leaf panel with tab, veins and border: 1 piece, about 80 g
- Small pockets: 3 pieces, about 13 g each (39 g total)
- Basket: 1 piece, about 30 g
Layout on the front of the leaf, RS facing:
             [ ring ]
             [ tab  ]
             top lobe
       [P1] [P2] [P3]      Rows 32-44
      [    BASKET    ]     Rows 16-31
            bottom tip
All the pockets are centered on the center vein. The three small pockets touch each other and together span 9.3 in (23.6 cm). At Row 42 the leaf is 37 sts, or 10.6 in (26.9 cm), wide, so the pockets fit inside the edge.
Joining
Finish the border and blocking first, then sew the pockets onto the flat panel.
Method: Whipstitch with the yarn tails and a tapestry needle.
- Pin the basket with its base on Row 16 and its rim on Row 31.
- The basket’s back wall is 34 sts, half of the 68-st round. Sew down both side fold columns and the full back edge of the base. Catch 1 leaf stitch or row-end for every pocket stitch or round.
- Leave the front wall and rim free so the front curves outward.
- Pin P2 above the basket with its base on Row 32. Pin P1 and P3 on either side so they touch P2.
- Sew each small pocket the same way: down both fold columns and along the 11-st back edge of the base.
Pull each stitch snug, but not so tight that the leaf puckers. Checkpoint: the organizer should still lie flat at 16.6 in (42.2 cm) wide.
Border
Border gauge: Work 1 sc into each row-end, each stitch and each chain free loop. On the diagonal edges, each row-end covers about 0.38 in (1.0 cm), so 1 sc per row-end keeps the edge flat.
Round 1: With RS facing, join yarn with an sc in the free loop of the foundation ch at the bottom tip, then work 2 more sc in the same ch.
- Side extended in Row 25: 24 row-ends (Rows 1–24), 6 chain free loops, then 18 row-ends (Rows 25–42) = 48 sc
- Side extended in Row 26: 25 row-ends (Rows 1–25), 6 chain free loops, then 17 row-ends (Rows 26–42) = 48 sc
- Main lobe tip: on each side, work 3 sc into the Row 34 row-end instead of 1 sc (adds 2 per side)
- Notch: on each side, 6 sc into the 6 sts across the top of Row 42
- Top lobe: on each side, 20 row-ends (Rows 43–62)
Carry straight across under the tab without adding stitches. Join with sl st to the first sc.
Per side: 48 + 6 + 20 = 74 sc, plus 2 extra at the lobe tip = 76 sc.
Round 1 total: 76 + 76 + 3 tip sc = 155 sts.
Round 2: Ch 1, sc in first 2 sts, pt, *sc in next 5 sts, pt; repeat from * 29 more times, sc in last 3 sts. Join. (155 sc and 31 points)
Why the math works: 2 + (30 x 5) + 3 = 155, which matches Round 1 exactly. The first point sits just after the center tip stitch. The other points are spaced every 5 sts, about 1.4 in (3.6 cm) apart.
Tab: Pass the tab through the ring from front to back, fold it down, and whipstitch Row 74 to the back of Row 62. This leaves a 1.5 in (3.8 cm) loop.
Final Blocking
- Soak the leaf panel for 15 minutes, then roll it in a towel to press out the water.
- Pin it RS up to a 16.6 in (42.2 cm) x 16.25 in (41.3 cm) outline.
- Pin the bottom tip, the lower lobe tips, the main lobe tips and the top lobe first.
- Pin each tooth so it dries sharp.
- Straighten the center vein against a ruler.
- Let it dry completely, then sew on the pockets.
- Stuff the pockets lightly with tissue and steam them from above to set their shape.
Final Quality-Control Checklist
- The leaf is 16.6 in (42.2 cm) wide, and both halves are the same.
- The center vein runs straight from the tip to the tab.
- Round 2 has 31 evenly spaced points.
- The three small pockets are level, touching and open at the top.
- The basket front curves outward, and its back is fully sewn.
- The tab is secure around the ring.
- All ends are woven in.
Troubleshooting
- Lobes curl: Round 1 is too tight. Rework it with a hook 0.5 mm larger.
- Edge ripples: There are extra border stitches. Recount to 76 per side.
- Veins pucker: Take them out and redo them with looser loops.
- Pockets gape away from the leaf: Add a second line of whipstitch down the fold columns.
- The organizer hangs crooked: Center the tab on the ring and check that the pockets are centered on the vein.
Care
Empty the pockets, hand wash in cool water, and lay flat to dry. Reshape the points while the piece is damp.

Final Notes
Everything follows from gauge: 14 sc = 4 in (10.2 cm). At that gauge the leaf is 8.3 in (21.1 cm) wide at Row 14 and 15.1 in (38.4 cm) wide at Row 34. It reaches 15.5 in (39.4 cm) tall at Row 62. The border of 155 sc and 31 points brings the width to 16.6 in (42.2 cm). The three 3.1 in (7.9 cm) pockets and the 9.7 in (24.6 cm) basket fit inside that outline.
Happy crocheting!