

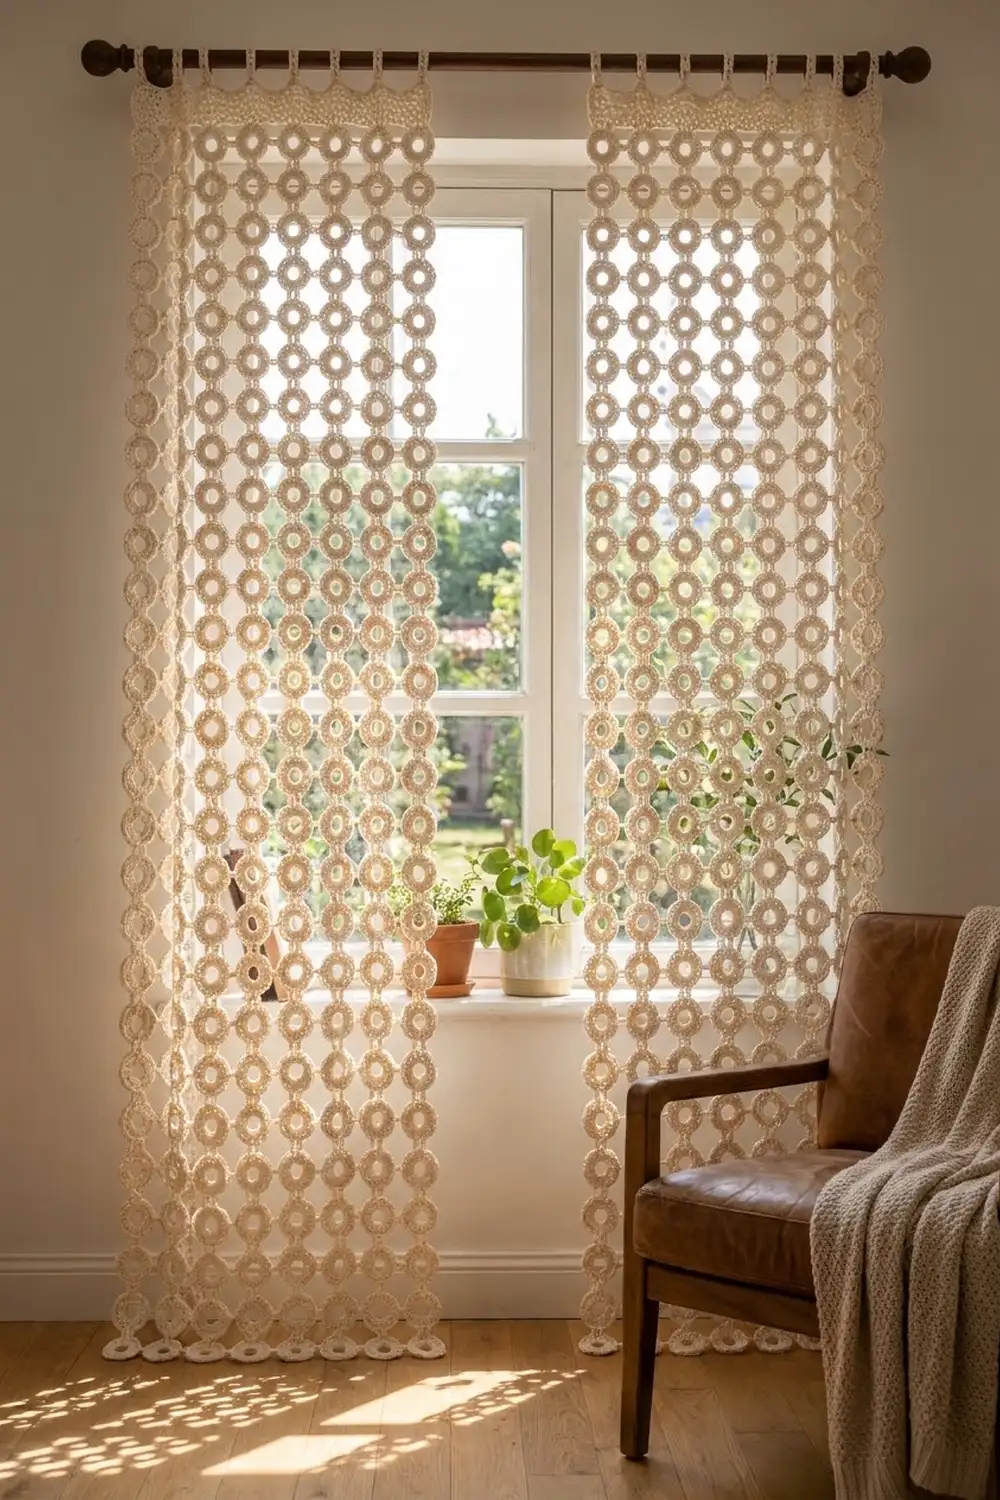
This curtain panel is made from small, solid crochet rings linked into an open grid. Each ring is a plump band of single crochet around a round center hole, and short doubled-chain bridges join every ring to its neighbors above, below, left, and right. When it hangs in a window, light comes through both the ring centers and the square gaps between rings.
The sample is worked in one color, a soft ivory or natural cream cotton. The look is boho and minimal. Cotton gives the stitches clear definition and lets the panel hang straight without stretching much.
This pattern uses US crochet terms. One finished panel measures 34.5 in (87.6 cm) wide and 76.5 in (194.3 cm) tall across the rings, or 78.25 in (198.8 cm) tall including the hanging tabs. The pair shown in the photos is simply two identical panels.
Construction is simple. You make 220 identical rings in three rounds each. From the second ring on, you join each one to its finished neighbors as you work its last round. Last, you crochet ten folded hanging tabs onto the top row of rings, then block the panel.
Finished Size and Construction
- Finished size: 34.5 in x 76.5 in (87.6 cm x 194.3 cm) across the rings; 78.25 in (198.8 cm) tall with tabs
- Skill level: Easy to intermediate (easy stitches, many repeats)
- Terminology: US
- Yarn weight: Worsted (#4), 100% cotton
- Hook: 5 mm (H-8)
- Number of pieces: 220 rings
- Layout: 10 rings wide x 22 rings tall
- Piece size: 3 in (7.6 cm) diameter ring, center hole about 1.25 in (3.2 cm)
- Bridge length: 0.5 in (1.3 cm), giving a ring-to-ring pitch of 3.5 in (8.9 cm)
- Size before border: 34.5 in x 76.5 in (87.6 cm x 194.3 cm)
- Border depth: 1.75 in (4.4 cm) of hanging tabs, top edge only
Materials
Choose a smooth, mercerized or combed worsted-weight cotton. Avoid acrylic. It sags under the weight of a long panel and softens the ring outlines. Use the same dye lot for every ring if you can, because 220 small pieces show color shifts easily.
- Ivory / natural cream: 700 g, about 1,190 m (1,301 yd), for example 14 balls of 50 g / 85 m (93 yd)
Each ring takes about 4.1 m (4.5 yd), and the ten tabs together take about 40 m (44 yd). The quantity above includes a margin of roughly 25%. That covers gauge differences, swatching, and long tails for weaving in. Double everything for a pair of panels.
Tools:
- 5 mm (H-8) crochet hook
- 4 locking stitch markers
- Tapestry needle
- Measuring tape and a ruler
- Scissors
- Blocking mats or thick towels, rust-proof pins, spray bottle
- Curtain rod up to 1 in (2.5 cm) in diameter
Abbreviations (US Terms)
- ch – chain
- sl st – slip stitch
- sc – single crochet
- st(s) – stitch(es)
- rnd – round
- RS – right side
Special stitch – Bridge join (BJ): Work the anchor sc as usual. Then ch 2, sl st in the matching anchor sc of the finished neighbor ring, ch 2, and sl st in the top of the anchor sc you just made. This makes a doubled chain bridge about 0.5 in (1.3 cm) long. The bridge chains are not counted as stitches.
Anchor stitches: On Rnd 3, the 5th, 14th, 23rd, and 32nd sc are the anchors, exactly 9 sts apart. Holding the RS toward you with the round worked counterclockwise, call them A1 (top), A2 (left), A3 (bottom), and A4 (right).
Gauge and Checkpoints
Gauge: 16 sc x 18 rows = 4 in (10.2 cm) in sc worked flat with a 5 mm hook.
Make one complete test ring before starting the panel. It tells you much more than a flat swatch.
Checkpoints for one ring:
- After Rnd 1: about 2 in (5.1 cm) across, center hole about 1.25 in (3.2 cm)
- After Rnd 2: about 2.5 in (6.4 cm) across
- After Rnd 3: 3 in (7.6 cm) across, lying flat with no ruffling or cupping
A tolerance of ±1/8 in (0.3 cm) is fine. Errors add up over 22 rings, though, so stay close to the target.
If the ring is too big: go down to a 4.5 mm hook. If it is too small: go up to a 5.5 mm hook. If the ring ruffles, your tension tightened on Rnd 1; work those stitches a little looser. If it cups, check that you made all 6 increases on Rnds 2 and 3.
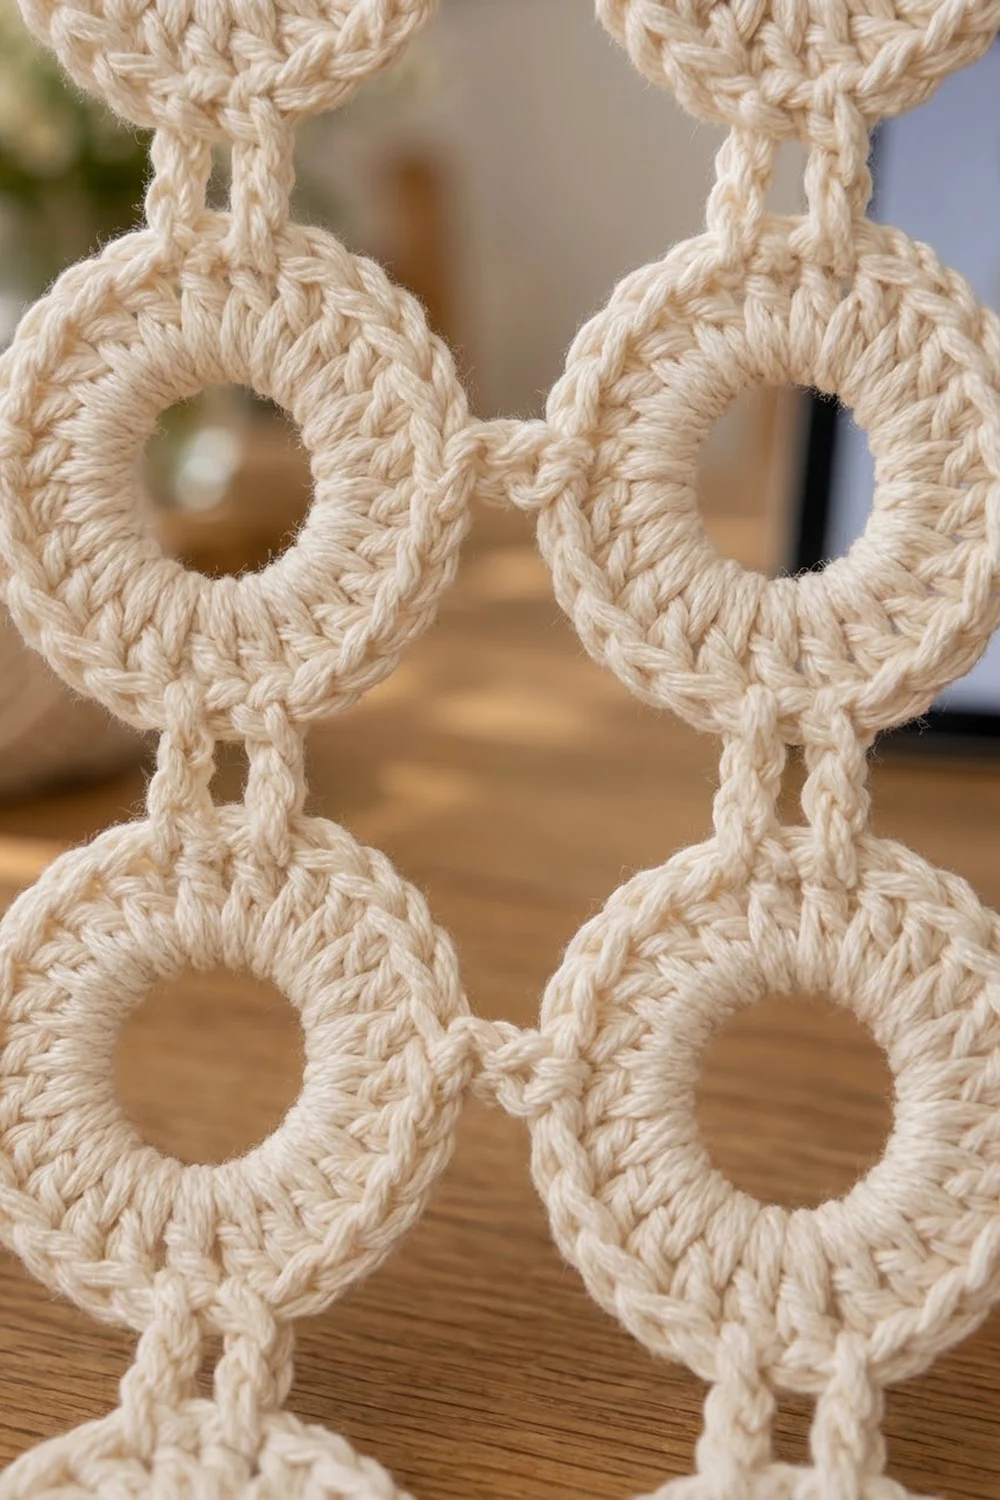
Ring Motif
Make 1 ring to the end with no joins. All other rings use the same rounds plus the joins described later.
Foundation: Ch 12, sl st in first ch to form a ring.
Rnd 1: Ch 1, work 24 sc into the ring over the chain, sl st in first sc to join. (24 sc)
Push the stitches together around the ring so they cover the chain completely.
Rnd 2 (growth): Ch 1, sc in next 3 sts, 2 sc in next st; repeat from * 5 more times, sl st in first sc. (30 sc)
Rnd 3 (growth): Ch 1, sc in next 4 sts, 2 sc in next st; repeat from * 5 more times, sl st in first sc. (36 sc)
As you work Rnd 3, place a marker in the 5th, 14th, 23rd, and 32nd sc. These are A1, A2, A3, and A4. Each anchor has 4 sts on each side before the next one, so 4 anchors x 9 sts = 36 sts.
Fasten off, leaving a 6 in (15.2 cm) tail. Weave in the starting tail now. Leave the final tail until the joins near it are done.
The ring is solid single crochet. Its outer edge stays smooth and rounded, and the center stays open.
Make All Pieces
You need 220 rings in ivory: 10 per row x 22 rows. Only the first ring is made on its own. Every other ring is joined while you work its Rnd 3.
Layout grid (O = ring, – and | = bridges; rows 4 to 21 repeat the same pattern):
Row 1:   O-O-O-O-O-O-O-O-O-O
         | | | | | | | | | |
Row 2:   O-O-O-O-O-O-O-O-O-O
         | | | | | | | | | |
Row 3:   O-O-O-O-O-O-O-O-O-O
          ... rows 4-21 ...
Row 22:  O-O-O-O-O-O-O-O-O-O
That gives 9 horizontal bridges per row x 22 rows = 198 horizontal bridges. It also gives 10 vertical bridges between each pair of rows x 21 gaps = 210 vertical bridges.
Joining
Method: join as you go with the Bridge join (BJ) on Rnd 3.
Order: Work across Row 1 from left to right, then across Row 2 from left to right, and so on. Lay the finished rows flat, RS up, next to you while you work.
Stitch-to-stitch logic:
- Row 1, ring 1: no joins.
- Row 1, rings 2–10: at A2 (the 14th sc), work BJ into A4 of the ring to the left.
- Rows 2–22, ring 1: at A1 (the 5th sc), work BJ into A3 of the ring above.
- Rows 2–22, rings 2–10: at A1, work BJ into A3 of the ring above. At A2, work BJ into A4 of the ring to the left.
A1 comes before A2 in the round, so each ring joins up first and then left. A ring never needs more than 2 joins while you work it. Its A3 and A4 stay free for the rings that come later. Each BJ links one anchor sc to one anchor sc, so the 36-st count of Rnd 3 does not change.
Tension: Keep the two ch-2 strands of each bridge snug but not tight. A tight bridge pulls the rings out of round and makes the panel narrower. A loose one lets the rings droop. Every bridge should measure 0.5 in (1.3 cm) between ring edges.
Size checkpoints:
- After Row 1: 10 x 3 in + 9 x 0.5 in = 34.5 in (87.6 cm) wide
- After Row 4: 4 x 3 in + 3 x 0.5 in = 13.5 in (34.3 cm) tall
- After Row 22: 22 x 3 in + 21 x 0.5 in = 76.5 in (194.3 cm) tall
Measure flat without stretching. If you are more than 1 in (2.5 cm) off by Row 4, look at your bridge tension before you go on.
Border: Hanging Tabs
The border is only on the top edge. The sides and bottom keep the natural scalloped outline of the rings.
Border gauge: the same as the main gauge, 16 sc x 18 rows = 4 in (10.2 cm). The tabs are worked flat in rows.
Per-side counts:
- Top: 10 rings x 7 sts per top arc = 70 sts, split into 10 tabs of 7 sts
- Left, right, bottom: 0 sts (no border)
The top arc of each Row 1 ring is 7 sts: A1 plus the 3 sts on each side of it.
Tab (make 10, one on each Row 1 ring):
Row 1: With RS facing, join yarn with a sc in the 3rd st before A1, sc in next 2 sts, sc in A1, sc in next 3 sts, turn. (7 sc)
Rows 2–16: Ch 1, sc in each st across, turn. (7 sc)
The strap now measures about 3.5 in (8.9 cm). Fold it toward the wrong side. Line the last row up with the base of Row 1 on the back of the ring, and sl st through both layers across all 7 sts. Fasten off and weave in the end.
The folded loop stands about 1.75 in (4.4 cm) above the ring and fits a rod up to 1 in (2.5 cm) in diameter. For a thicker rod, add 4 rows for each extra 1/4 in (0.6 cm) of rod diameter.
Why the math works: Each tab is 7 sts, or 1.75 in (4.4 cm), wide and sits centered on A1. The rings are on a 3.5 in (8.9 cm) pitch, so the tabs are also exactly 3.5 in (8.9 cm) apart, center to center. The ten tabs carry equal weight, so the columns hang straight, with no extra stitches added between rings.
Final Blocking
- Weave in all remaining tails along the back of the Rnd 3 stitches. Do not run them through the bridges.
- Soak the panel in cool water with a little wool wash for 15 minutes.
- Press out the water gently; do not wring it. Roll the panel in towels to remove more water.
- Lay it flat on mats or towels, working in sections if you need to.
- Pin the outer corners to 34.5 in x 76.5 in (87.6 cm x 194.3 cm).
- Check that each column of rings is straight and each row is level. Use a ruler to set bridges at 0.5 in (1.3 cm).
- Nudge each ring round with your fingers and open the center holes evenly.
- Let it dry completely. Then hang it and let it settle for a day.
Final Quality-Control Checklist
- [ ] 220 rings, 10 wide x 22 tall
- [ ] Each ring has 36 sc on Rnd 3 and measures 3 in (7.6 cm)
- [ ] 198 horizontal and 210 vertical bridges, no missing joins
- [ ] All bridges about 0.5 in (1.3 cm) long
- [ ] Width 34.5 in (87.6 cm), height 76.5 in (194.3 cm) across the rings
- [ ] 10 tabs of 7 sts each, centered on A1
- [ ] All tails woven into ring stitches, none visible from the front
- [ ] Rings lie flat with no cupping or ruffles
Troubleshooting
Ring ruffles: Rnd 1 is too tight around the chain ring. Redo it more loosely, or use ch 13 for the foundation.
Ring cups: An increase is missing. Count each round; Rnd 2 is 30 sc and Rnd 3 is 36 sc.
Panel leans to one side: You attached a ring to the wrong anchor. Check that A1 always joins A3 above and A2 always joins A4 on the left.
Panel too long: If each ring is 1/8 in (0.3 cm) too large, 22 rings add 2.75 in (7.0 cm). Go down a hook size for the remaining rings, or leave off a final row.
Bridges twisted: Keep the RS facing up on both rings when you work each BJ.
Tabs slip on the rod: Add 2 rows to each tab for more ease, or use a smaller rod.
Care
Hand wash cool and dry flat, reshaping the rings while damp. Do not hang a wet panel; the extra weight will stretch the bridges.
Final Notes
The whole panel comes from a short chain of measurements. Each ring is 36 sts and 3 in (7.6 cm), and each bridge is 0.5 in (1.3 cm). That gives a 3.5 in (8.9 cm) pitch. Ten rings across make 34.5 in (87.6 cm), and 22 rings down make 76.5 in (194.3 cm). The 70-st tab border adds 1.75 in (4.4 cm), for 78.25 in (198.8 cm) in total. Check your first ring, check again after Row 4, and the rest of the panel will follow.
Happy crocheting!