

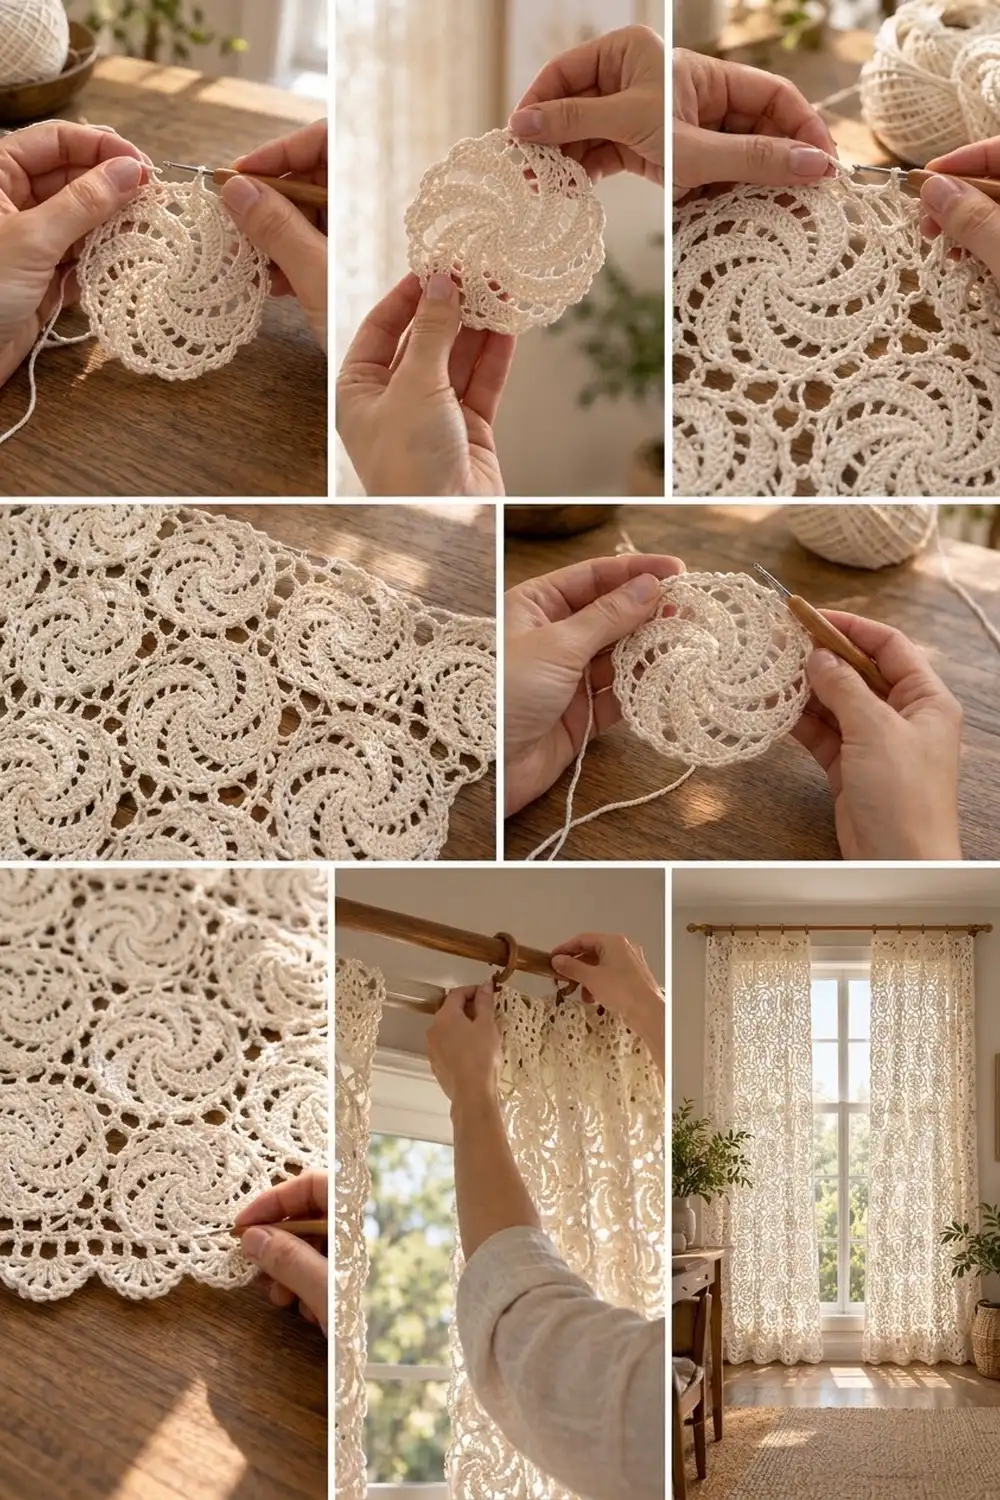
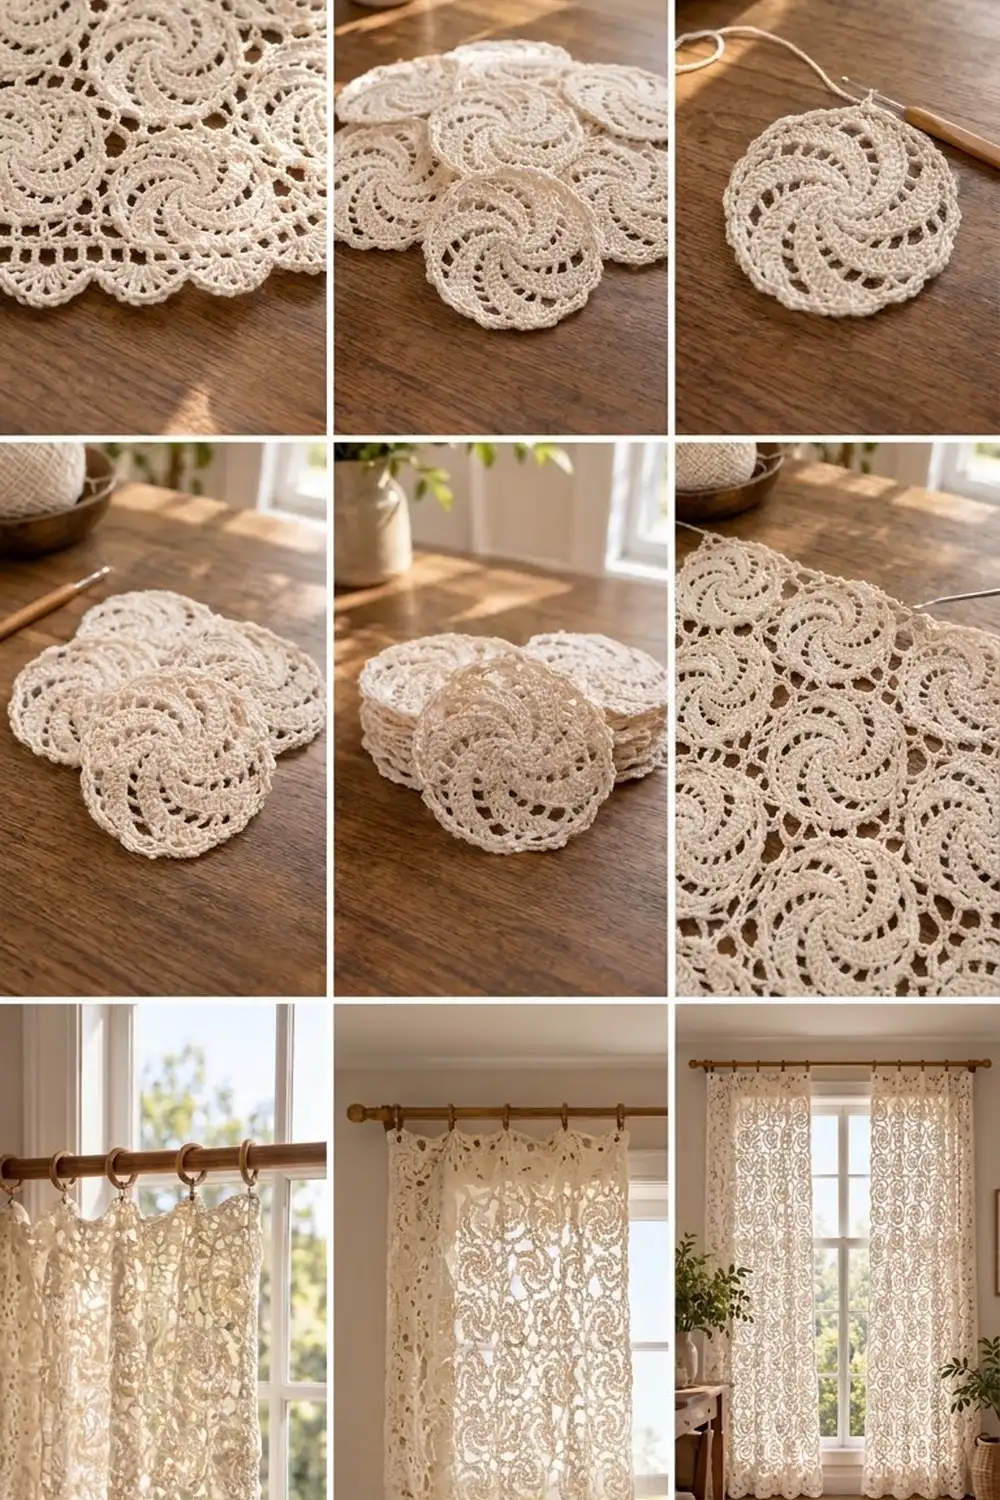
This curtain panel is made of round swirl motifs. Each motif has eight curved arms of double crochet that spin out from a small solid center, with chain spaces between the arms that let light through. The motifs are joined in a straight grid. Where four circles meet, a small open window is left, and the circles along the bottom edge form a soft scalloped hem.
The panel is worked in one color: a warm ivory cotton. In a sunny window it reads as airy, cottage-style lace, and the single color keeps the attention on the swirling texture. The pattern uses US crochet terms throughout.
One finished panel measures about 43 x 85 in (109.2 x 215.9 cm), which suits a standard floor-length window. The photos show two identical panels hung as a pair. This pattern covers one panel, so make it twice for a pair.
Here’s how it’s built: you crochet 98 swirl motifs and join each new one to its neighbors in its last round (join-as-you-go). Then you add a two-round border that follows the curves of the circles, and finally you block the panel.
Finished Size and Construction
- Finished size (one panel): 43 x 85 in (109.2 x 215.9 cm)
- Skill level: Intermediate
- Terminology: US crochet terms
- Yarn weight: Sport weight (#2) mercerized cotton
- Hook: 3.5 mm (E-4)
- Number of pieces: 98 round motifs per panel
- Layout: 7 motifs across x 14 motifs down
- Motif size: 6 in (15.2 cm) across, measured loop tip to loop tip
- Size before border: 42 x 84 in (106.7 x 213.4 cm)
- Border depth: about 0.5 in (1.3 cm) on each edge
Materials
Yarn: Use a smooth mercerized cotton in sport weight, about 150 m per 50 g. Mercerized cotton shows the swirls clearly, holds its shape when hung, and survives washing. Avoid stretchy or fuzzy fibers, because a long hanging panel will sag under its own weight.
- Ivory (one panel): 350 g, approximately 1,050 m
- Ivory (pair of panels): 700 g, approximately 2,100 m
Each motif uses about 8 m, and the border uses about 60 m. These quantities include a margin of about 20% for swatching, weaving in ends, and differences in tension.
Tools:
- 3.5 mm (E-4) crochet hook
- Tapestry needle
- Scissors
- Rustproof pins and blocking mats
- Spray bottle
- Tape measure
- Stitch markers
- 8 curtain ring clips per panel
Abbreviations (US Terms)
- ch – chain
- sl st – slip stitch
- sc – single crochet
- dc – double crochet
- sp(s) – space(s)
- st(s) – stitch(es)
- rep – repeat
- sc2tog across loops – insert hook in first loop, yarn over and pull up a loop; insert hook in second loop, yarn over and pull up a loop; yarn over and pull through all 3 loops on hook
- JAYGO loop (join-as-you-go) – instead of ch 6, work ch 3, sl st into the matching ch-6 loop of the finished neighbor motif, ch 3
- Picot – ch 3, sl st in 3rd ch from hook
Gauge and Checkpoints
Before starting the panel, make one full test motif and block it. Small errors add up across the panel: an extra 0.25 in (0.6 cm) on each motif adds 1.75 in (4.4 cm) across the width and 3.5 in (8.9 cm) down the length.
Measurement checkpoints (blocked, measured across the center):
- After Round 3: 2.75 in (7.0 cm)
- After Round 6: 5.25 in (13.3 cm)
- After Round 7: 6 in (15.2 cm), loop tip to loop tip
If your motif is too big: switch to a 3.25 mm (D-3) hook, or snug up your chains. Oversized motifs usually come from loose ch-6 loops in Round 7.
If your motif is too small: switch to a 3.75 mm (F-5) hook. Check that you’re pulling each dc up to its full height.
Swirl Motif
The swirl comes from shifting each arm one stitch forward on every round: skip the first dc of the arm, work over the rest, and add 2 dc in the next space.
Round 1: Make a magic ring. Ch 3 (counts as first dc), work 15 dc in ring, sl st to top of ch-3. Pull the ring closed. (16 dc)
Round 2: Ch 3 (counts as dc), dc in next st, ch 2, dc in each of next 2 sts, ch 2; rep from * 6 more times, sl st to top of ch-3. (16 dc in 8 arms of 2 dc, 8 ch-2 sps)*
Round 3: Sl st in next dc, ch 3 (counts as dc), 2 dc in next ch-2 sp, ch 2, skip next dc, dc in next dc, 2 dc in next ch-2 sp, ch 2; rep from * 6 more times, sl st to top of ch-3. (24 dc in 8 arms of 3 dc, 8 ch-2 sps)*
Round 4: Sl st in next dc, ch 3 (counts as dc), dc in next dc, 2 dc in next ch-2 sp, ch 3, skip next dc, dc in each of next 2 dc, 2 dc in next ch-2 sp, ch 3; rep from * 6 more times, sl st to top of ch-3. (32 dc in 8 arms of 4 dc, 8 ch-3 sps)*
Round 5: Sl st in next dc, ch 3 (counts as dc), dc in each of next 2 dc, 2 dc in next ch-3 sp, ch 3, skip next dc, dc in each of next 3 dc, 2 dc in next ch-3 sp, ch 3; rep from * 6 more times, sl st to top of ch-3. (40 dc in 8 arms of 5 dc, 8 ch-3 sps)*
Round 6: Sl st in next dc, ch 3 (counts as dc), dc in each of next 3 dc, 2 dc in next ch-3 sp, ch 4, skip next dc, dc in each of next 4 dc, 2 dc in next ch-3 sp, ch 4; rep from * 6 more times, sl st to top of ch-3. (48 dc in 8 arms of 6 dc, 8 ch-4 sps)*
Checkpoint: you should see eight curved arms, all leaning the same way, and the motif should measure 5.25 in (13.3 cm).
Round 7 (loop round): Sl st in each of next 2 dc (you are now in the 3rd dc of the arm), ch 1, sc in same st, ch 6, sc in next ch-4 sp, ch 6, sc in 3rd dc of next arm, ch 6, sc in next ch-4 sp, ch 6; rep from * 6 more times, sl st to first sc. Fasten off. (16 sc, 16 ch-6 loops)*
Motif sides: Each loop is the ch-6 that follows an sc. Divide the 16 loops into four sides of 4 loops each, which is 2 arms per side. Loops 2 and 3 of a side are the joining loops. Loops 1 and 4 are never joined. Inside the panel they frame the open windows, and on the outer edges they become border anchors.
Make All Pieces
You need 98 ivory motifs per panel (196 for a pair). Make the first one complete as written. Make all the others with Round 7 joined to their neighbors as you go.
Layout grid (7 across x 14 down, O = one motif):
Row 1:  O O O O O O O
Row 2:  O O O O O O O
Row 3:  O O O O O O O
Row 4:  O O O O O O O
Row 5:  O O O O O O O
Row 6:  O O O O O O O
Row 7:  O O O O O O O
Row 8:  O O O O O O O
Row 9:  O O O O O O O
Row 10: O O O O O O O
Row 11: O O O O O O O
Row 12: O O O O O O O
Row 13: O O O O O O O
Row 14: O O O O O O O
Row 1 is the top edge of the curtain, and Row 14 is the scalloped hem.
Joining
Method: Join-as-you-go in Round 7. Work Rounds 1–6 of the new motif as usual. In Round 7, go around normally until you reach the side that faces a finished motif. On that side:
- Loop 1: plain ch 6
- Loops 2 and 3: JAYGO loops
- Loop 4: plain ch 6
Stitch-to-stitch logic: The new motif’s loop 2 joins the neighbor’s loop 3, and the new loop 3 joins the neighbor’s loop 2, because the two motifs face each other mirror-wise. Each shared side has exactly 2 connection points, and the free loops 1 and 4 line up across the seam.
Which sides to join:
- In Row 1, each motif joins to its left neighbor only.
- The first motif of each later row joins to the motif above it only.
- Every other motif joins on two consecutive sides, left and above, for 4 sl st joins in total.
Don’t join diagonal neighbors. That’s what leaves the open window where four circles meet.
Tension: Each JAYGO loop should be the same length as a plain ch-6 loop. Before joining each motif, check that it’s right side up and that its swirl spins the same way as the others.
Size checkpoint: A finished Row 1 should measure 42 in (106.7 cm) wide. After 4 rows the length should be 24 in (61.0 cm). With all 14 rows done, the panel should measure 42 x 84 in (106.7 x 213.4 cm) when laid flat without stretching.
Border
The border runs all the way around the panel. It follows the outer curve of each circle and dips into the notch between neighboring motifs, which keeps the scalloped look on every edge, including the hem.
Border gauge: Each ch-6 space, once filled with 6 sc and a picot, covers about 1.2 in (3.0 cm) of edge. That’s the same as the spacing between loop tips on a 6 in (15.2 cm) motif.
Per-side count: Each motif has 4 outward loops per side (one full side). Corner motifs have two outward sides, and each side’s 4 loops are counted only once, on that side, so no corner loop is counted twice.
Round 1: With the right side facing, join yarn with sc in loop 1 of the top side of the top-left motif. Then work the repeat below across the top edge:
[Ch 6, sc in next outward loop] 3 times; ch 6, sc2tog across the two free notch loops (the loop of this motif beside the join, then the matching loop of the next motif); ch 6, sc in loop 1 of the next motif’s outward side; rep from * across, ending after the last motif’s 4th outward loop.
At each corner, ch 6 and sc in loop 1 of the corner motif’s next side. Work every side the same way. To finish, ch 6 and sl st to the first sc.
Counts for Round 1:
- Top and bottom (each): 7 x 4 = 28 loop sc, plus 6 notch sc2tog (one per seam, shown separately and not included in the 28) = 34 anchors and 33 ch-6 sps
- Left and right sides (each): 14 x 4 = 56 loop sc, plus 13 notch sc2tog = 69 anchors and 68 ch-6 sps
- Corners: 4 ch-6 sps
- Total: 206 anchors and 206 ch-6 sps (33 + 33 + 68 + 68 + 4 = 206)
Round 2: Sl st into the first ch-6 sp, ch 1. Work (3 sc, picot, 3 sc) in every ch-6 sp around, including the corners. Sl st to first sc and fasten off.
Counts for Round 2:
- Top and bottom (each): 33 x 6 = 198 sc and 33 picots
- Left and right sides (each): 68 x 6 = 408 sc and 68 picots
- Corners: 4 x 6 = 24 sc and 4 picots
- Total: 198 + 198 + 408 + 408 + 24 = 1,236 sc and 206 picots
Why the math works: The ch-6 spaces match the loop spacing, so the border neither cinches nor ruffles. Six sc fill six chains one-to-one. Each sc2tog pulls the two notch loops together into a neat valley, which is what makes the scallops. The border adds about 0.5 in (1.3 cm) on each edge, so 42 x 84 in (106.7 x 213.4 cm) becomes 43 x 85 in (109.2 x 215.9 cm).
Final Blocking
- Weave in all ends, running each tail back along a dc arm so it doesn’t show against the light.
- Lay the panel right side up on mats or a towel-covered floor.
- Pat it out to 43 x 85 in (109.2 x 215.9 cm), checking both long edges and both short edges.
- Pin the corners first, then the midpoint of each side, then each notch valley.
- Ease the arms of any lopsided motif into an even pinwheel.
- Spray until damp but not dripping.
- Let it dry completely (12–24 hours) before unpinning.
- Don’t pin the length beyond 85 in (215.9 cm). Cotton lace drops slightly once it’s hung.
Final Quality-Control Checklist
- All 98 motifs have 8 arms swirling in the same direction
- Every motif measures 6 in (15.2 cm)
- Each shared side has exactly 2 joins (loops 2 and 3)
- No diagonal neighbors are joined
- Border Round 1 has 206 ch-6 sps, and Round 2 has 206 picots
- The hem shows 7 even scallops, one per motif
- The panel measures 43 x 85 in (109.2 x 215.9 cm)
- All ends are secure and hidden
Troubleshooting
The arms look straight instead of swirled: Each arm must start in its 2nd dc. Don’t skip the opening sl st.
The motif cups: The chain spaces are too tight. Loosen them, or go up a hook size.
The motif ruffles: The chains are too loose. Snug them up, or use a 3.25 mm (D-3) hook.
The panel puckers at the seams: The JAYGO loops are too short. Make each one match a plain ch-6 loop.
The border waves: Check that each space has exactly 6 sc plus 1 picot, and that every notch has an sc2tog.
The panel stretches when hung: Re-block it, and spread the weight across all 8 clips.
Care
Hand wash in cool water with a mild detergent, roll in a towel to press out the water, and dry flat. Re-block lightly before hanging.
Final Notes
The measurement chain is simple. A 6 in (15.2 cm) motif, set 7 across and 14 down, makes a 42 x 84 in (106.7 x 213.4 cm) panel. The two-round border adds 0.5 in (1.3 cm) on each edge, for a finished size of 43 x 85 in (109.2 x 215.9 cm). Check your test motif, keep your joins as long as your plain loops, and count the border spaces. To hang the panel, clip one ring at each top corner and one at each of the 6 notch valleys along the top edge.
Happy crocheting!