

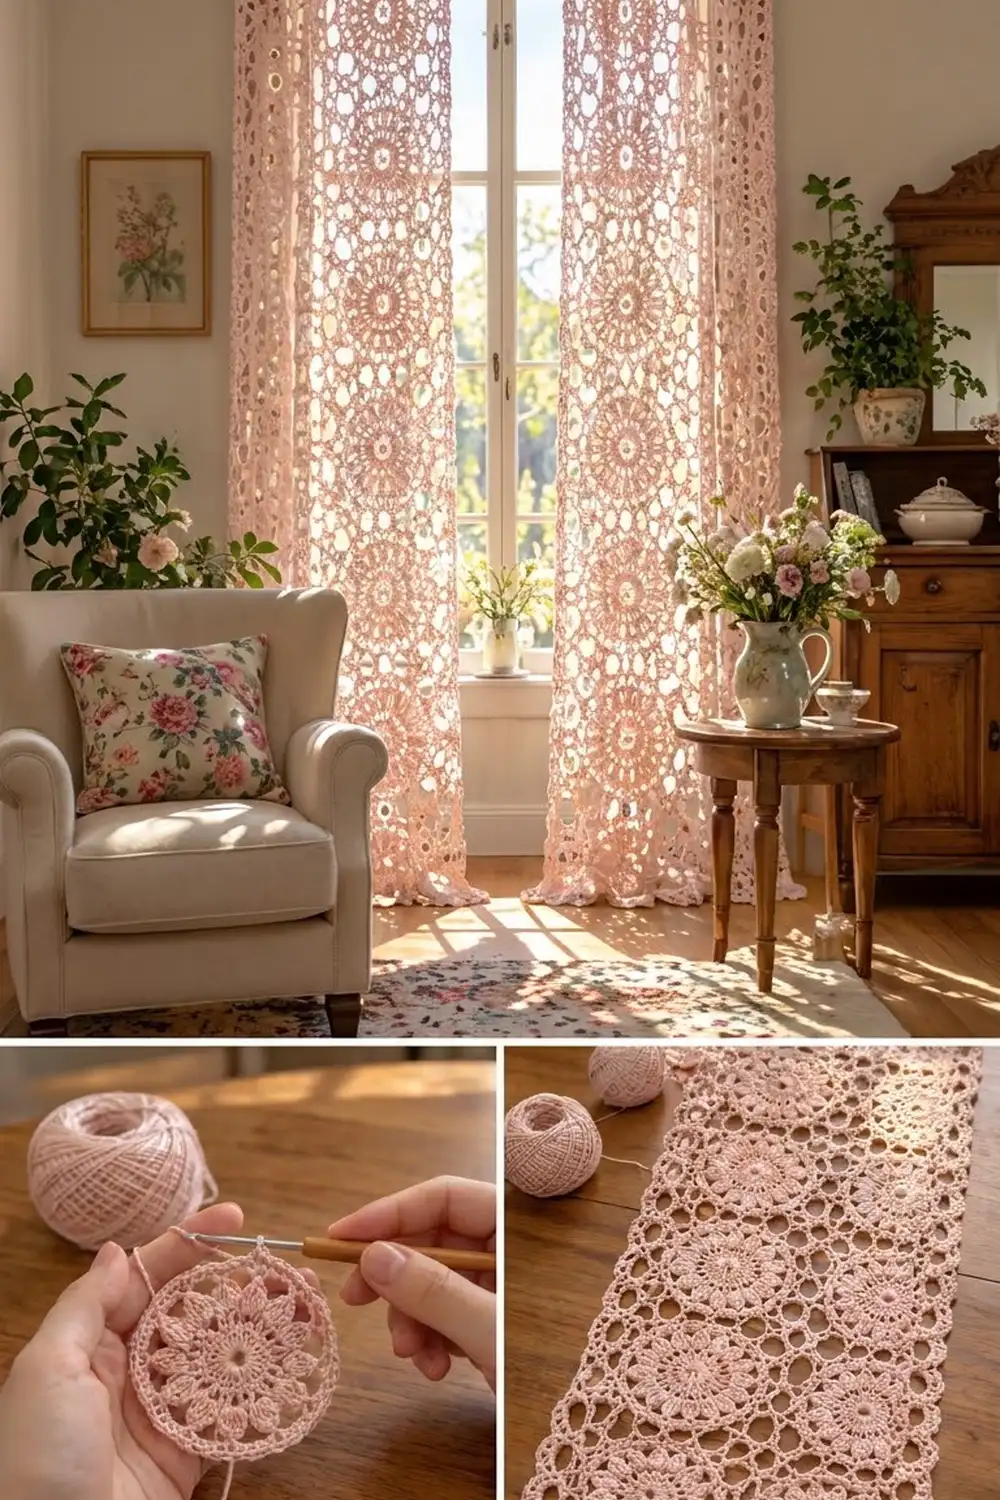
These airy curtain panels are made from round lace medallions in one soft blush pink. Each medallion has a small open center, a ring of double crochet spokes, twelve pointed leaf petals, a ring of chain arches, a solid single crochet band, and a scalloped edge of chain loops. Small chain stars fill the spaces where four medallions meet, so light shows through every gap.
The look is romantic and vintage, but the construction is simple and repetitive. The pattern uses US crochet terms throughout.
Each finished panel measures about 22½” × 78½” (57.2 × 199.4 cm). Hung as a pair from clip rings, the panels fit a standard window. Each medallion is 7″ (17.8 cm) across.
Each medallion takes 7 rounds, and you join it to its neighbors as you go on the last round. Then you add the star fillers and work a 3-round border that turns the scalloped edges into a straight picot frame.
Finished Size and Construction
- Finished panel size: 22½” × 78½” (57.2 × 199.4 cm)
- Skill level: Intermediate
- Terminology: US crochet terms
- Yarn weight: Sport (#2), mercerized cotton
- Hook: 3.5 mm (E-4)
- Number of pieces: 2 panels; each panel has 33 medallions and 20 star fillers
- Layout: 3 medallions wide × 11 medallions tall per panel
- Medallion size: 7″ (17.8 cm) diameter
- Size before border: 21″ × 77″ (53.3 × 195.6 cm)
- Border depth: ¾” (1.9 cm) on each edge
Materials
Choose a smooth mercerized cotton or cotton blend in sport weight. Mercerized cotton shows the stitches clearly, keeps its shape while hanging, and fades less in sunlight than matte cotton.
- Blush Pink: 700 g / about 2,100 m (2,297 yd) for the pair of panels (about 350 g / 1,050 m per panel)
These amounts include a margin of about 15% for gauge differences and a test medallion.
Tools:
- 3.5 mm (E-4) crochet hook
- Tapestry needle
- Locking stitch markers (at least 4)
- Scissors
- Measuring tape
- Blocking mats, rustproof pins, and a spray bottle
- 16 curtain clip rings (8 per panel)
Abbreviations (US Terms)
- ch: chain
- sl st: slip stitch
- sc: single crochet
- hdc: half double crochet
- dc: double crochet
- tr: treble crochet
- dtr: double treble crochet (yo 3 times)
- trtr: triple treble crochet (yo 4 times)
- sp(s): space(s)
- st(s): stitch(es)
- yo: yarn over
Special stitches:
- Petal: (hdc, dc, tr, ch 2, tr, dc, hdc) all in the same space.
- Join loop: ch 2, sl st into the matching loop of the neighboring medallion, ch 2. This replaces a ch-5 loop and keeps the stitch count the same.
- trtr2tog: yo 4 times, insert hook in first loop, pull up a loop, (yo, pull through 2) 4 times; repeat from * to * in second loop; yo, pull through all 3 loops on hook.
- Picot: ch 3, sl st in 3rd ch from hook.
Gauge and Checkpoints
Gauge: 6 sc = 1″ (2.5 cm) in Round 6 of the medallion.
Make one complete medallion before anything else. Measure it flat, lightly pressed, without stretching.
- After Round 2: 2¼” (5.7 cm) across
- After Round 4: 4½” (11.4 cm) across, petal tip to petal tip
- After Round 6: 5¾” (14.6 cm) across
- After Round 7: 7″ (17.8 cm) across, loop to loop
If your medallion is larger than 7¼” (18.4 cm), go down half a hook size. If it is smaller than 6¾” (17.1 cm), go up half a size. Being off by only ¼” (0.6 cm) per medallion adds up to 2¾” (7.0 cm) over 11 medallions, so check carefully.
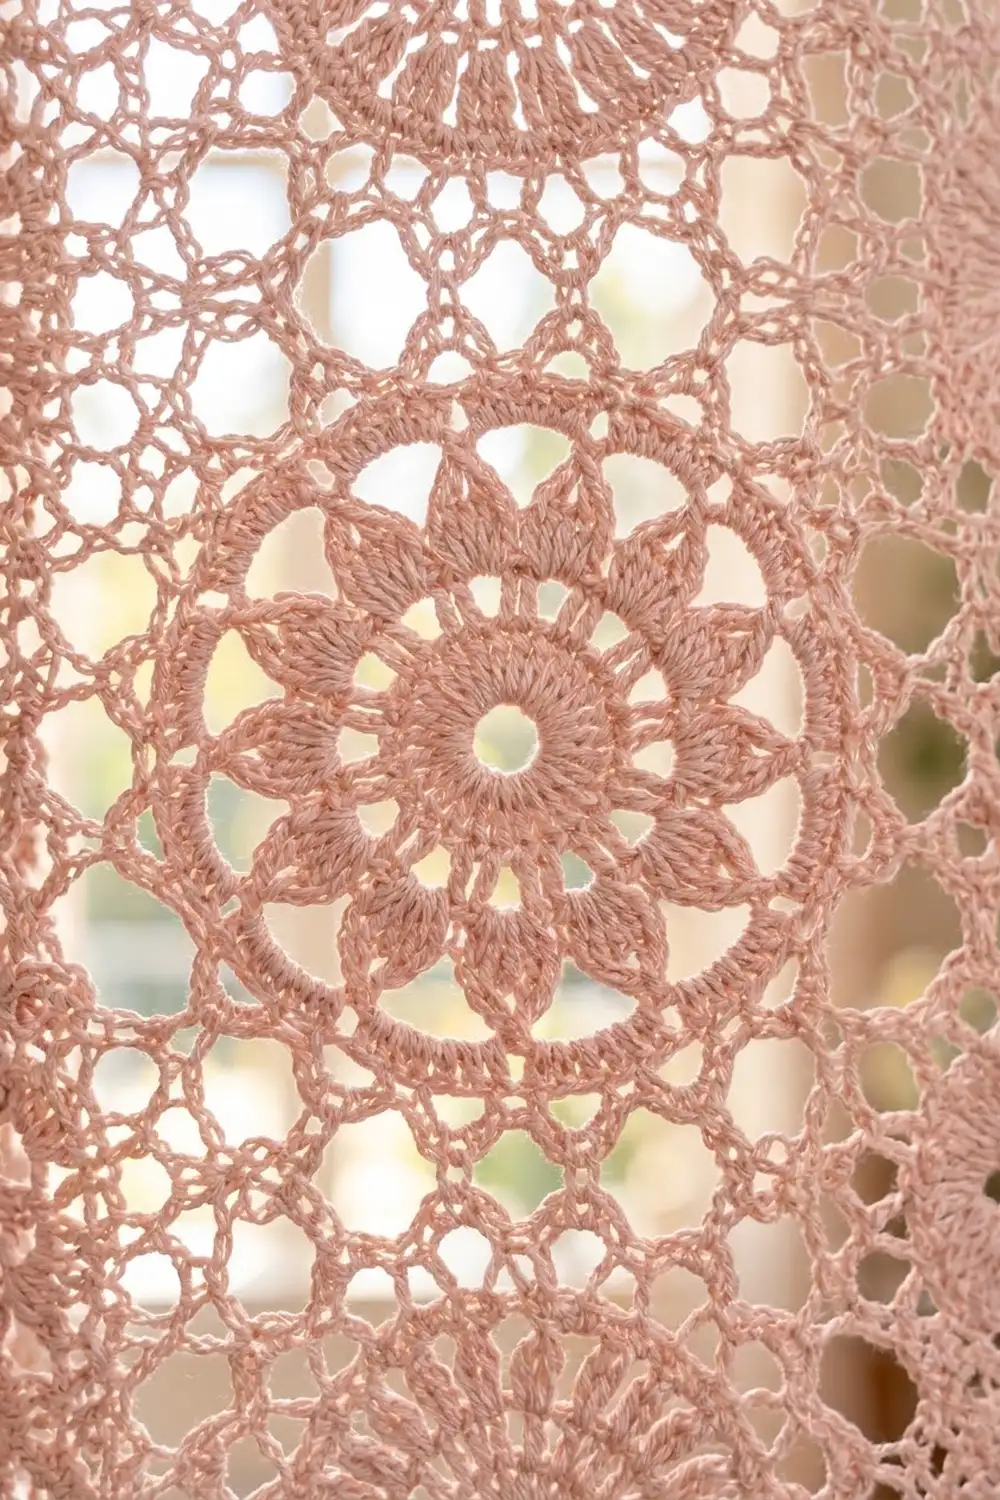
Medallion
Start: ch 6, sl st in first ch to form a ring.
Round 1: Ch 3 (counts as dc), 23 dc in ring; join with sl st to top of ch-3. (24 dc)
Round 2: Ch 3 (counts as dc), dc in same st, 2 dc in each st around; join to top of ch-3. (48 dc)
Round 3: Ch 6 (counts as dc + ch 3), dc in same st, ch 1, skip 3 sts, (dc, ch 3, dc) in next st, ch 1, skip 3 sts; repeat from * 10 more times; join to 3rd ch of beginning ch-6. (12 V-stitches: 24 dc, 12 ch-3 sps, 12 ch-1 sps)
Round 4: Sl st into first ch-3 sp, ch 1 (does not count), Petal in same sp, sc in next ch-1 sp, Petal in next ch-3 sp, sc in next ch-1 sp; repeat from * 10 more times; join to first hdc. (12 Petals + 12 sc = 84 sts, plus 12 ch-2 tips)
Round 5: Sl st in next dc, in next tr, and into the ch-2 tip. Ch 1, sc in same tip, ch 7, sc in next ch-2 tip, ch 7; repeat from * 10 more times; join to first sc. (12 sc, 12 ch-7 loops)
Round 6: Ch 1, sc in sc, 8 sc in next ch-7 loop; repeat from * 11 more times; join to first sc. (108 sc: 12 × 9)
Round 7 (first medallion only): Ch 1, sc in first sc, ch 5, skip 2 sts, sc in next st, ch 5, skip 2 sts; repeat from * 34 more times; join to first sc. Fasten off. (36 sc, 36 ch-5 loops: 108 ÷ 3 = 36)
Loop map
Place a marker in the first ch-5 loop of Round 7. Hold the medallion with that loop just beside 12 o’clock and call it Loop 1. Number the loops in the order you made them, so Loop 36 sits on the other side of 12 o’clock.
- Joining pairs (one at each compass point): Loops 36 & 1, 9 & 10, 18 & 19, and 27 & 28.
- Free loops: 7 loops between each pair of joining pairs.
- Diagonal loops: the middle (4th) free loop in each group: Loops 5, 14, 23, and 32. These point toward the corners of the grid.
Make All Pieces
Each panel needs 33 medallions and 20 star fillers, all in Blush Pink. For the pair, make 66 medallions and 40 fillers. If you like, work Rounds 1–6 of every medallion first, then join them on Round 7.
Layout per panel (M = medallion, F = filler at each inner crossing):
M M M
 F F
M M M
 F F
M M M
... (continue to 11 rows)
M M M
That gives 3 columns × 11 rows = 33 medallions and (3 − 1) × (11 − 1) = 20 fillers.
Joining
Join medallions as you go on Round 7, working row by row from the top. Before joining, turn each medallion so its marker sits at 12 o’clock.
How the loops match: A side joining pair always meets the facing side pair of the neighbor, and a top pair meets the bottom pair of the medallion above. Join both loops of each pair, upper loop to upper loop. For example, Loop 9 joins the neighbor’s Loop 28 and Loop 10 joins Loop 27. Loop 36 joins the upper medallion’s Loop 19 and Loop 1 joins Loop 18.
Working Round 7 with joins: Work Round 7 as written. When you reach a loop that needs joining, work a Join loop instead of ch 5, then sc in the next st as usual. Each Join loop is still 5 sts (ch 2, sl st, ch 2), so every medallion keeps 36 loops.
A medallion after the first row and first column joins on two sides (side and top) with 4 Join loops. Medallions in the first row join on one side only.
Tension: Keep each sl st snug but not tight. Tight joins pull the medallions together and make the panel too narrow. The joined loops should lie flat without rippling.
Star fillers
Fill each square gap where four medallions meet.
Ch 6, sl st in first ch to form a ring.
Round 1: Ch 1, 12 sc in ring; join to first sc. (12 sc)
Round 2: Ch 6, sl st into a loop of a surrounding medallion, ch 6, sl st in next sc of ring; repeat from * 11 more times, working the last sl st into the first sc. Fasten off. (12 arms)
Attach the arms in order around the gap. On each of the four medallions, use the diagonal loop that points into the gap plus the loop on each side of it: 3 loops × 4 medallions = 12 arms.
Size checkpoint: Lay the joined panel flat. It should measure 21″ × 77″ (53.3 × 195.6 cm), because 3 × 7″ = 21″ and 11 × 7″ = 77″. If the length is off by more than 1″ (2.5 cm), check your join tension before starting the border.
Border
Border gauge: about 5 sc = 1″ (2.5 cm) along the edge in Round 2.
The edge medallions leave a scalloped outline. Round 1 uses stitches of different heights to fill the dips and make a straight line.
Round 1 (leveling round): With right side facing, join yarn with a standing dtr in a diagonal loop of a corner medallion.
Along each edge medallion, work into the 10 outer loops from one diagonal loop to the next (diagonal loop, 3 free loops, the 2 unjoined loops of the outer pair, 3 free loops, diagonal loop):
- dtr, ch 2, tr, ch 2, dc, ch 2, hdc, ch 2, sc, ch 2, sc, ch 2, hdc, ch 2, dc, ch 2, tr, ch 2, dtr. (10 sts + 9 ch-2 sps = 28 sts)
Dip between two medallions: Ch 4, trtr2tog with the first leg in the next loop of the medallion you just worked and the second leg in the loop just before the diagonal loop of the next medallion, ch 4. (9 sts) The loops under this bridge stay unworked.
Corner: In the diagonal loop of each corner medallion, work (dtr, ch 5, dtr). Each dtr is the end stitch of its own side, and the ch-5 is the corner space.
Join to the first dtr.
Round 1 counts per side (corner dtrs included, corner ch-5 not included):
- Short sides: 3 medallions × 28 + 2 dips × 9 = 84 + 18 = 102 sts
- Long sides: 11 medallions × 28 + 10 dips × 9 = 308 + 90 = 398 sts
Round 2: Ch 1. Sc in each st, 2 sc in each ch-2 sp, and 4 sc in each ch-4 sp. Work (2 sc, ch 3, 2 sc) in each corner ch-5 sp. Join to first sc.
- Short sides: 102 + 2 + 2 = 106 sc
- Long sides: 398 + 2 + 2 = 402 sc
Round 3 (picot edge): Ch 1. Along each side, sc in first 3 sc, Picot, sc in next 4 sc; repeat from * to the last 3 sc, then Picot, sc in last 3 sc. In each corner ch-3 sp, work (sc, Picot, sc). Join and fasten off.
- Short sides: 3 + 25 × 4 + 3 = 106 sc, with 26 picots
- Long sides: 3 + 99 × 4 + 3 = 402 sc, with 100 picots
Why the math works: Every edge medallion gives exactly 28 sts in Round 1 and every dip gives exactly 9, so each side equals (medallions × 28) + (dips × 9). Round 2 counts each stitch and chain once and adds only the 2 sc from each corner space at each end. For Round 3, each side needs 3 sc at each end plus a multiple of 4. Since 106 − 6 = 100 = 25 × 4 and 402 − 6 = 396 = 99 × 4, the picots are evenly spaced and both ends match.
The border adds ¾” (1.9 cm) to each edge: 21″ + 1½” = 22½” (57.2 cm) wide and 77″ + 1½” = 78½” (199.4 cm) long.
Final Blocking
- Weave in all ends before blocking, following the stitch paths so they stay hidden in the lace.
- Soak the panel in cool water for 15 minutes, then gently press out the water. Do not wring.
- Roll the panel in towels to remove more moisture.
- Lay it flat on mats. A long panel can be blocked in three sections while the rest stays folded on a towel.
- Pin the medallion centers on a 7″ (17.8 cm) grid, then pin the border straight at 22½” (57.2 cm) wide.
- Pin out each picot and open the star fillers so their arms run straight.
- Let each section dry completely before moving to the next.
- Check the full length: 78½” (199.4 cm).
Final Quality-Control Checklist
- Every medallion has 12 petals and 36 loops in Round 7.
- All joining pairs are joined upper loop to upper loop, with no twisted medallions.
- Every inner crossing has a star filler with all 12 arms attached.
- Short sides have 26 picots and long sides have 100 picots.
- Each panel measures 22½” × 78½” (57.2 × 199.4 cm).
- Both panels are the same length within ½” (1.3 cm).
- All ends are woven in and trimmed.
Troubleshooting
Medallion cups: Round 6 or 7 is too tight. Go up half a hook size for those rounds only.
Medallion ruffles: The Round 5 chains are too loose. Use ch 6 instead of ch 7, but still work 8 sc into each loop on Round 6.
Petals lean to one side: Make sure all 7 stitches and chains of each Petal go into the same ch-3 sp.
Uneven gaps between medallions: A medallion was joined with its marker out of place. Check the loop map and redo that Round 7.
Star fillers pucker: The arms are too short for your gauge. Use ch 7 arms.
Border waves: Your border gauge is looser than 5 sc per 1″ (2.5 cm). Redo Round 2 with a smaller hook.
Panel stretches when hung: Cotton relaxes under its own weight. Block slightly short of your target, and space the clip rings evenly, about every 3″ (7.6 cm).
Care
Hand wash in cool water with mild soap and dry flat. Keep the panels out of long hours of strong direct sun to keep the blush color soft.
Final Notes
The whole curtain depends on one measurement chain. A 7″ (17.8 cm) medallion, placed 3 across and 11 down, gives a 21″ × 77″ (53.3 × 195.6 cm) panel. The ¾” (1.9 cm) border then brings each panel to 22½” × 78½” (57.2 × 199.4 cm). Check your first medallion carefully and the rest will follow.
Happy crocheting!