

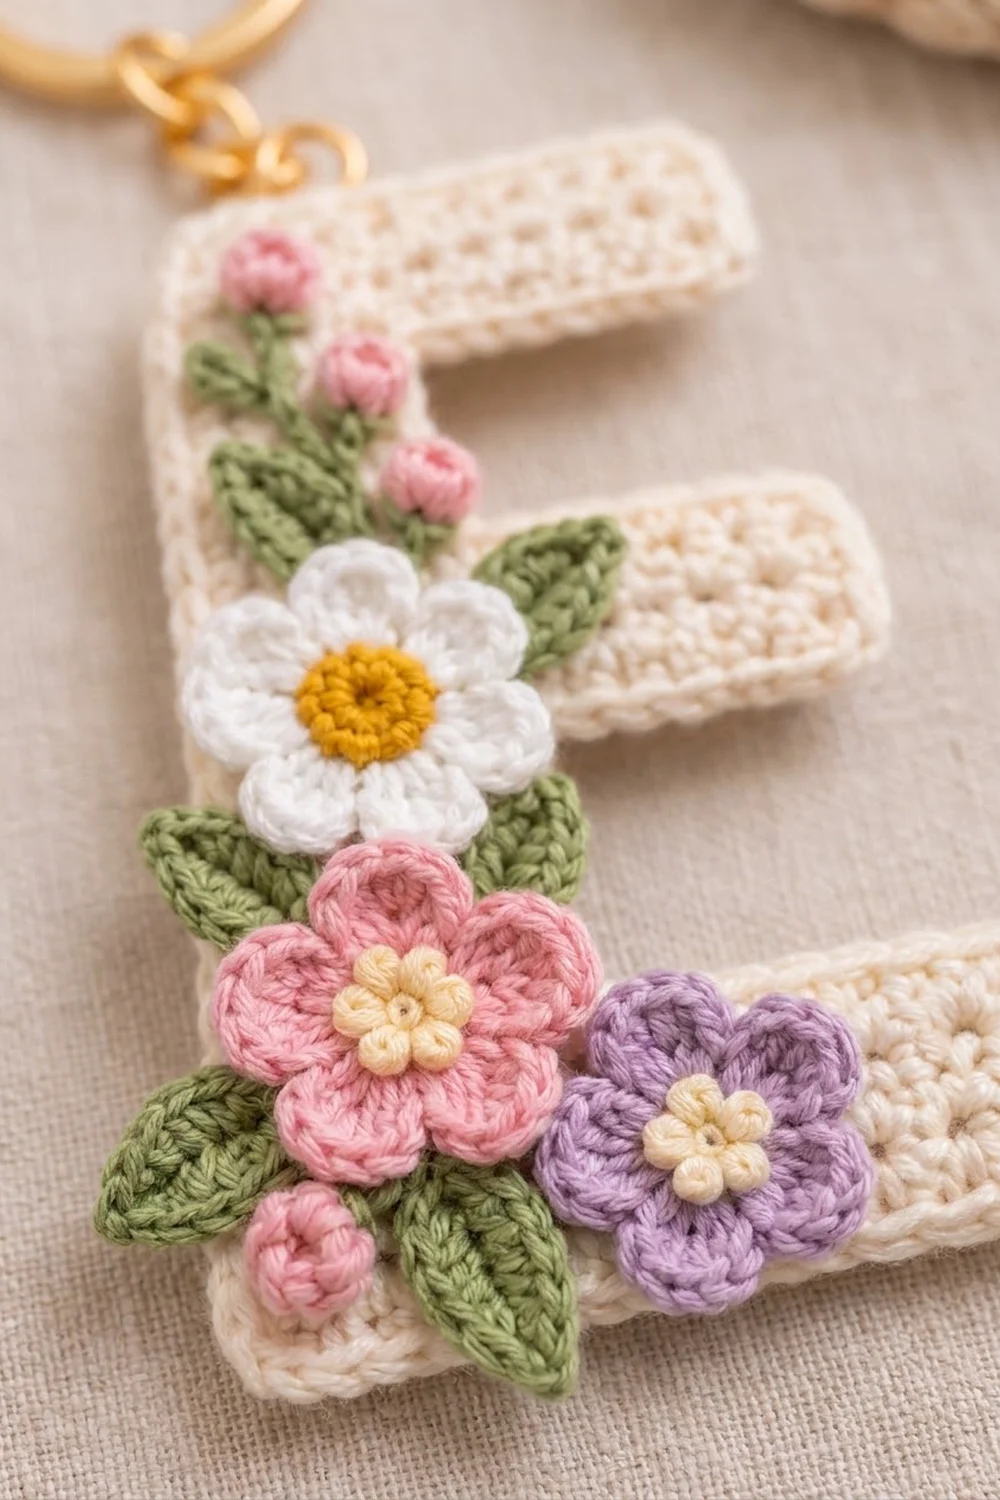
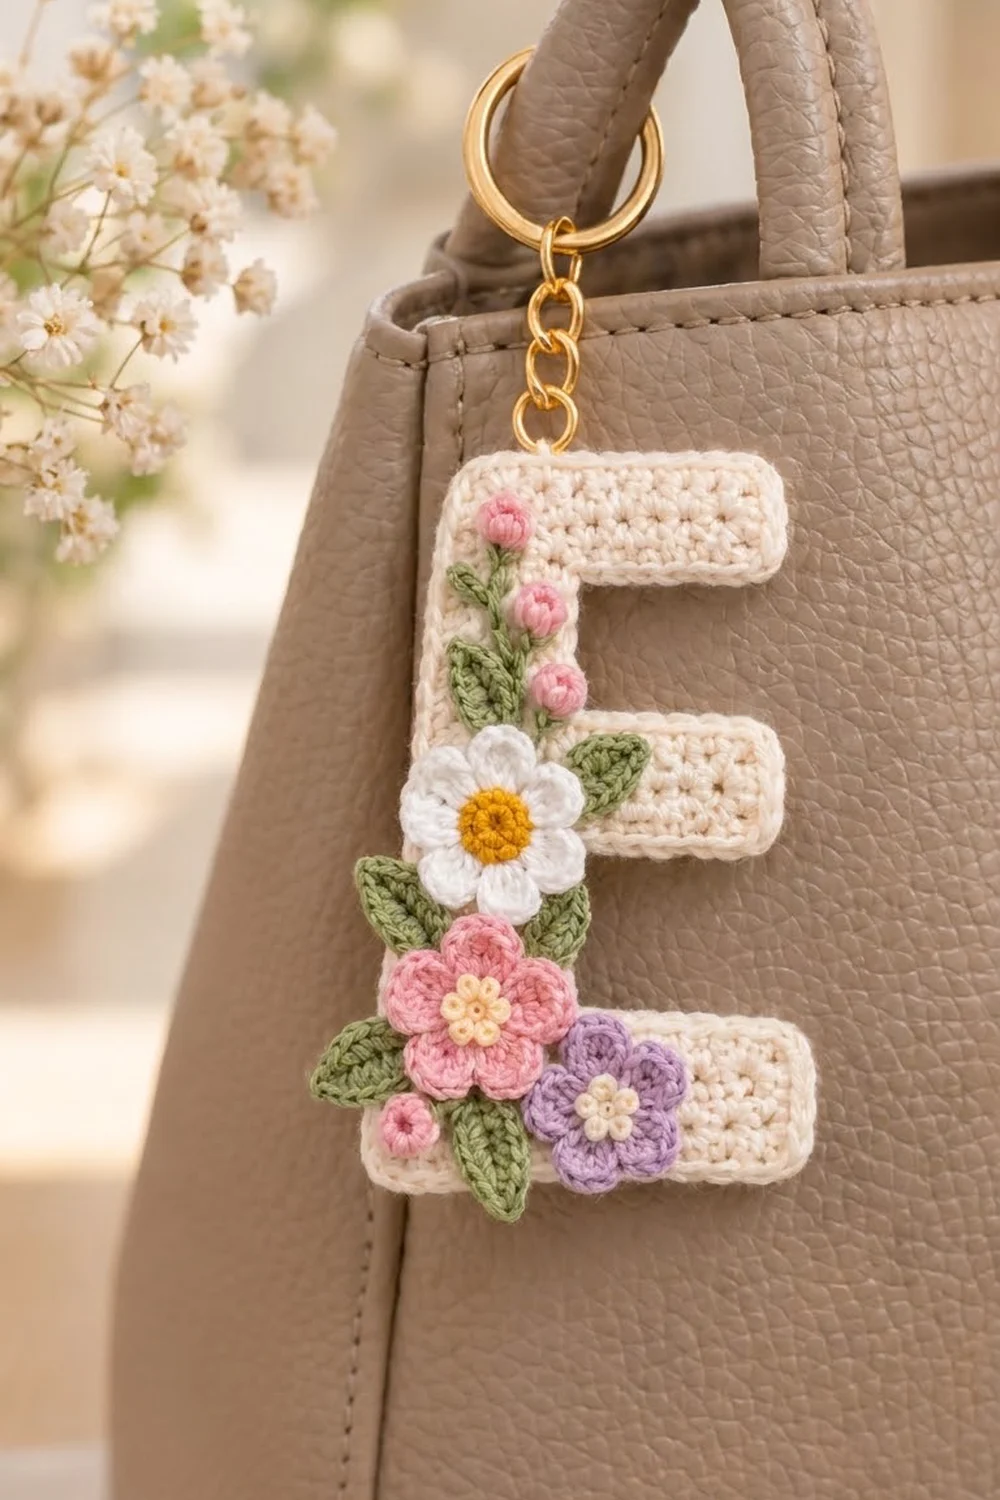
This little letter E keychain is a sweet, personal accessory. The cream body is worked in firm single crochet, so it stays flat and holds its shape on a bag handle. A cluster of wildflowers grows down the spine: pink buds on embroidered stems, a white daisy, a soft pink blossom and a small lilac flower, framed by sage-green leaves.
The palette is gentle and springlike. You’ll use cream for the letter, white and mustard for the daisy, light pink for the main blossom and buds, lilac for the accent flower, sage green for leaves and stems, and pale butter yellow for the knotted flower centers. A gold split ring and short chain finish it off.
This pattern uses US crochet terms. The finished letter measures 4.0 in (10.2 cm) tall and 2.4 in (6.1 cm) wide. With the hardware attached, the keychain hangs about 5.5 in (14.0 cm) long.
Here’s how it’s built. You crochet the spine first as a short rectangle of rows. Then you work each of the three bars directly off the spine’s inner edge, so there is no sewing at the letter’s joints. Two border rounds outline the whole shape. Last, you make the flowers and leaves separately and sew them on.
Finished Size and Construction
- Finished size: 4.0 in × 2.4 in (10.2 cm × 6.1 cm)
- Skill level: Easy+ (simple stitches, small-scale finishing)
- Terminology: US crochet terms
- Yarn weight: DK (#3) cotton or cotton blend
- Hook: 3.25 mm (US D/3) for the body, 2.75 mm (US C/2) for the appliqués
- Number of pieces: 1 crocheted letter, plus small sewn-on appliqués
- Layout: single piece; no joining
- Piece size before border: 3.6 in × 2.0 in (9.1 cm × 5.1 cm)
- Border depth: about 0.2 in (0.5 cm) on every edge
Materials
Yarn: Use a smooth DK cotton. Cotton gives crisp stitch definition, crisp corners and very little fuzz, which matters on a small piece that gets handled a lot. Pick yarns of the same weight so the flowers sit evenly.
- Cream (body and border): 8 g / 18 m
- White (daisy petals): 2 g / 4 m
- Mustard yellow (daisy center): 1 g / 2 m
- Light pink (main flower and 4 buds): 3 g / 7 m
- Lilac (accent flower): 2 g / 4 m
- Sage green (leaves, stems, sepals): 3 g / 7 m
- Pale butter yellow (French knot centers): 1 g / 2 m
All quantities include a comfortable margin for swatching and sewing tails.
Tools:
– 3.25 mm (US D/3) and 2.75 mm (US C/2) crochet hooks
– Tapestry needle
– Sharp embroidery needle
– Gold split ring, 1 in (2.5 cm)
– Gold jump ring, 8 mm (0.3 in / 0.8 cm)
– Gold chain, 1 in (2.5 cm) long
– 2 pairs of flat-nose pliers
– Stitch markers, rustproof pins, blocking mat, spray bottle
Abbreviations (US Terms)
- ch: chain
- sl st: slip stitch
- sc: single crochet
- hdc: half double crochet
- dc: double crochet
- sc2tog: single crochet 2 together
- BLO: back loop only
- MR: magic ring
- st(s): stitch(es)
- RS: right side
Special stitch: sc2tog across an inner corner. Insert the hook into the last position of one edge, yarn over and pull up a loop. Insert into the first position of the next edge, yarn over and pull up a loop. Yarn over and pull through all 3 loops. This makes 1 stitch from 2 positions and keeps inner corners from puckering.
Gauge and Checkpoints
Gauge: 10 sc × 12 rows = 2 in (5.1 cm) square with the 3.25 mm hook, worked firmly.
Make a swatch first. Ch 11, sc in the 2nd ch from the hook and in each ch across (10 sc), then work 11 more rows. Measure it unstretched. Gauge matters here because the letter’s proportions depend entirely on stitch and row counts.
Checkpoints:
1. After the spine: 3.6 in × 0.83 in (9.1 cm × 2.1 cm)
2. After each bar: the top and bottom bars reach 2.0 in (5.1 cm) from the spine’s outer edge; the middle bar reaches 1.83 in (4.6 cm)
3. After the border: 4.0 in × 2.4 in (10.2 cm × 6.1 cm)
If your piece is too big, go down a hook size or tighten your tension. If it’s too small, go up a hook size. Change hooks rather than stitch counts, because the border math depends on the exact counts.
Spine
Use cream and the 3.25 mm hook.
Foundation: Ch 19.
Row 1: Sc in the 2nd ch from the hook and in each ch across. (18 sc)
Rows 2–5: Ch 1, turn, sc in each st across. (18 sc per row)
Don’t fasten off. You now have 5 rows. Row 5 forms the spine’s inner edge, and its 18 sts are the base for all three bars. The foundation chain forms the outer left edge.
Checkpoint: 3.6 in × 0.83 in (9.1 cm × 2.1 cm).
Number the sts of Row 5 from 1 to 18, starting where your hook is now. The bar layout is symmetrical, so either end works:
- Sts 1–4: bottom bar
- Sts 5–7: gap
- Sts 8–11: middle bar
- Sts 12–14: gap
- Sts 15–18: top bar
Bars
Bottom bar:
Row 1: Ch 1, turn, sc in sts 1–4 only. Leave the rest unworked. (4 sc)
Rows 2–7: Ch 1, turn, sc in each st across. (4 sc per row)
Fasten off. The bar is 0.8 in (2.0 cm) thick and reaches 1.17 in (3.0 cm) out from the spine.
Middle bar:
Skip sts 5–7 of Row 5 (this is the first gap, 0.6 in / 1.5 cm). Hold the piece with the same face toward you that faced you when you worked Bottom Bar Row 1.
Row 1: Join cream with a sl st in st 8, ch 1, sc in the same st and in sts 9–11. (4 sc)
Rows 2–6: Ch 1, turn, sc in each st across. (4 sc per row)
Fasten off. The middle bar reaches 1.0 in (2.5 cm) from the spine. That makes it a little shorter than the other bars, which matches the classic E shape.
Top bar:
Skip sts 12–14 (the second gap). Hold the same face toward you as before.
Row 1: Join cream in st 15, ch 1, sc in the same st and in sts 16–18. (4 sc)
Rows 2–7: Ch 1, turn, sc in each st across. (4 sc per row)
Fasten off and weave in all body tails.
Checkpoint: 3.6 in × 2.0 in (9.1 cm × 5.1 cm). Body total: 90 + 28 + 24 + 28 = 170 sc.
Choosing the front: An E is symmetrical from top to bottom. Flip the piece over top-to-bottom and it still reads as an E with the spine on the left, so you can use whichever face looks neater.
Border
Border gauge: Work 1 sc per stitch along stitch edges and 1 sc per row-end along row edges. Use the 3.25 mm hook with the same tension as the body.
With the front facing, the spine on the left and cream yarn, join at the bottom-left corner. You’ll work clockwise, starting up the left edge.
Round 1 is a conversion round. Work 1 sc into each of the 86 edge positions. Then add 2 extra sc at each of the 8 outer corners and merge 2 positions into 1 at each of the 4 inner corners. That gives 86 + 16 − 4 = 98 sc.
At each outer corner, the corner position gets 3 sc. Work clockwise, edge by edge:
- Left edge (foundation ch): 1 sc in each of 18 ch loops, with 3 sc in the 18th (top-left corner) → 20 sts
- Top edge (12 row-ends: 5 spine + 7 bar): 1 sc in each, with 3 sc in the last → 14 sts
- Top bar end (4 sts): 1 sc in each, with 3 sc in the last → 6 sts
- Top bar underside, gap and middle bar top:
- Top bar underside, 7 row-ends: 6 sc, then sc2tog over the last row-end and gap st 12.
- Gap, 3 sts: 1 sc in st 13, then sc2tog over st 14 and the first row-end of the middle bar.
- Middle bar top, 6 row-ends (1 is already used): 4 sc, then 3 sc in the last.
- Section total: 6 + 1 + 1 + 1 + 4 + 3 → 16 sts
- Middle bar end (4 sts): 1 sc in each, with 3 sc in the last → 6 sts
- Middle bar underside, gap and bottom bar top:
- Middle bar underside, 6 row-ends: 5 sc, then sc2tog over the last row-end and gap st 7.
- Gap: 1 sc in st 6, then sc2tog over st 5 and the first row-end of the bottom bar.
- Bottom bar top, 7 row-ends (1 is already used): 5 sc, then 3 sc in the last.
- Section total: 5 + 1 + 1 + 1 + 5 + 3 → 16 sts
- Bottom bar end (4 sts): 1 sc in each, with 3 sc in the last → 6 sts
- Bottom edge (12 row-ends: 7 bar + 5 spine): 1 sc in each, with 3 sc in the last (bottom-left corner) → 14 sts
Join with a sl st to the first sc. Total: 20 + 14 + 6 + 16 + 6 + 16 + 6 + 14 = 98 sts.
Round 2: Ch 1. Loosely sl st in each sc around, keeping the yarn at the back. Join to the first sl st. (98 sl st) This makes the smooth, slightly raised outline. Fasten off and weave in the tails.
Why the math works: Round 1 places exactly 1 sc on every edge position, so it neither stretches nor gathers the body. The +2 at each outer corner lets the edge turn without cupping. The sc2tog at each inner corner removes the extra fullness a concave turn would create. Round 2 adds no stitches, only a firm edge. Together the two rounds add about 0.2 in (0.5 cm) on every side: 3.6 + 0.4 = 4.0 in tall and 2.0 + 0.4 = 2.4 in wide.
Flower Appliqués
Use the 2.75 mm hook. Leave a sewing tail of 8 in (20.3 cm) on every appliqué.
Daisy (make 1):
Rnd 1: In mustard, 10 sc in the MR. Pull it closed and join. (10 sc) Fasten off.
Rnd 2: Join white with a sl st in any st. Work (ch 2, 2 dc) in the same st, then (2 dc, ch 2, sl st) in the next st. Sl st in the next st, (ch 2, 2 dc) in the same st, (2 dc, ch 2, sl st) in the next st. Repeat from * 4 more times. (5 petals, 20 dc) Fasten off. Size: about 1.0 in (2.5 cm).
Pink flower (make 1):
Rnd 1: In light pink, 10 sc in the MR. Join. (10 sc)
Rnd 2: Ch 1. (Sc, hdc, 2 dc) in the next st, (2 dc, hdc, sc) in the next st. Repeat from * 5 times in total. Join. (5 petals, 40 sts) Fasten off.
With butter yellow, embroider 5 French knots over Rnd 1. Size: about 1.1 in (2.8 cm).
Lilac flower (make 1):
Rnd 1: In lilac, 10 sc in the MR. Join. (10 sc)
Rnd 2: Ch 1. (Sc, 2 dc) in the next st, (2 dc, sc) in the next st. Repeat from * 5 times in total. Join. (5 petals, 30 sts) Fasten off.
Embroider 5 butter-yellow French knots in the center. Size: about 0.9 in (2.3 cm).
Pink buds (make 4):
Rnd 1: 6 sc in the MR. Pull it closed and join. (6 sc)
Rnd 2: Ch 1, sc in the BLO of each st around. Join. (6 sc) The bud cups up into a dome.
Tuck the starting tail inside as padding. Size: about 0.3 in (0.8 cm).
Small leaves (make 3, sage):
Ch 5. Starting in the 2nd ch from the hook, work sc, hdc, hdc, sc. Ch 1. Rotate and work into the opposite side of the chain: sc, hdc, hdc, sc. Sl st into the skipped tip ch. (8 sts) Length: 0.5 in (1.3 cm).
Medium leaves (make 4, sage):
Ch 7. Starting in the 2nd ch from the hook, work sc, hdc, dc, dc, hdc, sc. Ch 1. Rotate and work along the opposite side: sc, hdc, dc, dc, hdc, sc. Sl st into the tip. (12 sts) Length: 0.7 in (1.8 cm).
Assembly of the Appliqués
Lay the letter front-up and pin everything in place before you sew anything. Arrange the pieces in this order:
- Stems: Using sage and stem stitch, embroider three short, gently curving stems down the spine. They start about 0.3 in (0.8 cm) below the top border and end at the spine’s midpoint.
- Leaves: Sew 3 small leaves along the stems in alternating directions. Place the 4 medium leaves at the flower cluster: one right of the daisy, one left of the daisy, one left of the pink flower and one below it. Tuck each leaf base where a flower will cover it.
- Lilac flower: Sew it on the bottom bar, just right of the spine.
- Pink flower: Sew it over the lower spine so its right petals overlap the lilac flower’s left edge.
- Daisy: Sew it just above the pink flower, centered on the spine where the middle bar joins.
- Buds: Sew 3 buds at the stem tips and 1 bud at the lower left, beside the pink flower. Add 2 sage lazy-daisy sepals under each of the top buds.
Stitch only through the front layer of the letter, using small stitches hidden between the appliqué stitches.
Hardware: Open the jump ring sideways with two pliers. Thread it through the middle sc of the top-left corner group, passing through both border rounds. Add the chain, close the jump ring, and thread the split ring onto the chain’s other end.
Final Blocking
- Remove the hardware, or keep it away from water.
- Mist the letter evenly with the spray bottle until it’s damp. Don’t soak it.
- Pin it to the mat at 4.0 in × 2.4 in (10.2 cm × 6.1 cm), using the grid lines.
- Put a pin at each of the 8 outer corners and the 4 inner corners so the edges dry straight.
- Gently press the flowers flat with your fingertips and open the petals.
- Let it dry completely, about 6–8 hours, before unpinning.
Final Quality-Control Checklist
- Letter measures 4.0 in × 2.4 in (10.2 cm × 6.1 cm)
- Border Round 1 has 98 sc and Round 2 has 98 sl st
- All 8 outer corners are crisp and all 4 inner corners lie flat
- Middle bar is visibly shorter than the top and bottom bars
- 3 flowers, 4 buds and 7 leaves are sewn on securely
- No sewing stitches show on the back
- Jump ring is fully closed with no gap
Troubleshooting
- The bars flare or ruffle: your tension is looser at the bars. Rework them with the same tension as the spine.
- Inner corners pucker: make sure you worked the sc2tog at each inner corner.
- Outer corners curl: check that you placed 3 sc in each corner position.
- The border wavers: you worked more than 1 sc per row-end. Recount against the edge totals.
- Petals curl forward: steam them lightly and pin them flat to dry.
- The keychain twists on the ring: attach the jump ring through both border rounds, not just Round 2.
Care
Spot clean with mild soap and cool water, then press flat and let it air dry. Don’t machine wash, and keep the gold hardware dry to protect the finish.
Final Notes
Here is the measurement chain in short:
- Gauge: 10 sc × 12 rows = 2 in (5.1 cm)
- Spine: 18 sc × 5 rows = 3.6 in × 0.83 in (9.1 cm × 2.1 cm)
- Bars: 4 sc wide; 7, 6 and 7 rows long, bringing the width to 2.0 in (5.1 cm)
- Border: 98 sc plus 98 sl st, adding 0.2 in (0.5 cm) per side
- Finished size: 4.0 in × 2.4 in (10.2 cm × 6.1 cm)
Check gauge, count each section, and the flowers will sit just right. You can use the same spine-and-bars method for other block letters.
Happy crocheting!