

The Sunlit Wings curtain is a pair of airy lace panels built entirely from cream butterfly motifs. Each butterfly has four lacy wings, each with an open teardrop window. A raised, wrapped body and two knob-tipped antennae sit on top. Hung in a sunny window, the open wings throw butterfly-shaped shadows across the floor.
The design uses one color, a soft cream or ecru cotton, so the texture does all the work. The style is romantic and cottage-inspired but still clean. All instructions use US crochet terms.
Each finished panel measures 18 in (45.7 cm) wide by 81 in (205.7 cm) long, plus hanging tabs. Each blocked motif measures 6 in (15.2 cm) wide by 5 in (12.7 cm) tall, measured from wingtip to wingtip.
Construction is simple to follow. Every motif is worked in the round from a center ring, the wings grow out of chain loops, and the last round adds a scalloped edge and four wingtip join loops. You join the motifs as you go, sew on a separate body for each, and then work a header with hanging tabs across the top.
Finished Size and Construction
- Finished size (one panel): 18 in (45.7 cm) wide x 81 in (205.7 cm) long, plus tabs
- Skill level: Intermediate
- Terminology: US
- Yarn weight: Sport-weight (#2 fine) mercerized cotton
- Hooks: 3.0 mm for motifs, 3.5 mm for header
- Number of pieces: 96 butterfly motifs (48 per panel), plus 96 bodies
- Layout: 3 motifs wide x 16 motifs tall per panel, 2 panels
- Motif size: 6 in (15.2 cm) x 5 in (12.7 cm), blocked
- Size before border: 18 in (45.7 cm) x 80 in (203.2 cm) per panel
- Border depth: 1 in (2.5 cm) header on the top edge only, plus tab loops; the sides and bottom keep the scalloped wing edges
Materials
Choose a smooth, mercerized sport-weight cotton. It shows stitch definition, holds its shape when hung, and is safe in sunlight. Avoid fuzzy or very stretchy fibers, because a long curtain pulls on itself.
- Cream / ecru: 650 g, about 2,015 m (13 balls of 50 g / 155 m)
Each motif with its body takes about 16.5 m (about 5.3 g). Each header takes about 25 m. The quantity above includes a margin of roughly 15% for gauge swatches and tails.
Tools
- 3.0 mm and 3.5 mm crochet hooks
- Tapestry needle
- Stitch markers
- Rustproof pins and blocking mats
- Tape measure
- Scissors
- Spray bottle
Abbreviations (US Terms)
- ch – chain
- sl st – slip stitch
- sc – single crochet
- hdc – half double crochet
- dc – double crochet
- sp – space
- st(s) – stitch(es)
- RS – right side
- [ ] – repeat the instructions inside the brackets as directed
Special stitch – 4-dc cluster: [yarn over, insert hook in st, pull up a loop, yarn over and pull through 2 loops] 4 times in the same st, yarn over and pull through all 5 loops on hook.
Special stitch – join loop: where the pattern says “ch 5”, if a neighbor motif is already there, work ch 2, sl st into the neighbor’s ch-5 loop, ch 2 instead.
Gauge and Checkpoints
Make one complete motif before you start the curtain. Block it and measure it. Every measurement after this depends on it.
- After Round 1: ring is 1 in (2.5 cm) across.
- After Round 3: about 4.5 in (11.4 cm) wide x 3.5 in (8.9 cm) tall.
- After Round 5, unblocked: about 5.75 in (14.6 cm) x 4.75 in (12.1 cm).
- After blocking: 6 in (15.2 cm) wide x 5 in (12.7 cm) tall, measured between the outer edges of the corner loops.
If your motif is too big, go down 0.25 mm in hook size. If it is too small, go up 0.25 mm. Check how loose your chains are too. Tight chain loops in Round 2 are the most common reason wings come out too small.
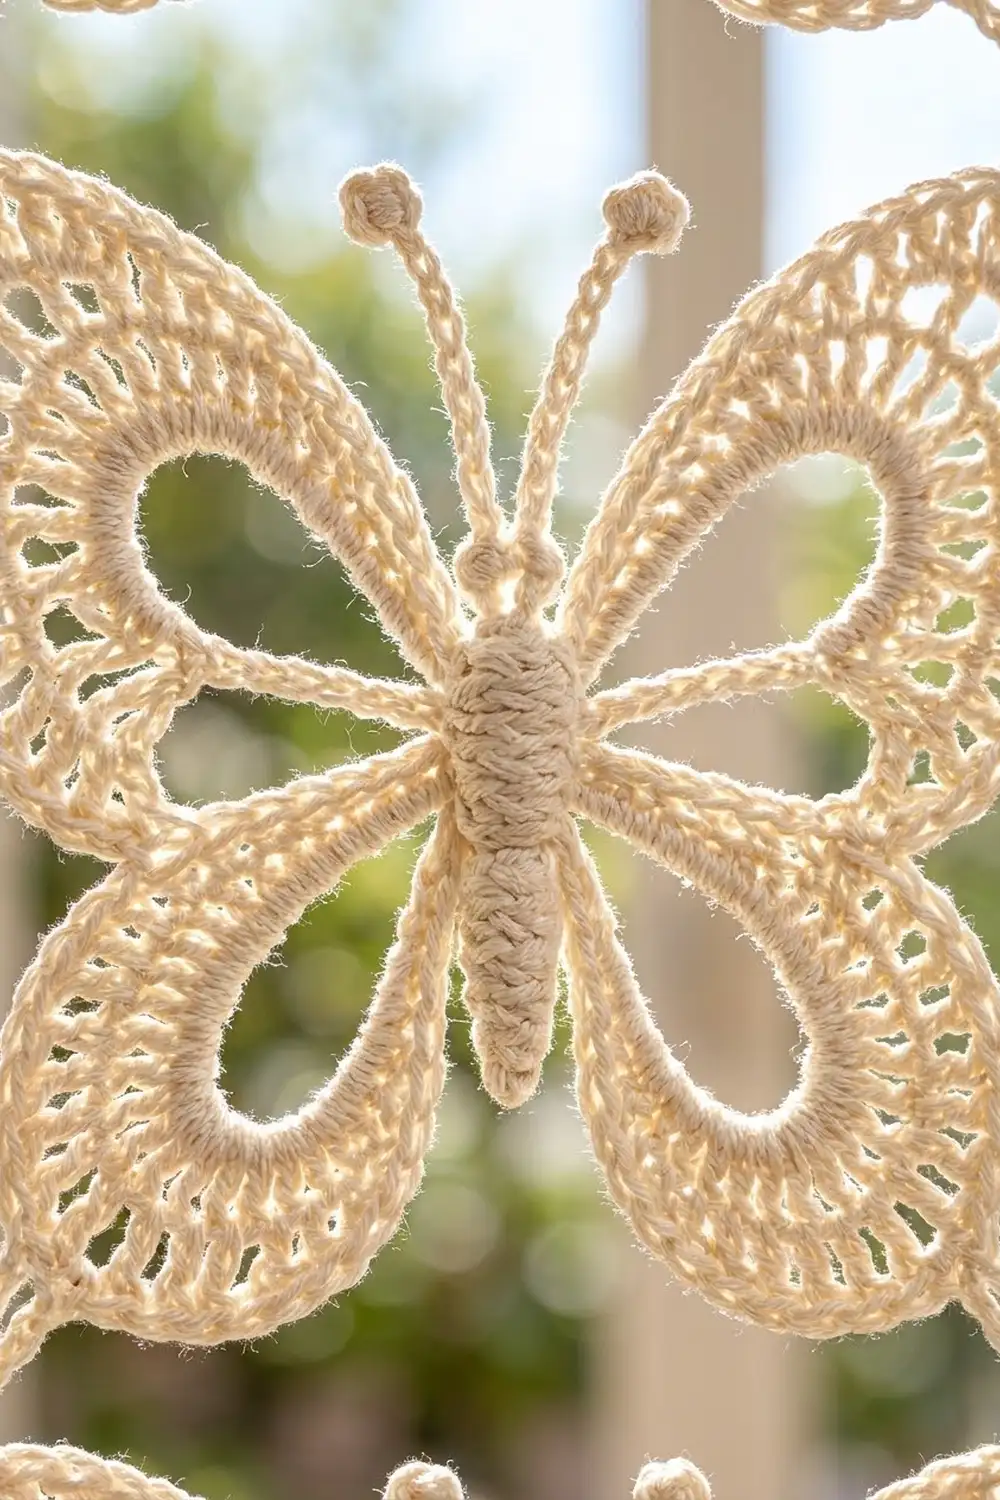
Butterfly Motif (make 96)
Use the 3.0 mm hook. Hold the motif RS up while you work. The motif is worked in the round, so Wing A is the upper wing you reach first. For right-handed crocheters that’s the upper left as you look at the RS. Wing B is the lower left, Wing C the lower right, and Wing D the upper right. Left-handed crocheters get a mirror image, which is fine because the motif is symmetrical.
Round 1: Make a magic ring, ch 1, 16 sc in ring, sl st to first sc. Pull the ring tight. (16 sc)
Round 2 (wing loops): Ch 1, sc in first sc, sc in next sc, (sc, ch 20, sc) in next sc for Wing A, sc in next 2 sc, (sc, ch 14, sc) in next sc for Wing B, sc in next 4 sc, (sc, ch 14, sc) in next sc for Wing C, sc in next 2 sc, (sc, ch 20, sc) in next sc for Wing D, sc in last 2 sc, sl st to first sc. (20 sc and 4 chain loops)
The chain loops stay open in the center of each wing, which forms the teardrop windows.
Round 3 (wing outlines): Sl st in each sc until you reach the Wing A loop. Work into the ch-20 loop: 3 sc, 3 hdc, 18 dc, 3 hdc, 3 sc (30 sts). Sl st in each sc across to the Wing B loop. Work into the ch-14 loop: 2 sc, 2 hdc, 14 dc, 2 hdc, 2 sc (22 sts). Sl st across to Wing C and work it like Wing B (22 sts). Sl st across to Wing D and work it like Wing A (30 sts). Sl st in each remaining sc and sl st to the first sl st. (104 wing sts: 30 + 22 + 22 + 30)
Round 4 (lace mesh): For Wing A, sl st in first 2 sts of Wing A, ch 4 (counts as dc and ch 1), [dc in next st, ch 1] 24 times, dc in next st, sl st in last 2 sts. That gives 26 dc and 25 ch-1 sps. Sl st across to Wing B.
For Wing B, sl st in first 2 sts, ch 4, [dc in next st, ch 1] 16 times, dc in next st, sl st in last 2 sts. That gives 18 dc and 17 ch-1 sps. Work Wing C like Wing B, then Wing D like Wing A. Sl st to the start. (88 dc and 84 ch-1 sps)
Round 5 (scalloped edge, picots, and wingtip loops): Unless the instructions name a different stitch, work (sc, hdc, sc) in each ch-1 sp. Skip the dc and sl st across between wings.
- Wing A (25 sps): (sc, ch 3, sc) in sp 6 for the top picot, and (sc, ch 5, sc) in sp 11 for the upper wingtip. (73 sts)
- Wing B (17 sps): (sc, ch 5, sc) in sp 11 for the lower wingtip. (50 sts)
- Wing C (17 sps): (sc, ch 5, sc) in sp 7 for the lower wingtip. (50 sts)
- Wing D (25 sps): (sc, ch 5, sc) in sp 15 for the upper wingtip, and (sc, ch 3, sc) in sp 20 for the top picot. (73 sts)
Sl st to the beginning and fasten off. (246 edge sts, 2 ch-3 picots, 4 ch-5 wingtip loops)
When you join as you go, replace the ch 5 at the shared wingtips with the join loop described in the abbreviations.
Body and Antennae (make 96)
Body: With the 3.0 mm hook, ch 14. Sc in 2nd ch from hook and in next 2 ch, hdc in next 4 ch, dc in next 5 ch, 6 dc in last ch for the head. Working along the other side of the chain, dc in next 5 ch, hdc in next 4 ch, sc in next 3 ch, sl st to first sc. (30 sts)
Fold the oval in half lengthwise with the RS out. Sl st the edges together through both layers. (15 sl sts) This gives you a rounded ridge about 2.75 in (7.0 cm) long that tapers to the tail.
Antennae: Join the thread at the tip of the head and ch 12. Work a 4-dc cluster in the 3rd ch from hook, then ch 2 and sl st in the same ch to make the knob. Sl st in each of the remaining 9 ch. Sl st in the next st of the head and make a second antenna the same way. Fasten off.
Wrapping: Cut 24 in (61.0 cm) of thread. Wrap it snugly around the body 7 times, evenly spaced from neck to tail. This pinches the body into segments.
Sew the body vertically over the center ring, with the head between Wings A and D. Tack the base of each antenna so they spread into a V.
Make All Pieces
All pieces use cream.
- Per panel: 48 motifs, 48 bodies
- Total: 96 motifs, 96 bodies
Layout for one panel (motifs numbered in join order):
Row 1:   [ 1][ 2][ 3]
Row 2:   [ 4][ 5][ 6]
Row 3:   [ 7][ 8][ 9]
 ...      (continue the same way)
Row 15:  [43][44][45]
Row 16:  [46][47][48]
Joining
Join the motifs as you go during Round 5. Work row by row from left to right.
- Motif 1: Work all four wingtips as ch-5 loops.
- Motifs to the right: Join the upper-left wingtip (Wing A) and lower-left wingtip (Wing B) to the left neighbor’s upper-right (Wing D) and lower-right (Wing C) loops.
- Motifs below: Join the upper-left wingtip (Wing A) and upper-right wingtip (Wing D) to the lower-left (Wing B) and lower-right (Wing C) loops of the motif above.
- Four-way points: Up to four wingtips meet at an inner corner. Always sl st into the one complete ch-5 loop at that point, which belongs to the first motif made there. Never sl st into another join chain.
The join replaces a ch 5 with ch 2, sl st, ch 2, so each join loop is still 5 sts long. Wingtip spacing stays the same and no stitches are added. Keep the join chains the same tension as your normal chains. Tight joins make the wings pucker and loose joins make diamond gaps that sag.
Size checkpoint: After Row 1, the panel should measure 18 in (45.7 cm) wide when laid flat and gently straightened. After 4 rows, it should measure 18 in (45.7 cm) x 20 in (50.8 cm). The finished body of the panel should measure 18 in (45.7 cm) x 80 in (203.2 cm).
Border: Top Header and Tabs
The header goes along the top edge only. Use the 3.5 mm hook.
Border gauge: 18 sc = 4 in (10.2 cm), or 4.5 sts per inch.
Row 1 (bridge row): With the RS facing, join the thread in the free upper-left wingtip loop of Motif 1. Ch 1. For each of the 3 top-row motifs, work: sc in upper-left wingtip, ch 7, sc in Wing A top picot, ch 9 (this passes behind the antennae), sc in Wing D top picot, ch 7, sc in upper-right wingtip.
That is 4 sc + 23 ch = 27 sts per motif. Where two motifs meet, the shared wingtip point gets 2 sc, one for each motif’s own count. (81 sts: 12 sc and 69 ch)
Row 2: Ch 1, turn, sc in each sc and each ch across. (81 sc)
Rows 3–4: Ch 1, turn, sc in each sc across. (81 sc)
Row 5 (tab loops): Ch 1, turn, sc in first 3 sts, [ch 25, skip 3 sts, sc in next 3 sts] 13 times. (42 sc and 13 ch-25 loops)
Row 6: Ch 1, turn, sc in first 3 sc, [30 sc in next ch-25 loop, sc in next 3 sc] 13 times. Fasten off. (432 sc)
Why the math works: Each motif contributes 27 sts, and 3 x 27 = 81. At 4.5 sts per inch, 81 sts is 18 in (45.7 cm), which matches the panel width exactly, so the header doesn’t gather or ruffle. For the tabs, 81 − 3 = 78, which is exactly 13 repeats of 6. Each ch-25 tab makes a loop of about 5 in (12.7 cm), big enough for rods up to 1.25 in (3.2 cm) across.
To make a wider panel, use an odd number of columns, such as 5 columns for 135 sts. An odd count keeps the tab repeat even.
Final Blocking
- Weave in every end along a solid outline round, not through the mesh.
- Soak the panel in cool water for 15 minutes, then press out the water in a towel. Don’t wring it.
- Mark a 6 in (15.2 cm) by 5 in (12.7 cm) grid on your blocking mats.
- Pin each four-way wingtip point onto a grid intersection, working in sections about 36 in (91.4 cm) long.
- Open each teardrop window with a pin and smooth the scallops outward.
- Pin the header straight at 18 in (45.7 cm).
- Let each section dry completely before you move along the panel.
Final Quality-Control Checklist
- Every motif measures 6 in (15.2 cm) x 5 in (12.7 cm).
- All teardrop windows are open and even.
- Every four-way point is joined into one ch-5 loop.
- Bodies are centered, wrapped 7 times, and point upward.
- The header holds 81 sts with 13 even tabs.
- The panel lies flat at 18 in (45.7 cm) x 81 in (205.7 cm), not counting the tabs.
Troubleshooting
- Wings cup: Your Round 4 chains are too tight. Loosen them or go up a hook size.
- Wings ruffle: Your Round 5 is too loose. Work the hdc firmly.
- Diamonds sag between motifs: The join chains are too long. Keep them at exactly ch 2 on each side.
- Header pulls in: Use the 3.5 mm hook, or go up to 4.0 mm.
- Body twists: Sew it down along the whole seam, not just at the ends.
- Panel grows when hung: Cotton relaxes a little under its own weight. Block it a little short and let it settle.
Care
Hand wash in cool water with mild soap and dry flat, pinned to the grid. Don’t tumble dry, and steam the header lightly if it creases.
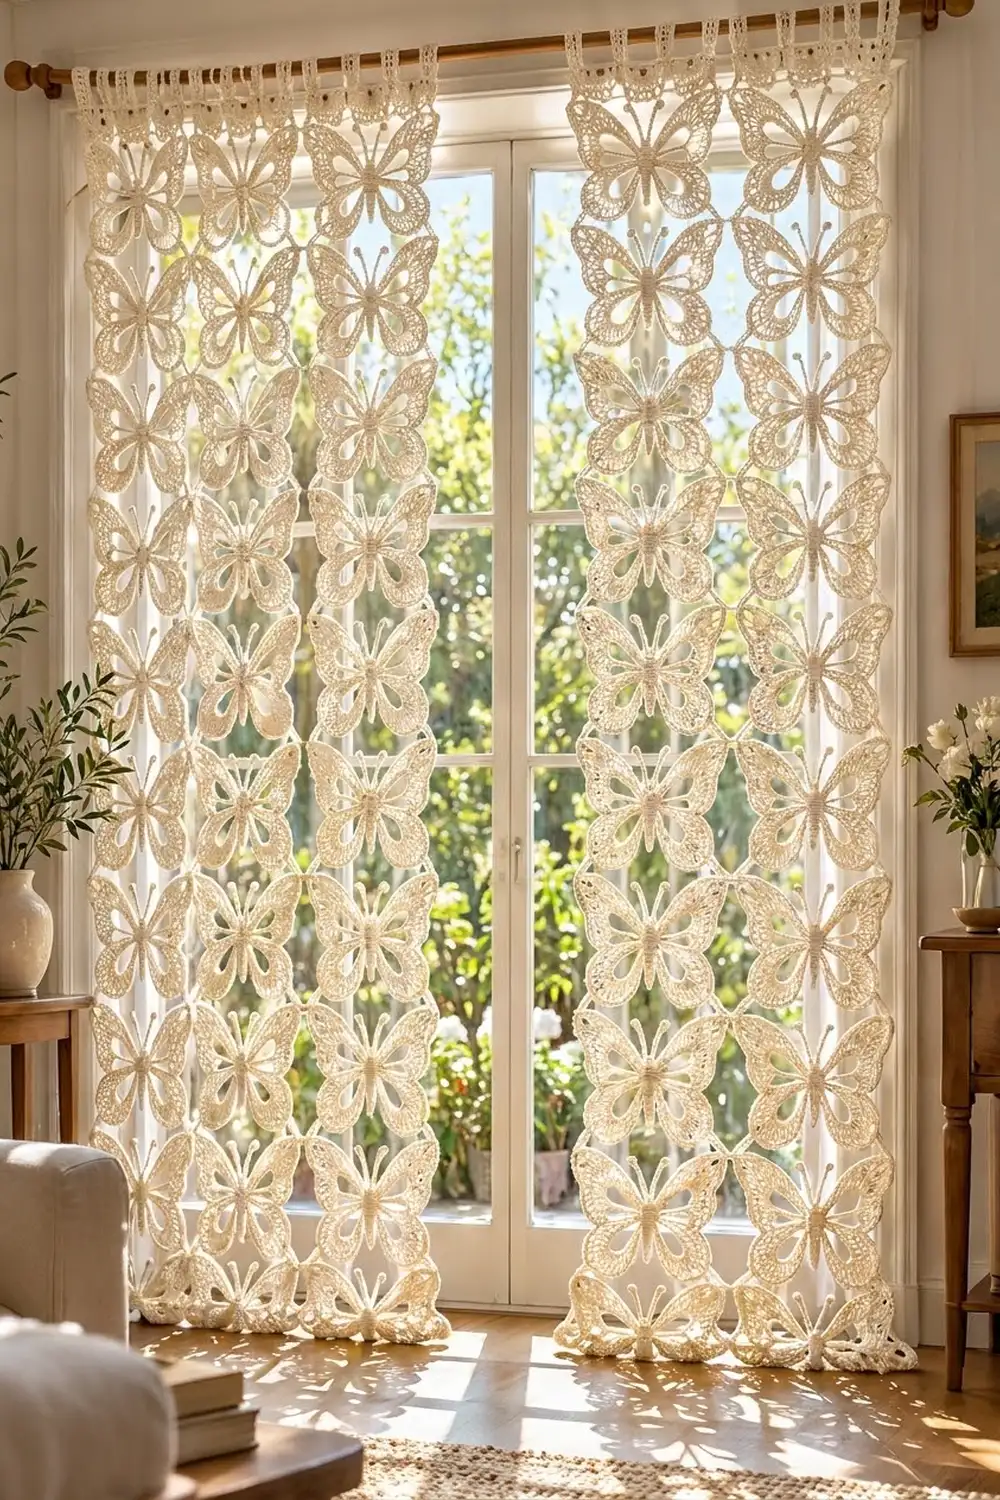
Final Notes
Everything rests on one measurement chain. The ring is 1 in (2.5 cm), the motif blocks to 6 in (15.2 cm) x 5 in (12.7 cm), 3 columns give 18 in (45.7 cm), and 16 rows give 80 in (203.2 cm). The 81-st header adds 1 in (2.5 cm) for a panel of 81 in (205.7 cm). Measure at each step and your butterflies will hang straight and even.
Happy crocheting!