

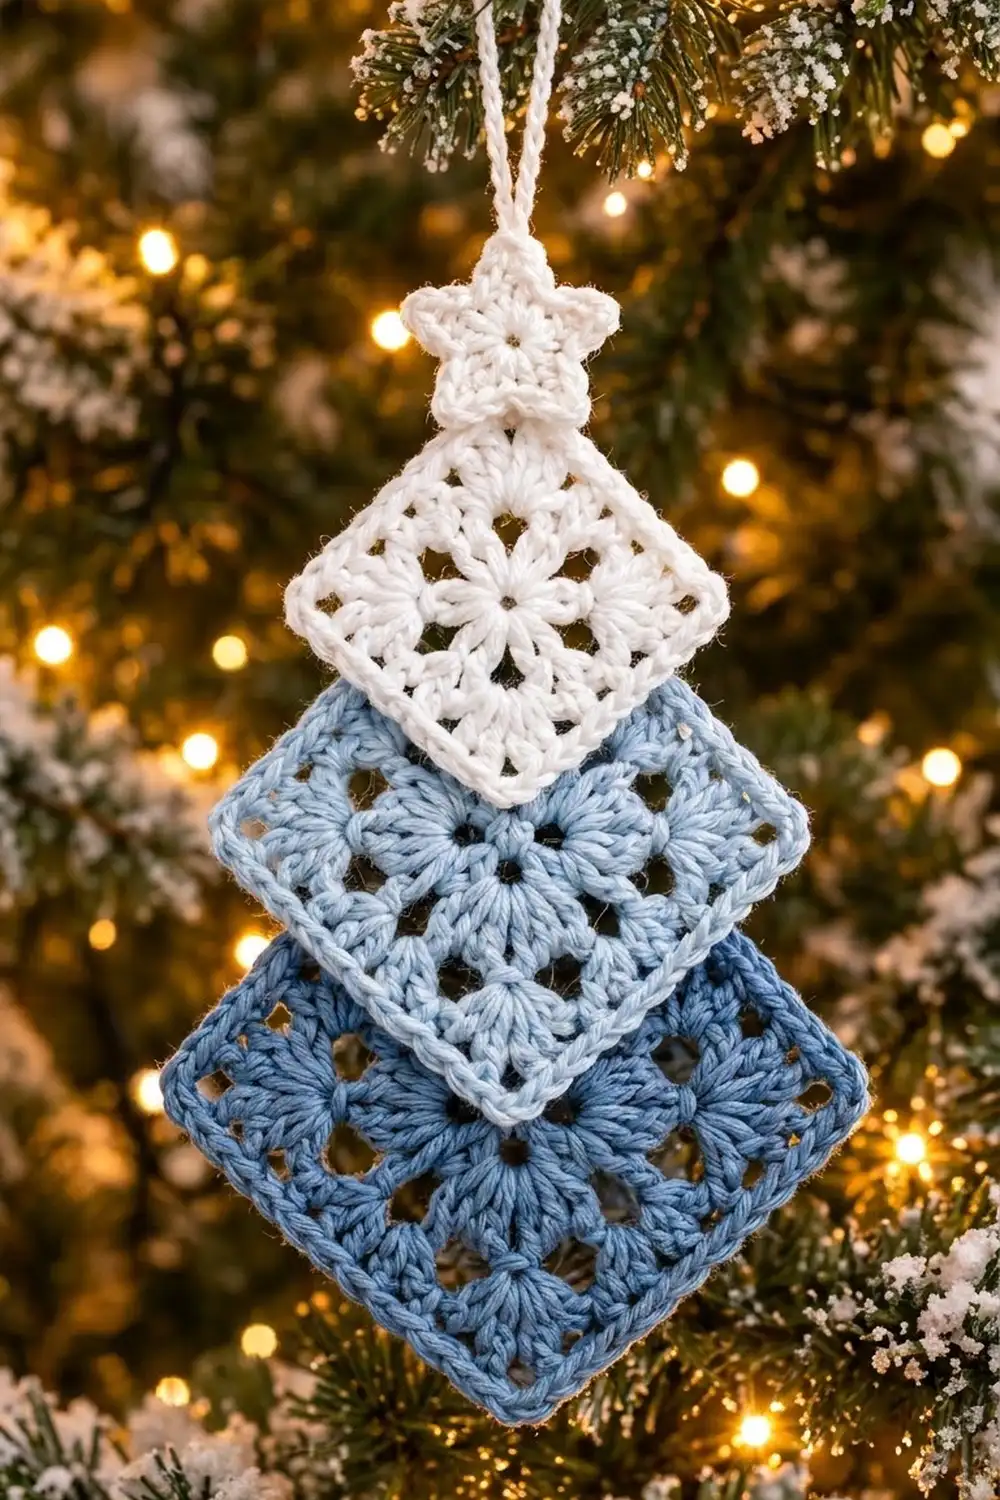
Frosted Tiers is a small Christmas tree ornament built from three granny squares turned on point. They are stacked from small to large, like the tiers of a snowy pine. The squares shade from crisp white at the top through soft ice blue to a deeper denim blue at the base. A tiny white star and a slim chain loop finish the top.
Every square starts with the same eight-petal flower center, so the tree looks unified even though each tier is a different size. Open ch-1 spaces surround the flower, and a smooth single-crochet edge gives every square a clean outline that stands out against the next color.
This pattern uses US crochet terms throughout. The finished ornament is about 5.75 in (14.6 cm) wide and 10.25 in (26.0 cm) tall from the bottom point to the star tip. The hanging loop adds about 2 in (5.1 cm).
You work the three squares in rounds and give each one its own sc border. Next you make the star and work the loop straight onto it. Finally, you overlap the pieces and sew them together by hand. It’s a great project for using up cotton scraps, and you can make one ornament in an evening.
Finished Size and Construction
- Finished size: 5.75 in (14.6 cm) wide x 10.25 in (26.0 cm) tall, plus a 2 in (5.1 cm) loop
- Skill level: Easy / advanced beginner
- Terminology: US crochet terms
- Yarn weight: DK (light worsted, #3), cotton or cotton blend
- Hook: 3.5 mm (E-4)
- Number of pieces: 4 crocheted pieces (3 squares and 1 star). The loop is worked onto the star.
- Layout: 3 squares on point, stacked in one vertical column, each overlapping the next by 2.25 in (5.7 cm)
- Piece sizes (side length, bordered): white 2.5 in (6.4 cm), light blue 3.25 in (8.3 cm), medium blue 4 in (10.2 cm)
- Size before border: white 2.25 in (5.7 cm), light blue 3 in (7.6 cm), medium blue 3.75 in (9.5 cm)
- Border depth: 1 round of sc, about 0.125 in (0.3 cm) per edge
Materials
Use a smooth, mercerized or matte DK cotton. Cotton shows clusters clearly, holds a sharp point and blocks flat. Acrylic works too, but the edges may roll slightly more. Choose a white, a pale icy blue and a medium denim blue that are clearly different from each other.
- Color A, White: 10 g / 22 m (white square, star and loop)
- Color B, Light Blue: 10 g / 22 m
- Color C, Medium Blue: 15 g / 33 m
These amounts include a generous margin for gauge swatching and weaving in ends. The ornament itself uses a little less.
Tools:
– 3.5 mm (E-4) crochet hook
– Blunt tapestry needle
– Scissors
– Stitch markers (2-3)
– Rust-proof pins and a blocking mat or folded towel
– Ruler or tape measure
– Spray bottle with water
Abbreviations (US Terms)
- ch – chain
- sl st – slip stitch
- sc – single crochet
- hdc – half double crochet
- dc – double crochet
- sp(s) – space(s)
- sk – skip
- rep – repeat
- RS / WS – right side / wrong side
Special stitches
- Beginning cluster (beg-cl): Ch 2. Yarn over, insert the hook in the stated space, pull up a loop, yarn over and pull through 2 loops. Repeat once more (3 loops on the hook), then yarn over and pull through all 3 loops.
- 3-dc cluster (cl): Yarn over, insert the hook in the stated space, pull up a loop, yarn over and pull through 2 loops. Repeat 2 more times (4 loops on the hook), then yarn over and pull through all 4 loops.
Gauge and Checkpoints
Gauge isn’t critical for an ornament. It does matter for the tiers, though, because the overlap only looks right when each square is the planned size. Make the white square first as your test piece and measure it before you go on.
Checkpoints (measure flat, lightly patted, before blocking):
– After Round 1: circle about 1 in (2.5 cm) across
– After Round 2: flower about 1.75 in (4.4 cm) across
– After Round 3: square about 2.25 in (5.7 cm) per side
– After Round 4: about 3 in (7.6 cm) per side
– After Round 5: about 3.75 in (9.5 cm) per side
– After the sc border: add about 0.25 in (0.6 cm) to the side length
Each granny round adds about 0.375 in (1.0 cm) to every edge, so the side length grows by about 0.75 in (1.9 cm) per round.
If your square is too big, go down to a 3.25 mm or 3.0 mm hook. If it’s too small, go up to a 3.75 mm hook. Use the same hook for all three squares so the tiers grow evenly.
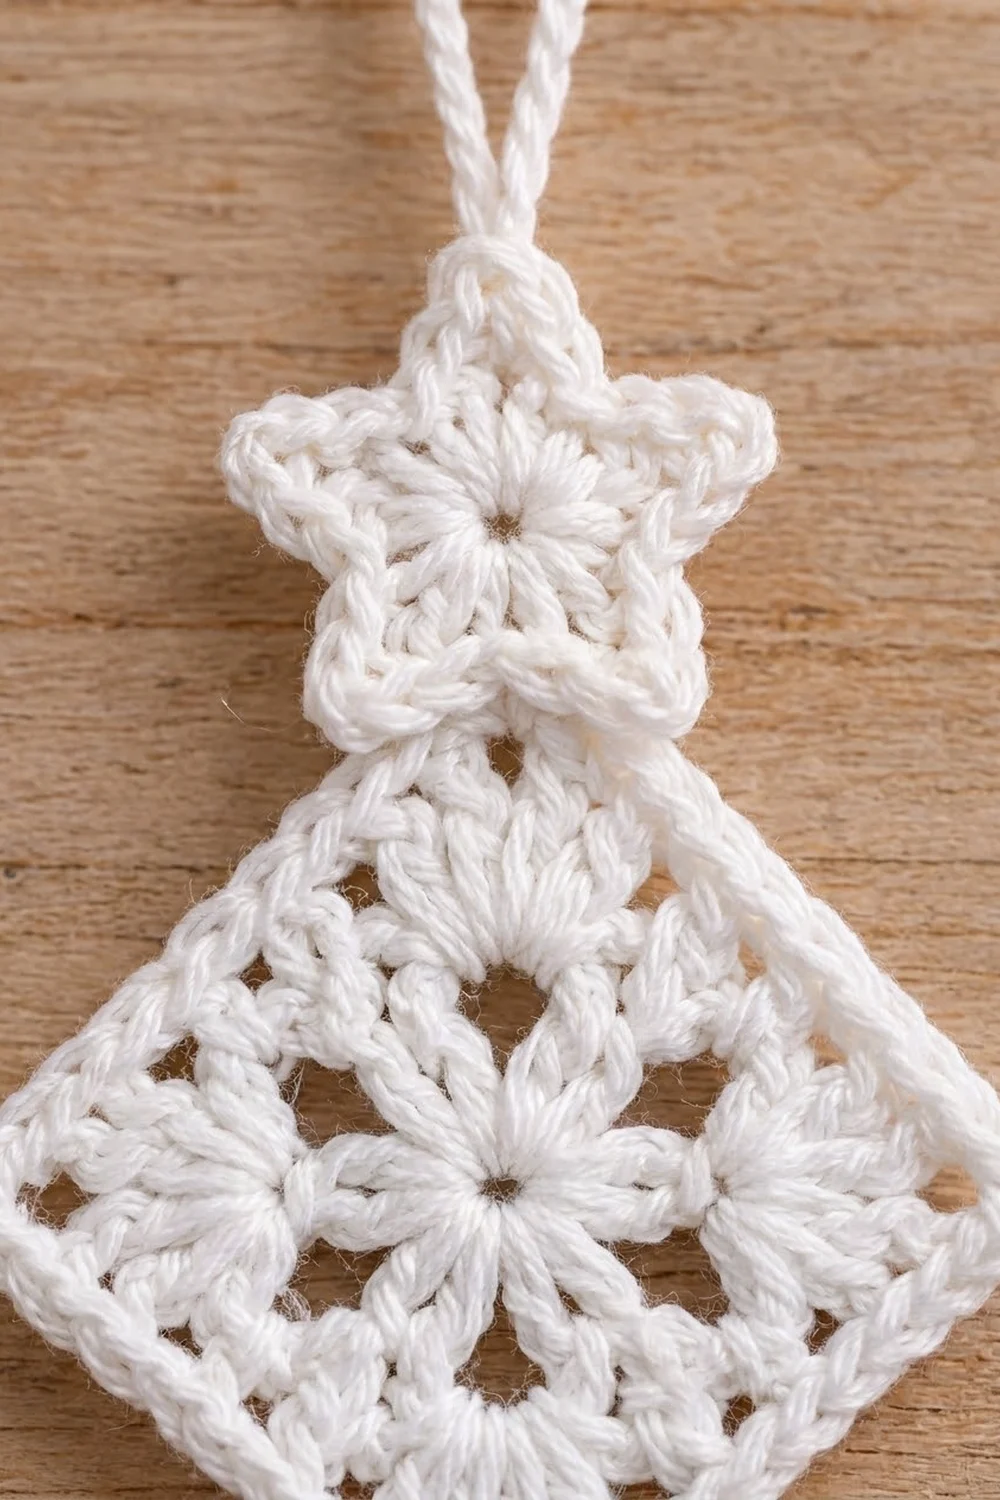
Square Pattern (All Three Tiers)
All three squares use the same rounds. You simply stop at a different round for each tier:
- White square (Color A): Rounds 1-3, then the Border
- Light blue square (Color B): Rounds 1-4, then the Border
- Medium blue square (Color C): Rounds 1-5, then the Border
Work with the RS facing you the whole time. Don’t turn between rounds.
Round 1: Make a magic ring. Ch 4 (this counts as dc + ch 1). Dc in the ring, ch 1. Rep from * 6 more times. Join with a sl st in the 3rd ch of the beginning ch-4. Pull the ring closed, leaving a small hole.
(8 dc, 8 ch-1 sps)
Round 2: Sl st into the first ch-1 sp. Beg-cl in the same sp, ch 3. Cl in the next ch-1 sp, ch 3. Rep from * 6 more times. Join with a sl st in the top of the beg-cl.
(8 clusters, 8 ch-3 sps)
These eight clusters are the flower petals.
Round 3 (squaring round): Sl st in the next 2 ch to move into the first ch-3 sp. Ch 3 (this counts as dc). In the same sp, work (2 dc, ch 2, 3 dc) for the corner. Ch 1, 3 dc in the next ch-3 sp, ch 1.
In the next ch-3 sp work (3 dc, ch 2, 3 dc), ch 1, 3 dc in the next ch-3 sp, ch 1. Rep from * 2 more times. Join with a sl st in the top of the beginning ch-3.
(36 dc: 9 dc per side between corners, 4 ch-2 corner sps, 8 ch-1 sps)
Corners and side groups alternate around the 8 petal spaces, which turns the round flower into a square.
White square only: Fasten off and go to the Border.
Round 4: Sl st in the next 2 dc and into the ch-2 corner sp. Ch 3 (this counts as dc), then (2 dc, ch 2, 3 dc) in the same sp. Ch 1.
(3 dc in the next ch-1 sp, ch 1) twice, then (3 dc, ch 2, 3 dc) in the corner sp, ch 1. Rep from * 2 more times. To finish, work (3 dc in the next ch-1 sp, ch 1) twice and join with a sl st in the top of the beginning ch-3.
(48 dc: 12 dc per side between corners, 4 ch-2 corner sps, 12 ch-1 sps)
Light blue square only: Fasten off and go to the Border.
Round 5: Work the same as Round 4, but put 3 dc in each of the 3 ch-1 sps along each side.
(60 dc: 15 dc per side between corners, 4 ch-2 corner sps, 16 ch-1 sps)
Medium blue square: Fasten off and go to the Border.
Star Topper (Color A)
Round 1: Make a magic ring. Ch 1 and work 10 sc in the ring. Join with a sl st in the first sc and pull the ring closed.
(10 sc)
Round 2 (points): Ch 4. Starting in the 2nd ch from the hook and working back down the chain: sl st, sc in the next ch, hdc in the next ch. Sk the next sc of Round 1 and sl st in the following sc. Rep from * 4 more times. Each point uses 2 sc of Round 1, so 5 points use all 10 sc.
(5 points)
The star measures about 1.5 in (3.8 cm) from point to point. Don’t fasten off.
Hanging loop: Sl st up the side of the nearest point to its tip. Ch 20 and sl st back into the same tip. Fasten off, leaving a 12 in (30.5 cm) tail for sewing. The loop hangs about 2 in (5.1 cm) when folded.
Make All Pieces
For one ornament you need:
- Color A: 1 white square (Rounds 1-3 and Border) and 1 star with loop
- Color B: 1 light blue square (Rounds 1-4 and Border)
- Color C: 1 medium blue square (Rounds 1-5 and Border)
Layout (one column, every square turned on point):
        [loop]
        [STAR]
       < WHITE >
     < LIGHT BLUE >
   <  MEDIUM BLUE  >
Each square points up and down, with the largest at the bottom. Each upper square overlaps the top point of the square below it.
Border (Every Square, Worked Before Joining)
Border gauge: about 5.75-6 sc per 1 in (2.5 cm). The open granny spaces take up a little more width than solid sc would, so the larger squares come out at the lower end of that range.
Border round: Join the same color (or keep going if you didn’t fasten off) in any ch-2 corner sp. Ch 1 and work 3 sc in the corner sp. Along each side, sc in every dc and every ch-1 sp. Work 3 sc in each ch-2 corner sp. Join with a sl st in the first sc. The middle sc of each 3-sc group is the corner stitch.
- White: 44 sc worked one into each existing st and sp (36 dc + 8 ch-1 sps) + 12 corner sc (3 per corner) = 56 sc. Each side has 15 sc, counting both corner sts (1 corner + 1 + 11 + 1 + 1 corner). Check: 4 x 15 − 4 shared corners = 56.
- Light blue: 60 sc into existing sts (48 dc + 12 ch-1 sps) + 12 corner sc = 72 sc. Each side has 19 sc, counting both corners. Check: 4 x 19 − 4 = 72.
- Medium blue: 76 sc into existing sts (60 dc + 16 ch-1 sps) + 12 corner sc = 88 sc. Each side has 23 sc, counting both corners. Check: 4 x 23 − 4 = 88.
Why the math works: Every granny round adds one 3-dc group and one ch-1 sp per side. That’s 4 more stitches per side between the corners: 11, 15 and 19. The border always adds a 3-sc group at each corner, so the per-side counts are 15, 19 and 23. Each step of 4 sts is about 0.75 in (1.9 cm), which matches the planned side lengths of 2.5, 3.25 and 4 in (6.4, 8.3 and 10.2 cm).
Leave a 12 in (30.5 cm) tail on the white and light blue squares for sewing. Weave in the medium blue tail.
Joining
Block all four pieces lightly first (see Final Blocking), so the points are sharp before you sew.
Method: Sew from the front of each upper square, through the back loops of its sc border and into the fabric of the square below. Use the matching tail so the stitches disappear.
Step 1, light blue onto medium blue: Lay the medium blue square on point. Place the light blue square on point above it so its bottom point sits 2.25 in (5.7 cm) below the medium blue’s top point, on the vertical centerline. The medium blue’s top point is now hidden behind the light blue. Pin it in place.
Step 2, stitch-to-stitch logic: Start at the light blue bottom corner sc. Sew that stitch, then 6 sc up each lower edge, so 13 sts in total. Catch the underlying medium blue fabric directly under each stitch. Turn the piece over and tack the medium blue’s top corner sc to the back of the light blue with 2 small stitches.
Step 3: Join the white square onto the light blue the same way, with the same 2.25 in (5.7 cm) overlap and 13 sts. The white bottom point should land near the center of the light blue flower.
Step 4, star: Center the star over the white top point so the star’s lower edge overlaps it by 0.5 in (1.3 cm), with the loop pointing straight up. Use the loop tail to sew around the star’s center ring through the white square.
Tension advice: Snug each stitch just enough to close the gap. If you pull tight, the edges pucker and the diamonds tilt.
Size checkpoint: The stacked squares should measure about 9.25 in (23.5 cm) from the bottom point to the white top point. With the star, it’s 10.25 in (26.0 cm), and the width is 5.75 in (14.6 cm).
Final Blocking
- Lay the joined ornament RS up on a blocking mat or towel.
- Mist it evenly with water until it’s damp but not soaking.
- Pin each of the 12 square corners and the 5 star points.
- Line up all the top and bottom points along one straight vertical line.
- Check the width (5.75 in / 14.6 cm) and the height (10.25 in / 26.0 cm).
- Gently open each petal hole and ch-1 space with your fingertip.
- Let it dry completely before you unpin, at least 4-6 hours.
Final Quality-Control Checklist
- [ ] Border counts are 56 (white), 72 (light blue) and 88 (medium blue)
- [ ] Side lengths are 2.5, 3.25 and 4 in (6.4, 8.3 and 10.2 cm)
- [ ] Each flower has 8 clear petals and an almost closed center hole
- [ ] Overlaps are each 2.25 in (5.7 cm) and centered
- [ ] All points line up vertically
- [ ] The star has 5 even points and the loop is centered on the top point
- [ ] No sewing stitches show on the front
- [ ] All ends are woven in securely
Troubleshooting
The square cups or ruffles. Your corners may be too tight or too loose. Check that each corner uses ch 2 and that there’s only one ch 1 between groups.
The square is the wrong size. Change your hook size, not the stitch counts, so the tier sizes stay in proportion.
The center hole is large. Pull the magic ring tail tight again and secure it with an extra stitch on the WS.
The star points curl. Block them flat and pinned. Also check that you’re skipping exactly 1 sc between points.
The tiers lean to one side. Unpick the joining stitches and line the points up again along a ruler before you resew.
Your count is off on a side. Count the dc plus ch-1 sps between the corners. It should be 11, 15 or 19, depending on the tier.
Care
Hand wash in cool water with mild soap, press out the water in a towel and dry flat, reshaping the points. Store the ornament flat between seasons to keep it crisp.
Final Notes
The measurement chain is simple. Each square starts as an 8-cluster flower about 1.75 in (4.4 cm) across, and Round 3 squares it off at 2.25 in (5.7 cm). Each extra granny round adds 0.75 in (1.9 cm). The sc border brings the squares to 2.5, 3.25 and 4 in (6.4, 8.3 and 10.2 cm), with 15, 19 and 23 sts per side. Overlapping by 2.25 in (5.7 cm) at each join gives a stack 9.25 in (23.5 cm) tall, and the star brings the ornament to 10.25 in (26.0 cm). Once you’ve made one, try making a few more in other color fades for a whole frosty forest on your tree.
Happy crocheting!