

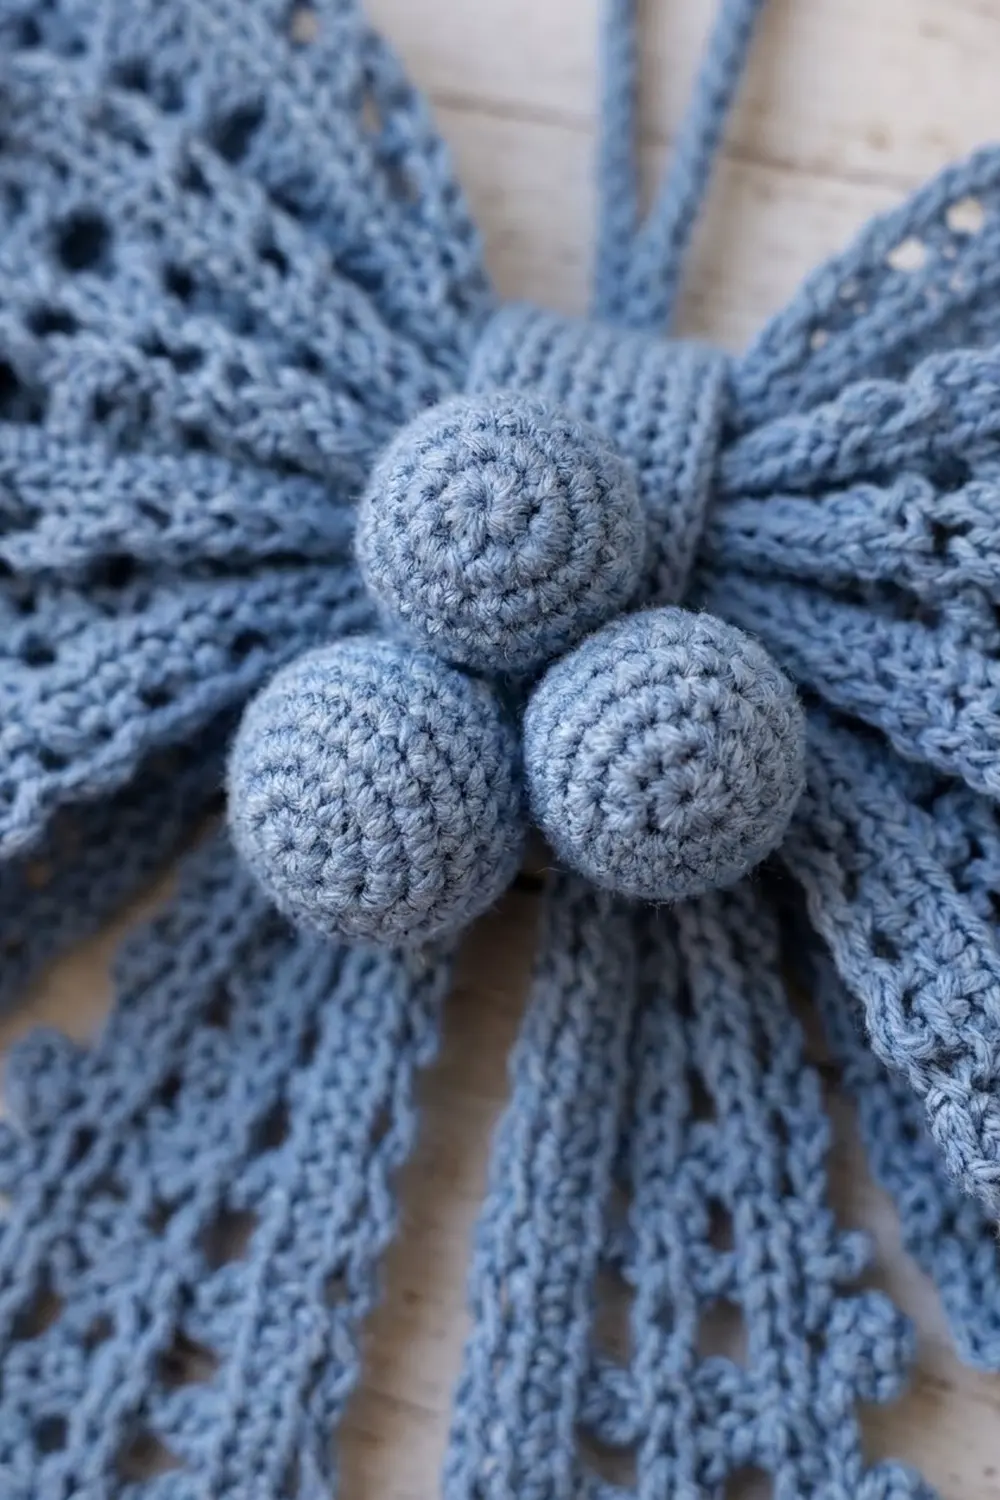
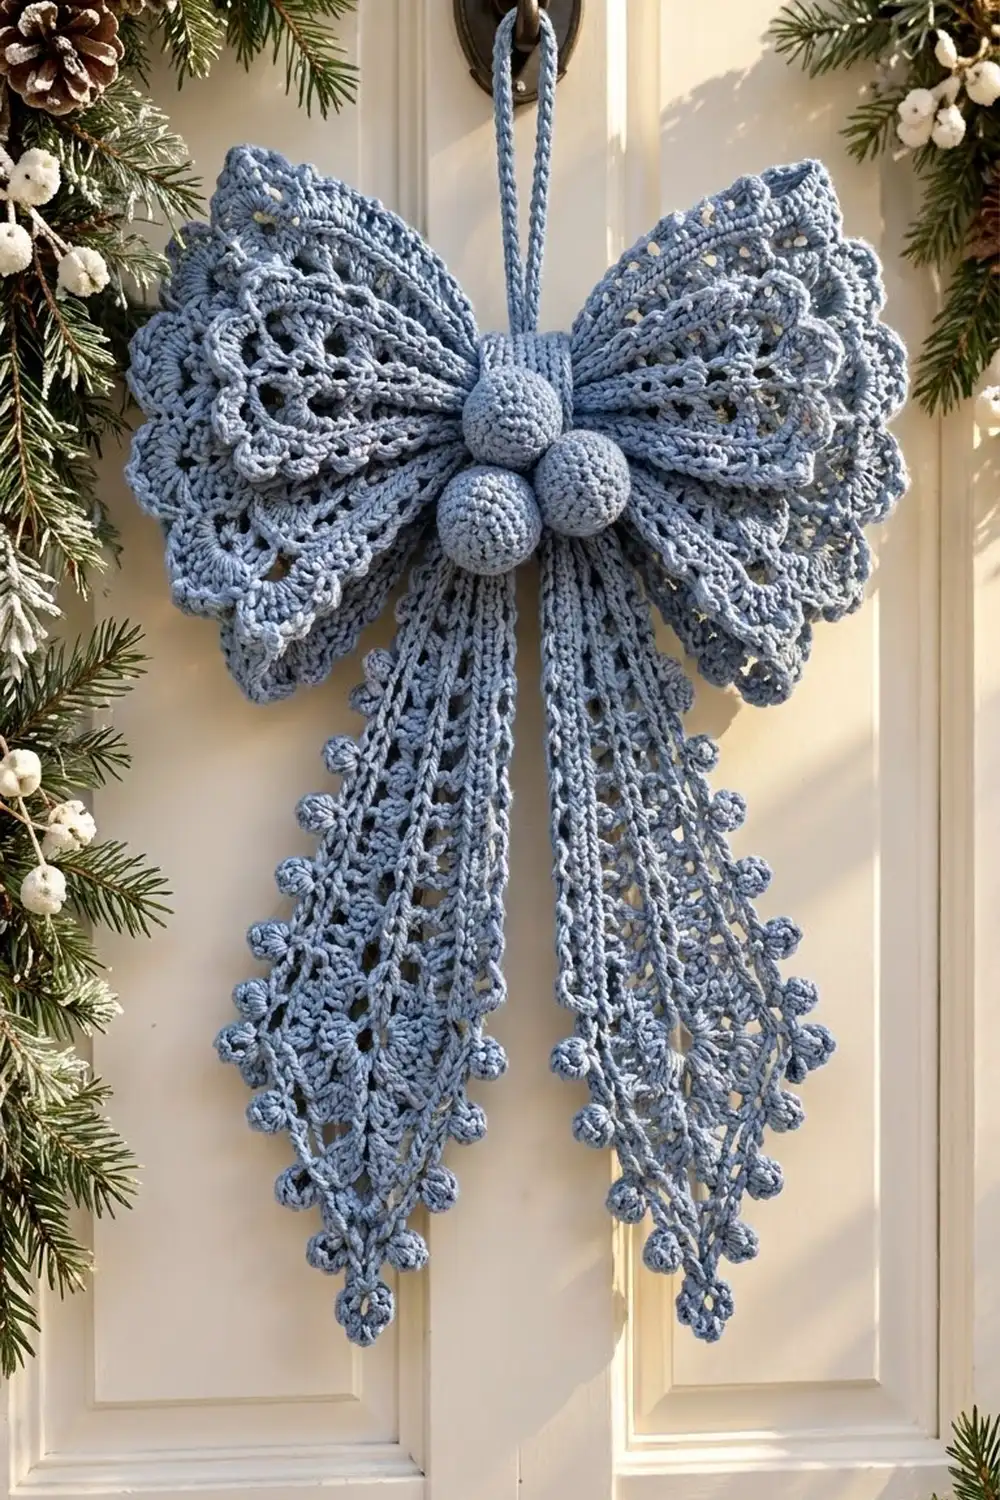
This lacy bow hangs on a door knob, a wreath hook or a mantel. It has two fan-shaped wings with layered scallops, two long pointed tails trimmed with tiny bead picots, a snug center band and three round accents on top.
The sample uses one soft dusty denim blue, a color that feels wintry without being only for Christmas. The style is vintage lace with a touch of farmhouse charm, and because there is only one color, the texture does all the work.
The pattern uses US crochet terms. The finished bow measures about 9 in (22.9 cm) wide and 13.5 in (34.3 cm) tall from the top of the wings to the tail tips, with a hanging loop of about 4 in (10.2 cm) above.
You will crochet nine pieces flat: two wings, two tails, one band, one cord and three balls. Each wing and each tail gets its own edging before assembly. Then you gather the wings, add the tails behind them, wrap the band around the center, and sew on the cord and balls.
Finished Size and Construction
- Finished size: 9 in (22.9 cm) wide x 13.5 in (34.3 cm) tall, plus a 4 in (10.2 cm) loop
- Skill level: Intermediate
- Terminology: US crochet terms
- Yarn weight: DK / light (#3), cotton or cotton blend
- Hook: 4.0 mm (G-6)
- Number of pieces: 9 (2 wings, 2 tails, 1 band, 1 cord, 3 balls)
- Layout: wings side by side, tails hanging behind, band at center, balls on band
- Wing size: 4.25 in (10.8 cm) from point to scalloped edge, about 7 in (17.8 cm) across the edge
- Tail size: 9.5 in (24.1 cm) long before edging, 3.25 in (8.3 cm) at the widest point
- Size before edging: wing 3.5 in (8.9 cm) deep; tail 9.5 in (24.1 cm) long
- Edging depth: wing scallops about 0.75 in (1.9 cm); tail picot edge about 0.5 in (1.3 cm)
Materials
Choose a smooth mercerized or matte cotton in DK weight. Cotton holds the lace shape well after blocking and shows the ribs clearly. Avoid fuzzy yarns, which blur the open spaces.
- Dusty denim blue: 120 g, about 270 m (295 yd), based on a yarn of roughly 225 m per 100 g
Approximate use per piece: wings 28 g each, tails 18 g each, band 4 g, cord 3 g, balls 3 g each. The listed amount includes a margin of roughly 10 percent for swatching and seams.
Tools:
– 4.0 mm (G-6) crochet hook
– Tapestry needle
– Small amount of polyester fiberfill
– Stitch markers
– Scissors
– Blocking mat, rustproof pins and a spray bottle
– Optional: fabric stiffener for a crisper bow
Abbreviations (US Terms)
- ch – chain
- sl st – slip stitch
- sc – single crochet
- dc – double crochet
- dc2tog / dc3tog – double crochet 2 or 3 stitches together
- inc – 2 sc in the same stitch
- dec – sc2tog
- sp – space
- st(s) – stitch(es)
- FLO – front loop only
- MR – magic ring
- RS / WS – right side / wrong side
Special stitch – Bead picot (bp): Ch 3, then work a 3-dc cluster in the 3rd ch from hook: (yo, insert hook in that ch, yo, pull up a loop, yo, pull through 2 loops) 3 times, yo, pull through all 4 loops. The cluster forms a small round bead on a short stem.
Gauge and Checkpoints
Gauge: 16 dc and 8 rows = 4 in (10.2 cm); 18 sc and 20 rows = 4 in (10.2 cm).
Make one wing first and measure it before starting the rest. The wing is your test piece: if it comes out the right size, the tails, band and balls will fit.
Checkpoints:
– Wing after Row 5: 2.5 in (6.4 cm) from point to edge
– Wing after Row 7: 3.5 in (8.9 cm) from point to edge
– Wing after edging: 4.25 in (10.8 cm) from point to scallop tips
– Tail after Row 7: 3.5 in (8.9 cm) long, 3.25 in (8.3 cm) wide
– Tail after Row 19: 9.5 in (24.1 cm) long
– Band: 1.3 in (3.3 cm) wide x 4 in (10.2 cm) long
If a piece is more than 0.5 in (1.3 cm) too big, go down one hook size. If it is too small, go up one size. Check your stitch counts first, because a missed stitch often looks like a gauge problem.
Wings (Make 2)
Each wing is worked in turned rows from the narrow point outward. Row 6 is worked in front loops only, so the back loops of Row 5 stay free for the frill.
Row 1 (RS): Ch 4 (counts as first dc), 6 dc in 4th ch from hook. Turn. (7 dc)
Row 2: Ch 5 (counts as dc and ch 2), [dc in next dc, ch 2] 5 times, dc in top of turning ch. Turn. (7 dc, 6 ch-2 sps)
Row 3: Ch 3 (counts as dc), [ch 1, dc in next ch-2 sp, ch 1, dc in next dc] 6 times, working the last dc in the 3rd ch of the turning ch. Turn. (13 dc, 12 ch-1 sps)
The new dc between each pair of original spokes creates the secondary ribs.
Row 4: Ch 5 (counts as dc and ch 2), skip first ch-1 sp, [dc in next dc, ch 2, skip next ch-1 sp] 11 times, dc in top of turning ch. Turn. (13 dc, 12 ch-2 sps)
Row 5: Ch 3, [3 dc in next ch-2 sp, dc in next dc] 12 times. Turn. (49 dc)
Checkpoint: 2.5 in (6.4 cm) from point to edge.
Row 6 (WS, FLO): Working in front loops only, ch 4 (counts as dc and ch 1), skip next st, [dc in next st, ch 1, skip next st] 23 times, dc in top of turning ch. Turn. (25 dc, 24 ch-1 sps)
The unused back loops of Row 5 now sit on the RS as a ridge of 49 loops.
Row 7 (RS): Ch 3, [dc in next ch-1 sp, dc in next dc] 24 times. Do not fasten off. (49 dc)
Checkpoint: 3.5 in (8.9 cm) from point to edge. Continue to the wing edging in the Border section.
Tails (Make 2)
Each tail is worked in turned rows from the narrow top down to the point. In the mesh rows, each dc sits on a dc, which builds the lengthwise ribs.
Row 1 (RS): Ch 9, dc in 4th ch from hook and in each ch across. Turn. (7 dc) Width: 1.75 in (4.4 cm).
Row 2 (increase mesh row): Ch 3 (counts as dc), dc in first st, [ch 1, skip next st, dc in next st] 3 times, dc in same last st. Turn. (9 sts: 6 dc, 3 ch-1 sps)
Row 3 (solid row): Ch 3, dc in each dc and ch-1 sp across. Turn. (9 dc)
Row 4: Work as Row 2 with 4 bracket repeats. (11 sts)
Row 5: Work as Row 3. (11 dc)
Row 6: Work as Row 2 with 5 bracket repeats. (13 sts)
Row 7: Work as Row 3. (13 dc)
Checkpoint: 3.5 in (8.9 cm) long, 3.25 in (8.3 cm) wide.
Row 8 (straight mesh row): Ch 4 (counts as dc and ch 1), skip next st, [dc in next st, ch 1, skip next st] 5 times, dc in top of turning ch. Turn. (13 sts: 7 dc, 6 ch-1 sps)
Row 9: Work as Row 3. (13 dc)
Rows 10–13: Repeat Rows 8–9 twice. (13 sts each row)
Checkpoint: 6.5 in (16.5 cm) long.
Row 14 (decrease): Ch 2 (does not count), dc2tog over first 2 sts, dc in each st to last 2 sts, dc2tog over last 2 sts. Turn. (11 sts)
Rows 15–18: Repeat Row 14. (9, 7, 5, 3 sts)
Row 19: Ch 2, dc3tog over all 3 sts. Fasten off. (1 st – the point)
Checkpoint: 9.5 in (24.1 cm) long.
Center Band
Row 1: Ch 7, sc in 2nd ch from hook and in each ch across. Turn. (6 sc)
Rows 2–20: Ch 1, sc in each st across. Turn. (6 sc)
Fasten off with a 12 in (30.5 cm) tail. Band: 1.3 in (3.3 cm) x 4 in (10.2 cm).
Balls (Make 3)
Work in continuous rounds and mark the first st of each round.
Rnd 1: 6 sc in MR. (6)
Rnd 2: Inc in each st. (12)
Rnd 3: [Sc in next st, inc] 6 times. (18)
Rnds 4–5: Sc in each st. (18)
Rnd 6: [Sc in next st, dec] 6 times. (12)
Stuff firmly.
Rnd 7: Dec 6 times. (6)
Close the hole, leaving a 10 in (25.4 cm) tail. Each ball is about 1.25 in (3.2 cm) across.
Hanging Cord
Ch 46. Sl st in the back bump of 2nd ch from hook and in each ch across. (45 sl st) The cord measures about 9 in (22.9 cm). Leave 8 in (20.3 cm) tails at both ends.
Make All Pieces
All pieces use the single dusty denim blue:
- 2 wings
- 2 tails
- 1 center band
- 3 balls
- 1 hanging cord
Assembly layout (front view):
              [ Cord loop ]
 [ Wing L ] [ Band + 3 Balls ] [ Wing R ]
        [ Tail L ]     [ Tail R ]
Joining
Gather the wings. Thread the starting tail of one wing through the row ends and base of Rows 1–2. Pull until the narrow end measures about 0.75 in (1.9 cm), then secure it. Repeat on the second wing.
Join the wings. Lay both wings RS up with their points facing and overlapping by 0.5 in (1.3 cm). Whipstitch through both layers at the overlap, sewing each Row 1 stitch of the top wing to the matching stitch below.
Add the tails. Turn the bow over. Place both tails behind the center with their tops overlapping by 3 sts, each angled about 15 degrees outward. Sew each tail’s 7 foundation loops to the back of the gathered center, one loop at a time.
Wrap the band. Wrap the band around the center from front to back. Sew Row 20 to the foundation loops of Row 1, one stitch to each loop (6 to 6). The seam sits on the back.
Add the cord. Fold the cord in half. Sew both ends 0.5 in (1.3 cm) under the band on the back, leaving a 4 in (10.2 cm) loop above.
Add the balls. Sew one ball centered at the top of the band. Sew the other two side by side just below it, touching.
Tension tips: Pull seams snug but not tight. The gathered center should be firm, but the wings should still flare freely.
Size checkpoint: 9 in (22.9 cm) wide; about 13.5 in (34.3 cm) from wing tops to tail tips.
Border
The wings and tails are edged separately before joining, so all border counts are per piece. No stitches are shared across seams.
Border gauge: Each 5-dc shell plus its sc uses 4 stitches, about 1 in (2.5 cm) of wing edge. The tail edge uses 2 sc per dc row end, which matches the 0.5 in (1.3 cm) row height.
Wing Edge Scallops
Row 8 (outer scallops): Continuing from Row 7, ch 1, sc in first st, [skip next st, 5 dc in next st, skip next st, sc in next st] 12 times. Fasten off. (12 shells, 13 sc)
Why it works: 1 + (12 x 4) = 49, exactly the 49 dc of Row 7.
Wing Frill (Second Tier)
With RS facing, join yarn with a sl st in the first free back loop of Row 5. Ch 1, sc in same loop, [skip next loop, 5 dc in next loop, skip next loop, sc in next loop] 12 times. Fasten off. (12 shells, 13 sc)
Why it works: Row 5 also has 49 sts, so the frill uses the same 1 + (12 x 4) = 49 math. It stands in front of the outer scallops and creates the layered look.
Tail Picot Edge
Edging Row 1: With RS facing, join yarn at the top corner at the end of Row 1. Work 2 sc in each row end from Row 1 down to Row 18 (36 sc), 3 sc in the tip of Row 19 (3 sc), then 2 sc in each row end from Row 18 back up to Row 1 (36 sc). Leave the top edge unworked. Turn. (75 sc)
Edging Row 2: Ch 1, sc in first 2 sc, [bp, sc in next 3 sc] 24 times, bp, sc in last sc. Fasten off. (75 sc, 25 bp)
Why it works: 2 + (24 x 3) + 1 = 75. The picots fall after sc 2, 5, 8 and so on up to sc 74. Sc 38, the center of the 3 tip stitches, gets a picot, so a bead sits right at the point and the two sides mirror each other.
Final Blocking
- Weave in all ends except those you will use for sewing.
- Soak the wings and tails in cool water for 10 minutes, then roll them in a towel to remove excess water.
- Pin each wing into a fan 7 in (17.8 cm) across and 4.25 in (10.8 cm) deep, pinning every shell point.
- Lift the frill gently so it stands slightly in front of the outer scallops.
- Pin each tail to 10 in (25.4 cm) long including edging, and pin out every bead picot.
- Mist with fabric stiffener if you want a crisp bow.
- Let everything dry completely, then assemble.
Final Quality-Control Checklist
- Both wings have 12 outer shells and 12 frill shells.
- Both tails have 25 bead picots, with one at the point.
- Wings measure 4.25 in (10.8 cm) deep.
- Tails measure 10 in (25.4 cm) including edging.
- The band seam and cord ends are hidden on the back.
- The balls are firm, round and sewn in a tight triangle.
- The bow hangs straight when held by the loop.
Troubleshooting
Wing cups too much: Your Row 5 shells may be tight. Use a larger hook for Rows 5–7 only.
Wing ruffles too much: Check that each ch-2 sp has exactly 3 dc in Row 5.
No place to attach the frill: Row 6 must be worked in front loops on the WS. If you worked it in both loops, the Row 5 back loops are no longer free.
Tails twist: Block them flat and pin the ribs straight while damp.
Bow tilts on the door: Re-sew the cord so both ends sit exactly at the center back.
Balls look lumpy: Add more stuffing in small pieces before Rnd 7.
Care
Hand wash in cool water with mild soap, reshape the wings and tails, and dry flat. If you used stiffener, spot clean only and re-block as needed.
Final Notes
Here is the measurement chain. The wing gauge sets the 49-stitch edge, which holds 12 shells on the outer edge and 12 more in the frill. The tails grow from 7 to 13 sts, then taper to a point inside a 75-stitch picot edge. Once you gather and wrap the center, the bow comes out 9 in (22.9 cm) wide and 13.5 in (34.3 cm) tall.
Happy crocheting!