

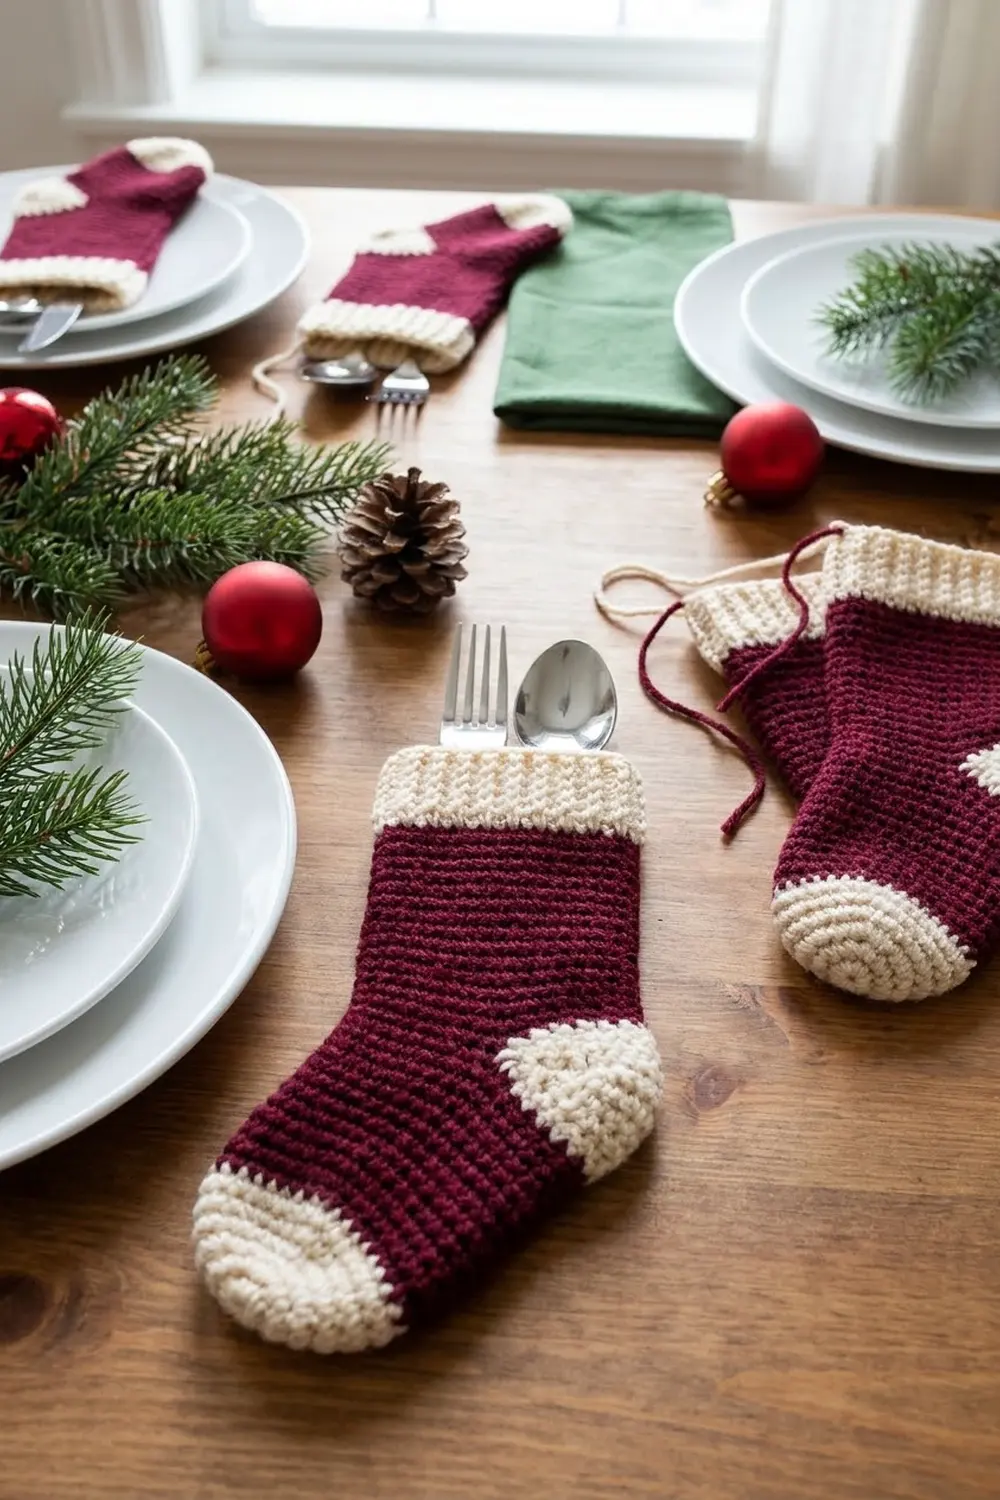
Hearthside is a small Christmas stocking that holds a fork and spoon at each place setting. It has a burgundy body, rounded cream heel and toe caps, and a ribbed cream cuff. Laid flat beside a plate, it brings a cozy, handmade look to the holiday table.
The style is classic and simple: dense single crochet for the body and post-stitch ribbing for the cuff. The pattern uses only two colors, so it is easy to make a matching set for every guest.
This pattern uses US crochet terms. The finished stocking measures about 3.5 in (8.9 cm) wide at the leg, 6.4 in (16.3 cm) tall including the cuff, and 5.6 in (14.2 cm) from heel to toe.
Here is the construction. You crochet two identical flat panels from the top down, then add a cream heel cap and toe cap to the row ends of each panel. One edging round of single crochet joins the two panels through both layers and leaves the top open. Finally, you work the ribbed cuff in rounds around the opening.
Finished Size and Construction
- Finished size: 3.5 in (8.9 cm) wide at the leg × 6.4 in (16.3 cm) tall; foot 5.6 in (14.2 cm) long
- Skill level: Easy+ (advanced beginner)
- Terminology: US crochet terms
- Yarn weight: Worsted (#4)
- Hook: 4.0 mm (US G-6)
- Number of pieces: One finished stocking, made from 2 identical panels joined into one pocket
- Layout: Single item; panels placed wrong sides together
- Panel size (before edging): leg 3 in (7.6 cm) wide; panel body 4.9 in (12.4 cm) tall; foot 5.1 in (13.0 cm) long including caps
- Size before border: same as the panel size above
- Border depth: edging adds about 0.25 in (0.6 cm) on each edge; the cuff is 1.25 in (3.2 cm) tall
Materials
Use a smooth worsted cotton or a cotton-acrylic blend. Cotton holds its shape well, washes easily and keeps the pocket firm. Avoid fuzzy yarn, because it hides the cuff ribs and sheds onto cutlery.
- Color A – Burgundy: 15 g, about 30 m
- Color B – Cream: 8 g, about 16 m
These amounts are for one stocking and include a safety margin of about 20 percent. For a set of 8, plan on 120 g (240 m) of burgundy and 64 g (128 m) of cream.
Tools:
– 4.0 mm (US G-6) crochet hook
– Tapestry needle
– 2 locking stitch markers
– Scissors
– Ruler or tape measure
– A cardboard strip 3 in (7.6 cm) wide for blocking
– Pins and a spray bottle or steam iron
Abbreviations (US Terms)
- ch – chain
- sc – single crochet
- hdc – half double crochet
- sl st – slip stitch
- sc2tog – single crochet 2 together (one decrease)
- st(s) – stitch(es)
- RS / WS – right side / wrong side
- FPhdc – front post half double crochet: yarn over, insert the hook from front to back to front around the post of the next stitch, and complete an hdc.
- BPhdc – back post half double crochet: yarn over, insert the hook from back to front to back around the post of the next stitch, and complete an hdc.
Special note: In this pattern, the ch 1 at the start of a sc row and the ch 2 at the start of a cuff round never count as stitches.
Gauge and Checkpoints
Gauge: 16 sc and 18 rows = 4 in (10.2 cm) with the 4.0 mm hook.
That works out to 4 sts and 4.5 rows per inch. The fabric should be firm enough that a spoon tip cannot poke through it.
Test one panel first. Instead of making a separate swatch, crochet the leg of Panel 1 (Rows 1–14) and measure it.
Checkpoints:
1. After Row 14: the leg is 3 in (7.6 cm) wide × 3.1 in (7.9 cm) tall.
2. After Row 22: the foot rows are 3.5 in (8.9 cm) wide; the whole panel body is 4.9 in (12.4 cm) tall.
3. After the caps: the heel cap sticks out about 0.7 in (1.8 cm) and the toe cap about 0.9 in (2.3 cm), so the foot measures 5.1 in (13.0 cm).
4. After the edging: the leg is 3.5 in (8.9 cm) wide and the foot 5.6 in (14.2 cm) long.
5. After the cuff: total height is 6.4 in (16.3 cm).
If the panel is too big, for example a leg wider than 3.1 in (7.9 cm), go down to a 3.75 mm hook. If it is too small, for example under 2.9 in (7.4 cm), go up to a 4.5 mm hook. Change the hook rather than the stitch counts, because the edging and cuff counts depend on 12 sts across each leg.
Panels (Make 2)
Single crochet looks almost the same on both sides. That means you can make both panels the same way and just flip one so the toes point the same direction.
Leg
With Color A, ch 13.
Row 1: Sc in the 2nd ch from the hook and in each ch across. (12 sts)
Rows 2–14: Ch 1, turn, sc in each st across. (12 sts)
Do not turn at the end of Row 14. The side where your hook sits now is the toe side. Put a stitch marker on that edge.
Checkpoint: 3 in (7.6 cm) wide × 3.1 in (7.9 cm) tall.
Foot
Extension: Ch 3.
Row 15: Sc in the 2nd ch from the hook and in the next ch (2 sts), then sc in each of the 12 leg sts. (12 worked 1-per-stitch + 2 extra = 14 sts)
Rows 16–22: Ch 1, turn, sc in each st across. (14 sts)
Fasten off and weave in the ends.
Checkpoint: the foot rows measure 3.5 in (8.9 cm) wide × 1.8 in (4.6 cm) tall. The panel body is 22 rows, or 4.9 in (12.4 cm), tall. The 2 extra sts stick out on the toe side to form the front ledge of the foot.
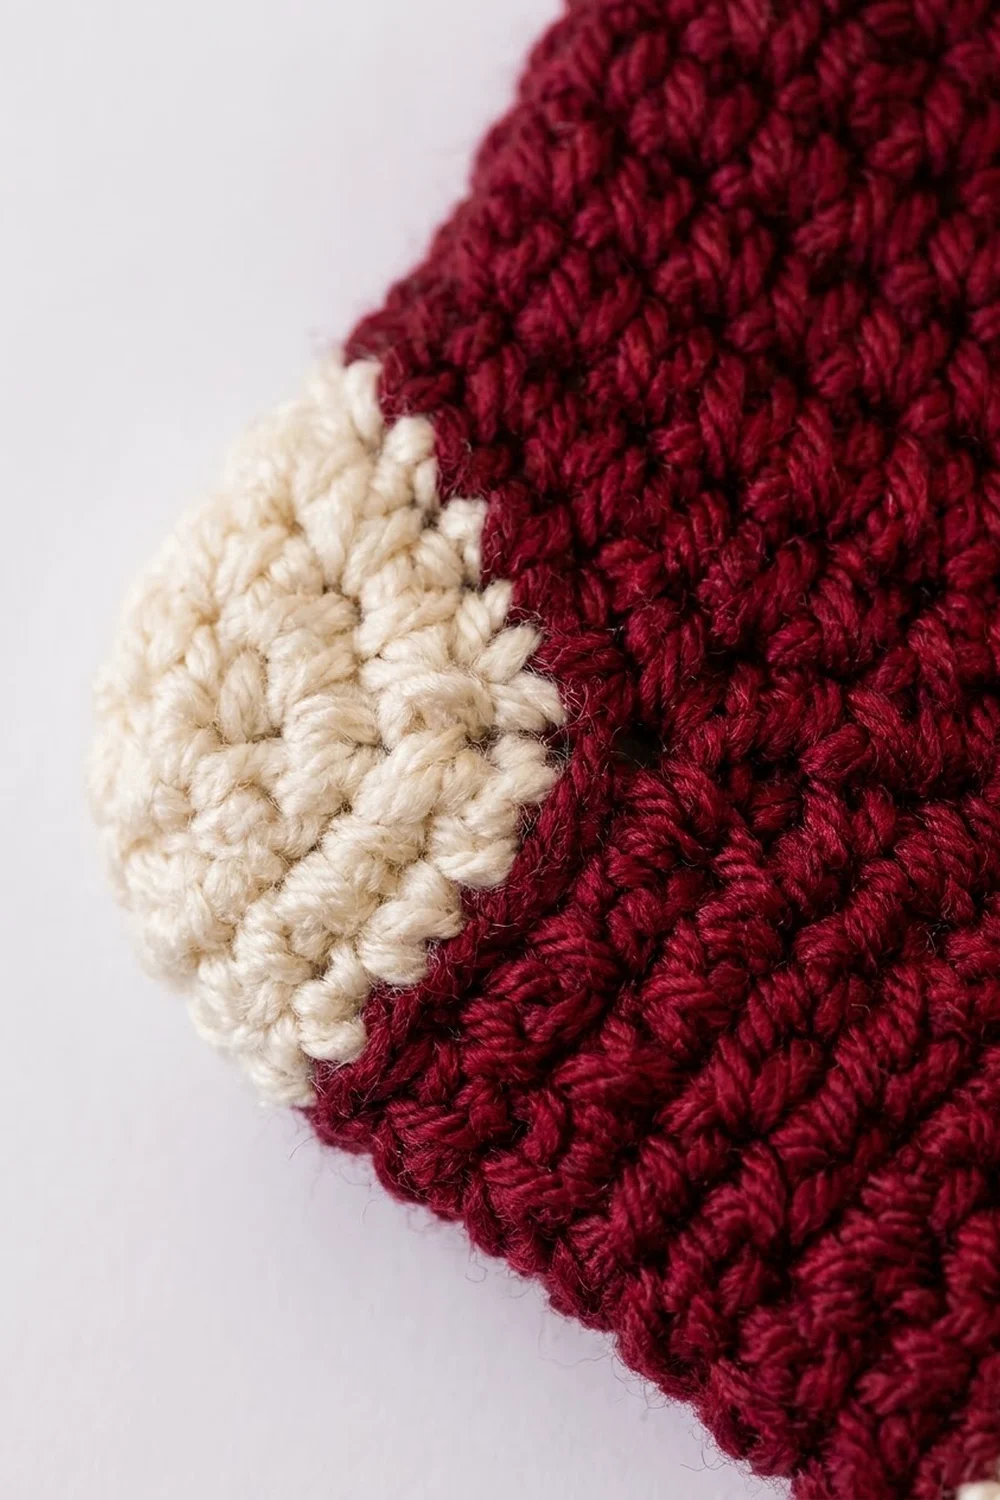
Toe Cap
Hold the panel so the toe-side row ends of Rows 15–22 face up. Join Color B at the row end of Row 15.
Row 1: Ch 1, work 1 sc in each of the 8 row ends (Rows 15–22). (8 sts)
Row 2: Ch 1, turn, sc in each st across. (8 sts)
Row 3: Ch 1, turn, sc2tog, sc in the next 4 sts, sc2tog. (6 sts)
Row 4: Ch 1, turn, sc2tog, sc in the next 2 sts, sc2tog. (4 sts)
Fasten off. The decreases at both ends of the last two rows round off the corners into a curved toe.
Heel Cap
Turn the panel so the opposite row ends of Rows 15–22 face up. This is the back edge, and it lines up with the back edge of the leg. Join Color B at the row end of Row 22.
Row 1: Ch 1, work 1 sc in each of the 8 row ends. (8 sts)
Row 2: Ch 1, turn, sc2tog, sc in the next 4 sts, sc2tog. (6 sts)
Row 3: Ch 1, turn, sc2tog, sc in the next 2 sts, sc2tog. (4 sts)
Fasten off and weave in all ends. The heel cap is one row shorter than the toe cap, so the heel bulges only a little past the back of the leg.
Make a second panel exactly the same way. Then compare the two: their row counts and measurements should match within 0.1 in (0.3 cm).
Border: Seaming Edge and Ribbed Cuff
The border has two parts. A single edging round joins the panels and outlines the stocking, and then the cuff is worked around the top opening.
Border gauge: edging sc are worked 1 per row end and 1 per stitch at the same 4 sts per inch as the panel. That spacing keeps the edges from rippling or pulling in.
Edging Round (Joining)
Place the panels wrong sides together with the edges lined up and the toes pointing the same way. Every stitch in this round goes through both layers.
When the color changes, finish the last sc in the old color with the new color. Carry the unused yarn between the two layers so it stays hidden inside the pocket.
Join Color A at the top back corner of the leg, at the row end of Row 1.
- Back leg: 14 sc, 1 in each row end of Rows 1–14. (14)
- Heel cap (Color B): 3 sc along the upper cap row ends, 4 sc across cap Row 3, 3 sc along the lower cap row ends. (10)
- Bottom (Color A): 1 sc in each st of Row 22. (14)
- Toe cap (Color B): 4 sc along the lower cap row ends, 4 sc across cap Row 4, 4 sc along the upper cap row ends. (12)
- Foot ledge (Color A): 1 sc in each of the 2 unused chain loops of the Row 15 extension. (2)
- Front leg (Color A): 1 sc in each row end of Rows 14 to 1. (14)
Total: 14 + 10 + 14 + 12 + 2 + 14 = 66 sts. Fasten off at the top front corner. Do not stitch across the top, because that is the opening.
Why the math works: every row end and every stitch gets exactly one sc, so each edge stays as long as the fabric under it. You don’t need extra corner stitches, because the cap decreases already round the corners. The back and front leg edges both have 14 sts, so the leg stays straight and the pocket sits flat.
Checkpoint: the leg now measures 3.5 in (8.9 cm) across and the foot 5.6 in (14.2 cm).
Ribbed Cuff (Worked in Rounds)
The top opening is made of the foundation-chain loops of Row 1 on both panels (12 per panel), plus the ends of the two side seams.
Rnd 1: Join Color B at the back seam. Ch 1, sc in the seam end, sc in each of the 12 foundation loops of the front panel, sc in the front seam end, then sc in each of the 12 foundation loops of the back panel. Sl st to the first sc. (24 worked 1-per-stitch + 2 extra at the seams = 26 sts)
Rnd 2: Ch 2, hdc in each st around. Sl st to the first hdc. (26 sts)
Rnd 3: Ch 2, FPhdc around the next st, BPhdc around the next st; repeat from * 12 more times. Sl st to the first FPhdc. (26 sts: 13 FPhdc + 13 BPhdc)
Rnd 4: Ch 2, FPhdc around the FPhdc, BPhdc around the BPhdc; repeat around. Sl st to the first FPhdc. (26 sts)
Fasten off and weave in the tail on the inside.
Why the math works: 26 is even, so the FP/BP pattern repeats exactly 13 times and the ribs line up in straight columns. The 2 extra seam stitches make the cuff a little wider than the leg, so it looks like a turned-down cuff rather than a continuation of the body. Measured flat, each side of the cuff has 13 sts, or 3.25 in (8.3 cm). The ribbing spreads that out to about 3.5 in (8.9 cm). The four rounds stack to 1.25 in (3.2 cm).
Final Blocking
- Weave in any remaining tails so they stay between the layers.
- Slide the 3 in (7.6 cm) cardboard strip into the leg so the pocket is open and flat.
- Pin the stocking to a blocking mat: leg 3.5 in (8.9 cm) wide, foot 5.6 in (14.2 cm) long, total height 6.4 in (16.3 cm).
- Mist it lightly with water, or hold a steam iron about 1 in (2.5 cm) above it. Never press the iron onto the fabric.
- Use your fingers to round the heel and toe caps and straighten the cuff ribs.
- Leave it to dry completely, at least 2 hours, before you take out the cardboard.
Final Quality-Control Checklist
- Each panel has 14 leg rows of 12 sts and 8 foot rows of 14 sts.
- The toe cap ends with 4 sts after 4 rows; the heel cap ends with 4 sts after 3 rows.
- The edging round has 66 sts, and the top stays open.
- No carried yarn shows on the outside.
- The cuff has 26 sts and 13 straight, unbroken ribs.
- The leg is 3.5 in (8.9 cm) wide, the foot 5.6 in (14.2 cm), the height 6.4 in (16.3 cm).
- A dinner fork and spoon slide in together and stand upright.
Troubleshooting
The panel edges ripple. You are probably putting more than 1 sc in some row ends. Count each edge against the totals listed in the edging round.
The leg is pulling into a trapezoid. You may be missing the first or last stitch of a row. Check that every row has 12 sts.
The caps look pointy. Make sure the sc2tog decreases are at both ends of each decrease row, not in the middle.
The cuff ribs are slanting. You may be posting around the wrong stitch type. Always work an FPhdc around an FPhdc and a BPhdc around a BPhdc.
The cuff flares out. Your hdc may be too loose. Work the cuff with a 3.75 mm hook.
The cutlery won’t fit. If your gauge is correct, choose slimmer cutlery or add one more sc row to the leg on both panels. That makes each panel 13 sts wide, which changes the cuff count to 28 (still even).
Care
Hand wash in cool water with a mild soap, press out the water in a towel, and dry flat, reshaping it over the cardboard strip. Store flat, with no cutlery inside, so the cuff keeps its shape.
Final Notes
Here is the measurement chain to keep in mind. Gauge is 16 sc and 18 rows to 4 in (10.2 cm). The leg is 3 in (7.6 cm) wide after Row 14, and the panel body is 4.9 in (12.4 cm) tall after Row 22. The caps bring the foot to 5.1 in (13.0 cm). The 66-st edging joins the panels and brings the stocking to 3.5 in (8.9 cm) by 5.6 in (14.2 cm). Finally, the 26-st cuff adds 1.25 in (3.2 cm), for a finished height of 6.4 in (16.3 cm). If you check each stage as you go, every stocking in your set will match the others.
Happy crocheting!