

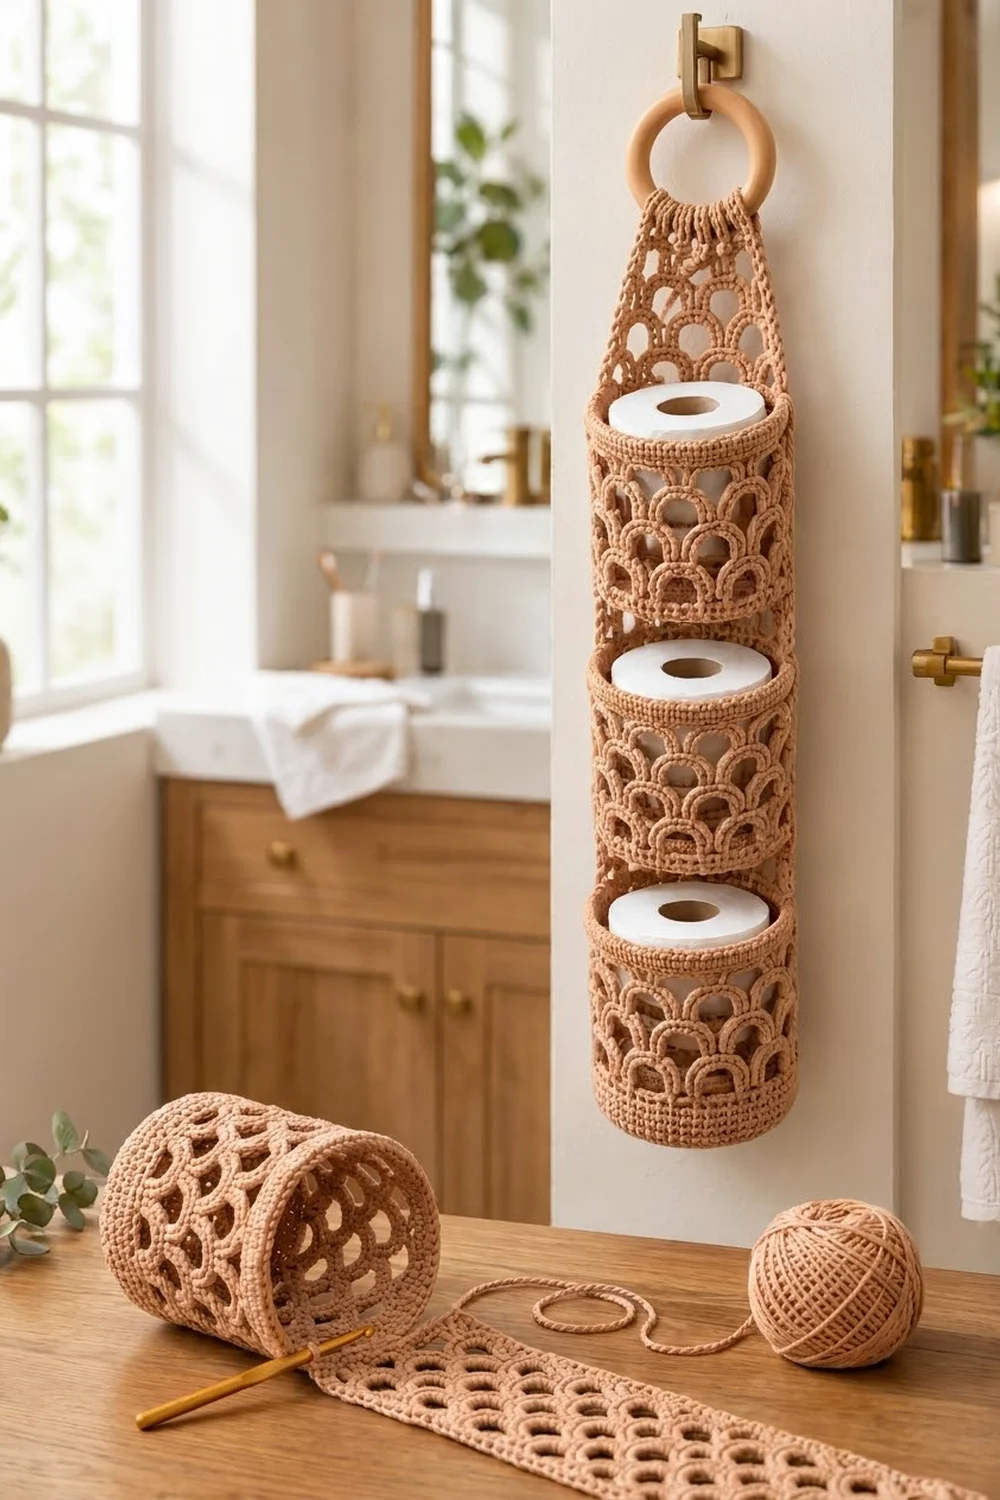
This hanging holder stores three rolls of toilet paper. Three round pockets are stitched onto a long arch-mesh back panel, and the whole piece hangs from a simple wooden ring. The padded arches sit in staggered rows like fish scales, so it looks like a decorative piece rather than plain storage.
The sample uses a single shade of blush terracotta cotton. It goes well with brass fixtures, white towels, and warm wood. Any solid color works, but light and mid tones show the arch texture best.
This pattern uses US crochet terms. The holder measures about 5.75 in (14.6 cm) wide and 23 in (58.4 cm) tall including the ring. Each pocket is 4.8 in (12.2 cm) across and 4.5 in (11.4 cm) tall.
You make it in four pieces. The back panel is worked flat in rows and finished with a single crochet border. The three pockets are worked in the round from the base up. You sew the pockets to the panel, then gather the top of the panel and fold it over the ring.
Finished Size and Construction
- Finished size: 5.75 in (14.6 cm) wide x about 23 in (58.4 cm) tall, ring included
- Skill level: Intermediate
- Terminology: US
- Yarn weight: Worsted (#4) cotton
- Hook: 5.0 mm (H-8)
- Number of pieces: 1 back panel + 3 pockets
- Layout: pockets stacked vertically on the panel, 0.75 in (1.9 cm) apart
- Pocket size: 4.8 in (12.2 cm) diameter x 4.5 in (11.4 cm) tall
- Panel size before border: 5.25 in (13.3 cm) x about 21.25 in (54.0 cm)
- Border depth: 0.25 in (0.6 cm), 1 round
Materials
Use 100% cotton or a cotton blend. Cotton holds the arches crisp and stands up to bathroom humidity. The sample yarn runs about 1.55 m per gram (for example, 70 g / 109 m skeins).
- Blush Terracotta (one color): 220 g / about 340 m (372 yd)
- Each pocket: about 45 g / 70 m
- Back panel: about 60 g / 93 m
- Border and sewing: about 10 g / 16 m
These quantities include a margin of roughly 10% for gauge swatches and tension differences.
Tools:
– 5.0 mm (H-8) crochet hook
– Wooden ring, 3 in (7.6 cm) outer diameter
– Tapestry needle
– 8 locking stitch markers
– Scissors and measuring tape
– Spray bottle and blocking pins
Abbreviations (US Terms)
- ch – chain
- sc – single crochet
- inc – 2 sc in the same stitch
- sl st – slip stitch
- sk – skip
- sp – space
- BLO – back loop only
- MR – magic ring
- st(s) – stitch(es)
Special stitch – Covered Arch: work 5 sc into one ch-4 space, pushing the stitches together so they fully cover the chain. The center (3rd) sc of the 5 is the top of the arch. The next arch row is anchored at that point.
Gauge and Checkpoints
Gauge: 16 sc x 18 rows = 4 in (10.2 cm) in sc worked flat.
Arch gauge: one arch row plus one cover row = about 0.8 in (2.0 cm) tall.
Make one pocket before starting anything else. It is the best gauge test, because the pocket has to fit a roll.
Checkpoints:
– Pocket Rnd 5 (30 sts): base diameter about 2.4 in (6.1 cm).
– Pocket Rnd 10 (60 sts): base diameter 4.8 in (12.2 cm), circumference 15 in (38.1 cm).
– Pocket Rnd 13: side height 0.67 in (1.7 cm).
– Finished pocket: 4.5 in (11.4 cm) tall.
– Panel Row 10: 5.25 in (13.3 cm) wide x about 3.65 in (9.3 cm) tall.
If the work is too big: go down to a 4.5 mm hook. If it is too small: go up to a 5.5 mm hook. A pocket that’s 0.25 in (0.6 cm) too narrow can make it hard to drop a roll in, so err on the larger side.
Pocket (Make 3)
Work in continuous rounds for the base. From Rnd 11 on, join each round with a sl st to the first sc.
Base
Rnd 1: 6 sc in MR. (6)
Rnd 2: inc in each st around. (12)
Rnd 3: (sc 1, inc) x 6. (18)
Rnd 4: (sc 2, inc) x 6. (24)
Rnd 5: (sc 3, inc) x 6. (30)
Rnd 6: (sc 4, inc) x 6. (36)
Rnd 7: (sc 5, inc) x 6. (42)
Rnd 8: (sc 6, inc) x 6. (48)
Rnd 9: (sc 7, inc) x 6. (54)
Rnd 10: (sc 8, inc) x 6. Sl st to first sc. (60)
The base should lie flat at 4.8 in (12.2 cm).
Bottom Band
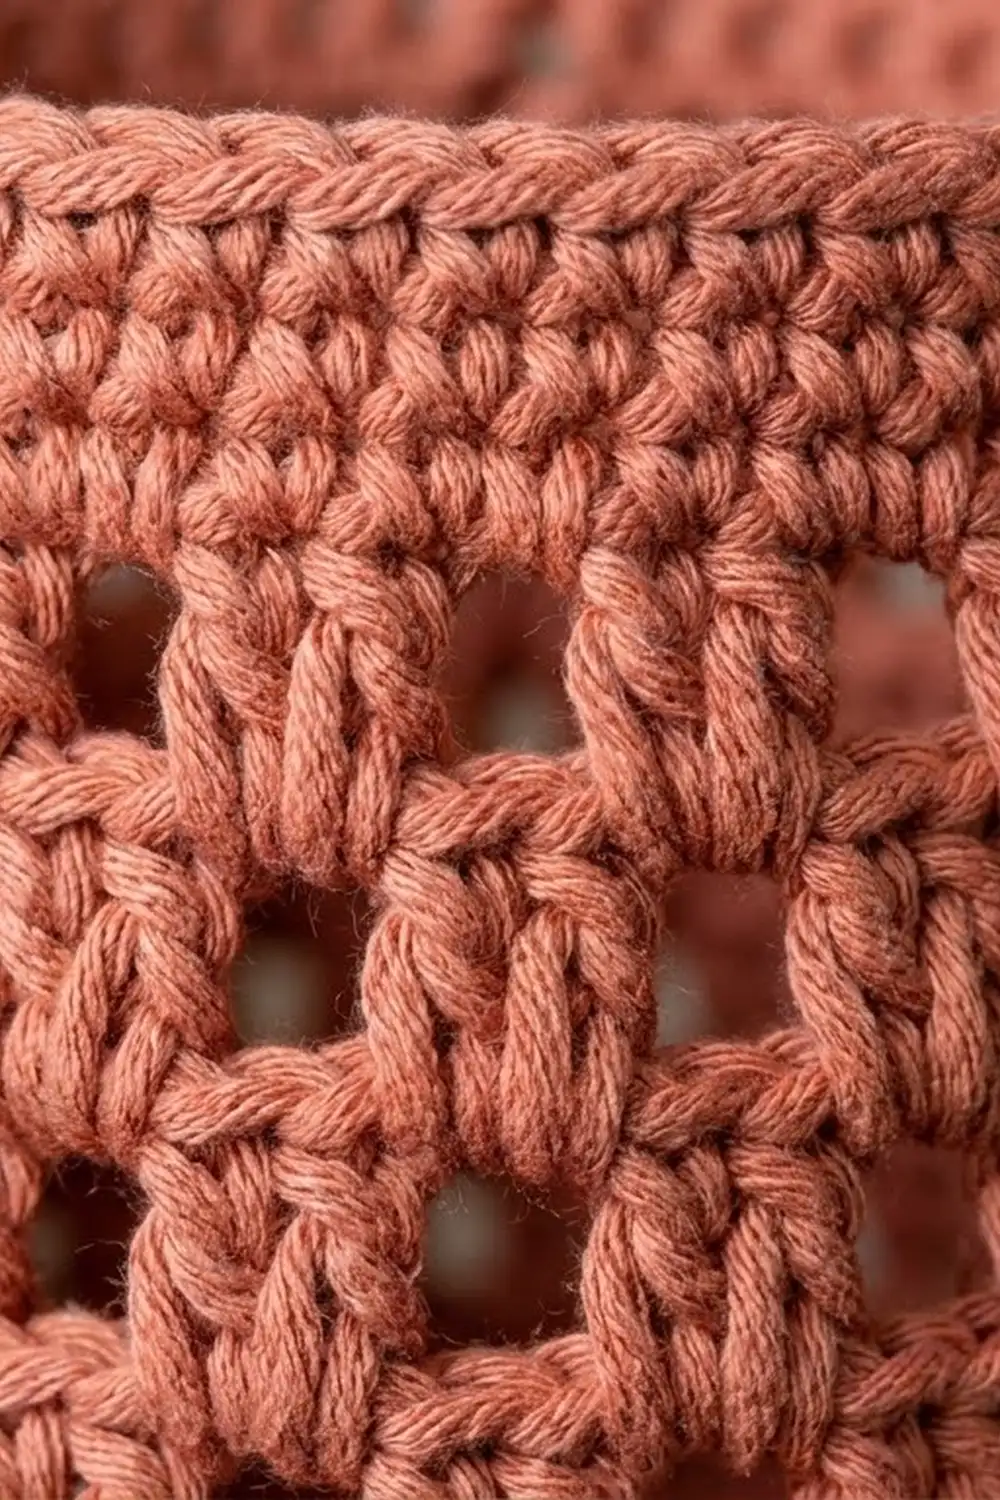
Rnd 11: ch 1, sc BLO in each st around, sl st to first sc. (60) This makes a clean fold line where the base meets the sides.
Rnds 12–13: ch 1, sc in each st around, sl st to first sc. (60)
Arch Section
Rnd 14 (Set-up Arch Round): ch 1, sc in first st, *ch 4, sk 3, sc in next st; repeat from * 13 more times, ch 4, sk 3, sl st to first sc. (15 sc anchors, 15 ch-4 sps)
Check: 15 repeats x 4 sts = 60. Every stitch of Rnd 13 is used.
Rnd 15 (Cover Round): sl st into first ch-4 sp, ch 1, 5 sc in each ch-4 sp around, sl st to first sc. (15 x 5 = 75 sc, which is 15 Covered Arches)
The anchor sc from Rnd 14 are skipped. They stay hidden at the feet of the arches.
Rnd 16 (Offset Arch Round): sl st in next 2 sc to reach the center sc of the first arch. Ch 1, sc in same st, *ch 4, sc in center sc of next arch; repeat from * 13 more times, ch 4, sl st to first sc. (15 anchors, 15 ch-4 sps)
Each new arch now spans between two arch tops below. That gives you the staggered fish-scale layout.
Rnd 17: repeat Rnd 15. (75)
Rnd 18: repeat Rnd 16. (15 ch-4 sps)
Rnd 19: repeat Rnd 15. (75)
Rnd 20: repeat Rnd 16. (15 ch-4 sps)
That makes four tiers of arches.
Top Band
Rnd 21 (Conversion Round): ch 1, *sc in anchor sc, 3 sc in ch-4 sp; repeat from * 14 more times, sl st to first sc. (15 sc in anchors + 45 sc in spaces = 60)
Rnds 22–24: ch 1, sc in each st around, sl st to first sc. (60)
Fasten off and leave a 30 in (76.2 cm) tail for sewing.
Pocket checkpoint: 4.8 in (12.2 cm) diameter x 4.5 in (11.4 cm) tall. The bottom band is 0.67 in (1.7 cm), the arches are 3.2 in (8.1 cm), and the top band is 0.67 in (1.7 cm).
Back Panel
Work flat in rows. Turn at the end of every row. The ch 1 does not count as a stitch.
Ch 22.
Row 1: sc in 2nd ch from hook and in each ch across. (21)
Row 2: ch 1, turn, sc in each st across. (21)
Row 3 (Arch Row A, set-up): ch 1, turn, sc in first st, *ch 4, sk 3, sc in next st; repeat from * 4 more times. (6 anchors, 5 ch-4 sps)
Check: 1 + (5 x 4) = 21.
Row 4 (Cover Row A): ch 1, turn, 5 sc in each ch-4 sp across. (5 x 5 = 25)
Row 5 (Arch Row B): ch 1, turn, sc in first sc, ch 2, sc in center (3rd) sc of first arch, *ch 4, sc in center sc of next arch; repeat from * 3 more times, ch 2, sc in last sc. (7 anchors, 2 ch-2 sps, 4 ch-4 sps)
The ch-2 spaces make half-arches at the edges, which keeps the sides straight.
Row 6 (Cover Row B): ch 1, turn, 3 sc in ch-2 sp, 5 sc in each of the next 4 ch-4 sps, 3 sc in last ch-2 sp. (3 + 20 + 3 = 26)
Row 7 (Arch Row A): ch 1, turn, sc in first sc, ch 4, sc in center sc of first full arch, *ch 4, sc in center sc of next arch; repeat from * 2 more times, ch 4, sc in last sc. (6 anchors, 5 ch-4 sps)
In the 26-st row, the anchors are sts 1, 6, 11, 16, 21, and 26.
Row 8: repeat Row 4. (25)
Rows 9–50: repeat Rows 5–8 another 10 times, then repeat Rows 5–6 once more. Row 50 is a Cover Row B. (26)
Rows 3–50 give you 24 arch tiers, about 19.2 in (48.8 cm).
Row 51: repeat Row 7. (6 anchors, 5 ch-4 sps)
Row 52 (Conversion Row): ch 1, turn, sc in first anchor, *3 sc in ch-4 sp, sc in next anchor; repeat from * 4 more times. (6 sc in anchors + 15 sc in spaces = 21)
Rows 53–56: ch 1, turn, sc in each st across. (21)
Do not fasten off. Go straight on to the border.
Panel checkpoint: 5.25 in (13.3 cm) x about 21.25 in (54.0 cm). That breaks down as 0.44 in for Rows 1–2, 19.2 in for Rows 3–50, 0.8 in for Rows 51–52, and 0.89 in for Rows 53–56.
Make All Pieces
All four pieces use the one color, Blush Terracotta:
- 3 pockets, about 45 g each
- 1 back panel, about 60 g
Layout (front view, top to bottom):
      [ wooden ring ]
     \  gathered top  /
     |  panel mesh    |   6.75 in (17.1 cm) above Pocket 3
     | [ POCKET 3 ]   |   10.5–15.0 in (26.7–38.1 cm)
     |   gap 0.75 in  |
     | [ POCKET 2 ]   |   5.25–9.75 in (13.3–24.8 cm)
     |   gap 0.75 in  |
     | [ POCKET 1 ]   |   0–4.5 in (0–11.4 cm)
Pocket positions are measured up from the bottom edge of the bordered panel.
Border
Border gauge: along the long sides the border works out to about 3.8 sts per inch. That is slightly tighter than body gauge, which stops the open mesh from stretching out lengthwise.
Rnd 1: ch 1, rotate to work down the left side.
- Left side: work into row-ends from Row 55 down to Row 2. Work 1 sc in each sc row-end, 2 sc around each arch row-end, and 1 sc in each cover row-end. (79 sc)
- Bottom-left corner: 3 sc in first st of Row 1.
- Bottom edge: sc in each of the next 19 sts. (19)
- Bottom-right corner: 3 sc in last st.
- Right side: work up from Row 2 to Row 55 using the same rule. (79)
- Top corners and top edge: 3 sc in first st of Row 56, sc in next 19 sts, 3 sc in last st.
Sl st to first sc. Total: 208 sc.
Why the math works:
- The sides cover 54 rows: Rows 2–55, with Rows 1 and 56 left to the corners. Of these, 5 are sc rows (5 sc), 25 are arch rows (50 sc), and 24 are cover rows (24 sc), for 79 per side.
- The top and bottom edges each have 21 sts. The 2 corner sts take 3 sc each, and the 19 between them take 1 each.
- Total: 79 + 79 + 19 + 19 + (4 x 3) = 208.
Fasten off and weave in the end.
Bordered panel: 5.75 in (14.6 cm) x about 21.75 in (55.2 cm).
Joining
Method: whipstitch with the pocket tail, through both loops.
- Mark the pocket back. On Rnd 13 and Rnd 22 of each pocket, place markers 12 sts apart, centered on the round’s join seam. That marks 3 in (7.6 cm) of each band as the back, and it hides the seam against the panel.
- Position the pocket. Center the marked area on the panel, leaving 1.375 in (3.5 cm) of panel showing on each side. Pin each pocket in place using the layout heights above.
- Bottom band. Sew the 12 marked sts of Rnds 12–13 to the panel in a straight line, one panel stitch for each pocket stitch.
- Pocket 1 lines up with panel Rows 1–2, so it’s a clean sc-to-sc match.
- For Pockets 2 and 3, sew into the covered-arch sc. Each arch has 5 sc, so 12 pocket sts span about 2.4 arches, which is the same 3 in (7.6 cm).
- Top band. Sew the 12 marked sts of Rnds 22–24 the same way.
- Sides. Run a vertical line of whipstitch up each marker line through the arch section, catching every anchor sc to the panel behind it.
Tension: stitches should be snug but not puckered. If the panel bunches behind the pocket, loosen up and re-sew. Fiber stays stretchy when it’s sewn loosely.
Size checkpoint: gaps between pockets measure 0.75 in (1.9 cm), and 6.75 in (17.1 cm) of panel shows above Pocket 3.
Attach the ring:
- Weave a strand through the sts of Row 52 and gather the top to about 2 in (5.1 cm) wide.
- Fold Rows 53–56 and the top border, about 1 in (2.5 cm), over the ring to the back.
- Whipstitch the folded edge to Row 52. This creates the tapered top.
Final Blocking
- Insert one roll into each pocket to hold its shape.
- Lay the holder flat on a towel and mist it until damp.
- Pin the panel straight at 5.75 in (14.6 cm) wide. Nudge each arch round with your fingers.
- Set each pocket rim level and check that each one is 4.5 in (11.4 cm) tall.
- Let it dry completely, then remove the pins. Hang it up to let the gathered top settle.
Final Quality-Control Checklist
- Each pocket has 60 sts on Rnds 13 and 24, and 15 arches per arch round.
- The panel has 21 sts on Rows 1, 2, 52, and 56, and the border has 208 sc.
- The arches are evenly staggered, with no doubled or missing arch.
- Pockets are centered, level, and evenly spaced.
- The ring is fully wrapped and the top is firmly stitched.
- A roll slides in and out easily.
Troubleshooting
- Arch round has 14 or 16 arches: count anchors before covering. Rnd 14 must skip exactly 3 sts each time.
- Arches look flat or gappy: pack all 5 sc tightly into each ch-4, or go down to a ch-3 if your yarn is thin.
- Panel edges wave: you have too many border sts along the sides. Work 1 sc instead of 2 at every fourth arch row-end.
- Pocket too tight for a roll: add 6 sts to the base (Rnd 11 with 66 sts doesn’t divide by 4), or remake it with a 5.5 mm hook.
- Base cups: go up one hook size for Rnds 1–10 only.
- Holder tilts: re-center the pockets, then re-gather the top evenly.
Care
Spot clean, or hand wash in cool water. Reshape the holder and lay it flat to dry with the rolls removed.
Final Notes
The measurement chain runs like this:
- Gauge is 16 sc = 4 in (10.2 cm).
- The 60-stitch pocket base is 4.8 in (12.2 cm) across.
- Four tiers of arches between the two bands make a pocket 4.5 in (11.4 cm) tall.
- The 21-stitch panel is 5.25 in (13.3 cm) wide and grows to 5.75 in (14.6 cm) with the border.
- Three pockets with 0.75 in (1.9 cm) gaps leave 6.75 in (17.1 cm) of panel to gather over the ring.
Check each link in that chain and the holder will hang straight and hold three rolls.
Happy crocheting!