

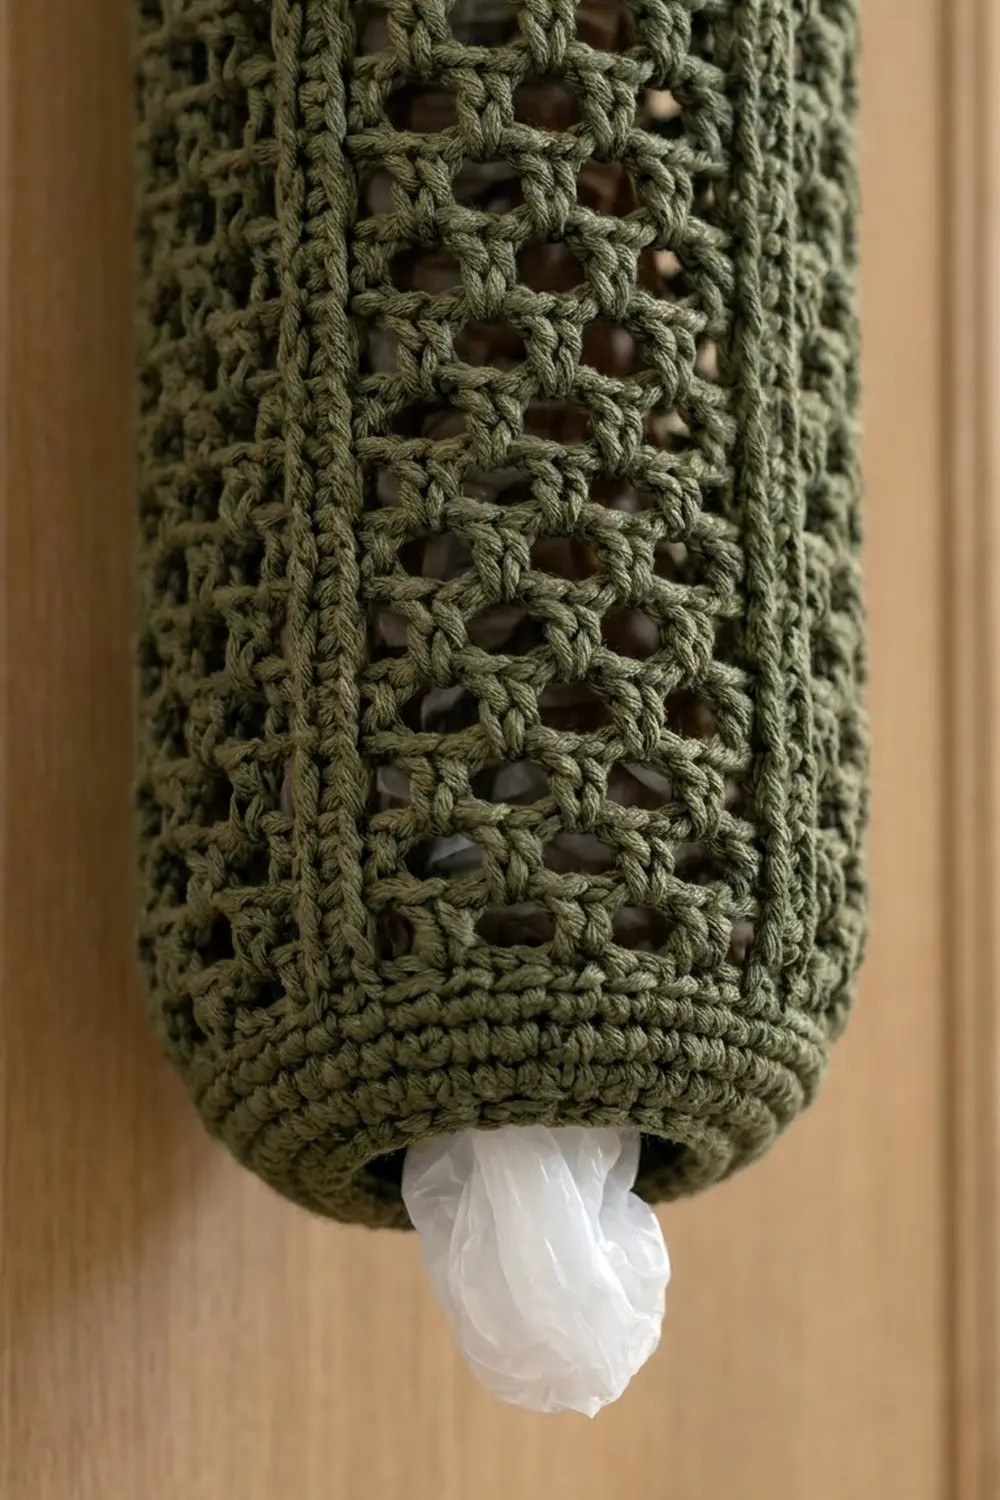
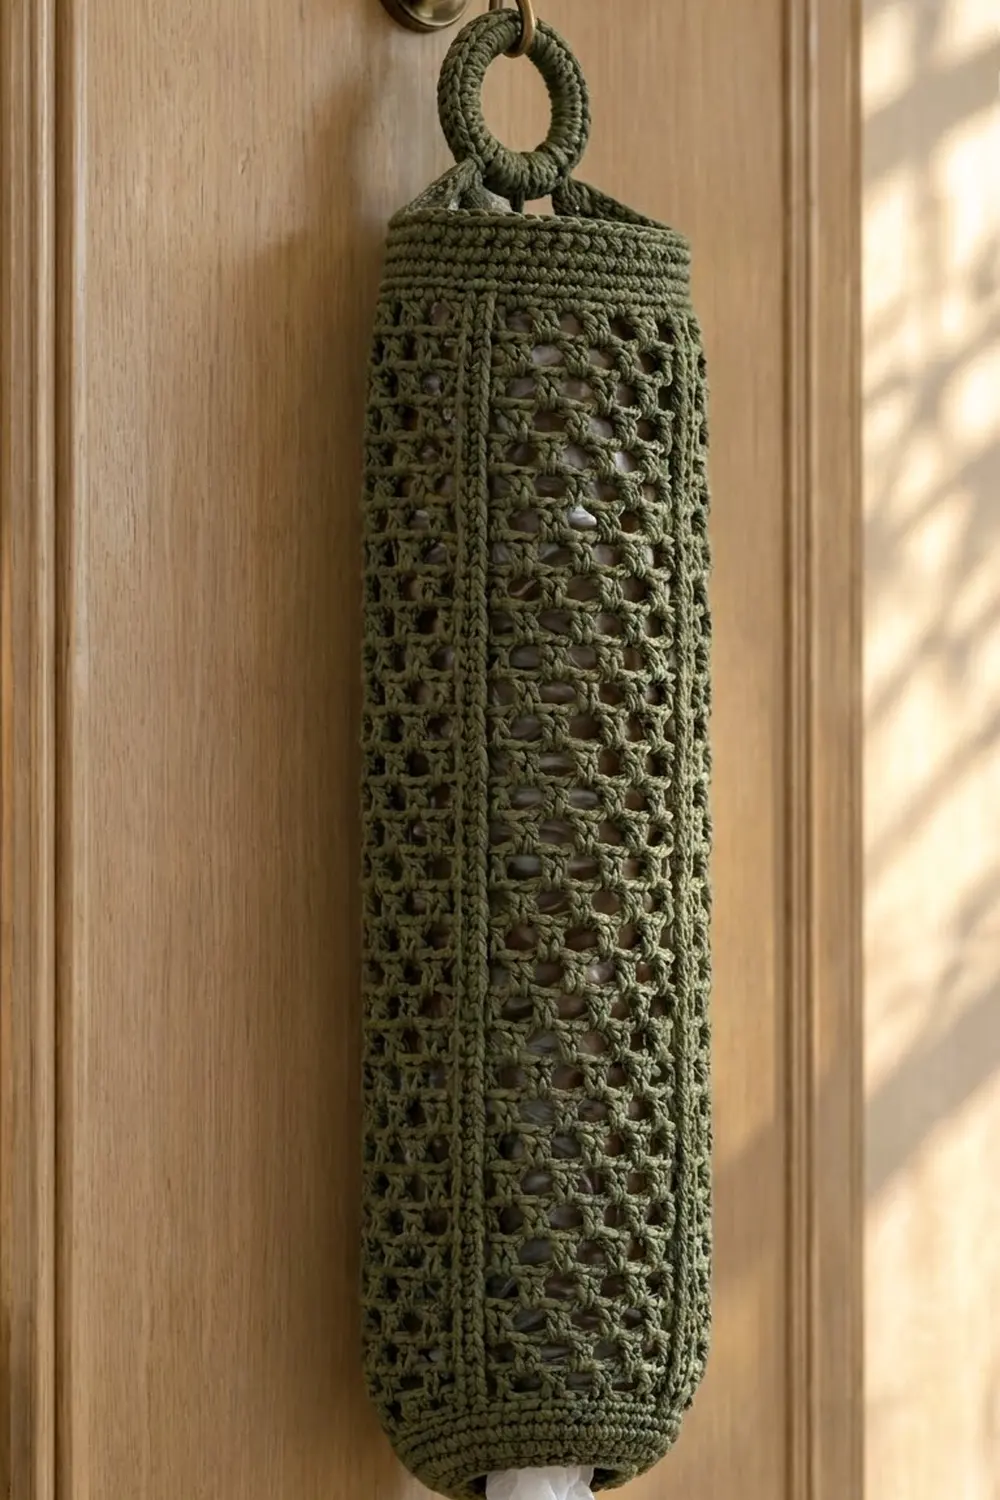
This bag holder is a tall tube of open lattice mesh with four solid vertical ribs. It hangs from a crochet-covered ring on a door hook. You stuff plastic bags in through the wide top and pull them out one at a time through the narrower, gathered bottom. The mesh lets you see when you’re running low, and the ribs keep the tube straight and give it a clean, structured look.
The sample uses one color, a muted olive green worsted cotton. Against warm wood and stone, the tone reads modern farmhouse: calm and practical. Cotton gives crisp stitch definition and holds its shape when the tube is full.
The pattern uses US crochet terms. The finished body is about 17 in (43.2 cm) long and 5.4 in (13.7 cm) across, or 8.5 in (21.6 cm) wide when flattened. Including the ring, the holder hangs about 20.5 in (52.1 cm) long.
You work the body top-down in joined rounds: a solid single crochet band at the top, then 29 rounds of offset double crochet mesh with ribs, then a conversion round back to single crochet. A gathered border closes the bottom down to a dispensing opening. Finally, you cover a ring in single crochet and attach it with a short tab.
Finished Size and Construction
- Finished body: 17 in (43.2 cm) long × 8.5 in (21.6 cm) flat width; 17 in (43.2 cm) circumference
- Overall hanging length: about 20.5 in (52.1 cm) including ring
- Skill level: Easy / advanced beginner
- Terminology: US
- Yarn weight: Worsted (#4), cotton or cotton blend
- Hook: 5.0 mm (US H-8)
- Number of pieces: 1 tubular body, plus a crochet-covered ring attached by a tab worked off the body
- Layout: 4 identical 17-stitch sections around the tube, each made of a 3-stitch rib and a 14-stitch mesh panel
- Section width: 4.25 in (10.8 cm)
- Size before border: 15.8 in (40.1 cm) long × 8.5 in (21.6 cm) flat
- Border depth: bottom about 0.9 in (2.3 cm); top edge about 0.2 in (0.5 cm)
Materials
Yarn: Use a smooth worsted-weight cotton or cotton blend (about 170 m per 100 g). Cotton holds the mesh open and does not stretch out under the weight of the bags. Pure acrylic works too, but the tube will be softer and may sag a little.
- Olive green: 150 g (about 255 m / 279 yd)
The amount includes a margin of about 25% for your gauge swatch and small differences in tension.
Tools:
- 5.0 mm (US H-8) crochet hook
- 1 metal or wooden ring, 2 in (5.1 cm) inside diameter
- 4 stitch markers
- Tapestry needle
- Scissors
- Tape measure
- For blocking: a spray bottle, plus a pool noodle, rolled towel, or tall bottle to fill the tube
Abbreviations (US Terms)
- ch – chain
- sc – single crochet
- dc – double crochet
- sc2tog – single crochet 2 together
- sl st – slip stitch
- sk – skip
- sp – space
- st(s) – stitch(es)
- rnd(s) – round(s)
- RS – right side
Special stitches:
- Rib: dc in each of the next 3 sts. On the first rib of a round, ch 3 counts as the first dc, so work only 2 more dc.
- Mesh A: 5 ch-2 sps and 4 dc between two ribs.
- Mesh B: a ch-1, 4 ch-2 sps, a closing ch-1, and 5 dc between two ribs. Mesh A and Mesh B alternate, so each round’s dc sit in the spaces of the round below. That offset creates the honeycomb lattice.
Gauge and Checkpoints
Single crochet gauge: 16 sc and 18 rnds = 4 in (10.2 cm).
Mesh gauge: one 17-st section = 4.25 in (10.8 cm) wide; 8 mesh rnds = 4 in (10.2 cm) tall.
Swatch first. Ch 17 and work 8 rows of sc, turning each row. The swatch should measure 4.25 in (10.8 cm) wide and about 1.8 in (4.6 cm) tall. If it’s too big, go down half a hook size. If it’s too small, go up half a size. A tube that’s too wide flops; one that’s too tight crowds the bags.
Checkpoints (measure the tube flat, without stretching it):
- After Rnd 5: 8.5 in (21.6 cm) flat width, 1.1 in (2.8 cm) tall
- After Rnd 21: 9.1 in (23.1 cm) tall
- After Rnd 34: 15.6 in (39.6 cm) tall
- After Rnd 35: 15.8 in (40.1 cm) tall, still 8.5 in (21.6 cm) flat
- After the border: about 17 in (43.2 cm) total length
If your mesh rounds come out taller than 0.5 in (1.3 cm) each, make the dc a little snugger rather than changing hooks partway through. The width depends on your sc gauge. The height depends mostly on the dc.
Body
Top Band
Foundation: Ch 68 and join with a sl st to the first ch to form a ring, taking care not to twist the chain.
Rnd 1 (RS): Ch 1, sc in each ch around, join with a sl st to the first sc. (68 sc)
Rnds 2–5: Ch 1, sc in each st around, join. (68 sc)
Checkpoint: the band is 8.5 in (21.6 cm) wide flat. Each 17-st section is 4.25 in (10.8 cm).
Mesh Setup
Rnd 6 (Mesh A setup): Ch 3 (counts as dc), dc in next 2 sc (first rib made). Then work the mesh: ch 2, sk 2 sc, (dc in next sc, ch 2, sk 2 sc) 4 times. You have now used 14 sc. Then work [dc in next 3 sc, ch 2, sk 2 sc, (dc in next sc, ch 2, sk 2 sc) 4 times] 3 times. Join with a sl st to the top of ch-3.
Each section uses 3 + 14 = 17 sc. With 4 sections, that’s 68. (4 ribs of 3 dc = 12 dc; 16 mesh dc; 20 ch-2 sps)
Place a marker in the first dc of each rib. Move the markers up every few rounds.
Mesh Rounds
Rnd 7 (Mesh B): Ch 3, dc in next 2 dc. Ch 1, dc in next ch-2 sp, (ch 2, dc in next ch-2 sp) 4 times, ch 1. Dc in next 3 dc of rib, ch 1, dc in next ch-2 sp, (ch 2, dc in next ch-2 sp) 4 times, ch 1; rep from * 2 more times. Join to the top of ch-3.
(12 rib dc + 20 mesh dc = 32 dc; 16 ch-2 sps; 8 ch-1 sps)*
Rnd 8 (Mesh A): Ch 3, dc in next 2 dc. Ch 2, sk ch-1 sp, (dc in next ch-2 sp, ch 2) 4 times, sk ch-1 sp. Dc in next 3 dc of rib, ch 2, sk ch-1 sp, (dc in next ch-2 sp, ch 2) 4 times, sk ch-1 sp; rep from * 2 more times. Join.
(12 rib dc + 16 mesh dc = 28 dc; 20 ch-2 sps)*
In Mesh B, the mesh dc go into the ch-2 sps between the Mesh A dc. In Mesh A, the mesh dc go into the ch-2 sps between the Mesh B dc. The ribs are always worked dc into dc, so they rise straight up.
Rnds 9–34: Repeat Rnds 7 and 8 alternately: odd rounds are Mesh B, even rounds are Mesh A. End after Rnd 34, which is a Mesh A round. (28 dc; 20 ch-2 sps)
That’s 29 mesh rounds in total (Rnds 6–34), about 14.5 in (36.8 cm) of lattice.
Checkpoint after Rnd 21: 9.1 in (23.1 cm) from the foundation. After Rnd 34: 15.6 in (39.6 cm).
Conversion Round
Rnd 35: Ch 1, sc in each of the 3 rib dc. *In the mesh, 2 sc in next ch-2 sp, (sc in next dc, 2 sc in next ch-2 sp) 4 times; sc in each of next 3 rib dc; rep from * around, ending with the last mesh panel. Join.
Count: 28 sc worked 1 per dc + 40 sc added in the 20 ch-2 sps (2 each) = 68 sc. Each section is 3 + (4 + 10) = 17 sts, so the tube keeps its 8.5 in (21.6 cm) flat width.
Ending on Mesh A matters. Its 4 dc and 5 spaces convert to exactly 14 sc per panel. A Mesh B round would not divide evenly.
Hanging Ring
Hold the 2 in (5.1 cm) ring and make a slip knot on your hook. Working over the ring, sc 40 around it, packing the sts so no ring shows. Join with a sl st to the first sc. Fasten off and weave in the ends. The covered ring measures about 2.75 in (7.0 cm) across.
Border
The border uses the same sc gauge of 4 sts per in (1.6 sts per cm). For the “per side” counts below, flatten the tube with 2 sections on each side. Then each side holds half the round.
Bottom Border (continue from Rnd 35)
Rnd B1: Ch 1, sc in each st around, join. (68 sc; 34 per side)
Rnd B2 (decrease round): Ch 1. In each section: (sc in next 2 sts, sc2tog) 4 times, sc in next st; rep around. Join.
Each section uses 17 sts and makes 13 (4 decreases). Total: 52 sc (16 decreases); 26 per side.
Rnd B3: Ch 1, sc in each st around, join. (52 sc; 26 per side)
Rnd B4 (decrease round): Ch 1. In each section: (sc in next st, sc2tog) 4 times, sc in next st; rep around. Join.
Each section uses 13 sts and makes 9. Total: 36 sc (16 decreases); 18 per side.
Rnd B5: Sl st in each st around. (36 sl sts) Fasten off.
Why the math works: Every decrease round works inside one section: 17 → 13 → 9 sts. So the decreases land evenly between the ribs, and the bottom curves in smoothly instead of puckering. The opening is 36 sts ÷ 4 = 9 in (22.9 cm) around, or about 2.9 in (7.4 cm) across. That’s small enough to hold the bags in but wide enough to pull one out.
Top Edge
Rnd T1: With the RS facing, join yarn in a foundation ch loop at the start of the round. Ch 1, sc in each foundation ch loop around, join. (68 sc; 34 per side) Don’t fasten off.
The round adds about 0.2 in (0.5 cm) and gives the top a firm, rounded lip like the bottom.
Tab and Ring Attachment
Find the center of the mesh panel on the back of the tube, between two ribs. Sl st along Rnd T1 to the 3rd st before that center.
Row 1: Ch 1, sc in the next 6 sts, turn. (6 sc)
Rows 2–14: Ch 1, sc in each st across, turn. (6 sc)
The tab measures 1.5 in (3.8 cm) wide × 3.1 in (7.9 cm) long. Pass it through the covered ring, then fold it to the inside of the tube. Whipstitch the last row to the inside of the top band, through the back bumps of Rnd 3, so it doesn’t show. About 0.75 in (1.9 cm) of doubled tab should show above the top edge. Weave in the ends.
Final Blocking
- Weave in all ends along the ribs, where they hide best.
- Slide a pool noodle, rolled towel, or tall bottle inside so the tube is round but not stretched.
- Mist evenly with water until damp.
- Straighten the ribs so they run vertically. Nudge each mesh opening into an even hexagon with your fingertips.
- Pat the top band and the bottom border so they curve in neatly.
- Measure: 17 in (43.2 cm) long, 17 in (43.2 cm) around. Adjust gently if you need to.
- Let it dry completely before you remove the form.
Final Quality-Control Checklist
- Rnds 1–5, 35, B1, and T1 each count 68 sc
- 4 ribs of 3 dc run straight from the top band to the bottom band
- Mesh rounds alternate A and B, starting and ending with Mesh A
- B2 = 52, B3 = 52, B4 = 36, B5 = 36 sl sts
- Flat width is 8.5 in (21.6 cm); length is about 17 in (43.2 cm)
- Bottom opening is about 2.9 in (7.4 cm) across
- No ring shows through the 40 sc cover
- Tab is centered on the back panel and sewn invisibly inside
- All ends are secure
Troubleshooting
The ribs drift sideways. You probably worked a rib dc into a space. Count the 3 rib dc at the marker every round.
The mesh isn’t offset. Make sure you alternate Mesh A and Mesh B. Two A rounds in a row stack the holes into columns.
Rnd 35 doesn’t count 68. Check that Rnd 34 was a Mesh A round, then recount 2 sc in every ch-2 sp.
The bottom ruffles. Check that each section in B2 and B4 got exactly 4 decreases.
Bags fall out. Work 1 more round like B4 before B5: (sc 1, sc2tog) 3 times per section, leaving 6 sts per section and 24 sc in total.
The tube is too short. Add Mesh B and Mesh A rounds in pairs, so you still end on Mesh A. Each pair adds 1 in (2.5 cm).
Care
Machine wash cold on a gentle cycle in a mesh bag, or hand wash. Reshape while damp and lay flat or hang to dry. Don’t tumble dry.
Final Notes
The measurement chain stays simple. An sc gauge of 4 sts per in (1.6 sts per cm) gives 68 sts, or 17 in (43.2 cm) around, as 4 sections of 17 sts at 4.25 in (10.8 cm) each. The 29 mesh rounds of 0.5 in (1.3 cm) each add 14.5 in (36.8 cm) of lattice. Rnd 35 converts back to 68 sc, and the bottom border gathers 68 to 52 to 36 sts for a 9 in (22.9 cm) opening. The sc rounds and edges bring the body to about 17 in (43.2 cm), and the covered ring brings the hanging length to about 20.5 in (52.1 cm). If you check those numbers at each checkpoint, your holder will hang straight, hold a good stash of bags, and give them up one at a time.
Happy crocheting!