

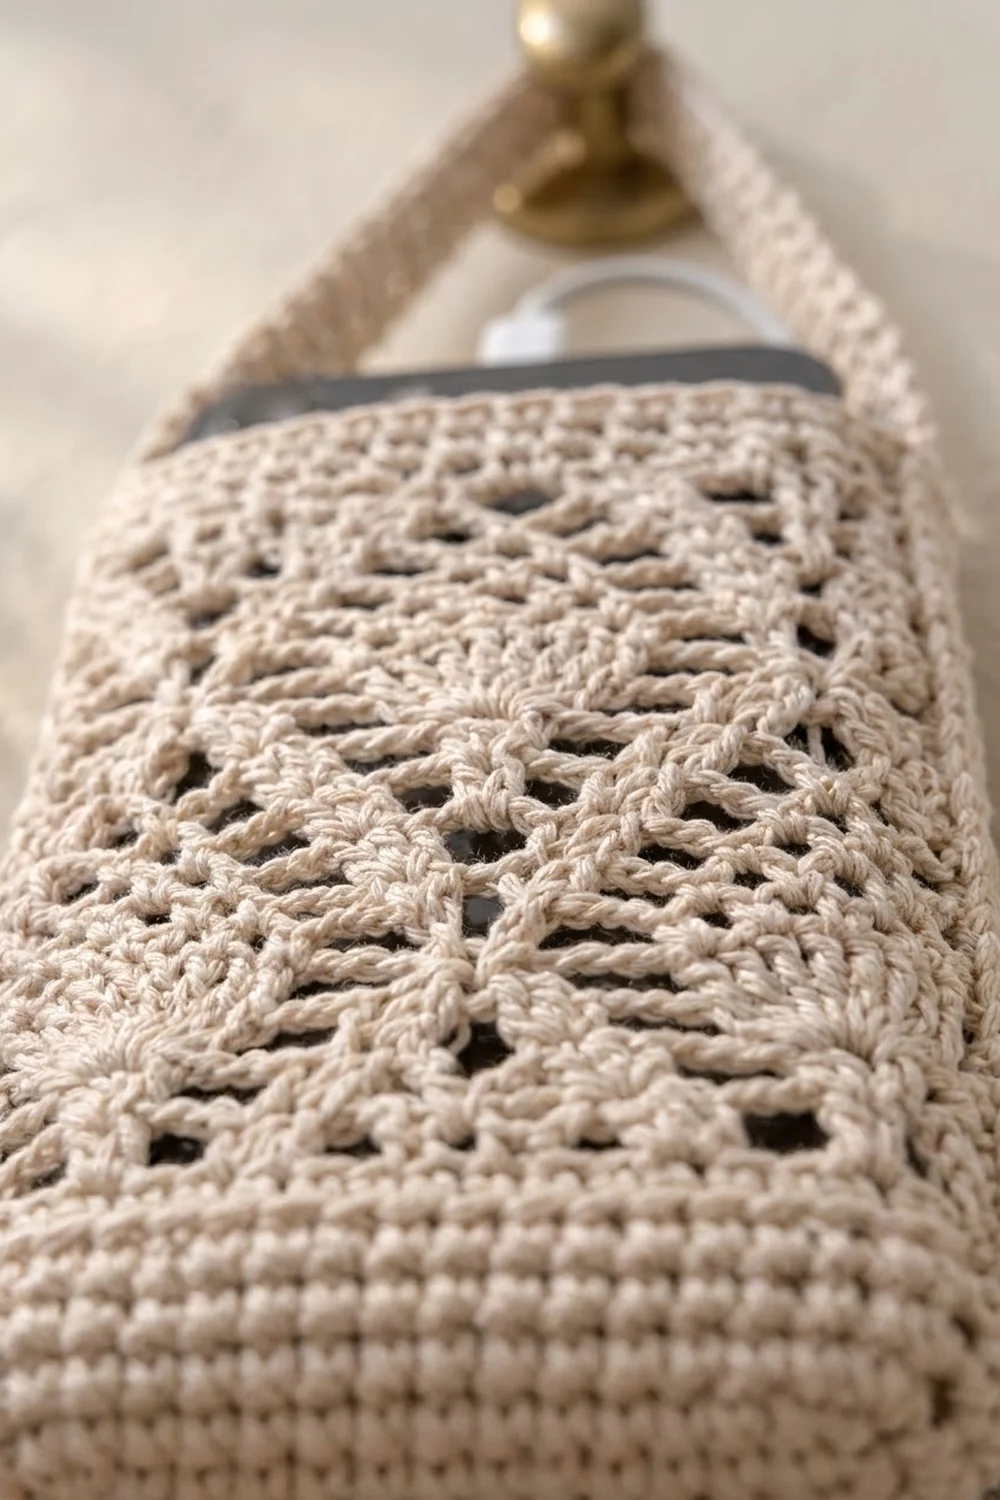
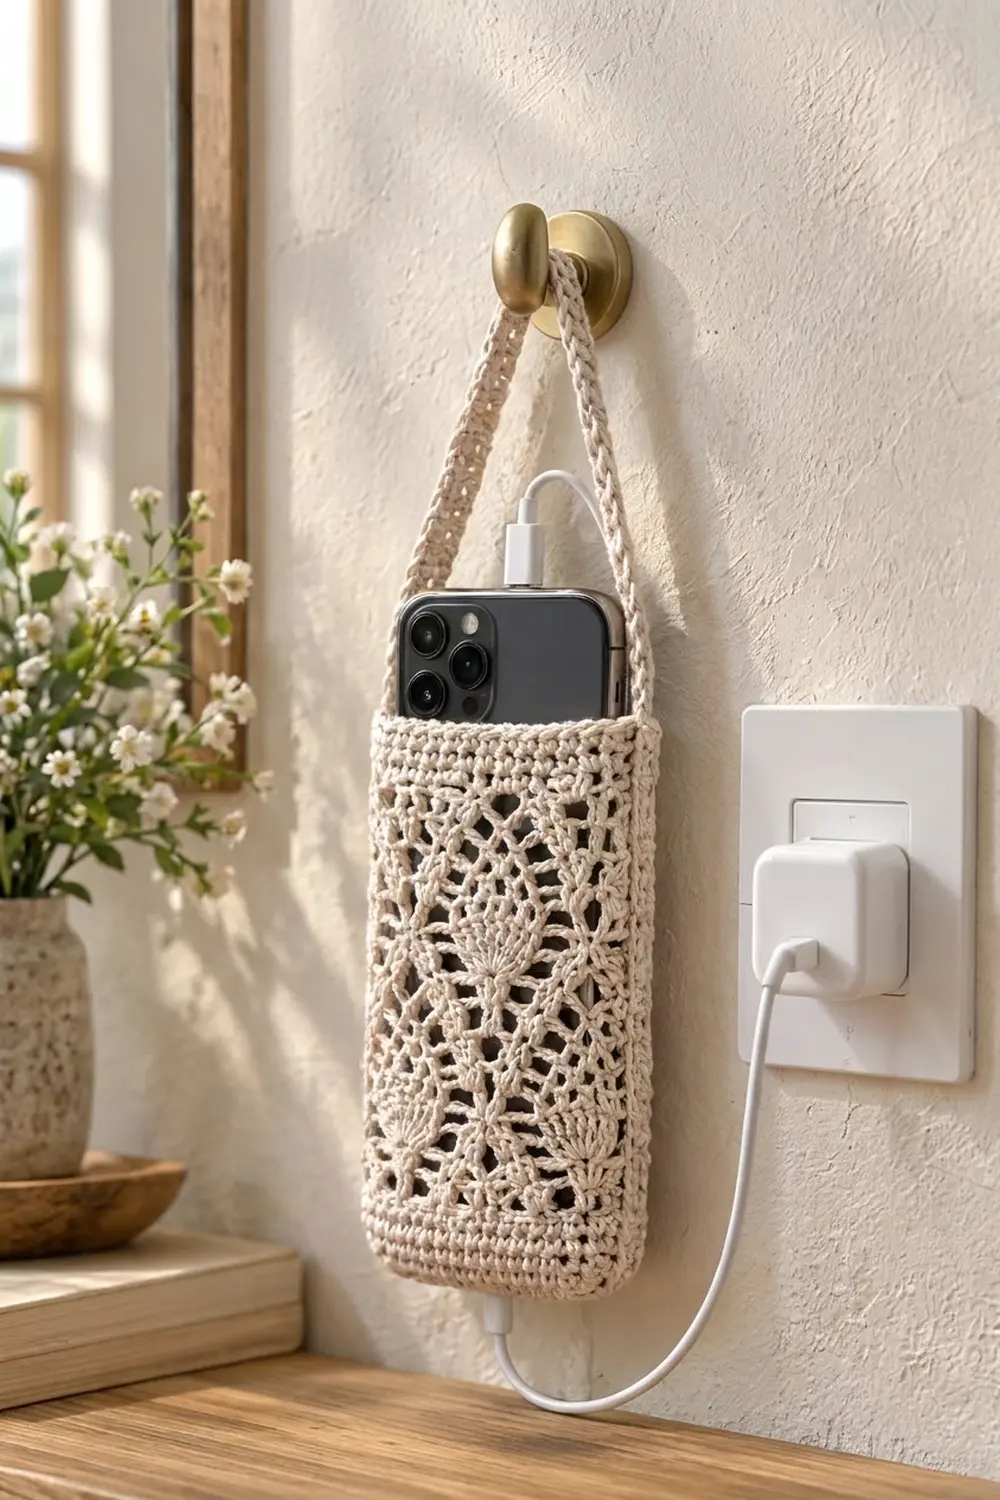
This hanging phone holder is a slim lace pouch with a long strap. It hangs from a wall hook next to an outlet, so your phone charges upright instead of lying on the counter. The body is a diamond lattice of chain loops with small fans inside. A solid single crochet band runs around the bottom and another around the top.
The sample uses one color, a warm cream or ecru cotton. A neutral shade lets the lace show and suits a calm, natural room. Any light, solid color will show the fans clearly. Dark or heavily variegated yarn will hide them.
The pattern uses US crochet terms. The finished pouch is about 4 in (10.2 cm) wide laid flat and about 6.75 in (17.1 cm) tall, not counting the strap. The strap is 10 in (25.4 cm) long and 0.6 in (1.5 cm) wide.
You start with a single crochet oval base and turn up the wall in the back loops. Next come a few solid rounds, ten rounds of fan-and-mesh lace, and a solid top band. The strap is worked in rows straight off one side fold and slip-stitched to the opposite fold. It’s all one piece, with no seams to sew.
Finished Size and Construction
- Finished size: 4 in (10.2 cm) wide flat x 6.75 in (17.1 cm) tall; strap 10 in (25.4 cm) long
- Skill level: Easy-Intermediate
- Terminology: US crochet terms
- Yarn weight: DK (light worsted, #3), cotton
- Hook: 3.5 mm (E-4)
- Number of pieces: 1 (pouch with attached strap)
- Layout: One tube worked in joined rounds from an oval base; strap worked in rows off the top edge
- Piece size: 8 in (20.3 cm) around, 40 stitches
- Size before border: about 5.7 in (14.5 cm) tall after the last lace round
- Border depth: top band about 1.1 in (2.8 cm), 6 rounds of sc
Materials
Yarn advice: Use a smooth mercerized or combed cotton in DK weight. Cotton holds the lace shape, barely stretches under the weight of a phone, and washes well. Acrylic works but sags more over time. Fuzzy yarns blur the fans, so avoid them.
- Cream / ecru: 45 g, about 90 m (98 yd)
This amount includes a margin of about 15 percent for your gauge check and differences in tension. The pouch itself uses about 38 g.
Tools:
- 3.5 mm (E-4) crochet hook
- 2 locking stitch markers
- Tapestry needle
- Scissors
- Measuring tape
- Stiff cardboard or foam, 4 in x 6.5 in (10.2 cm x 16.5 cm), wrapped in a plastic bag, for blocking
- Rust-proof pins
Abbreviations (US Terms)
- ch – chain
- sl st – slip stitch
- sc – single crochet
- dc – double crochet
- BLO – back loop only
- st(s) – stitch(es)
- sk – skip
- sp – space
- rnd – round
- RS – right side
- [ ] – repeat the steps inside the brackets as many times as stated
Special stitch – Fan: 7 dc worked into the same ch-5 loop. It sits in the loop like a small, dense shell.
Gauge and Checkpoints
Gauge: 20 sc and 22 rnds = 4 in (10.2 cm) in sc worked in the round. That is 5 sc and 5.5 rnds per 1 in (2.5 cm).
Make the base first and use it as your gauge test. It is quick to work and tells you whether your tension is right before you start the lace.
Checkpoints:
- After Rnd 3: the base oval measures about 3.4 in x 1.1 in (8.6 cm x 2.8 cm) and has 40 sts.
- After Rnd 7: the solid wall is about 0.75 in (1.9 cm) tall. Flattened, the tube is 4 in (10.2 cm) wide.
- After Rnd 17: total height is about 5.7 in (14.5 cm). The lace lies flat at 4 in (10.2 cm) wide.
- After Rnd 23: total height is about 6.75 in (17.1 cm).
- Strap: 10 in (25.4 cm) long before you attach it.
If your base is too big, go down to a 3.25 mm (D-3) hook. If it is too small, go up to 3.75 mm (F-5). Don’t change the stitch counts. The lace is built on 8 loops over 40 sts, so the count must stay at 40.
If only the lace is off, change the chains. Lace that comes out wider than 4 in (10.2 cm) can use ch 4 loops instead of ch 5. Lace that pulls in can use ch 6.
Pattern
Join every round with a sl st instead of working in a spiral, and don’t turn unless told to. The ch 1 at the start of a sc round does not count as a stitch.
Base
Ch 14.
Rnd 1: Sc in 2nd ch from hook, sc in next 11 ch, 3 sc in last ch. Rotate and work along the other side of the foundation chain: sc in next 11 ch, 2 sc in same ch as first sc. Join with sl st to first sc. (28 sts)
There are 3 curve sts at each end of the oval and 11 side sts along each long edge.
Rnd 2: Ch 1, 2 sc in first st, sc in next 11 sts, [2 sc in next st] 3 times, sc in next 11 sts, [2 sc in next st] 2 times. Join. (34 sts)
Check: this round adds 6 sts, 3 at each end, so each end now has 6 sts.
Rnd 3: Ch 1, 2 sc in first st, sc in next st, sc in next 11 sts, [2 sc in next st, sc in next st] 3 times, sc in next 11 sts, [2 sc in next st, sc in next st] 2 times. Join. (40 sts)
Check: each end now has 9 sts and each long edge has 11 sts: 9 + 11 + 9 + 11 = 40.
Bottom Band
Rnd 4: Ch 1, sc in BLO of each st around. Join. (40 sts)
Working in the back loops makes the ridge where the base turns up into the wall.
Rnds 5–7: Ch 1, sc in each st around. Join. (40 sts)
Mark the folds: Flatten the tube so the two curved ends of the base sit at the left and right edges. Place a marker in the Rnd 7 st at each fold, directly above the center of each base end. The markers should be 20 sts apart on each face. Remember these two columns; you’ll need them for the strap.
Lace Body
Rnd 8 (Set-up Mesh): Ch 1, sc in first st, [ch 5, sk 4 sts, sc in next st] 7 times, ch 5, sk 4 sts, join with sl st to first sc. (8 sc, 8 ch-5 loops)
Check: 1 + (7 x 5) + 4 = 40 sts used. Each loop spans 5 sts, or 1 in (2.5 cm).
The lace uses three round types, defined once here and then repeated by name.
Fan Round: Sl st in first 3 ch of next ch-5 loop, ch 1, sc in same loop, ch 2, [Fan in next loop, ch 2, sc in next loop, ch 2] 3 times, Fan in last loop, ch 2, join with sl st to first sc. (4 sc, 4 Fans = 28 dc, 8 ch-2 sps)
Net Round: Ch 1, sc in same sc as join, ch 5, sk next ch-2 sp and 3 dc, sc in next dc (4th dc of Fan), ch 5, [sk 3 dc and ch-2 sp, sc in next sc, ch 5, sk ch-2 sp and 3 dc, sc in 4th dc of Fan, ch 5] 3 times, join with sl st to first sc. (8 sc, 8 ch-5 loops)
Mesh Round: Sl st in first 3 ch of next ch-5 loop, ch 1, sc in same loop, [ch 5, sc in next loop] 7 times, ch 5, join with sl st to first sc. (8 sc, 8 ch-5 loops)
Work the lace in this order:
- Rnd 9: Fan Round
- Rnd 10: Net Round
- Rnd 11: Mesh Round
- Rnd 12: Fan Round
- Rnd 13: Net Round
- Rnd 14: Mesh Round
- Rnd 15: Fan Round
- Rnd 16: Net Round
- Rnd 17: Mesh Round
How the diamonds form: The Net Round anchors a loop at the top of each Fan, and the loops meet to close a diamond above it. The Mesh Round then moves the anchor points half a loop sideways. Because of that, the next Fan Round lands in the gaps between the previous Fans. The Fans end up staggered (a half-drop layout), 2 on each face per Fan Round, and the loops between them form the diagonal lattice.
The start of each round shifts sideways a little during the lace. That is normal. Place the strap by the fold columns, not by where the round starts.
Border
The border on this piece is the solid top band, plus a slip-stitch edge on the strap. The band firms up the opening so it keeps its shape when you put the phone in and take it out.
Border gauge: 5 sc per inch (2.5 cm) and 5.5 rnds per inch, the same as the base.
Rnd 18 (Conversion Round): Ch 1, sc in same sc as join, 4 sc in next ch-5 loop, [sc in next sc, 4 sc in next ch-5 loop] 7 times, join. (8 sc worked 1 per existing sc + 32 sc worked 4 per loop = 40 sts)
Rnds 19–23: Ch 1, sc in each st around, join. (40 sts)
Fasten off at the end of Rnd 23 and weave in the tail.
Per-side count: Flattened, the tube has 20 sts across the front and 20 across the back. Each fold st is counted once, in one face’s 20, and no extra sts are added at the folds.
Why the math works: 40 sts at 5 sts per inch = 8 in (20.3 cm) around, so the flat width is 8 ÷ 2 = 4 in (10.2 cm), the same as the base. The 8 lace loops cover 5 sts each (8 x 5 = 40). Turning each loop and its anchor back into 1 sc + 4 sc gives exactly 40 sts again, so the opening neither ruffles nor pulls tight. Six rounds at 5.5 rnds per inch make a band 6 ÷ 5.5 = about 1.1 in (2.8 cm) deep.
Strap
Find the Fold A marker column on Rnd 23.
Row 1: With RS facing, join yarn with sc in the st before Fold A, sc in the Fold A st, sc in next st. (3 sc)
Rows 2–55: Ch 1, turn, sc in each st across. (3 sc)
At 5.5 rows per inch, 55 rows = 10 in (25.4 cm).
Attach: Bring the end of the strap across to Fold B without twisting it. Line up the 3 sts of Row 55 with the 3 sts centered on Fold B, holding the strap against the inside of the rim. Sl st through both layers across all 3 sts. (3 sl sts) Fasten off, leaving a 6 in (15.2 cm) tail, and use the tail to tack the strap end flat against the inside of the band.
Strap edging: Join yarn at the base of the strap at Fold A. Sl st along one long edge, 1 sl st in the end of each row. (55 sl sts) Fasten off and repeat on the other long edge. (55 sl sts) This gives the strap a neat chain-like edge and keeps it from stretching.
Hung from its center, the strap rises about 4.5 in (11.4 cm) above the rim.
Final Blocking
- Weave in all tails through the solid sc rounds, never through the lace.
- Soak the pouch in cool water with a drop of mild soap for 10 minutes.
- Press out the water and roll the pouch in a towel. Do not wring it.
- Slide the wrapped cardboard, 4 in x 6.5 in (10.2 cm x 16.5 cm), into the pouch. The top band should sit just above it.
- Open each Fan with your fingers and straighten the loops so the diamonds line up on both faces.
- Pin the strap flat at 10 in (25.4 cm) long.
- Let it dry completely, 12 to 24 hours, before you remove the cardboard.
Final Quality-Control Checklist
- The base has 40 sts and lies flat.
- Rnd 4 shows a clean ridge all the way around.
- Each lace round has 8 loops, or 4 Fans on Fan Rounds.
- Fans are staggered from one Fan Round to the next.
- Rnd 18 has exactly 40 sts.
- Flat width is 4 in (10.2 cm) at both bands and through the lace.
- Height is about 6.75 in (17.1 cm).
- The strap is 3 sts wide, 55 rows long, untwisted, and sits above both base ends.
- A phone slides in easily and the rim does not flare.
Troubleshooting
The base cups like a bowl. Recount Rnds 2 and 3. Each one should add exactly 6 sts.
The lace is wider than the bands. Your chains are loose. Use ch 4 loops, or go down half a hook size for the lace only.
The lace pulls in. Your chains are tight. Use ch 6 loops, or go up half a hook size for the lace rounds.
The Fans stack in straight columns. A Mesh Round was probably skipped. Every Fan Round needs a Net Round and then a Mesh Round after it.
Rnd 18 doesn’t come to 40. Check that you worked 4 sc in every loop and 1 sc in every sc, and none in the joining sl st.
The strap pulls the rim into a point. Center each strap end over a fold across 3 sts, and loosen the strap edging.
The pouch sags. Switch to cotton and keep the top band firm. You can add one more sc round before you start the strap.
Care
Hand wash in cool water and dry flat, reshaping over the blocking card. Don’t hang the pouch by its strap while it’s wet, because wet cotton stretches.
Final Notes
The measurements build on each other from the bottom up. The base ends at 40 sts, which is 8 in (20.3 cm) around and 4 in (10.2 cm) wide flat. The bottom band adds 0.75 in (1.9 cm). The ten lace rounds keep the 40-st width as 8 loops of 5 sts and bring the height to about 5.7 in (14.5 cm). The top band turns the loops back into exactly 40 sts and adds 1.1 in (2.8 cm), for about 6.75 in (17.1 cm) in total. The 3-st strap is 55 rows, or 10 in (25.4 cm), anchored over the two side folds.
If you check your gauge on the base and count every round, the lace will match the bands and the pouch will hang straight.
Happy crocheting!