

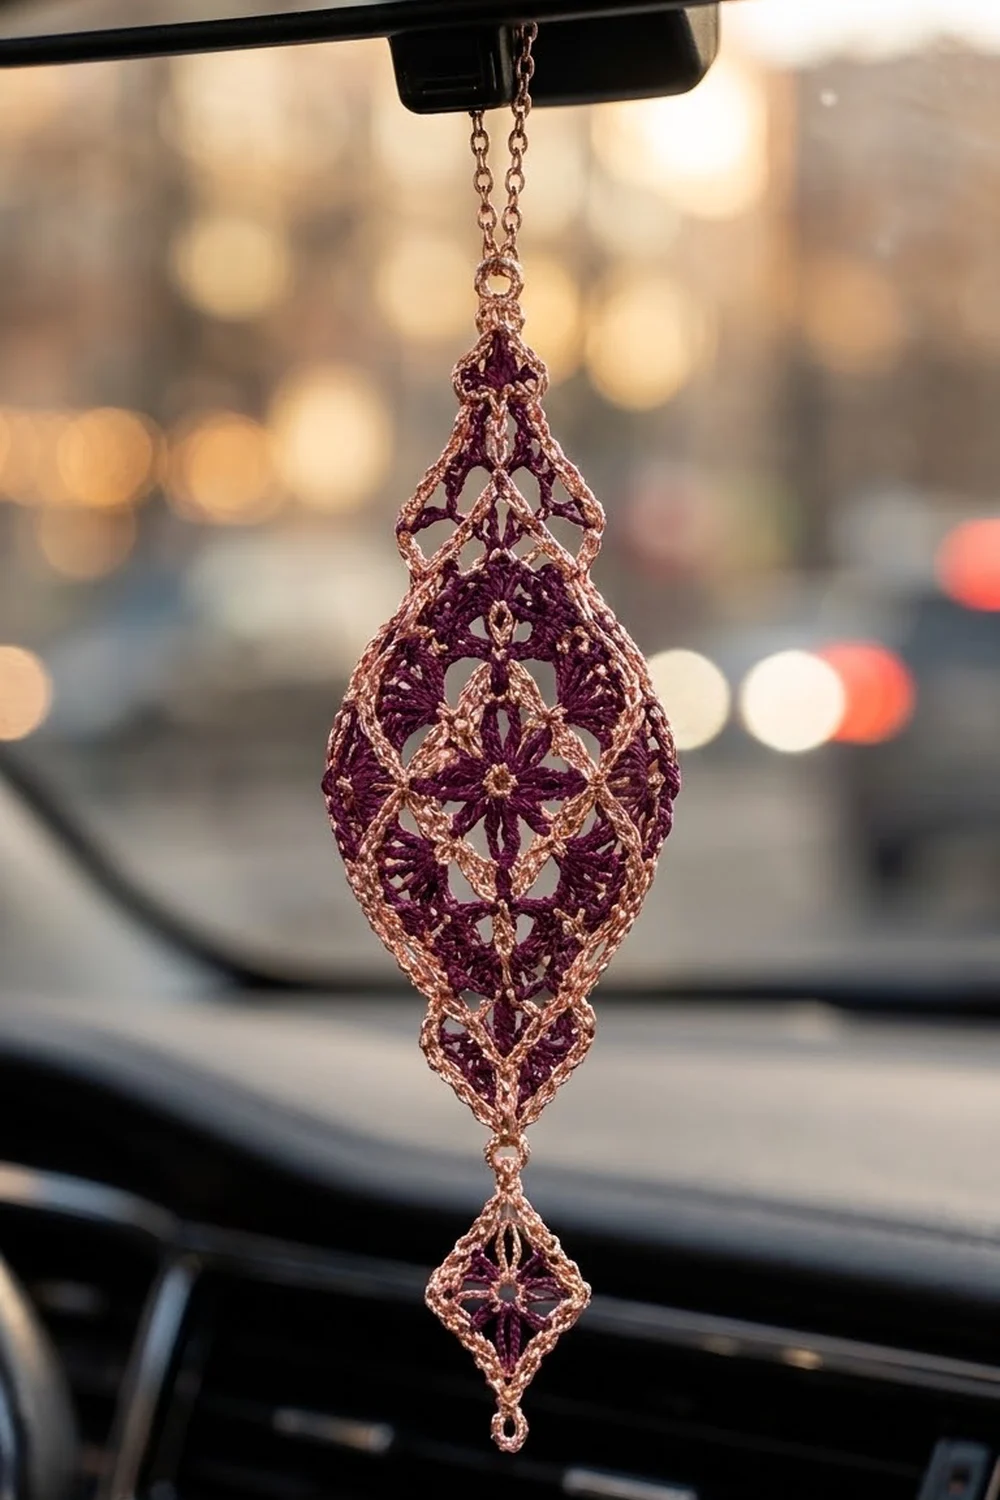
The Plum Lantern Car Mirror Charm is a small lace ornament made to hang from a rearview mirror. It has a pointed, lantern-shaped body and a little diamond drop below it. Deep plum fans and petals fill the lace, and rose-gold metallic thread outlines every shape, so the charm catches the light whenever the car moves.
The look is somewhere between vintage thread lace and a holiday bauble. The plum gives the piece depth, and the rose gold makes the edges look like fine jewelry wire. It works well as a gift, a holiday swap item, or a year-round charm.
This pattern uses US crochet terms. The finished body measures 2.55 in × 4.95 in (6.5 × 12.6 cm). The diamond drop is 1.4 in (3.6 cm) from point to point, and the full charm hangs 6.85 in (17.4 cm) below its cord.
You work the body center in the round as a medallion. Then you add a tapered tip to the top and bottom in short rows and edge the whole body with a picot outline. The diamond is a separate small motif. A chain link joins the two, and a chain cord finishes the top.
Finished Size and Construction
- Body size: 2.55 in × 4.95 in (6.5 × 12.6 cm), bordered
- Body size before border: 2.25 in × 4.65 in (5.7 × 11.8 cm)
- Border depth: 0.15 in (0.4 cm)
- Diamond drop: 1 in (2.5 cm) per side, 1.4 in (3.6 cm) point to point
- Total hanging length (without cord): 6.85 in (17.4 cm)
- Cord: 8 in (20.3 cm) loop, which hangs 4 in (10.2 cm) when folded
- Skill level: Intermediate
- Terminology: US
- Yarn weight: Size 10 crochet thread (Lace, 0)
- Hook: 1.5 mm steel hook
- Number of pieces: 2 motifs (body + diamond), plus 1 cord
- Layout: One vertical column: cord, body, connector, diamond
Materials
Use a mercerized cotton size 10 thread for the plum, because it gives crisp, clear stitches. For the rose gold, use a size 10 metallic thread with a cotton or polyester core. Avoid loose, flat tinsel threads, which split easily on a steel hook.
- Color A – Plum: about 5 g / 25 m
- Color B – Rose Gold metallic: about 8 g / 30 m
These quantities include a margin of about 25% for swatching and weaving in ends.
Tools:
– 1.5 mm steel crochet hook
– Fine tapestry needle
– Small sharp scissors
– Stitch markers (2)
– Foam blocking board and rustproof pins
– Fabric stiffener or a diluted white glue solution (optional)
– Ruler or tape measure
Abbreviations (US Terms)
- ch – chain
- sl st – slip stitch
- sc – single crochet
- dc – double crochet
- sp(s) – space(s)
- st(s) – stitch(es)
- MR – magic ring
- RS – right side
- rep – repeat
- dc4tog – double crochet 4 together
Special stitches
- 3-dc cluster (cl): Yarn over, insert the hook in the stitch, pull up a loop, yarn over, pull through 2 loops. Do this 3 times in the same stitch, then yarn over and pull through all 4 loops on the hook.
- Beginning cluster (beg-cl): Ch 3, then work the * to * step twice in the same stitch. Yarn over and pull through all 3 loops.
- Ch-3 picot: Ch 3, then sl st into the front loop and left leg of the last sc made.
Gauge and Checkpoints
Gauge in Color B is 12 sc = 1 in (2.5 cm). Small lace depends heavily on tension, so make the diamond drop first. It works as your gauge swatch, and it is part of the finished charm.
Checkpoints:
– Diamond after Round 2: 0.9 in (2.3 cm) across, cluster tip to cluster tip
– Finished diamond: 1 in (2.5 cm) per side
– Body medallion after Round 5: 2.25 in (5.7 cm) across
– Each tip: 1.2 in (3.0 cm) tall
– Body before border: 2.25 in × 4.65 in (5.7 × 11.8 cm)
– Body after border: 2.55 in × 4.95 in (6.5 × 12.6 cm)
If your diamond is too big, go down to a 1.4 mm or 1.3 mm hook. If it is too small, go up to a 1.65 mm hook. Change the hook, not the stitch counts, because every count in this pattern depends on the others.
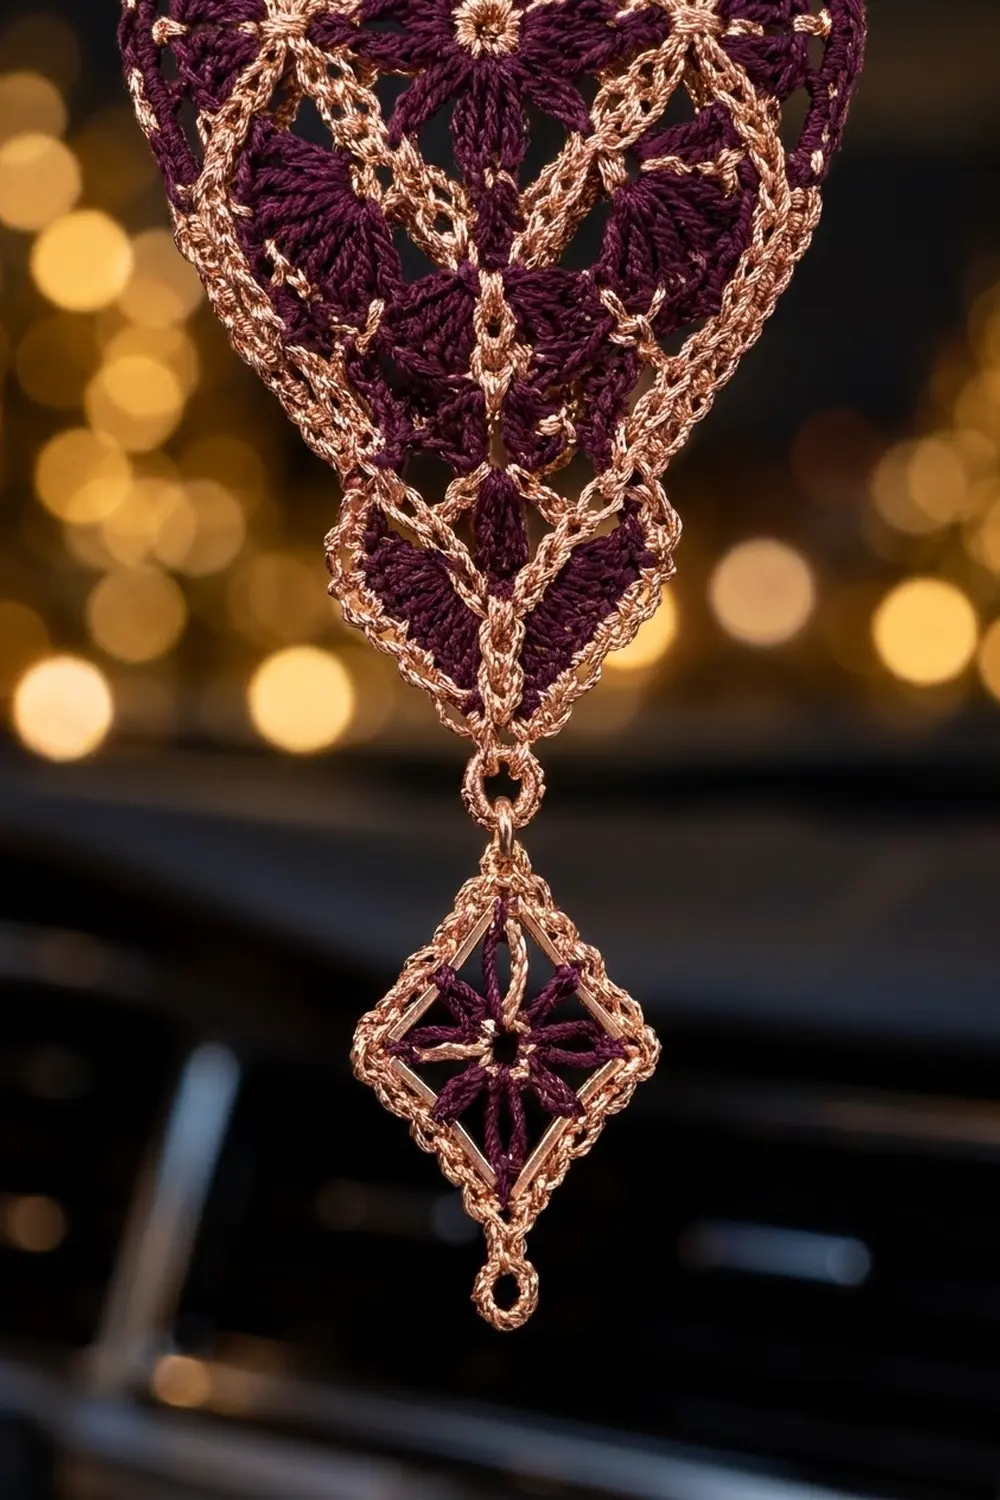
Diamond Drop
This piece is worked in the round with RS facing throughout. You don’t turn.
Round 1 (A): MR, ch 1, 8 sc in ring. Join with sl st to first sc. (8 sc)
Round 2 (A): Beg-cl in the same st, ch 3. Cl in next sc, ch 3. Rep from * 6 more times. Join with sl st to the top of beg-cl. Fasten off. (8 clusters, 8 ch-3 sps)
These 8 clusters form the plum star.
Round 3 (B): You will call clusters 1, 3, 5 and 7 corner clusters, and clusters 2, 4, 6 and 8 side clusters. Join B with sc in the top of any cluster. Ch 3 and sc in the same cluster top to make the first corner loop. Ch 3, sc in the top of the next cluster, ch 3. (Sc, ch 3, sc) in the next cluster, ch 3, sc in the next cluster, ch 3. Rep from * 2 more times. Join with sl st to first sc. (12 sc, 4 corner ch-3 loops, 8 ch-3 side sps)
The ch-3 spaces from Round 2 stay behind this round as open lace.
Round 4 (B): Sl st into the first corner loop and ch 1. (2 sc, ch 3, 2 sc) in the corner loop. 4 sc in each of the next 2 ch-3 sps, then (2 sc, ch 3, 2 sc) in the next corner loop. Rep from * 2 more times. Finish with 4 sc in each of the last 2 ch-3 sps. Join with sl st to first sc. Fasten off. (48 sc, 4 corner ch-3 loops)
Per side: 2 + 8 + 2 = 12 sc. This count includes the 2 corner sc at each end of the side, so 4 sides × 12 sc = 48 sc. At 12 sc per inch, each side is 1 in (2.5 cm), which gives a diagonal of 1.4 in (3.6 cm).
Turn the square on point. One corner loop becomes the top (the joining loop), and the opposite corner loop becomes the charm’s bottom tip.
Body Medallion
Round 1 (A): MR, ch 1, 8 sc in ring. Join. (8 sc)
Round 2 (A): Work as Round 2 of the diamond. Fasten off. (8 clusters, 8 ch-3 sps)
Round 3 (B): Join B with sc in the top of any cluster and mark it as the T (top) stitch. Ch 5. Sc in the top of the next cluster, ch 5. Rep from * 6 more times. Join with sl st to first sc. Fasten off. (8 sc, 8 ch-5 sps)
This round makes the rose-gold ring around the flower.
Round 4 (A): Join A with sl st in the marked T sc. Ch 1, then sc in the same st. (3 dc, ch 2, 3 dc) in the next ch-5 sp, sc in the next sc. Rep from * 6 more times. Finish with (3 dc, ch 2, 3 dc) in the last ch-5 sp and join with sl st to first sc. Fasten off. (8 shells: 48 dc, 8 sc, 8 ch-2 sps)
Round 5 (B): Join B with sc in the R4 sc above T and move the marker to it. Ch 5, sc in the ch-2 sp of the next shell, ch 5, sc in the next sc. Rep from * 7 more times, leaving out the last sc. Join with sl st to first sc. Fasten off. (16 sc, 16 ch-5 arches)
Checkpoint: The medallion should be 2.25 in (5.7 cm) across.
Number the arches 1 to 16 in the order you worked them. Arch 1 comes right after the T sc and arch 16 comes right before it. The 9th sc, between arches 8 and 9, sits directly opposite T. Mark it as B (bottom).
Tapered Tips (make 2)
The tips are worked in short rows with RS facing. You don’t turn, except on Row 6. Fasten off at the end of each row and join the next color at the right-hand end.
Top tip: worked over arches 15, 16, 1 and 2, centered on T.
Bottom tip: worked over arches 7, 8, 9 and 10, centered on B.
Row 1 (A): Join A with sl st in the first arch. Ch 3 (counts as dc) and work 4 dc in the same arch. Work 5 dc in each of the next 3 arches. Fasten off. (20 dc)
Row 2 (B): Join B with sl st in the 3rd st. Ch 3 (counts as dc), then dc in each of the next 15 sts. Leave the last 2 sts unworked. (16 dc)
Row 3 (A): Join in the 3rd st, ch 3, dc in the next 11 sts. (12 dc)
Row 4 (B): Join in the 3rd st, ch 3, dc in the next 7 sts. (8 dc)
Row 5 (A): Join in the 3rd st, ch 3, dc in the next 3 sts. Do not fasten off. (4 dc)
Row 6 (A): Ch 2 (does not count), turn, then dc4tog over all 4 sts. Fasten off. (1 point cluster)
Each row drops 2 stitches at each end, so the tip steps in evenly to a centered point. The B rows add rose-gold lines through the plum tip. Each tip is 1.2 in (3.0 cm) tall.
Checkpoint: 2.25 in + 1.2 in + 1.2 in = 4.65 in (11.8 cm) tall, 2.25 in (5.7 cm) wide.
Make All Pieces
| Piece | Qty | Color A rounds/rows | Color B rounds/rows |
|---|---|---|---|
| Diamond drop | 1 | R1–R2 | R3–R4 |
| Body | 1 | R1, R2, R4; tip Rows 1, 3, 5, 6 | R3, R5; tip Rows 2, 4; border |
| Cord | 1 | — | all |
Layout (top to bottom):
      ( cord loop, 8 in / 20.3 cm )
                  |
           /\  BODY  /\
          <  lens 2.55 x 4.95 in  >
           \/        \/
                  |   connector, 0.5 in / 1.3 cm
                 <>   DIAMOND, 1.4 in / 3.6 cm
Joining
You join after the body border is done, because the connector goes into the border’s bottom point loop. Read this section now and work it after Section 10.
Connector (B): Join B with sl st in the body’s bottom ch-3 point loop. Ch 6, then sl st in one corner loop of the diamond. Turn, sl st in the back bump of each of the 6 ch, and sl st into the body loop. Fasten off.
Stitch logic: The connector joins one loop to one loop. It doesn’t touch any side stitches, so neither piece’s edge count changes.
Tension: Keep the 6 chains the same size as your gauge chains. If they are tight, the diamond tilts. If they are loose, the link sags.
Checkpoint: 4.95 + 0.5 + 1.4 = 6.85 in (17.4 cm) total.
Cord (B): Join B with sl st in the body’s top ch-3 point loop. Ch 96 and sl st in the same loop. Turn, sl st in the back bump of each of the 96 ch, and sl st in the loop. Fasten off. The loop is 8 in (20.3 cm) around and hangs 4 in (10.2 cm) when folded. Attach it to the mirror arm with a lark’s head knot.
Border (Body Only)
The border uses the same gauge, 12 sc = 1 in (2.5 cm). The diamond doesn’t need a border, because Round 4 is already its edge.
Round 1 (B): Join B in the top point cluster and work (sc, ch 3, sc) there. Down the first side, work:
– 3 sc around each row-end of Rows 5, 4, 3, 2 and 1 of the top tip (15 sc)
– 5 sc in each of the next 4 free arches (20 sc)
– 3 sc around each row-end of Rows 1 to 5 of the bottom tip (15 sc)
Work (sc, ch 3, sc) in the bottom point cluster. Repeat the same sequence up the second side and join with sl st to first sc.
Per side: 1 + 15 + 20 + 15 + 1 = 52 sc, which includes the point sc at each end. Total: 2 × 52 = 104 sc and 2 ch-3 point loops.
Round 2 (B): Sl st into the top point loop and ch 1. Work (sc, ch 3, sc) in the loop, then sc in the next sc (the point sc). [Sc in the next 5 sc, ch-3 picot] 10 times, then sc in the next sc (the point sc). Work (sc, ch 3, sc) in the bottom point loop, sc in the next sc, and rep from * once more. Join with sl st and fasten off.
Count: 104 sc worked one per stitch + 4 extra sc in the point loops = 108 sc, plus 20 picots and 2 ch-3 point loops.
Why the math works: Each side has 52 stitches. Take away the 2 point sc and 50 remain, which divides into exactly 10 groups of 5 with one picot each. The 3 sc per tip row-end matches the height of a dc row at this gauge. The 5 sc per ch-5 arch matches the arch length. Because both match, the outline lies flat instead of ruffling or cupping. Two rounds of sc add 0.15 in (0.4 cm) per edge, so the body grows from 2.25 × 4.65 in to 2.55 × 4.95 in (6.5 × 12.6 cm).
Final Blocking
- Weave in all ends along same-color stitches, about 1 in (2.5 cm) each.
- Soak both motifs in cool water for 10 minutes, then press out the water in a towel.
- Pin the body to 2.55 in × 4.95 in (6.5 × 12.6 cm). Pin each point and every picot.
- Pin the diamond on point to 1.4 in (3.6 cm) in both directions.
- Pin each tip’s center line straight with the flower’s T and B petals.
- Optional: dab on stiffener so the charm holds its shape in a warm car.
- Let the pieces dry completely, then work the Joining section.
Final Quality-Control Checklist
- The diamond has 12 sc per side and 4 corner loops.
- The medallion has 16 arches and measures 2.25 in (5.7 cm).
- Both tips are centered on T and B, with 20/16/12/8/4/1 stitches per row.
- The border has 52 sc per side and 10 picots per side.
- The body measures 2.55 × 4.95 in (6.5 × 12.6 cm).
- The connector is 6 ch, and the total length is 6.85 in (17.4 cm).
- The cord is firmly attached and the charm hangs straight.
Troubleshooting
- The medallion cups: Your ch-5 arches are too tight. Chain more loosely, or go up 0.1 mm for Rounds 3 and 5 only.
- The medallion ruffles: Your chains are too loose. Tighten them, or use ch 4 in Round 3.
- A tip leans to one side: You joined at the wrong stitch. Every row starts in the 3rd stitch.
- The border pulls the tips inward: Work the 3 sc around the row-end post, not into it.
- The metallic thread frays: Cut shorter lengths, about 36 in (91.4 cm), and wax them lightly.
- The charm spins: Block it with stiffener, and center the connector exactly on the point loops.
Care
Hand wash in cool water, press dry in a towel, and reshape. Don’t wring the piece or put it in a dryer, because the metallic thread can kink.
Final Notes
Here is the measurement chain:
– The diamond gauge (12 sc = 1 in / 2.5 cm) sets the 1 in (2.5 cm) sides.
– The medallion is 2.25 in (5.7 cm) across.
– The tips add 1.2 in (3.0 cm) each, for a body of 4.65 in (11.8 cm) before the border.
– The 0.15 in (0.4 cm) border brings the body to 2.55 × 4.95 in (6.5 × 12.6 cm).
– The connector adds 0.5 in (1.3 cm) and the diamond adds 1.4 in (3.6 cm), for 6.85 in (17.4 cm) in total.
If each checkpoint matches, the final charm will match too. Happy crocheting!