

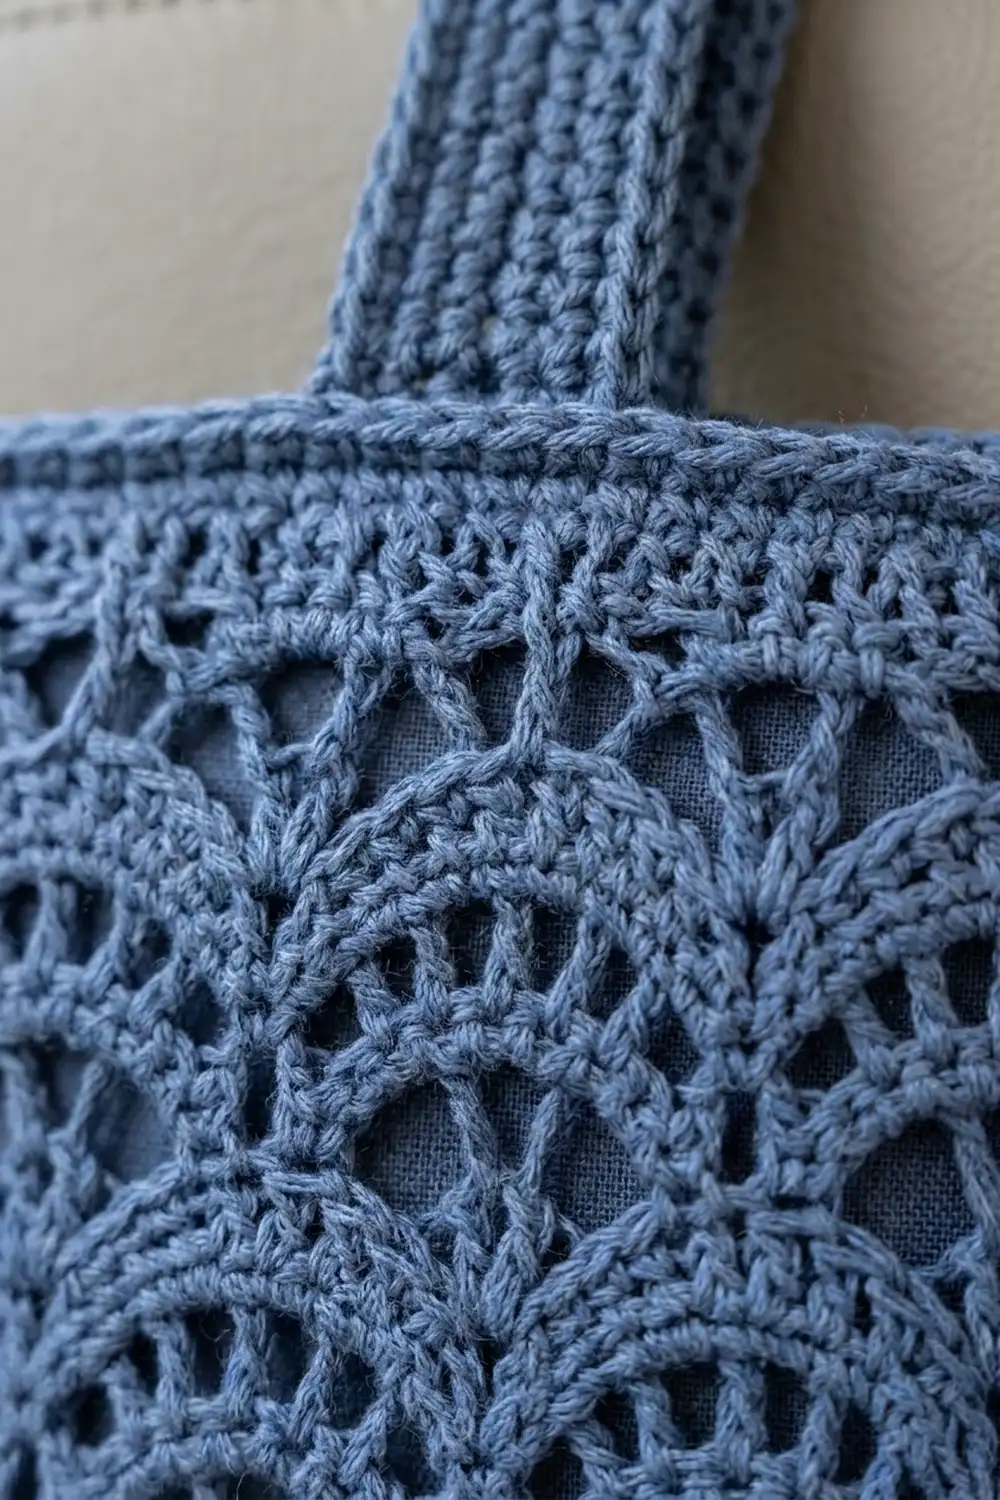
This holder hangs from your headrest post, so tissues stay within reach of the back seat. The body is covered in rows of open scallop shells, and one long slot on the front lets you pull tissues out one at a time. A firm rim around the slot keeps the opening neat, and a solid strap loops over the headrest post.
The sample is worked in one denim blue cotton, which shows off the lace and looks good against gray or beige car interiors. The style is simple and tidy: lace on the faces, solid stitches at the base, top and strap.
The pattern uses US crochet terms. The finished holder is 5.5 in (14.0 cm) wide, 9.75 in (24.8 cm) tall and 1.25 in (3.2 cm) deep, plus a strap loop about 3.25 in (8.3 cm) tall.
Construction is one continuous piece. You start with a single-crochet oval base, then work scallop rounds upward. For the slot section you work back and forth in rows, then close the slot with a chain bridge and go back to rounds. Single-crochet decrease rounds shape the top, a single-crochet row closes it, and the strap is worked straight off the top edge.
Finished Size and Construction
- Finished size: 5.5 in (14.0 cm) wide x 9.75 in (24.8 cm) tall x 1.25 in (3.2 cm) deep
- Strap loop: 1.2 in (3.0 cm) wide, about 3.25 in (8.3 cm) tall when folded
- Skill level: Intermediate
- Terminology: US
- Yarn weight: DK (3), cotton or cotton blend
- Hook: 3.5 mm (E-4)
- Number of pieces: 1 (worked continuously; nothing to join)
- Layout: Oval base, a tube of scallop rounds, a slot section in rows, more rounds, a closed top and a strap
- Circumference of the body: 60 sts = 12 in (30.5 cm)
- Size before edging: slot opening 1 in (2.5 cm) wide x 5.2 in (13.2 cm) tall
- Edging depth: about 0.2 in (0.5 cm) around the slot
Materials
Yarn: Use a smooth DK cotton or cotton blend. Cotton holds the shell shapes well and doesn’t fuzz from being handled in the car. Don’t use very stretchy acrylic, because the slot can sag over time.
- Denim blue: 85 g, about 195 m (213 yd)
This amount includes a margin of about 20% for your gauge swatch and any small differences in tension.
Tools:
– 3.5 mm (E-4) crochet hook
– 3 locking stitch markers
– Tapestry needle
– Scissors
– Tape measure
– Blocking mat, rustproof pins and a spray bottle
– A soft-pack car tissue refill, about 4.75 x 8.5 x 1 in (12.1 x 21.6 x 2.5 cm), for test fitting
Abbreviations (US Terms)
- ch – chain
- sl st – slip stitch
- sc – single crochet
- dc – double crochet
- sc2tog – single crochet 2 together
- BLO – back loop only
- sk – skip
- st(s) – stitch(es)
- rep – repeat
- tch – turning chain
Special stitches:
- Shell: 5 dc in the same stitch.
- Half shell: at the start of a row or round, ch 3 (counts as dc) and 2 dc in the same stitch. At the end of a row, 3 dc in the last stitch.
- Standing sc: start with a slipknot on the hook, insert the hook into the stitch, yarn over, pull up a loop, yarn over and pull through both loops.
Gauge and Checkpoints
Single-crochet gauge: 20 sc x 22 rows = 4 in (10.2 cm).
Shell gauge: 2 shell repeats (12 sts) = 2.4 in (6.1 cm), and 5 shell rounds = 2 in (5.1 cm). That makes each shell round 0.4 in (1.0 cm) tall.
Work the base (Rnds 1–3) as your test piece. It uses only about 5 g, and it tells you right away whether the body circumference will be correct.
Checkpoints:
1. After Rnd 3: base about 5.5 x 1.25 in (14.0 x 3.2 cm), 60 sts.
2. After Rnd 9: 2.2 in (5.6 cm) tall from the base edge. The body circumference is 12 in (30.5 cm).
3. After slot Row 13: 7.4 in (18.8 cm) tall. The slot gap is 1 in (2.5 cm) wide x 5.2 in (13.2 cm) tall.
4. After Rnd 13: 9 in (22.9 cm) tall.
5. After the closing row: 9.75 in (24.8 cm) tall.
6. Strap before folding: 6.5 in (16.5 cm).
If your piece is too big, go down to a 3.25 mm hook. If it is too small, go up to a 3.75 mm hook. If only your shell rounds are too tall, pull the dc loops up a little less. Don’t change the stitch counts, because the shell repeats only work on a multiple of 6 stitches.
Base (Oval)
Ch 24.
Rnd 1: 3 sc in 2nd ch from hook, sc in next 21 ch, 3 sc in last ch. Rotate and work along the opposite side of the chain: sc in next 21 ch. Join with sl st to first sc. (48 sts)
Rnd 2: Ch 1, 2 sc in each of next 3 sts, sc in next 21 sts, 2 sc in each of next 3 sts, sc in next 21 sts, join. (54 sts)
Rnd 3: Ch 1, (sc in next st, 2 sc in next st) 3 times, sc in next 21 sts, (sc in next st, 2 sc in next st) 3 times, sc in next 21 sts, join. (60 sts)
Fasten off. Rnd 3 now has 9 sts at each curved end and 21 sts on each straight side. The first straight side is sts 10–30. Place a marker in st 20, its middle stitch. This marks center front.
Body: Lower Scallop Rounds
Work the shell rounds with the right side facing. Don’t turn.
Rnd 4 (wall): Join yarn with a standing sc in the BLO of the marked st. Sc in BLO of each st around, then join. (60 sts) The unworked front loops create the crisp edge around the base.
Rnd 5 (Shell Rnd A): Ch 1, sc in same st, sk 2 sts, shell in next st, sk 2 sts, sc in next st; rep from * 8 more times, sk 2 sts, shell in next st, sk 2 sts, join to first sc. (10 shells + 10 sc = 60 sts)*
Rnd 6 (Shell Rnd B): Ch 3 (counts as dc), 2 dc in same st, sk 2 dc, sc in center dc of shell, sk 2 dc, shell in next sc; rep from * 8 more times, sk 2 dc, sc in center dc of last shell, sk 2 dc, 2 dc in same st as beginning ch-3, join to top of ch-3. (60 sts)* The first shell is split across the join. Its center is the ch-3.
Rnd 7 (Shell Rnd A): Ch 1, sc in top of beginning ch-3, sk 2 dc, shell in next sc, sk 2 dc, sc in center dc; rep from * 8 more times, sk 2 dc, shell in next sc, sk 2 dc, join to first sc. (60 sts)*
Rnd 8: Rep Rnd 6. (60 sts)
Rnd 9: Rep Rnd 7. (60 sts)
The join stays at center front in every round. Check Checkpoint 2.
Body: Slot Section (Rows)
From here you work back and forth in rows. The 5 unworked stitches at center front form the slot.
Sl st in next 3 sts. You should end in the center dc of the first shell.
Row 1: Ch 1, sc in same st, sk 2 dc, shell in next sc, sk 2 dc, sc in center dc; rep from * 8 more times. The last sc goes into the center dc of the last shell. Leave the last 2 dc, the join sc and the first 2 dc unworked. Turn. (9 shells + 10 sc = 55 sts)*
Row 2: Ch 3 (counts as dc), 2 dc in first sc, sk 2 dc, sc in center dc, sk 2 dc, shell in next sc; rep from * 7 more times, sk 2 dc, sc in center dc of last shell, sk 2 dc, 3 dc in last sc. Turn. (3 + 8 x 6 + 1 + 3 = 55 sts)*
Row 3: Ch 1, sc in first dc, sk 2 dc, shell in next sc, sk 2 dc, sc in center dc; rep from * 7 more times, sk 2 dc, shell in next sc, sk 2 dc, sc in top of tch. Turn. (1 + 8 x 6 + 5 + 1 = 55 sts)*
Rows 4–13: Work Row 2 and Row 3 alternately, ending with a Row 3. (55 sts each row)
Don’t turn after Row 13. Bridge: Ch 5 and sl st into the first sc of Row 13. This closes the slot at the top. The round count is now 55 + 5 ch = 60 sts again. Check Checkpoint 3.
Body: Upper Scallop Rounds
Rnd 10 (Shell Rnd B): Ch 3 (counts as dc), 2 dc in same sc as sl st, sk 2 dc, sc in center dc, sk 2 dc, shell in next sc; rep from * 8 more times, sk 2 ch, sc in 3rd ch of bridge, sk 2 ch, 2 dc in same st as beginning ch-3, join to top of ch-3. (60 sts)*
The join is now 3 sts to one side of center front. It keeps that position up to the top.
Rnd 11: Rep Rnd 7. (60 sts)
Rnd 12: Rep Rnd 6. (60 sts)
Rnd 13: Rep Rnd 7. (60 sts)
Check Checkpoint 4.
Top Shaping and Closing
Rnd 14: Ch 1, sc in each dc and sc around, join. (60 sts) Counting the first st as st 1, place markers in st 13 and st 43. These sit 15 sts on either side of the slot’s center line and mark the side folds.
Rnd 15: Ch 1, sc in next 8 sts, (sc in next st, sc2tog) 3 times, sc in next 21 sts, (sc in next st, sc2tog) 3 times, sc in next 13 sts, join. (8 + 6 + 21 + 6 + 13 = 54 sts)
Rnd 16: Ch 1, sc in next 8 sts, sc2tog 3 times, sc in next 21 sts, sc2tog 3 times, sc in next 13 sts, join. (8 + 3 + 21 + 3 + 13 = 48 sts)
These rounds mirror the base, so the top has the same rounded corners as the bottom.
Closing row: Sl st in next 9 sts. Flatten the top with the slot centered on the front. Working through 1 front st and its matching back st together, sc across. (24 sc) Fasten off. Check Checkpoint 5.
Strap
Row 1: With the front facing, join with a standing sc in the 10th sc of the closing row, then sc in next 5 sts. (6 sts) There are 9 sts left on each side.
Rows 2–36: Ch 1, turn, sc in each st across. (6 sts)
The strap measures 6.5 in (16.5 cm). Leave a 10 in (25.4 cm) tail. Fold the strap toward the back, so the last row lies flat against the back layer just under the closing row and lines up with the strap base. Whipstitch it in place. The loop stands about 3.25 in (8.3 cm) tall.
Border (Slot Edging and Strap Edging)
Border gauge: 5 sc per inch (2.5 cm), matching the main single-crochet gauge.
Slot Rnd 1: With the right side facing, join yarn at the bottom right corner of the slot. Work evenly around the opening:
– Bottom end: 5 sc in the 5 unworked sts of Rnd 9
– Left side: 2 sc in each row end, 26 sc
– Top end: 5 sc into the underside of the ch-5 bridge
– Right side: 2 sc in each row end, 26 sc
Join. (26 + 5 + 26 + 5 = 62 sts)
Slot Rnd 2: Sl st loosely in each sc around, join. (62 sts) Fasten off. This round gives the rim its smooth, firm finish.
Why the math works: each side of the slot is 13 rows x 0.4 in = 5.2 in (13.2 cm) tall. 26 sc at 5 sc per inch also measures 5.2 in, so the sides lie flat without ruffling or puckering. Each end has 5 sts, which equals 1 in (2.5 cm), the exact width of the gap. The finished opening is about 0.75 x 4.75 in (1.9 x 12.1 cm).
Strap edging (optional): Sl st in each row end along both long edges of the strap. (36 sl sts per side) This keeps the strap from stretching.
Final Blocking
- Weave in all ends along the solid sc areas, where they are hidden best.
- Spray the holder until it is evenly damp, but not soaked.
- Slide a folded towel inside, sized to about 5.5 x 1.25 in (14.0 x 3.2 cm) in cross-section.
- Lay the holder flat with the slot centered on top. Pin it to 5.5 x 9.75 in (14.0 x 24.8 cm).
- Pin open the points of the shell scallops in a few rows if they curl.
- Pin the slot straight and even along both sides.
- Pin the strap flat at 1.2 in (3.0 cm) wide.
- Let it dry completely before you remove the towel.
Final Quality-Control Checklist
- Every round from Rnd 4 to Rnd 16 has the stated count: 60, 60, 54, 48.
- Every slot row has 55 sts.
- The shells line up in offset scallops all the way around the body.
- The slot is centered on the front, straight and the same width top to bottom.
- The slot rim has 26 sc on each side and 5 sc at each end.
- The top corners look as round as the base corners.
- The strap sits centered on the top, with 9 sts on each side.
- The strap is sewn securely, and there are no visible ends.
- Final size is 5.5 x 9.75 in (14.0 x 24.8 cm).
Troubleshooting
The body is wider at the top than the bottom: your shell rounds loosened as you went. Measure the circumference every few rounds and keep it at 12 in (30.5 cm).
The join drifts away from center front: in each round, make sure you start into the ch-3 or the join sc of the round below. Don’t count the sl st as a stitch.
The slot ruffles: you probably worked more than 2 sc per row end. Take out the edging and work exactly 26 sc per side.
The slot is too tight for tissues: work Slot Rnd 2 more loosely, or skip it.
The top puckers when you close it: check that Rnd 16 has 48 sts. Line up the stitches one-to-one through both layers.
The strap stretches: add the sl st edging, or sew a ribbon to the inside of the strap.
Care
Hand wash in cool water with a mild soap. Press out the water in a towel, then reshape and dry flat over a folded towel.

Final Notes
Each stage gives you a measurement to check. The 60-stitch base sets a 12 in (30.5 cm) circumference. Five shell rounds bring the height to 2.2 in (5.6 cm). Thirteen slot rows add 5.2 in (13.2 cm) and bring you to 7.4 in (18.8 cm). Four more rounds reach 9 in (22.9 cm). The decrease rounds and closing row finish the body at 9.75 in (24.8 cm), and the 6.5 in (16.5 cm) strap folds into its loop. If you check each number as you reach it, the finished piece will match the stated size.
Happy crocheting!