

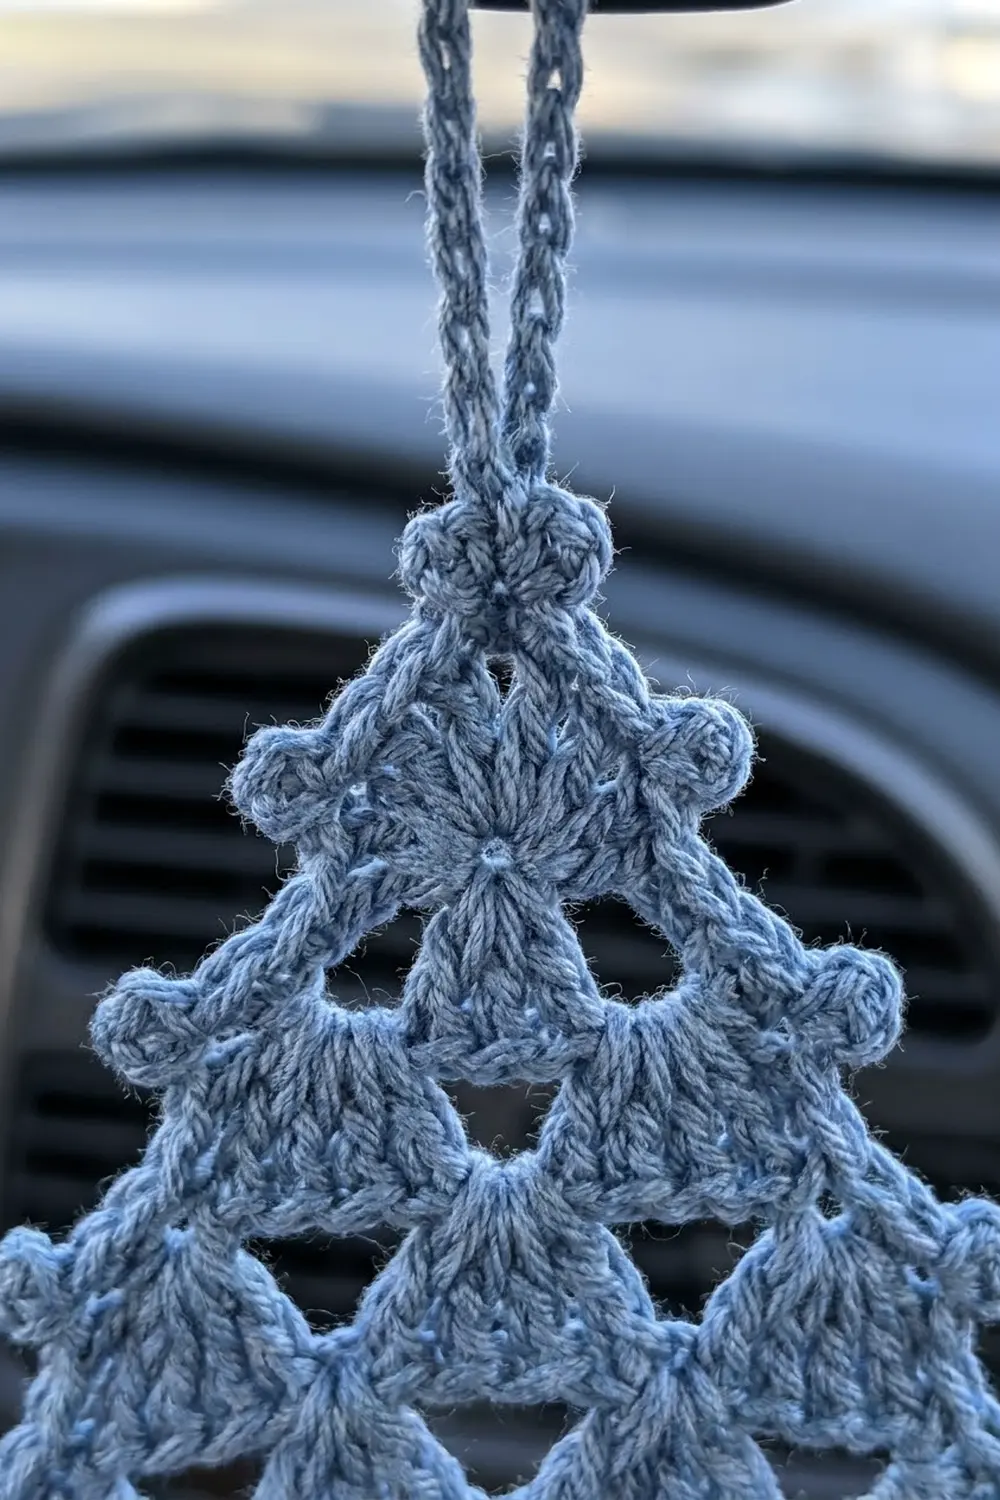
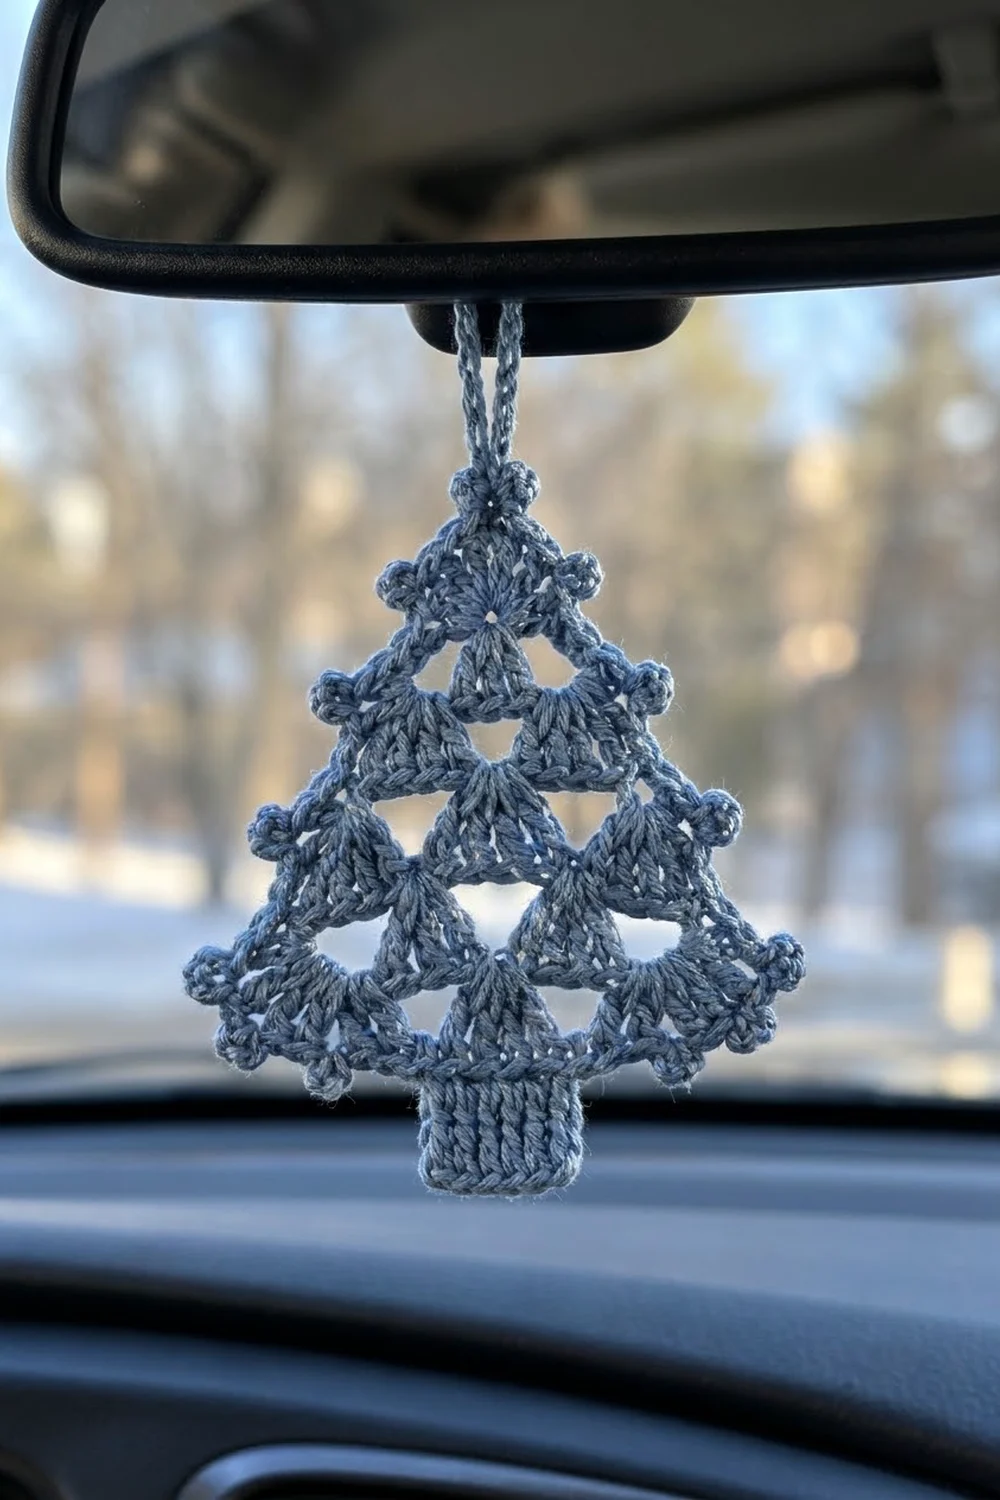
The Frosted Pine is a small, lacy Christmas tree ornament. Solid cluster triangles stack in tiers above a ribbed trunk, and open triangular windows sit between them, so light shows through the tree. Tiny picots mark the outer tip of each tier, and a padded loop at the top lets it hang from a rearview mirror, a tree branch or a gift bag.
The sample is made in one color, a soft denim blue, in smooth DK-weight cotton. Cotton shows the cluster lines and keeps the triangles crisp. The style is simple and Scandinavian-inspired, and it works just as well in white, sage or classic green.
This pattern uses US crochet terms. The finished ornament is about 4.75 in (12.1 cm) wide and 4.5 in (11.4 cm) tall, not counting the loop. The loop adds about 1.5 in (3.8 cm), for a total hanging length of about 6 in (15.2 cm).
Construction is all one piece. You work the trunk in rows first. Then you build a wider base row out from the top of the trunk and work five rows of clusters, with one fewer cluster in each row. Last, you work one edging row with picots and the hanging loop. The only ends to weave in are at the start and finish.
Finished Size and Construction
- Finished size: 4.75 in (12.1 cm) wide × 4.5 in (11.4 cm) tall, plus a 1.5 in (3.8 cm) loop
- Skill level: Easy–Intermediate
- Terminology: US crochet terms
- Yarn weight: DK / light worsted (#3), cotton
- Hook: 3.5 mm (US E-4)
- Number of pieces: 1
- Layout: Single flat ornament, worked bottom to top
- Piece size before border: 4.2 in (10.7 cm) wide × 4.35 in (11.0 cm) tall
- Border depth: about 0.2 in (0.5 cm) of single crochet, plus picots
Materials
Yarn: Use a smooth, mercerized or combed cotton in DK weight. Cotton holds the cluster shapes well and blocks flat. Acrylic works, but the triangles may look softer and rounder.
- Denim blue: 10 g (about 23 m / 25 yd)
The ornament uses about 6 g. The quantity above includes a margin for your gauge swatch and tails.
Tools:
– 3.5 mm (US E-4) crochet hook
– Tapestry needle
– Scissors
– Rust-proof pins and a blocking mat or folded towel
– Spray bottle with water
– Optional: fabric stiffener, for a very crisp ornament
Abbreviations (US Terms)
- ch – chain
- sl st – slip stitch
- sc – single crochet
- fsc – foundation single crochet
- dc – double crochet
- tr – treble crochet
- st(s) – stitch(es)
- sp – space
Special stitches:
- tr5tog (5-treble cluster): *Yarn over twice, insert your hook in the next stitch and pull up a loop, [yarn over and draw through 2 loops] twice; repeat from * 4 more times, working each leg into the next stitch, for 6 loops on the hook. Yarn over and draw through all 6 loops. The cluster has a wide 5-stitch base and a single point at the top, which makes the solid triangle.
- Picot: Ch 3, sl st in the 3rd ch from your hook.
- fsc: Insert your hook in the base ch of the previous stitch, pull up a loop, ch 1 (this is the new base), yarn over and draw through 2 loops.
Gauge and Checkpoints
Gauge: 10 sc = 2 in (5.1 cm). One dc row is about 0.45 in (1.1 cm) tall, and one tr cluster row is about 0.65 in (1.7 cm) tall.
The ornament is small, so it can serve as its own swatch. Work the trunk and the base row, then measure before you go on.
Checkpoints:
– Trunk: 1.4 in (3.6 cm) wide × 0.9 in (2.3 cm) tall
– Base row (Row 1): 4.2 in (10.7 cm) wide
– After Row 2: 0.85 in (2.2 cm) from the top of the trunk to the cluster tips
– After Row 4: 2.15 in (5.5 cm) above the trunk
– After Row 6: 3.45 in (8.8 cm) above the trunk, and 4.35 in (11.0 cm) total height
If your piece is too big: go down to a 3.25 mm hook, or tighten your yarn-overs on the tr legs.
If your piece is too small: go up to a 3.75 mm hook. Check that your clusters aren’t squeezed. Pull each leg up to its full height before closing the cluster.
Pattern
Trunk
Ch 9.
Row 1: Dc in 4th ch from hook (the skipped 3 ch count as the first dc), dc in each of the next 5 ch. Turn. (7 sts)
Row 2: Ch 3 (counts as dc), dc in each of the next 5 dc, dc in the top of the turning ch. Do not turn. (7 sts)
The trunk should measure 1.4 in (3.6 cm) wide × 0.9 in (2.3 cm) tall. The dc posts form the vertical ribs.
Base Row
This row adds 7 stitches out to each side of the trunk, making the straight base the tree sits on.
Row 1: Ch 8. Sc in the 2nd ch from hook and in each of the next 6 ch (7 sc). You are now back at the corner of the trunk. Continue in the same direction and sc in each of the 7 trunk stitches (7 sc). From the last sc, work 7 fsc out past the far corner (7 sc). Turn. (21 sc)
The trunk is centered, with 7 sc on each side. The base row should measure 4.2 in (10.7 cm).
Tree Tiers
The clusters in each row share their end stitches, so neighboring triangles touch at the base. The open space between them forms a downward-pointing triangle. In each row, the turning ch-4 does not count as a stitch.
Row 2 (5 clusters): Ch 4. Tr5tog over sts 1–5. Ch 3, tr5tog starting in the same st as the last leg of the previous cluster (spanning 5 sts); repeat from * 3 more times. Turn.
Count: 5 cluster tops + 4 ch-3 sps = 5 + 12 = 17 sts*. Clusters span sts 1–5, 5–9, 9–13, 13–17 and 17–21.
Row 3 (4 clusters): Ch 4. Tr5tog with its first leg in the first cluster top, the next 3 legs in the 3 ch, and the last leg in the next cluster top. Ch 3, tr5tog starting in the same cluster top as the last leg (top, 3 ch, next top); repeat from * 2 more times. Turn.
Count: 4 tops + 3 ch-3 sps = 4 + 9 = 13 sts*.
Row 4 (3 clusters): Ch 4. Work as Row 3, making 3 clusters in total, with ch 3 between them. Turn.
Count: 3 tops + 2 ch-3 sps = 3 + 6 = 9 sts.
Row 5 (2 clusters): Ch 4. Work as Row 3, making 2 clusters in total, with ch 3 between them. Turn.
Count: 2 tops + 1 ch-3 sp = 2 + 3 = 5 sts.
Row 6 (1 cluster): Ch 4. Tr5tog over all 5 sts. Do not fasten off.
Count: 1 st (the top tip).
Each new cluster sits over the gap between two clusters below, so the tree narrows by half a cluster on each side per row. That gives you a clean triangle. You now have 15 clusters in total. The tree should measure 4.2 in (10.7 cm) wide × 4.35 in (11.0 cm) tall from the bottom of the trunk to the top tip.
Border
Border gauge: 3 sc fit along the edge of one tr row, about 0.65 in (1.7 cm). That matches 5 sc per inch, so the edge lies flat. The picots sit where each tier begins, at the outer bottom corner of each tier.
The border is one edging row. It runs from one side of the trunk, around the tree, to the other side of the trunk. The trunk edges are not bordered.
Border Row (right side facing): Ch 1, then work down the side you just finished:
Side 1 (slope):
– Up the edge of Row 6: 3 sc. (You’re working down the slope, so these 3 sc go along the Row 6 edge toward the Row 5 tip.)
– At the top of the end cluster of Row 5: picot, then 3 sc down the Row 5 edge.
– Repeat that picot and 3 sc for the end clusters of Rows 4, 3 and 2: picot, 3 sc along the Row 4 edge; picot, 3 sc along the Row 3 edge; picot, 3 sc along the Row 2 edge.
– At the end of the base row: sc, picot.
Count: 3 + 3 + 3 + 3 + 3 + 1 = 16 sc, 5 picots.
Base, Side 1: Rotate the piece. Work 7 sc along the underside of the 7 base sts out to the trunk. (7 sc)
Sl st into the corner of the trunk, then sl st across the bottom of the trunk to reach the other corner. These sl sts are not counted in the border.
Base, Side 2: Work 7 sc along the underside of the other 7 base sts. (7 sc)
Side 2 (slope, mirror of Side 1):
– At the end of the base row: sc, picot.
– Then 3 sc up the Row 2 edge, picot at the top of the end cluster; repeat for Rows 3, 4 and 5 (3 sc, picot each).
– Then 3 sc up the Row 6 edge.
Count: 16 sc, 5 picots.
Top and hanging loop: In the top of the Row 6 cluster: sc, ch 20, sl st in the same top st to close the loop, 26 sc into the ch-20 loop, sl st in the same top st, sc in the same top st. (2 sc + loop)
Sl st in the first sc of the border. Fasten off.
Border total: 16 + 7 + 7 + 16 + 2 = 48 sc, 10 picots and 1 covered loop.
Why the math works: Each slope has 5 cluster rows. At 3 sc per row that’s 15 sc, plus 1 sc at the base corner, for 16 sc per slope. The base sides use one sc per base stitch (7 + 7 = 14), so the trunk-free part of the base stays exactly 4.2 in (10.7 cm). Nothing is added at the seams, so the edge won’t ripple or pull. With the sc depth and picots, the widest point becomes 4.75 in (12.1 cm), and the top sc brings the height to 4.5 in (11.4 cm).
Final Blocking
- Weave in both tails along the trunk or the border sc, not through the open spaces.
- Spray the ornament until it’s evenly damp, or dip it and press out the water in a towel.
- Lay it flat on a blocking mat, right side up.
- Pin the trunk square at 1.4 in (3.6 cm) wide.
- Pin the base corners so the base measures 4.75 in (12.1 cm) across, picots included.
- Pin the top tip so the height is 4.5 in (11.4 cm).
- Pin out each picot along the slopes so both sides are straight lines from the base corners to the tip.
- Gently open each triangular window with a fingertip or a pin.
- If you want it stiffer, brush on fabric stiffener now. Let it dry completely before unpinning.
Final Quality-Control Checklist
- [ ] Trunk has 7 stitches and 2 rows of dc, and is centered under the base
- [ ] Base row has 21 sc, with 7 sc on each side of the trunk
- [ ] Rows 2–6 have 5, 4, 3, 2 and 1 clusters
- [ ] Every cluster is closed cleanly, with no loose legs
- [ ] All 14 open spaces point downward and are even in size
- [ ] There are 5 picots on each slope, at the outer corner of every tier
- [ ] Hanging loop is fully covered with 26 sc and attached firmly
- [ ] Finished size is 4.75 × 4.5 in (12.1 × 11.4 cm) after blocking
- [ ] Ends are woven in and invisible from both sides
Troubleshooting
The tree leans to one side. You may have started a cluster in the wrong stitch. Each cluster must start in the stitch where the previous cluster’s last leg went.
The open spaces are lopsided. Check your ch-3 count between clusters. Two or four chains will throw off the next row’s 5-stitch spans.
The clusters curl or cup. Your tr legs are too short. Pull each loop up to full height before you close the cluster.
The slopes ripple after the border. You used more than 3 sc per row edge. Rework the side with 3 sc per row.
The slopes pucker. You used fewer than 3 sc per row edge, or your sc are tight. Loosen up or go up half a hook size for the border only.
The base is wider than the slopes. The fsc may be loose. Work them more firmly, or use a chain-and-sc start instead.
The loop twists. Spread the 26 sc evenly around the loop and steam it lightly.
Care
Hand wash in cool water with mild soap. Press out the water in a towel and dry flat, re-pinning the picots and tip if needed. If you used stiffener, spot clean only.
Final Notes
The measurements build on each other. A 7-stitch trunk 1.4 in (3.6 cm) wide supports a 21-stitch base 4.2 in (10.7 cm) wide. Five cluster rows (5, 4, 3, 2, 1) bring the tree to 4.35 in (11.0 cm) tall. The 48-sc picot border brings the finished ornament to 4.75 × 4.5 in (12.1 × 11.4 cm), and the covered loop adds 1.5 in (3.8 cm). If your trunk and base row match their checkpoints, the rest of the tree will follow.
Happy crocheting!