

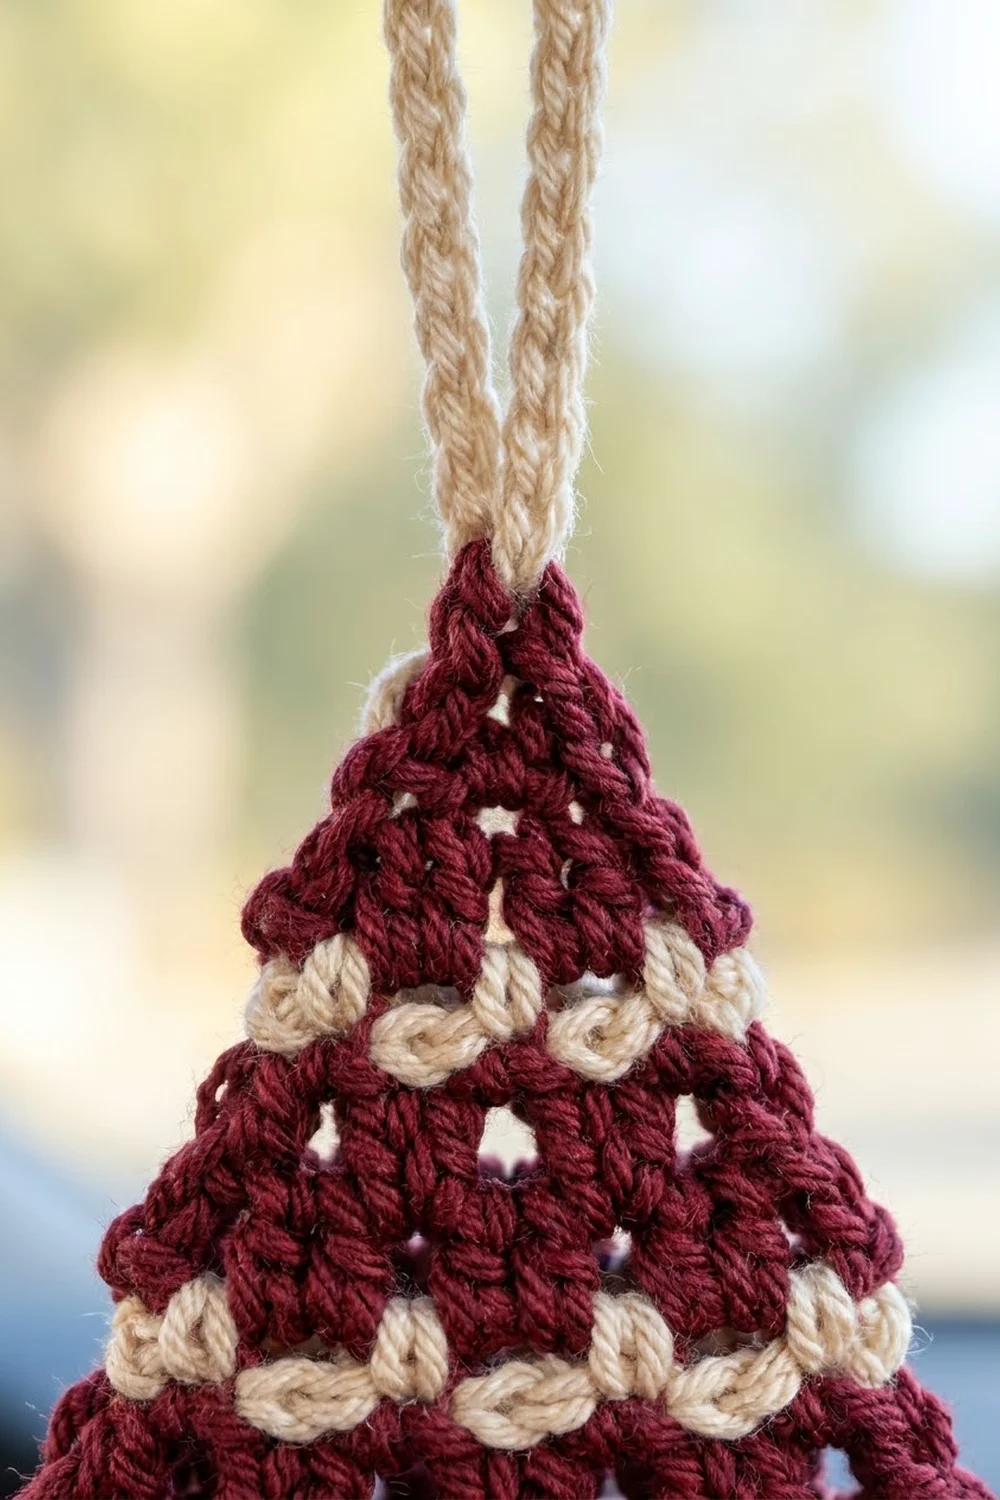
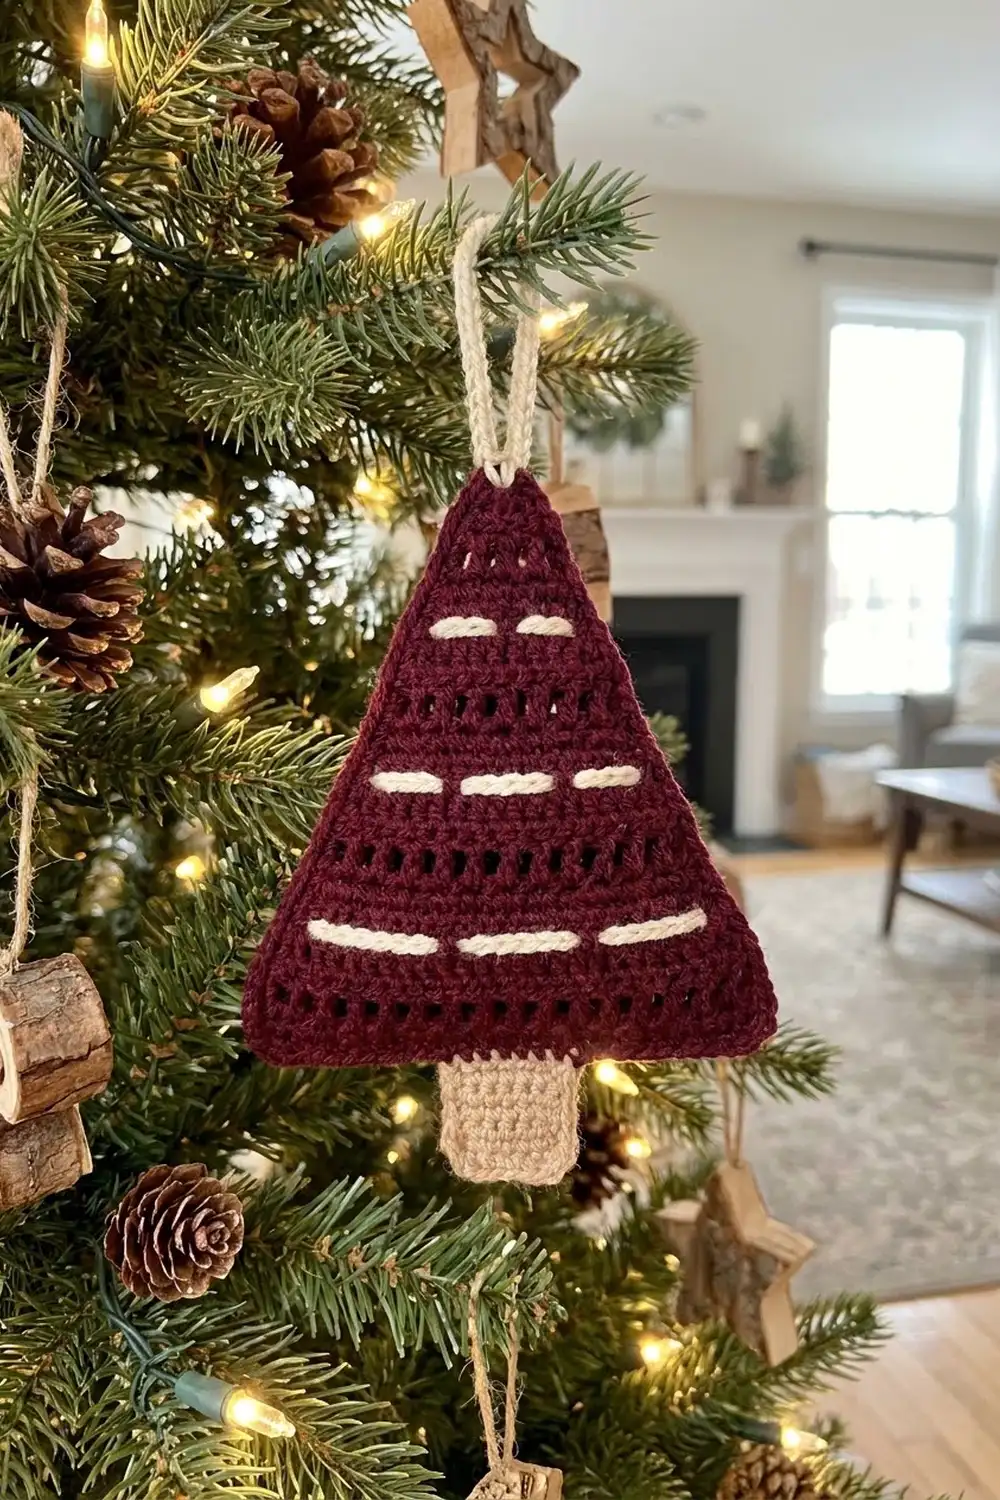
This little tree ornament is quick to make. The deep cranberry triangle has a light mesh texture, three soft cream stripes run across it, and a tan trunk sits underneath. A cream loop at the top lets you hang it on the tree, a gift, a doorknob, or a car mirror.
The texture comes from just two stitches. Solid single crochet rows alternate with open double-crochet mesh rows, so you get small windows that catch the light. The cream stripes are single crochets separated by chain spaces, which makes them look like tiny stitched dashes.
This pattern uses US crochet terms. The finished tree measures 3.2 in (8.1 cm) wide and 4.5 in (11.4 cm) tall from the bottom of the trunk to the top point. With the hanging loop it is 6.0 in (15.2 cm) tall.
How it’s built: you work the triangle from the bottom up in turned rows, losing one stitch at each edge on every solid row. Then you add one round of burgundy single crochet border around it. The tan trunk is worked straight down from the center of the base, and the cream loop goes on last.
Finished Size and Construction
- Finished size (triangle with border): 3.2 in (8.1 cm) wide × 3.7 in (9.4 cm) tall
- Total height with trunk: 4.5 in (11.4 cm)
- Total height with loop: 6.0 in (15.2 cm)
- Skill level: Easy / advanced beginner
- Terminology: US crochet terms
- Yarn weight: Sport weight (#2) cotton or cotton blend
- Hook: 3.0 mm
- Number of pieces: 1 (worked in one piece; the trunk and loop are added directly)
- Layout: Single flat ornament
- Triangle size before border: 2.8 in (7.1 cm) wide × 3.3 in (8.4 cm) tall
- Border depth: 1 round of sc, about 0.2 in (0.5 cm) on each edge
- Trunk: 0.8 in (2.0 cm) wide × 0.8 in (2.0 cm) tall
Materials
Use a smooth, mercerized cotton in sport weight. Cotton shows the mesh windows and the cream dashes clearly, and it keeps its shape when it hangs. Fuzzy acrylic will blur the texture.
- Color B (burgundy/cranberry): 6 g, about 17 m
- Color C (cream): 3 g, about 8 m
- Color T (light tan/beige): 2 g, about 6 m
These amounts include a margin for gauge swatching and weaving in ends. One ornament uses only a little of each color, so a single set of 50 g balls will make many trees.
Tools:
- 3.0 mm crochet hook
- Tapestry needle
- Scissors
- Stitch markers (2)
- Rustproof pins and a foam blocking mat
- Spray bottle with water
- Ruler or tape measure
Abbreviations (US Terms)
- ch – chain
- sl st – slip stitch
- sc – single crochet
- dc – double crochet
- sc2tog – single crochet 2 together
- sc3tog – single crochet 3 together
- sk – skip
- sp – space
- st(s) – stitch(es)
- B / C / T – burgundy / cream / tan
Special stitches:
- sc2tog: (Insert hook in next st or ch-sp, yarn over, pull up a loop) twice, yarn over, pull through all 3 loops on hook.
- sc3tog: (Insert hook in next st, yarn over, pull up a loop) three times, yarn over, pull through all 4 loops on hook.
Counting note: In this pattern a ch-1 space counts as 1 stitch, and the ch-3 at the start of a mesh row counts as 1 dc.
Gauge and Checkpoints
Gauge: 24 sc and 24 sc rows = 4 in (10.2 cm), which is 6 sts and 6 sc rows per 1 in (2.5 cm). Each dc mesh row is as tall as 2 sc rows. Each cream dash row is as tall as 1 sc row.
Treat your first tree as your test piece. It is small, so if it comes out the wrong size you have lost very little yarn.
Checkpoints (before border):
- After Row 1: width 2.8 in (7.1 cm)
- After Row 4: height 0.8 in (2.0 cm)
- After Row 8: height 1.7 in (4.3 cm)
- After Row 12: height 2.5 in (6.4 cm)
- After Row 16: height 3.3 in (8.4 cm)
If your piece is too big: go down to a 2.75 mm hook. Also check that your mesh dc stitches aren’t loose, because loose dc rows make the tree too tall.
If your piece is too small: go up to a 3.25 mm hook. Tight sc rows usually also curl the side edges.
Getting the width right matters more than getting the height exactly right. A tree that is a little taller or shorter still looks correct.
Tree Pattern
Use Color B unless the row says otherwise.
Foundation: With B, ch 18.
Row 1 (B, solid): Sc in 2nd ch from hook and in each ch across. Turn. (17 sts)
Row 2 (B, mesh): Ch 3 (counts as dc), ch 1, sk next st, dc in next st; repeat from * across. Turn. (17 sts: 9 dc + 8 ch-1 sps)
Row 3 (B, solid decrease): Ch 1, sc2tog over first dc and first ch-1 sp. Sc in each dc and ch-1 sp across until 2 sts remain. Sc2tog over last ch-1 sp and top of turning ch-3. Fasten off B. (15 sts: 13 sc + 2 sc2tog)
Checkpoint: Row 3 should measure 2.5 in (6.4 cm) across.
Row 4 (C, dash stripe): Join C in the first st without turning the work, since Row 4 starts where Row 3 ended. Ch 1, sc in same st, ch 1, sk next st, sc in next st; repeat from * across. Fasten off C. (15 sts: 8 sc + 7 ch-1 sps)
The cream sc stitches sit on top of the burgundy like small bumps, and the ch-1 spaces leave burgundy showing between them. That is what creates the dashed stripe.
Row 5 (B, solid decrease): Turn. Join B in the first st. Ch 1, sc2tog over first sc and first ch-1 sp. Sc in each sc and ch-1 sp across until 2 sts remain. Sc2tog over the last ch-1 sp and last sc. Turn. (13 sts)
Row 6 (B, mesh): Ch 3 (counts as dc), ch 1, sk next st, dc in next st; repeat from * across. Turn. (13 sts: 7 dc + 6 ch-1 sps)
Row 7 (B, solid decrease): Work as for Row 3. Fasten off B. (11 sts)
Row 8 (C, dash stripe): Work as for Row 4. (11 sts: 6 sc + 5 ch-1 sps)
Checkpoint: height 1.7 in (4.3 cm).
Row 9 (B, solid decrease): Work as for Row 5. (9 sts)
Row 10 (B, mesh): Work as for Row 6. (9 sts: 5 dc + 4 ch-1 sps)
Row 11 (B, solid decrease): Work as for Row 3. Fasten off B. (7 sts)
Row 12 (C, dash stripe): Work as for Row 4. (7 sts: 4 sc + 3 ch-1 sps)
Checkpoint: height 2.5 in (6.4 cm).
Row 13 (B, solid decrease): Work as for Row 5. (5 sts)
Row 14 (B, mesh): Ch 3 (counts as dc), ch 1, sk next st, dc in next st, ch 1, sk next st, dc in last st. Turn. (5 sts: 3 dc + 2 ch-1 sps)
Row 15 (B, solid decrease): Ch 1, sc2tog, sc in next ch-1 sp… wait, use the standard rule instead: ch 1, sc2tog over first dc and ch-1 sp, sc in center dc, sc2tog over last ch-1 sp and turning ch. Turn. (3 sts)
Row 16 (B, point): Ch 1, sc3tog. Do not fasten off. (1 st)
Checkpoint: the triangle should measure 2.8 in (7.1 cm) wide × 3.3 in (8.4 cm) tall. Each side edge should be straight. If an edge is wavy, your decreases are too loose or too tight compared with the rest of the row.
Border
The border is one round of burgundy sc. It tidies the stepped row ends, hides the color-change tails, and gives the tree its crisp outline.
Border gauge: Use the same 6 sts per 1 in (2.5 cm). Along the side edges, place 1 sc in each sc row end or dash row end, and 2 sc in each dc mesh row end. Mesh rows are twice as tall, so they need twice as many stitches.
Rnd 1 (B): Continue from the point of Row 16. Work 2 more sc in the same point st, so the top corner has 3 sc.
- First slanted side: Work down the row ends from Row 15 to Row 2: 1 sc in each end of Rows 15, 13, 12, 11, 9, 8, 7, 5, 4 and 3, and 2 sc in each end of Rows 14, 10, 6 and 2. That is 18 sc between corners.
- Bottom corner: 3 sc in the first foundation ch.
- Base: Sc in the back of each of the next 15 foundation chs. That is 15 sc between corners.
- Second bottom corner: 3 sc in the last foundation ch.
- Second slanted side: Work up the row ends from Row 2 to Row 15, placing stitches the same way. That is 18 sc between corners.
Sl st to the first sc. Fasten off.
Total: 18 + 18 + 15 sc on the sides, plus 3 corners × 3 sc = 9 corner sc, for 60 sc.
Why the math works: Each slanted side has 14 row ends (Rows 2–15): 10 short rows at 1 sc each plus 4 mesh rows at 2 sc each makes 18. The Row 1 end sits right at each bottom corner, so the 3-sc corner group covers it. The top corner group covers Row 16. On the base, the 17 foundation chs give 15 for the side and 1 for each of the 2 corners. That is 17 total, so nothing is counted twice.
Checkpoint: the bordered triangle measures 3.2 in (8.1 cm) wide × 3.7 in (9.4 cm) tall.
Trunk
The trunk hangs straight down from the center 5 stitches of the 15-sc base side.
Hold the tree upside down with the base at the top. Count the 15 base sc between the corner groups, and put markers in the 6th and 10th sc. Those are the center 5 (sts 6–10).
Row 1 (T): Join T in the 6th base sc. Ch 1, sc in same st and in next 4 sts. Turn. (5 sc)
Rows 2–5 (T): Ch 1, sc in each st across. Turn. (5 sc)
Fasten off after Row 5.
Checkpoint: the trunk measures 0.8 in (2.0 cm) wide × 0.8 in (2.0 cm) tall, and it should sit centered with 5 base sc showing on each side. The full ornament now measures 4.5 in (11.4 cm) tall.
Hanging Loop
Step 1 (C): Join C in the center sc of the top corner group. Ch 18, then sl st in the same st to form a ring. The 18 chains are about 3.0 in (7.6 cm) long.
Step 2 (C): Work 24 sc over the chain loop, inserting the hook into the loop’s opening, not into the chains. Push the stitches together as you go so the chain is fully covered. Sl st in the top corner st again. Fasten off.
The finished loop stands about 1.5 in (3.8 cm) above the point.
Weave in all ends along the back of the border, moving each tail first in one direction and then back the other way. This keeps the cream tails from showing through the mesh.
Final Blocking
- Lightly mist the ornament with water until it is evenly damp but not soaked.
- Lay it face up on the blocking mat.
- Pin the two bottom corners 3.2 in (8.1 cm) apart, keeping the base straight.
- Pin the top point so the triangle is 3.7 in (9.4 cm) tall, centered over the base.
- Pin each slanted side straight between its corners, with a pin about every 0.5 in (1.3 cm).
- Pin the trunk square at 0.8 in (2.0 cm) × 0.8 in (2.0 cm), lined up with the center of the base.
- Gently open the mesh windows with a fingertip so they all look the same.
- Pull the hanging loop straight up and pin its tip.
- Let it dry completely, usually 4–6 hours, before unpinning.
Final Quality-Control Checklist
- [ ] The triangle is 3.2 in (8.1 cm) wide and 3.7 in (9.4 cm) tall with the border.
- [ ] There are 4 burgundy mesh rows, with windows lined up.
- [ ] There are 3 cream dash stripes, evenly spaced.
- [ ] The border has 60 sc: 18 per slanted side, 15 on the base, and 3 in each corner.
- [ ] The trunk is 5 sc wide, 5 rows tall, and centered on base sts 6–10.
- [ ] The hanging loop is fully covered with 24 sc and anchored at the point.
- [ ] No tails show from the front.
- [ ] The ornament hangs straight without twisting.
Troubleshooting
The sides curve inward. You probably skipped the 2 sc in the mesh row ends. Redo the border with exactly 18 sc per side.
The sides ruffle. You have too many border sc. Count again, and only put 2 sc in mesh row ends.
The cream stripe looks solid. You probably worked sc in every stitch. Remember to ch 1 and skip 1 between cream sc.
The tree leans to one side. One edge’s decreases are tighter than the other’s. Block it firmly, and on your next tree make your sc2tog at both ends with the same tension.
The trunk sits off-center. Count the 15 base sc again and restart the trunk in the 6th sc.
The mesh holes are uneven. Keep every ch-1 the same size, and pull each dc up to the full height of the ch-3.
The loop twists. Push the sc closer together on the loop, then block it straight.
Care
Hand wash in cool water with mild soap, press out the water in a towel, and reshape it flat to dry. Store it flat or hanging so the point and loop don’t get crushed.
Final Notes
This tree depends on a short chain of measurements. The gauge of 6 sts and 6 sc rows per 1 in (2.5 cm) gives a 17-st base at 2.8 in (7.1 cm). Sixteen rows bring the triangle to 3.3 in (8.4 cm) tall. The 60-sc border brings it to 3.2 in (8.1 cm) × 3.7 in (9.4 cm). The 0.8 in (2.0 cm) trunk makes the ornament 4.5 in (11.4 cm) tall, and the 1.5 in (3.8 cm) loop brings the total to 6.0 in (15.2 cm).
If each checkpoint matches, the finished ornament will match. Once you’ve made one, the rest go fast, so make a few for gifts, gift tags, or a cozy rear-view mirror charm.
Happy crocheting!