

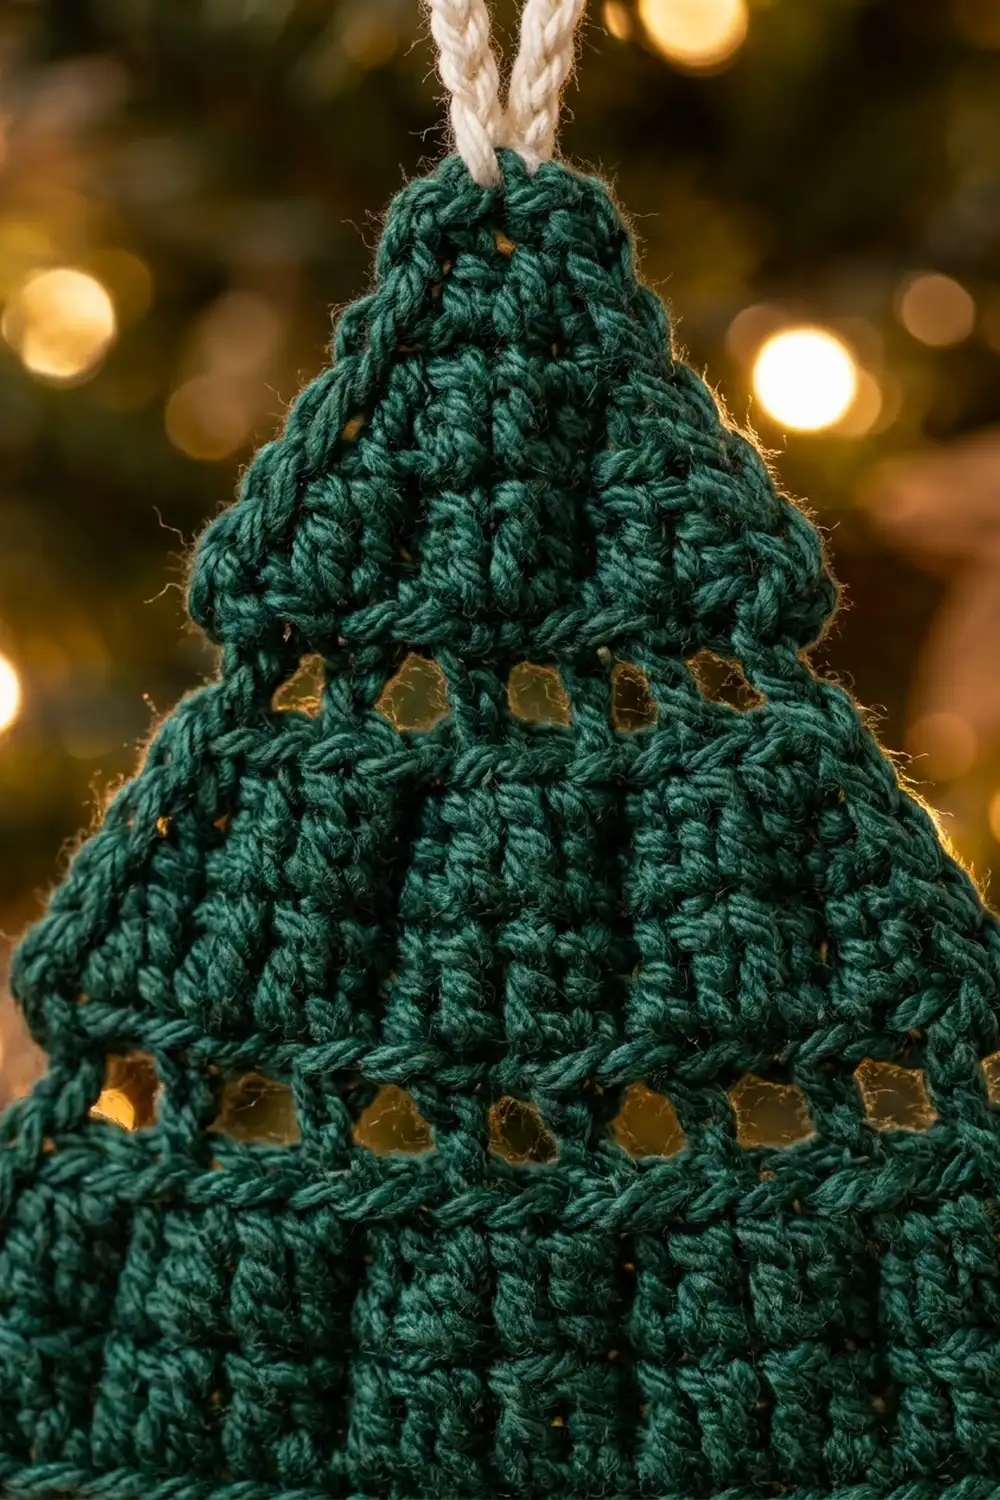
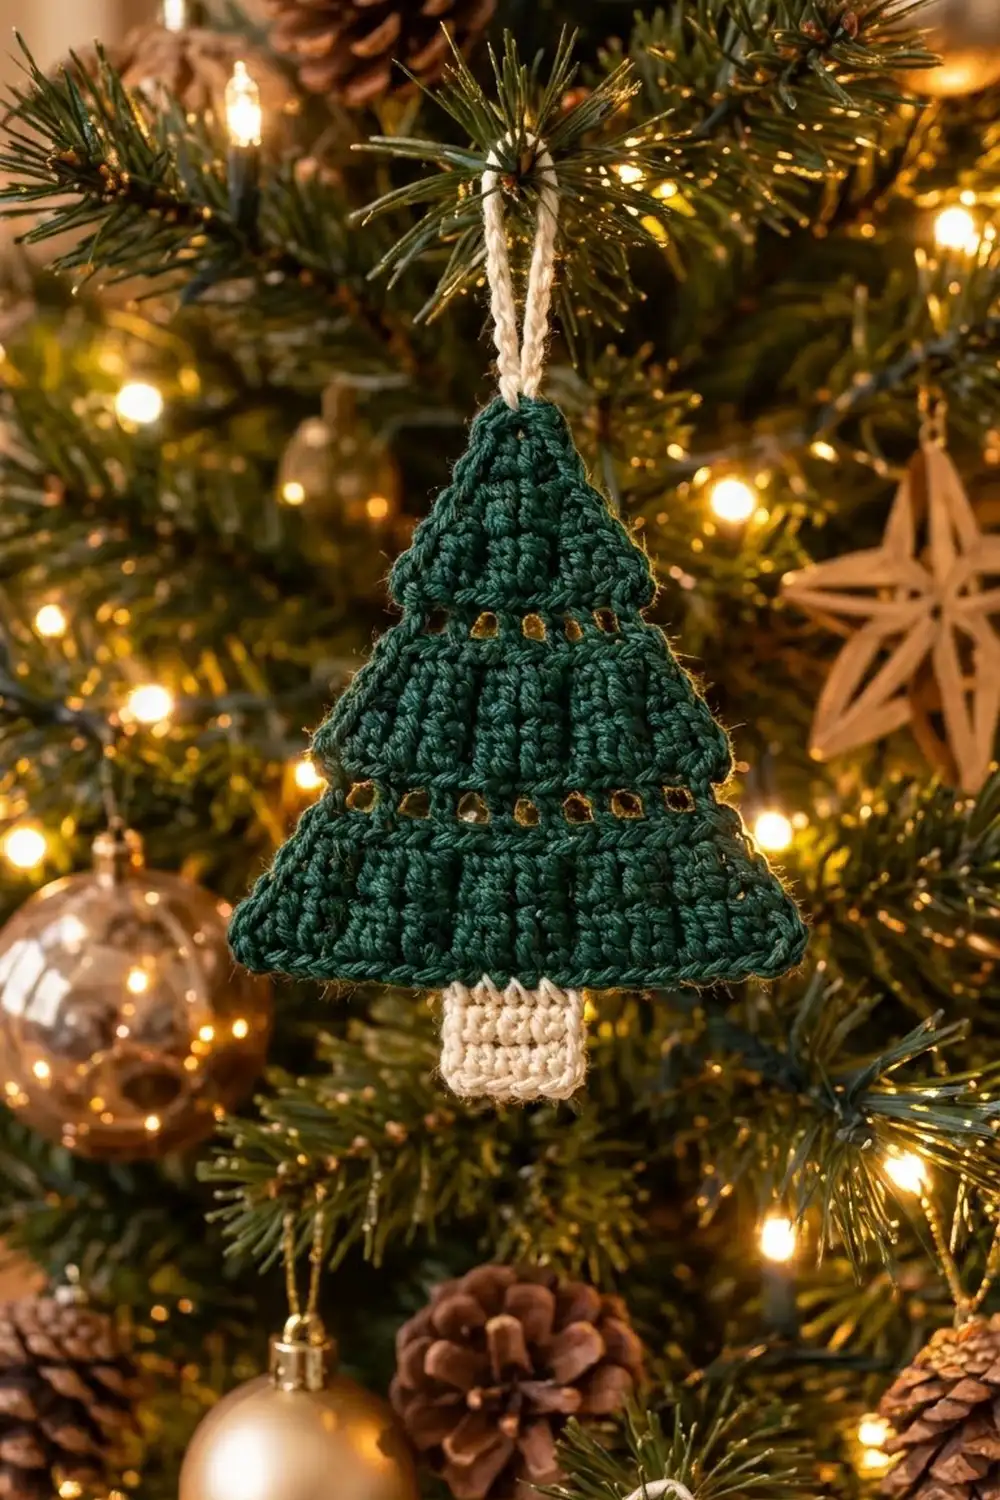
This little tree is a flat Christmas ornament with a clean triangle shape, three soft tiers, a cream trunk and a hanging loop. Two rows of small eyelets cross the tree like strings of tiny lights and create the tiers. The body is solid double crochet, so the tree feels firm and textured and hangs neatly on a branch.
The colors are classic: deep forest green for the tree and warm cream for the trunk and loop. One round of green single crochet runs around the whole triangle and gives it a tidy outline with a slightly raised edge. Use it as a tree ornament, a gift tag or a package topper.
This pattern uses US crochet terms. The finished triangle is 4.6 in (11.7 cm) wide at the base and 4.8 in (12.2 cm) tall from base to tip. With the trunk it is 5.8 in (14.7 cm) tall, plus a hanging loop of about 2 in (5.1 cm).
You crochet the triangle from the bottom up in rows of double crochet, losing one stitch at each edge every row until the top ends in a point. Then you work one round of single crochet around the edge, add a 5-row trunk below the base and chain a loop at the tip.
Finished Size and Construction
- Finished size: 4.6 in (11.7 cm) wide x 4.8 in (12.2 cm) tall triangle; 5.8 in (14.7 cm) tall with the trunk
- Skill level: Easy
- Terminology: US crochet terms
- Yarn weight: DK / light worsted (#3), cotton or cotton blend
- Hook: 3.5 mm (E-4)
- Number of pieces: 1 (one flat ornament; the trunk and loop are worked directly onto it)
- Layout: one triangle, with the trunk centered under the base and the loop at the tip
- Triangle size before border: 4.2 in (10.7 cm) wide x 4.4 in (11.2 cm) tall
- Border depth: 1 round of sc, about 0.2 in (0.5 cm)
- Trunk size: 1 in (2.5 cm) wide x 1 in (2.5 cm) tall
Materials
A smooth mercerized or matte cotton in DK weight gives the crisp stitches shown here. Acrylic also works, but cotton holds a flat shape better after blocking. Choose a dark green that contrasts well with the cream so the eyelets stand out.
- Forest green (tree and border): 8 g, about 20 m
- Cream (trunk and hanging loop): 3 g, about 8 m
These amounts include extra for checking gauge and weaving in ends. One ornament uses very little yarn, so leftovers from another project work well.
Tools:
- 3.5 mm (E-4) crochet hook
- Tapestry needle
- Scissors
- Stitch marker (optional)
- Ruler or tape measure
- Rustproof pins and a foam blocking mat
- Spray bottle with water
Abbreviations (US Terms)
- ch – chain
- sl st – slip stitch
- sc – single crochet
- dc – double crochet
- sk – skip
- sp – space
- st(s) – stitch(es)
- RS – right side
- dc2tog – double crochet 2 together
- dc3tog – double crochet 3 together
Special stitches:
- dc2tog: (Yarn over, insert hook in next st, yarn over and pull up a loop, yarn over and pull through 2 loops) twice. Yarn over and pull through all 3 loops on hook. Counts as 1 st.
- dc3tog: Repeat the bracket from dc2tog 3 times, then yarn over and pull through all 4 loops on hook. Counts as 1 st.
Turning chain note: The ch 2 at the start of each row does NOT count as a stitch. Rows 2–10 each start and end with a dc2tog, which keeps the slanted edges straight and smooth.
Gauge and Checkpoints
Gauge: 20 dc and 10 dc rows = 4 in (10.2 cm). That is 5 sts per inch, and each dc row is 0.4 in (1.0 cm) tall. For sc (border and trunk): 20 sc and 20 sc rows = 4 in (10.2 cm).
The ornament is small, so the first rows of the tree work as your gauge test. Work Rows 1 and 2, then measure before you continue.
Checkpoints:
- After Row 1: 21 dc, 4.2 in (10.7 cm) wide.
- After Row 2: 0.8 in (2.0 cm) tall.
- After Row 5: 2.0 in (5.1 cm) tall; Row 5 is 13 sts, about 2.6 in (6.6 cm) wide.
- After Row 11: 4.4 in (11.2 cm) tall, ending in a single point.
- After the border: 4.6 in (11.7 cm) wide x 4.8 in (12.2 cm) tall.
- After the trunk: 5.8 in (14.7 cm) total height.
If Row 1 is too wide (over 4.4 in / 11.2 cm), switch to a 3.25 mm hook. If it is too narrow (under 4 in / 10.2 cm), switch to a 3.75 mm hook. If the width is right but the rows are too tall, snug the yarn after each yarn over. If the rows are too short, let the first loop of each dc sit a little higher. The tree should be about as tall as it is wide, so row height matters as much as width.
Tree Pattern
Use forest green.
Foundation: Ch 23.
Row 1 (bottom tier): Dc in 3rd ch from hook and in each ch across. Turn. (21 sts)
The 2 skipped chains do not count as a stitch, so 23 chains minus 2 gives 21 dc.
Row 2 (bottom tier): Ch 2 (does not count), dc2tog over first 2 sts, dc in each of next 17 sts, dc2tog over last 2 sts. Turn. (19 sts)
Check: 2 + 17 + 2 = 21 sts worked into, which gives 1 + 17 + 1 = 19 sts.
Row 3 (first eyelet row): Ch 2, dc2tog over first 2 sts, dc in next st, [ch 1, sk 1 st, dc in next st] 7 times, dc2tog over last 2 sts. Turn. (17 sts: 2 dc2tog + 8 dc + 7 ch-1 sps)
This row makes the first line of 7 small holes. The 15 middle sts (1 dc plus 7 repeats of 2 sts) sit between the two decreases: 2 + 15 + 2 = 19 sts worked into.
Row 4 (middle tier): Ch 2, dc2tog over first 2 sts, dc in each st and each ch-1 sp across to last 2 sts, dc2tog over last 2 sts. Turn. (15 sts)
Treat each ch-1 sp as one stitch and work into the space, not the chain. This keeps the eyelets open and round.
Row 5 (middle tier): Ch 2, dc2tog, dc in each of next 9 sts, dc2tog. Turn. (11 sts)
Correction for clarity: Row 4 has 15 sts, so Row 5 is: ch 2, dc2tog, dc in each of next 11 sts, dc2tog. Turn. (13 sts) Check: 2 + 11 + 2 = 15.
Row 6 (second eyelet row): Ch 2, dc2tog over first 2 sts, dc in next st, [ch 1, sk 1 st, dc in next st] 4 times, dc2tog over last 2 sts. Turn. (11 sts: 2 dc2tog + 5 dc + 4 ch-1 sps)
This makes the second line of 4 holes, about 2.2 in (5.6 cm) across. Check: 2 + 9 + 2 = 13 sts worked into.
Row 7 (top tier): Ch 2, dc2tog, dc in each st and ch-1 sp across to last 2 sts (7 dc), dc2tog. Turn. (9 sts)
Row 8: Ch 2, dc2tog, dc in each of next 5 sts, dc2tog. Turn. (7 sts)
Row 9: Ch 2, dc2tog, dc in each of next 3 sts, dc2tog. Turn. (5 sts)
Row 10: Ch 2, dc2tog, dc in next st, dc2tog. Turn. (3 sts)
Row 11 (tip): Ch 2, dc3tog over all 3 sts. (1 st) Do not fasten off.
You now have a triangle with 11 rows, 4.4 in (11.2 cm) tall and 4.2 in (10.7 cm) wide. The bottom tier is Rows 1–2, the middle tier is Rows 4–5 and the top tier is Rows 7–11. Rows 3 and 6 are the eyelet rows between them.
Border
Border gauge: 5 sc per inch along every edge. On the base, that means 1 sc in each foundation ch. On the slanted sides, it means 2 sc in each dc row end, matching the 0.4 in (1.0 cm) height of each row.
Border Round (forest green): Continuing from Row 11, ch 1. Work 3 sc in top of the dc3tog (tip corner). Work 2 sc around the post at each row end down the first slanted side, from Row 10 to Row 1 (20 sc). Rotate to the base and work 3 sc in the first foundation ch (corner). Work 1 sc in each of next 19 foundation chs (19 sc). Work 3 sc in the last foundation ch (corner). Work 2 sc in each row end up the second side, from Row 1 to Row 10 (20 sc). Join with sl st to first sc. Fasten off. (68 sts)
Count per side:
- Tip corner: 3 sc
- First slanted side: 20 sc between corners
- Base corner: 3 sc
- Base: 19 sc between corners (21 sc counting the middle sc of each corner group)
- Base corner: 3 sc
- Second slanted side: 20 sc between corners
Total: 3 + 20 + 3 + 19 + 3 + 20 = 68 sts.
Why the math works: The base had 21 foundation chains, and it now has 21 sc counting the middle sc of each corner group. That keeps the 4.2 in (10.7 cm) width at the same density. Each side has 10 row ends below the tip. At 2 sc each, that gives 20 sc, which matches the dc row height. Each row end on the slant is slightly longer than 0.4 in (1.0 cm), so this count keeps the edge flat without ruffling. The 3-sc groups turn the three corners cleanly. The border adds about 0.2 in (0.5 cm) on every edge: 4.2 + 0.4 = 4.6 in (11.7 cm) wide and 4.4 + 0.4 = 4.8 in (12.2 cm) tall.
Trunk (cream): Turn the tree upside down with the RS facing and the base on top. Count the 19 base sc between the corner groups. Join cream with a sl st in the 8th sc. Ch 1, sc in the same st and in each of the next 4 sc. Turn. (5 sc) That leaves 7 sc on each side of the trunk, so it sits exactly centered (7 + 5 + 7 = 19).
Trunk Rows 2–5: Ch 1 (does not count), sc in each st across. Turn. (5 sc) Fasten off after Row 5. The trunk is 1 in (2.5 cm) wide and 1 in (2.5 cm) tall.
Hanging loop (cream): Join cream with a sl st in the middle sc of the 3-sc tip group. Ch 24, then sl st into the same st. Fasten off. This makes a loop about 2 in (5.1 cm) long.
Weave in all ends along the back of the border and trunk.
Final Blocking
- Lightly mist the tree with water until it is damp but not soaked.
- Lay it RS up on a blocking mat.
- Pin the two base corners 4.6 in (11.7 cm) apart.
- Pin the tip so it sits 4.8 in (12.2 cm) above the base, centered between the corners.
- Smooth both slanted sides into straight lines and add a pin at the middle of each side.
- Pin the trunk square at 1 in (2.5 cm) wide and long, and check that it hangs straight down from the base center.
- Gently open each eyelet with a fingertip so the holes look even.
- Let it dry completely before you unpin it, usually a few hours.
Final Quality-Control Checklist
- Row 1 has 21 dc, and every row after it has 2 fewer sts: 19, 17, 15, 13, 11, 9, 7, 5, 3, 1.
- Row 3 has 7 eyelets and Row 6 has 4 eyelets, all evenly spaced.
- Both slanted sides are straight, with no bumps or steps.
- The border has 68 sts and 3 sc at each corner.
- The trunk is centered under the base, with 7 base sc on each side.
- The finished triangle is 4.6 in (11.7 cm) wide x 4.8 in (12.2 cm) tall.
- The total height with the trunk is 5.8 in (14.7 cm).
- The loop is secure and all ends are woven in out of sight.
Troubleshooting
Sides look stepped or jagged: You may be counting the ch 2 as a stitch. Begin every row with a dc2tog worked into the first 2 real sts.
Eyelets are closing up: Work into the ch-1 space itself, not into the chain loops, on Rows 4 and 7.
The tree is taller than it is wide: Your dc rows are too tall. Snug the yarn or try a shorter, flatter yarn over.
The border ruffles: Use 2 sc per row end, not 3, and keep the stitches relaxed.
The border pulls the sides inward: Make sure you have 20 sc per side. If they are still tight, go up 0.25 mm in hook size for the border round only.
The trunk is off-center: Pull it out and recount the 19 base sc between the corners. Join in the 8th sc.
The point is blunt: Work the dc3tog firmly in Row 11, and put exactly 3 sc into its top.
Care
Hand wash in cool water with mild soap, press out the water in a towel, then reshape and dry flat. Store it flat or hang it by the loop so the triangle keeps its shape.
Final Notes
The size comes from a simple chain of measurements. Twenty-one dc at 5 sts per inch gives a base of 4.2 in (10.7 cm). Eleven rows at 0.4 in (1.0 cm) each give a height of 4.4 in (11.2 cm). The one-round sc border adds 0.2 in (0.5 cm) on every edge, for a 4.6 in (11.7 cm) x 4.8 in (12.2 cm) triangle. The 5-row trunk adds 1 in (2.5 cm), for a total of 5.8 in (14.7 cm). If your Row 1 width and Row 2 height match the checkpoints, the rest will follow. Once you have made one, it is easy to make a few more for the tree or gift wrap.
Happy crocheting!